DIY for Single Girls: Replacing Shed Door Hinges

When I moved into my new house in May 2025, it needed quite a lot of things doing to it. I’d managed to wangle a whole month before we needed to move in properly so I could deal with the worst of it. A kind friend painted the house from top to bottom, and a nice handyman picked up some of the tougher tasks around the house. But when I moved in, that’s when I discovered a whole host of small, niggly bits which needed my attention. One of the first of these tasks was to replace the hinges on my inherited storage shed.

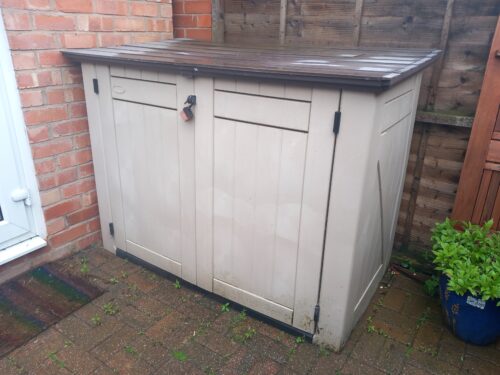
The shed is made of plastic and is just the right size for my small back yard. It’s incredibly helpful to have, and is now home to a stack of wooden garden chairs, some gardening tools and things like creosote and weed killer. There’s absolutely nothing in there worth stealing, but it is helpful to have doors you can open without them just falling off.
DIY for Single Girls: Replacing Shed Door Hinges

I spent a couple of weeks popping into my sunny yard and contemplating the problem. Sure, I could buy a new shed, but I’d just bought a whole house and all of the expensive things that you also need to buy when you treat yourself to a new step on the property ladder. I discerned that a new shed was too expensive and I could probably get away with just replacing the hinges.   

In some paperwork that had been left for me by the previous owners were some instructions for the shed, which helpfully gave me a make and model number to search for. I was the proud owner of a “Keter Store it Out XL” plastic shed. Once I was armed with that information, finding some replacement hinges took me just a few moments of searching on Amazon, and before you could say “you want to order some replacement hinges for that”, I’d ordered some replacement hinges and they would be delivered the next day.

Sometimes, or oftentimes, it can take me a little while to actually do the task, especially once the bravado of ordering just the thing I needed wears off. And this was no different. My hinges sat on the kitchen table, quietly nagging me to just get on with it for a week or two.
DIY for Single Girls: Replacing Shed Door Hinges

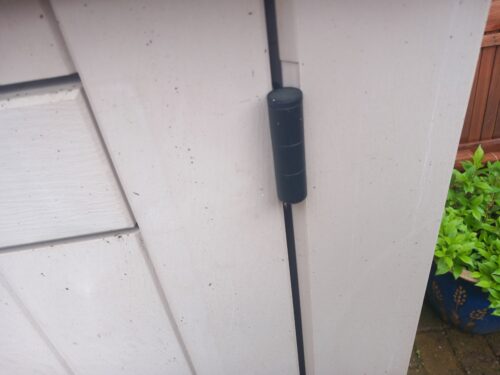
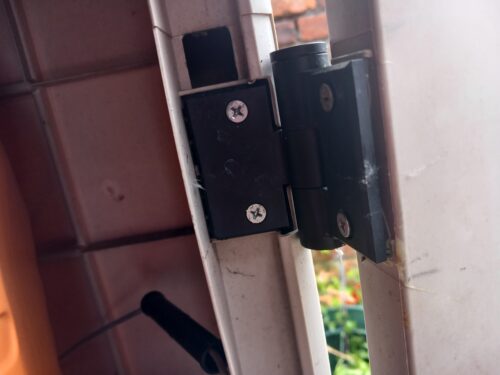
After a couple of weeks of being guilt-tripped by some rather judgemental ultra strong plastic hinges, I decided to just do it. I started off by removing the doors and the broken hinges. This was simple and straightforward, and I made a mental note of what they looked like, so when I screwed the new hinges into place, they’d look the same.

Whilst the doors were off, I gave them a bit of a wipe down and I screwed the hinges into position. This was the easy bit. The doors and their new hinges needed attaching to the shed again, and this was a bit more difficult. I floundered about for a little while, trying to hold the door in position whilst trying to screw them into place before I cracked. I’d tried balancing it on my foot, and popping it on a wedge of wood, but what it needed was the help of a teenage boy who was furious at being torn away from his screen for almost five minutes.

Luckily I already had one of those in the house, so he was summoned to briefly perform the holding the door duties I required of him. Thanks son!

A set of two hinges cost me £11.99, which is considerably cheaper than buying a new shed, or paying someone to come and fix it for you. The only tools I needed were a screwdriver and a teenage boy. Though a teenage girl would be equally useful, I just didn’t have one to hand.
DIY for Single Girls: Replacing Shed Door Hinges

Once the hinges had been replaced, the doors worked perfectly and I was really very pleased with my efforts. It’s such a small thing in the grand scheme of things, but those small things add up. I was very much emboldened by my early success with the hinges, and that’s led me to keep cracking on with tackling the small things.

It’s also led me to Google some probably very unwise things, like “how to render an outside wall” or “how to replace a kitchen yourself”. I do need to know my limits, but also it’s important to remember that I can do things for myself. I am capable and I’m slowly turning my house into something really quite lovely. And if I can do it, then you absolutely can too!

Please do follow me and my home improvement journey.
Home Improvement Update: Finding a Very Good Lady Plumber

Back in the spring of 2025, I bought my first house by myself. Leaving a 20+ year marriage to strike out on my own, losing my mum and moving twice made that time especially stressful. What I needed was a team of good, trustworthy people to help me out. Like most sensible people, I asked the people I know for recommendations, and through that, I found a brilliant handyman, and good electrician, my mate kindly decorated my house for me before I moved in. I also found the worst plumber on earth.

My boiler is in my bedroom, so I was naturally keen for it to be serviced before I moved in. I got a man in to take a look and he condemned it before he’d even opened it up properly. Now I realise he probably saw a woman on her own and decided I was fair game. He quoted me 10K for a replacement, but I managed to get him down to a cheaper 5K model, which he duly fitted. He also replaced two radiators for me, and fitted them so badly, they were very visibly wonky on the wall. My cowboy plumber had the audacity to say it was my eyes that were wonky, not the radiator, that was until I got the spirit level out. It’s still not properly straight now, and each time I look at it, I fume quietly to myself.

On reflection, I was keen not to ever have him in my house again. Even more so when I logged into TikTok and his account came up and it was full of sexist and obscene content. Anyway, I’ve been in the house a year now, and needed to get my boiler serviced. I had decided I didn’t want him back, or really any other man rummaging around in my bedroom. What I needed was a female plumber, and a Gas Safe one at that.

Finding a Very Good Lady Plumber

I live in South Manchester, and I Googled lady plumbers in my area. Hana K came up, her reviews were good, so I dropped her a message. She’s very busy, but she managed to book me in and she came to service my boiler. It was only a year old, so I was pretty sure it would be fine, but she found a tiny leak in the pipework which did need fixing, but she couldn’t fit me in. She did give my boiler a good service, and it’s been so much quieter since she did. Thanks Hana!

Hana did refer me to a female colleague, Sherry (aka The Plumbing Detective), and she arrived a few days later to fix my leaky pipework. She was here for about two hours. I left her to it, but I could hear her busily clanging about upstairs. When she’d finished, she invited me up to take a look at what she’d done. She’d done a beautiful, clean and tidy job. The pipework was much neater, and any mess she’d made she had cleaned up. She’d also bled my radiators and made sure everything was working as it should. Not only that, but she was incredibly reasonably priced, and it cost me just a fraction of what I was expecting.

I’m really impressed with my boiler now. Previously it roared into life, like a jet engine, but now it’s a lot quieter and doesn’t make the alarming clunking noises it once did.

I think it is so important to have people who you can trust. Especially if you’re allowing them into your home. I’d initially put my trust in an absolute cowboy, but I was very glad to have met Hana and Sherry, and I know I’ll be asking them back next year to service my boiler again. If you’re looking for a lady plumber in South Manchester, then Hana and Sherry are both wonderful, and I can highly recommend them.

Note: Hana and Sherry have no idea I’ve written this, I was just so impressed by them, I wanted to spread the word!

DIY for Single Girls: Easy Cable Trunking

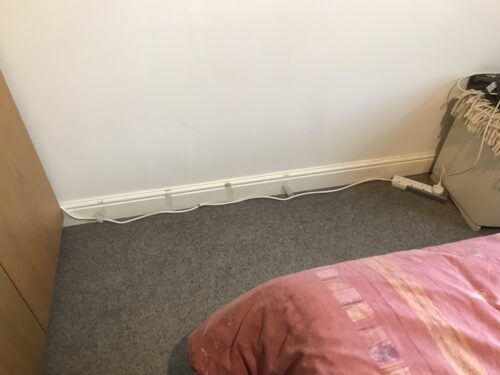
In my bedroom, I am woefully short of available sockets, and it being a small and slightly awkward room, one out of the two sockets that room has is behind my rather huge wardrobe. Before it was assembled, I hastily plugged in an extension lead and thought no more about it.

Once I’d unpacked (let’s be honest, there’s still a stack of boxes awaiting my attention in the dining room), I began to get mildly irritated by the sight of the extension lead in my bedroom. Short on time and inspiration, I used some masking tape to stick it along the skirting board and hoped for the best.

Easy Cable Trunking

Alas, the best lasted less than a day before the cable was trailing along the floor again, and there it’s sat for a year. Just annoying me, for a year. Lying there, gently taunting me.

Emboldened by a recent flurry of successful DIY jobs, I did some googling. I watched some videos on YouTube. I ordered just the thing off Amazon, and now I’m the world’s leading expert in hiding cables. Or at least those two YouTube videos I watched made me feel that way.

Easy Cable Trunking

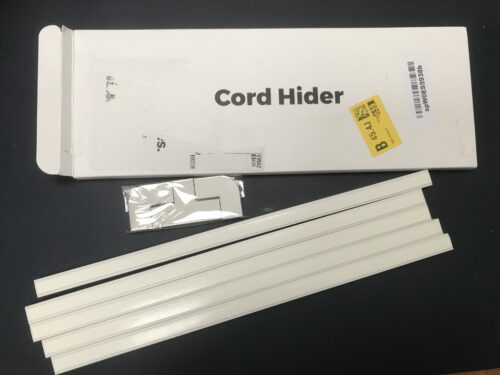
So today, I tackled the trailing cable. I’d bought the Delamu mini cable trunking kit, which was designed to house one cable, it’s self adhesive and looked like the right thing. It was also just £8.99, which fits neatly into my tiny budget.

I unpacked it and it contained 6 raceways and two corners. I didn’t need it all, but it was enough to do the job. It didn’t come with instructions, but it seemed fairly self explanatory.

Easy Cable Trunking

I started by cleaning my skirting-board and the wall behind it where the trunking would be stuck. It wasn’t filthy, but the masking tape had left a mark. I gave those marks a bit of a scrub before giving up and deciding that I probably needed to just repaint those bits next time I had a paint pot on the go. Oh well, the DIY never really stops, does it?

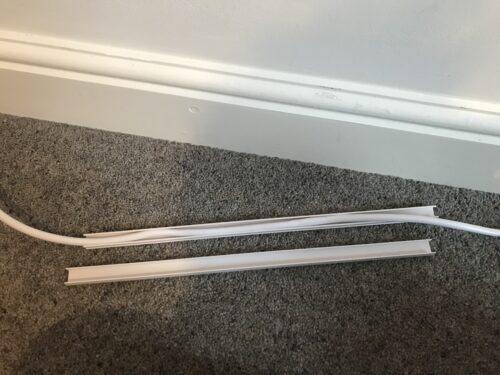
Next, I plonked myself on the floor to spend no more than three seconds figuring out how the trunking worked. Basically, you put the cable inside one side of the trunking, then clip the other side on top of it. There’s a self adhesive strip at the back, so you just need to remove the backing and stick it in place. Simples.

Easy Cable Trunking

I faffed about with it for a couple of minutes, then decided to clip all the trunking onto the cable, then move it into place, then take the backing off each one before sticking them to the wall one after the other. It made sense to do it that way, as once it’s stuck to the wall, there’s no shifting it, and I needed to be able to adjust them a bit before I was happy.

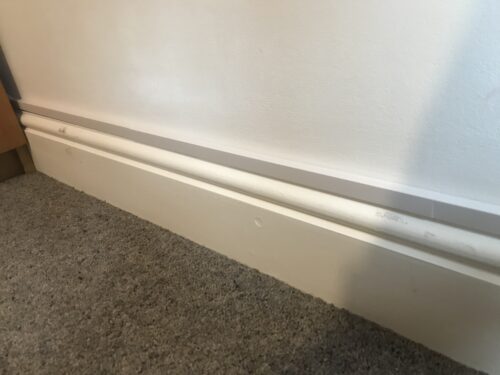
The whole job took about ten minutes, including the cleaning and tidying up. I think it’s a vast improvement on what was there before. My son walked into my room when I was done and was very impressed.

If you’ve got some trailing cables, I promise you it’s an easy fix. It takes no time and no particular skill to do, and it looks pretty darn good. And if I can do it, then you can too!

Easy Cable Trunking

Update: I gave the sticky marks on the skirting board a wipe with some WD40 and they came up as good as new, so no need to get my paint brush out now. Winning!

DIY for Single Girls – My home improvement journey

About a year ago I bought my first solo home. I was post-divorce and I’d never in my life had the privilege and pleasure of living by myself. So far it’s been a joyous 12 months, where I’ve been able to more or less decorate my house and organise my home exactly how I’d like it.

When I bought my house, it needed quite a lot doing to it. A friend kindly painted it from top to bottom for me. Another friend recommended a budget friendly handyman who helped out with some of the trickier things that were beyond my skill set. A terrible plumber replaced my boiler and fitted some radiators really badly, and the rest was mostly me, occasionally helped by my brother or my lovely partner (who lives in a different city and mostly pops up every other weekend to check I’m eating vegetables).

DIY for single girls

My teenage son is a reluctant assistant, though he does like helping me in the garden. Though in truth, it’s no garden. I’ve got a front and back yard, both pretty tiny, but that’s not stopping us from filling them with plants and flowers.

I’m not very good at looking at a problem and just ignoring it. If I spot something that needs sorting, I usually quickly google how to fix it, buy the things I need online and then set to work making my home a slightly better place. My budget is tiny, but each month I try to chip away at my to do list.

Last week, it was fixing some collapsing drawers, painting a corner by the front door where the dog had chipped the paint, fixing a fence panel where all the wood was falling off and potting up some nice herbs, so I can at least be self sufficient in herbs when the world bursts into flames.

DIY for single girls

When I moved in, I was constantly finding things that were wrong and then patiently waiting for my long distance partner to come and fix it, which is no way to have a relationship. He’s in my life so we can show each other a good time, not to spend his time with me elbow deep in a toolbox. There are some things I do need his help with, but, you know, I’m a grown up and I’m discovering that I’m actually remarkably capable. There’s also quite a lot of pride to be found in doing things your-bloody-self.

For years I’d been told that I couldn’t possibly live alone. I wouldn’t cope. I needed someone to fix all of the things and do all the man stuff and the DIY. It turns out, I can manage to do the bins all by myself, and I can fix things around the house too, and the man stuff I wasn’t thought capable of is just stuff, and I can do it.

DIY for single girls

Why am I telling you all this? Well, I’ve decided I might start blogging about my DIY and home improvement exploits. In the last year, I’ve made a warm and welcoming home, and in so many ways it’s still a work in progress, and I’d like to share that with you.

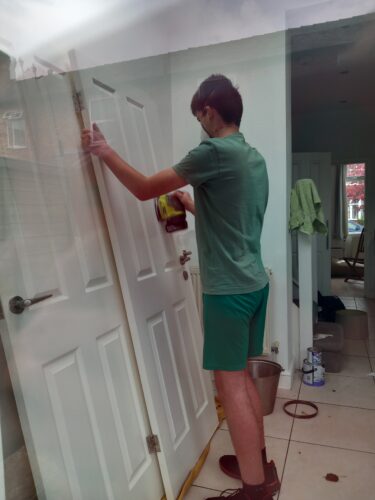
Note: The photos in this post are just snaps I took last year when I was desperately scrabbling to make my house a nice place to live before I had to leave our rental property. Teenage son helped a lot!