Half a century and just finding my feet…

Way back in the year 1984, I was sat in a school assembly, and the Headmistress, Mrs Ethmyadis, asked us all how old we would be in the year 2000. It seemed an impossibly long way into the future, and my brain could scarcely comprehend it. It would be a time when we would surely travel by hoverboard, all our jumpers would be silver, and robots would cook our tea for us. In the assembly, Nicola Pugh shot her hand up and declared we would be 24 years old in 2000, and my brain fizzed with shock at the thought of ever being that old. The future has now happened, and is now a whopping 26 years back in the past, waving at me in the rear-view mirror.

Me as a little girl

For any keen mathematicians reading this, you might have correctly deduced that being 24 years old in the year 2000, plus it being 2026 right now, means that the fresh faced 24 year old I was is this year turning 50. Yep, it’s my birthday on Saturday, and since it’s my birthday, I’m going to indulge myself a bit for a few paragraphs, if that’s OK with you?

Frankly, if it’s not OK with you, that’s absolutely fine, because I’m increasingly finding my ability to give a toss about what other people think is vastly diminished, and that’s no bad thing. Like many perimenopausal women, I’m discovering a new, or at least previously very well hidden, side of myself, and I like her.

Sometimes I find myself looking in the mirror and seeing my Grandma looking back at me. She was a fierce and fearsome woman, carved out a career in a time when women shouldn’t really. She was widowed relatively young and had my Dad to raise. Once she found her feet again, she travelled the world, set up social groups for other women of the same age, and stood proudly as a strong, independent woman. When I see her looking back at me in the mirror, it gives me some power. She was powerful, and so am I. There’s no arse that cannot be kicked if the time is right.

Me in 2026

Over the last few weeks, in a lot of the conversations I’ve had, people have asked if I’m worried about turning 50. I’d say not. It’s just a number, and I’m not suddenly going to turn into one of The Golden Girls overnight (but if I do, fingers crossed it’s Dorothy). Inside, I feel at least twenty years younger than I am. ChatGPT suggested I looked about 38, and I’ll take that, even if it is just AI nonsense.

I’ve spent my life doing what I should do. I got a job, got married, bought a house, had a baby. I made myself less to please or appease other people. I hid my many lights under several bushels, and now I am done with all the hiding of lights, and it’s like bloody Blackpool Illuminations around here. It’s marvellous.

There’s so much I could write about my life here, but there are posts you can scroll back to read about some of the harder life things that have happened over the last few years. I could wax lyrical about perimenopause and all the joys that brings, but I won’t. Life is too short, but HRT is brilliant; don’t be shy about asking for it.

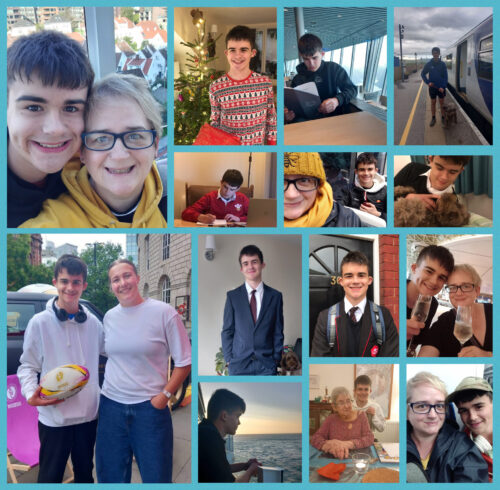
Me and Ben

As I approach my half century, I think about the people who I love who aren’t here to celebrate with me. I think about all the wonderful friends and family I have in my life. I think about how blessed I am to have my wonderful, wonderful son, my lovely partner, my small but perfectly formed family, and my friends who have held me up during the roughest of times. And I am rich beyond whatever Jeffrey Bezos has in his Monzo account, because I am loved and I am able to return that love in abundance.

Growing old is a privilege. Not everyone gets to do this, and I hope very much that I’ll get to carry on growing old until I get bored of it. I always think that growing up is a bit of a trap, so I resist that as much as I can. Being quite silly keeps you young in so many ways. And 50 isn’t as old as it used to be. I am loving who I am right now. I’ve had half a lifetime of being cowed, and now I’m just a bit of a cow, and I love that for me.
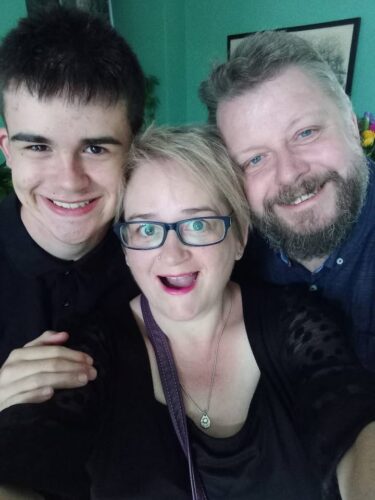
The three of us

So, happy birthday to me. Thank you for reading my meandering thoughts on my big birthday. If I can leave you with a recommendation, it’s wear sunscreen. Baz Luhrmann got his advice for life absolutely bang on. You might not have listened to this since 1999 (when I was 23), but it’s worth another listen now, I promise. Dance.

Love you xx
Easy Recipe: Chocolate and Cherry Traybake

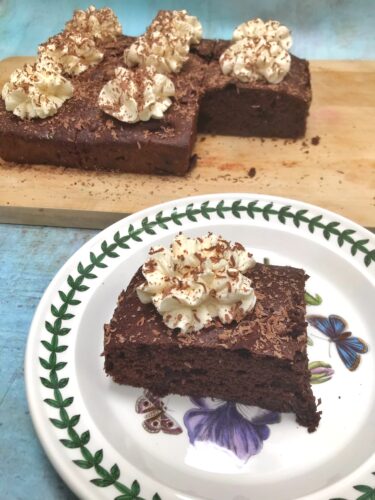
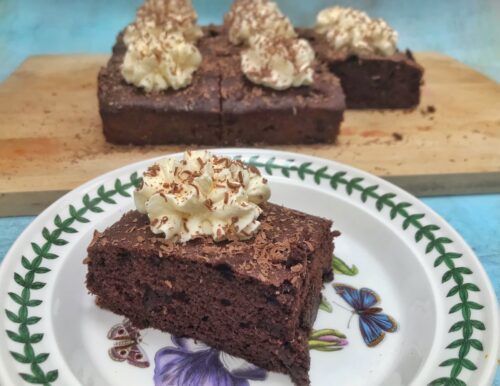
A couple of times a month I do a big online shop from Morrisons. I fancied some cherries, and in my search, a bag of frozen pitted cherries popped up for what seemed like a good price. I know cherries are good for you, but they’re also my favourite fruit. I also knew I didn’t want to sit and eat a big bag of frozen cherries, but I knew they’d be good to bake with, so I made plans for this chocolate and cherry traybake.

Chocolate and Cherry Traybake

I’m a bit keen on the 1970s style Black Forest Gateaux. I’m also quite lazy, so in a slight homage to the original and best, I topped my chocolate and cherry traybake with swirls of Chantilly cream. It’s pretty simple to make, and the cake is actually better eaten a day or after you’ve baked it, as the flavours really develop over time. If you can bear to keep your hands off it for 48 hours, it’s worth wrapping up and keeping safe until you’re ready to put a too generous amount of cream on top.

Cherries

It was most definitely a really simple, but equally delicious bake, and one I’ll be returning to again and again. Those frozen cherries worked really well, and they’re useful to have at hand to sate those Black Forest cravings which anyone brought up in the 80s has occasionally.

Chocolate and Cherry Traybake

Ingredients:

150g butter or baking margarine
150g caster sugar
1 teaspoon vanilla extract
4 medium eggs
1 teaspoon of coffee dissolved in 1 tablespoon of milk
50g cocoa powder
1 teaspoon baking powder
150g self-raising flour
300g bag of frozen pitted cherries

For the Chantilly cream –
300mls double cream
1 teaspoon of vanilla extract
3 dessert spoons of sifted icing sugar

Method:

Pre-heat your oven to 180 degrees and line a suitable baking tin. I used a 10×8 inch brownie tin.

Cream the butter and sugar together until pale, light and fluffy. Add the vanilla and eggs and beat again until airy. Add the coffee and milk mixture and stir through.

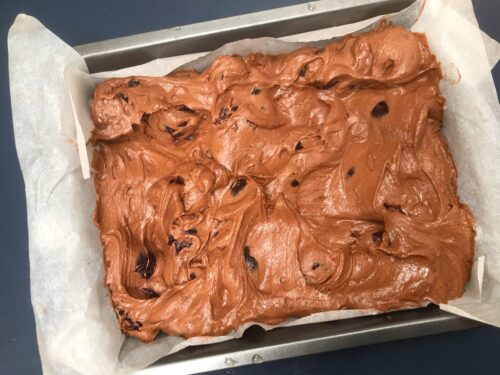
Carefully tip in the cocoa powder, baking powder and self raising flour (you can sift these in if you prefer) and mix until it’s well combined. Tip in your frozen cherries and stir through. Pour into your lined baking tin, smooth the top a little and then bake in the oven for 30 minutes, though I’d check it after 25 minutes.

Chocolate and Cherry Traybake

My oven is old and grumpy, so I like to turn it off and leave the cake in the cooling oven for an extra five minutes. But that’s just a weird quirk I’ve developed while I’ve been getting to know my oven. I just find it doesn’t shock the cake, coming from a hit oven to a much cooler kitchen worktop.

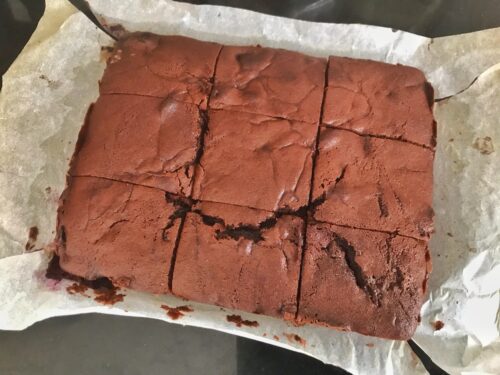
Once baked, remove from the oven and leave to cool on a rack. You’re going to pile a load of cream on top of it, so it needs to be fully cool before you can do this. Leaving it covered in a clean tea towel overnight is a good plan, or pop it in the fridge for an hour to chill it, so when you do pile the cream on top, it doesn’t slide off the warm cake.

Chocolate and Cherry Traybake

I chose to slice my traybake into equal sized pieces, but you can keep it whole if you prefer. I knew I wanted to wrap some up to give to some neighbours, so it was easier for me to cut and decorate them individually. To ensure I cut the same sized pieces, I measured the cake and decided it should be cut into nine squares. So I measured and divided the width of the cake into three and cut, and did the same with the length of the cake. They ended up being nice, generous squares of cake, but you should cut them as big or small as you’d like.

Chantilly cream

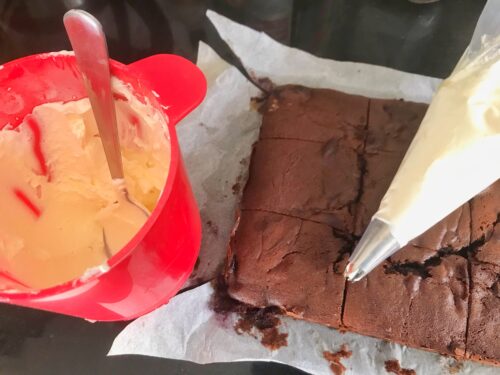
To make the Chantilly cream, pour your double cream, the sifted icing sugar and vanilla extract to a suitable bowl and whisk until you get stiff peaks. Depending on how fancy you’re feeling, you could either smooth a layer of the cream all over the top of the traybake, or you could pipe it on in dainty swirls. If you want a third option, pop the cream in a tub and serve the slices of cake with a dollop of the cream on the side.

Chocolate and Cherry Traybake

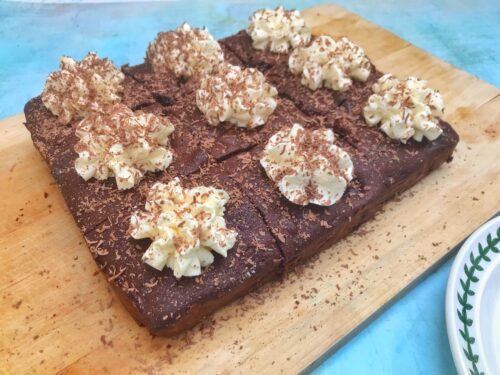
I piped the Chantilly cream on each square, and grated a little dark chocolate over the top, just to make it look a bit fancy, and look fancy it did. It stored really well in a large plastic tub in the fridge, but once you top with the cream, it’ll need keeping in the fridge and eating within 48 hours. Thankfully, my teenager arrived home just in time, and helpfully polished off several slices before it even had chance for the cream to turn.

Chocolate and Cherry Traybake

If you enjoyed this recipe, you might also like to try –

DIY for Single Girls: Replacing Shed Door Hinges

When I moved into my new house in May 2025, it needed quite a lot of things doing to it. I’d managed to wangle a whole month before we needed to move in properly so I could deal with the worst of it. A kind friend painted the house from top to bottom, and a nice handyman picked up some of the tougher tasks around the house. But when I moved in, that’s when I discovered a whole host of small, niggly bits which needed my attention. One of the first of these tasks was to replace the hinges on my inherited storage shed.

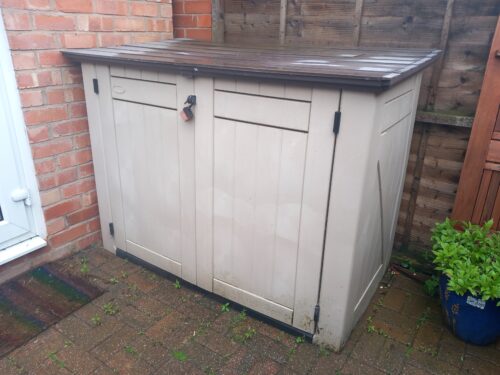
The shed is made of plastic and is just the right size for my small back yard. It’s incredibly helpful to have, and is now home to a stack of wooden garden chairs, some gardening tools and things like creosote and weed killer. There’s absolutely nothing in there worth stealing, but it is helpful to have doors you can open without them just falling off.

DIY for Single Girls: Replacing Shed Door Hinges

I spent a couple of weeks popping into my sunny yard and contemplating the problem. Sure, I could buy a new shed, but I’d just bought a whole house and all of the expensive things that you also need to buy when you treat yourself to a new step on the property ladder. I discerned that a new shed was too expensive and I could probably get away with just replacing the hinges.   

In some paperwork that had been left for me by the previous owners were some instructions for the shed, which helpfully gave me a make and model number to search for. I was the proud owner of a “Keter Store it Out XL” plastic shed. Once I was armed with that information, finding some replacement hinges took me just a few moments of searching on Amazon, and before you could say “you want to order some replacement hinges for that”, I’d ordered some replacement hinges and they would be delivered the next day.

Sometimes, or oftentimes, it can take me a little while to actually do the task, especially once the bravado of ordering just the thing I needed wears off. And this was no different. My hinges sat on the kitchen table, quietly nagging me to just get on with it for a week or two.

DIY for Single Girls: Replacing Shed Door Hinges

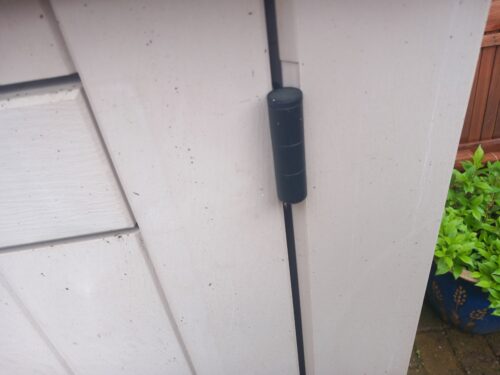
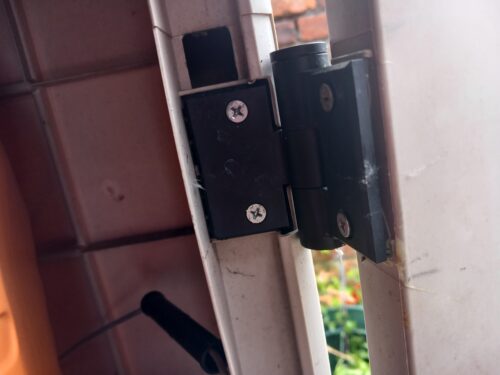
After a couple of weeks of being guilt-tripped by some rather judgemental ultra strong plastic hinges, I decided to just do it. I started off by removing the doors and the broken hinges. This was simple and straightforward, and I made a mental note of what they looked like, so when I screwed the new hinges into place, they’d look the same.

Whilst the doors were off, I gave them a bit of a wipe down and I screwed the hinges into position. This was the easy bit. The doors and their new hinges needed attaching to the shed again, and this was a bit more difficult. I floundered about for a little while, trying to hold the door in position whilst trying to screw them into place before I cracked. I’d tried balancing it on my foot, and popping it on a wedge of wood, but what it needed was the help of a teenage boy who was furious at being torn away from his screen for almost five minutes.

Luckily I already had one of those in the house, so he was summoned to briefly perform the holding the door duties I required of him. Thanks son!

A set of two hinges cost me £11.99, which is considerably cheaper than buying a new shed, or paying someone to come and fix it for you. The only tools I needed were a screwdriver and a teenage boy. Though a teenage girl would be equally useful, I just didn’t have one to hand.

DIY for Single Girls: Replacing Shed Door Hinges

Once the hinges had been replaced, the doors worked perfectly and I was really very pleased with my efforts. It’s such a small thing in the grand scheme of things, but those small things add up. I was very much emboldened by my early success with the hinges, and that’s led me to keep cracking on with tackling the small things.

It’s also led me to Google some probably very unwise things, like “how to render an outside wall” or “how to replace a kitchen yourself”. I do need to know my limits, but also it’s important to remember that I can do things for myself. I am capable and I’m slowly turning my house into something really quite lovely. And if I can do it, then you absolutely can too!

Please do follow me and my home improvement journey.

Home Improvement Update: Finding a Very Good Lady Plumber

Back in the spring of 2025, I bought my first house by myself. Leaving a 20+ year marriage to strike out on my own, losing my mum and moving twice made that time especially stressful. What I needed was a team of good, trustworthy people to help me out. Like most sensible people, I asked the people I know for recommendations, and through that, I found a brilliant handyman, and good electrician, my mate kindly decorated my house for me before I moved in. I also found the worst plumber on earth.

My boiler is in my bedroom, so I was naturally keen for it to be serviced before I moved in. I got a man in to take a look and he condemned it before he’d even opened it up properly. Now I realise he probably saw a woman on her own and decided I was fair game. He quoted me 10K for a replacement, but I managed to get him down to a cheaper 5K model, which he duly fitted. He also replaced two radiators for me, and fitted them so badly, they were very visibly wonky on the wall. My cowboy plumber had the audacity to say it was my eyes that were wonky, not the radiator, that was until I got the spirit level out. It’s still not properly straight now, and each time I look at it, I fume quietly to myself.

On reflection, I was keen not to ever have him in my house again. Even more so when I logged into TikTok and his account came up and it was full of sexist and obscene content. Anyway, I’ve been in the house a year now, and needed to get my boiler serviced. I had decided I didn’t want him back, or really any other man rummaging around in my bedroom. What I needed was a female plumber, and a Gas Safe one at that.

Finding a Very Good Lady Plumber

I live in South Manchester, and I Googled lady plumbers in my area. Hana K came up, her reviews were good, so I dropped her a message. She’s very busy, but she managed to book me in and she came to service my boiler. It was only a year old, so I was pretty sure it would be fine, but she found a tiny leak in the pipework which did need fixing, but she couldn’t fit me in. She did give my boiler a good service, and it’s been so much quieter since she did. Thanks Hana!

Hana did refer me to a female colleague, Sherry (aka The Plumbing Detective), and she arrived a few days later to fix my leaky pipework. She was here for about two hours. I left her to it, but I could hear her busily clanging about upstairs. When she’d finished, she invited me up to take a look at what she’d done. She’d done a beautiful, clean and tidy job. The pipework was much neater, and any mess she’d made she had cleaned up. She’d also bled my radiators and made sure everything was working as it should. Not only that, but she was incredibly reasonably priced, and it cost me just a fraction of what I was expecting.

I’m really impressed with my boiler now. Previously it roared into life, like a jet engine, but now it’s a lot quieter and doesn’t make the alarming clunking noises it once did.

I think it is so important to have people who you can trust. Especially if you’re allowing them into your home. I’d initially put my trust in an absolute cowboy, but I was very glad to have met Hana and Sherry, and I know I’ll be asking them back next year to service my boiler again. If you’re looking for a lady plumber in South Manchester, then Hana and Sherry are both wonderful, and I can highly recommend them.

Note: Hana and Sherry have no idea I’ve written this, I was just so impressed by them, I wanted to spread the word!

DIY for Single Girls: Easy Cable Trunking

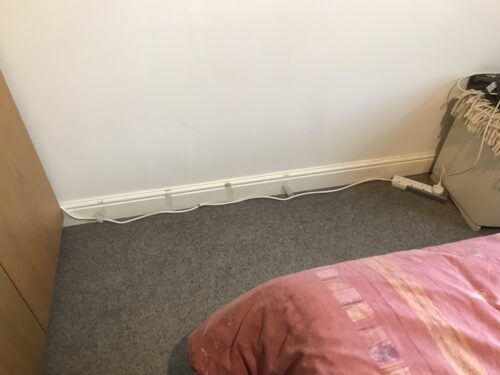
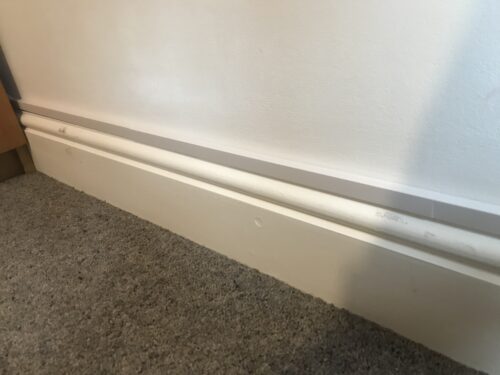
In my bedroom, I am woefully short of available sockets, and it being a small and slightly awkward room, one out of the two sockets that room has is behind my rather huge wardrobe. Before it was assembled, I hastily plugged in an extension lead and thought no more about it.

Once I’d unpacked (let’s be honest, there’s still a stack of boxes awaiting my attention in the dining room), I began to get mildly irritated by the sight of the extension lead in my bedroom. Short on time and inspiration, I used some masking tape to stick it along the skirting board and hoped for the best.

Easy Cable Trunking

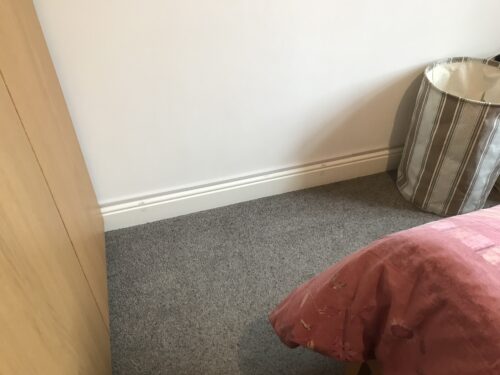
Alas, the best lasted less than a day before the cable was trailing along the floor again, and there it’s sat for a year. Just annoying me, for a year. Lying there, gently taunting me.

Emboldened by a recent flurry of successful DIY jobs, I did some googling. I watched some videos on YouTube. I ordered just the thing off Amazon, and now I’m the world’s leading expert in hiding cables. Or at least those two YouTube videos I watched made me feel that way.

Easy Cable Trunking

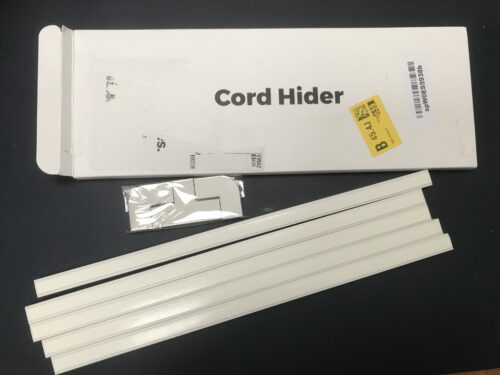
So today, I tackled the trailing cable. I’d bought the Delamu mini cable trunking kit, which was designed to house one cable, it’s self adhesive and looked like the right thing. It was also just £8.99, which fits neatly into my tiny budget.

I unpacked it and it contained 6 raceways and two corners. I didn’t need it all, but it was enough to do the job. It didn’t come with instructions, but it seemed fairly self explanatory.

Easy Cable Trunking

I started by cleaning my skirting-board and the wall behind it where the trunking would be stuck. It wasn’t filthy, but the masking tape had left a mark. I gave those marks a bit of a scrub before giving up and deciding that I probably needed to just repaint those bits next time I had a paint pot on the go. Oh well, the DIY never really stops, does it?

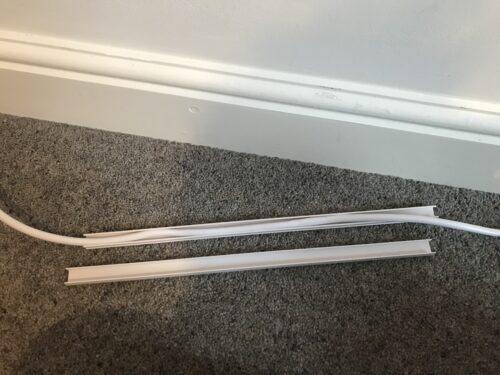
Next, I plonked myself on the floor to spend no more than three seconds figuring out how the trunking worked. Basically, you put the cable inside one side of the trunking, then clip the other side on top of it. There’s a self adhesive strip at the back, so you just need to remove the backing and stick it in place. Simples.

Easy Cable Trunking

I faffed about with it for a couple of minutes, then decided to clip all the trunking onto the cable, then move it into place, then take the backing off each one before sticking them to the wall one after the other. It made sense to do it that way, as once it’s stuck to the wall, there’s no shifting it, and I needed to be able to adjust them a bit before I was happy.

The whole job took about ten minutes, including the cleaning and tidying up. I think it’s a vast improvement on what was there before. My son walked into my room when I was done and was very impressed.

If you’ve got some trailing cables, I promise you it’s an easy fix. It takes no time and no particular skill to do, and it looks pretty darn good. And if I can do it, then you can too!

Easy Cable Trunking

Update: I gave the sticky marks on the skirting board a wipe with some WD40 and they came up as good as new, so no need to get my paint brush out now. Winning!

DIY for Single Girls – My home improvement journey

About a year ago I bought my first solo home. I was post-divorce and I’d never in my life had the privilege and pleasure of living by myself. So far it’s been a joyous 12 months, where I’ve been able to more or less decorate my house and organise my home exactly how I’d like it.

When I bought my house, it needed quite a lot doing to it. A friend kindly painted it from top to bottom for me. Another friend recommended a budget friendly handyman who helped out with some of the trickier things that were beyond my skill set. A terrible plumber replaced my boiler and fitted some radiators really badly, and the rest was mostly me, occasionally helped by my brother or my lovely partner (who lives in a different city and mostly pops up every other weekend to check I’m eating vegetables).

DIY for single girls

My teenage son is a reluctant assistant, though he does like helping me in the garden. Though in truth, it’s no garden. I’ve got a front and back yard, both pretty tiny, but that’s not stopping us from filling them with plants and flowers.

I’m not very good at looking at a problem and just ignoring it. If I spot something that needs sorting, I usually quickly google how to fix it, buy the things I need online and then set to work making my home a slightly better place. My budget is tiny, but each month I try to chip away at my to do list.

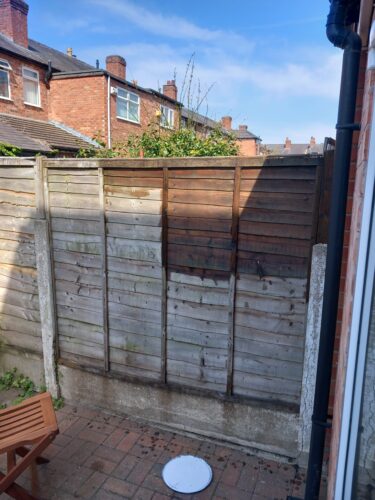
Last week, it was fixing some collapsing drawers, painting a corner by the front door where the dog had chipped the paint, fixing a fence panel where all the wood was falling off and potting up some nice herbs, so I can at least be self sufficient in herbs when the world bursts into flames.

DIY for single girls

When I moved in, I was constantly finding things that were wrong and then patiently waiting for my long distance partner to come and fix it, which is no way to have a relationship. He’s in my life so we can show each other a good time, not to spend his time with me elbow deep in a toolbox. There are some things I do need his help with, but, you know, I’m a grown up and I’m discovering that I’m actually remarkably capable. There’s also quite a lot of pride to be found in doing things your-bloody-self.

For years I’d been told that I couldn’t possibly live alone. I wouldn’t cope. I needed someone to fix all of the things and do all the man stuff and the DIY. It turns out, I can manage to do the bins all by myself, and I can fix things around the house too, and the man stuff I wasn’t thought capable of is just stuff, and I can do it.

DIY for single girls

Why am I telling you all this? Well, I’ve decided I might start blogging about my DIY and home improvement exploits. In the last year, I’ve made a warm and welcoming home, and in so many ways it’s still a work in progress, and I’d like to share that with you.

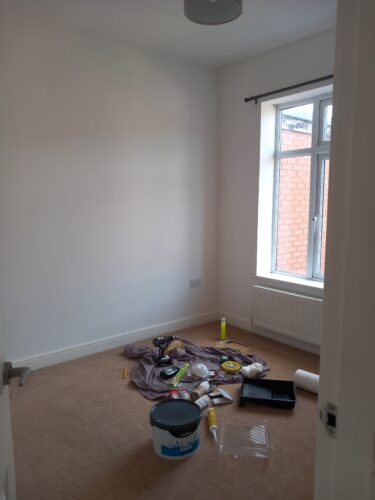
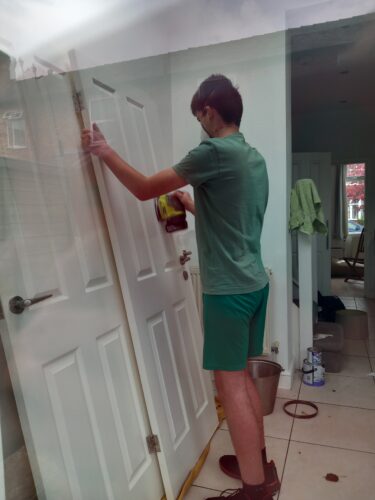
Note: The photos in this post are just snaps I took last year when I was desperately scrabbling to make my house a nice place to live before I had to leave our rental property. Teenage son helped a lot!

Travel: Taking a Viking Adventures Tour of Haugesund

Last summer I did a mad, impetuous thing and booked a week long P&O Cruise to the Norwegian Fjords on their ship, Iona. It was very much a bucket list trip and a huge treat to myself after a pretty horrendous few years.

We cruised from Southampton to Stavanger in Norway, on to Olden, where we had an impromptu two night stay due to Storm Floris, and finally we visited Haugesund before heading home to Southampton.

I’d booked a few nice things to do for me and my teenage son, but in Haugesund, I mostly wanted to see the Rising Tides and get a bit of history. You can book excursions directly through P&O, but they tend to be a lot more expensive, so I looked at what local options were available and plumped for a minibus tour of Haugesund, which seemed to tick all of the boxes.

Viking Adventures Tour of Haugesund

I booked directly through the Viking Adventures website. The electric minibus tour was 90 minutes long, and you had the option to also buy advance tickets with 10% off to The Viking Planet, a local museum. I chose to buy museum tickets too. In total I spent 880 krone on an adult and a child ticket for the tour and an extra 285 krone for the museum. In total this was around £91.

Our timed tickets to the guided scenic tour of Haugesund were for 10am, the first tour of the day. We keenly scrambled off the ship and found the Viking Adventures kiosk on the harbour, and joined the queue. We were met by our tour guide and our driver and we were invited onto the electric minibus. Once we were all buckled in, the tour began.

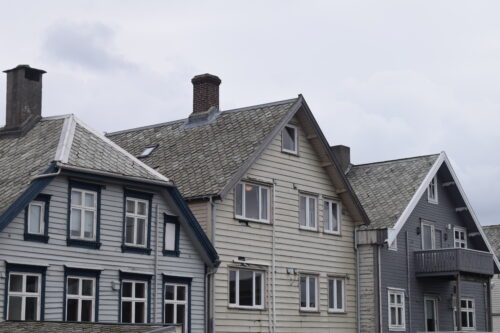
We headed out of the port and onwards to our first destination, traveling first through Haugesund, where our guide shared interesting stories about the people and history of the area. This was a whistle-stop tour, so we drove through the town centre and onwards, to Steinsfjellet, or Stone Mountain. We climbed the steep road in our electric minibus, and we were treated to stunning panoramic views of Haugesund and the surrounding islands. It was breathtaking.

Viking Adventures Tour of Haugesund

I confess our first impressions of Haugesund were rather industrial, but once you’re away from the port, the town it was clear that the neat town and the surrounding areas are rather lovely and well worth exploring.

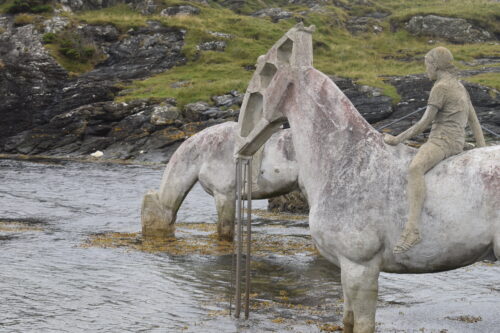
Once the minibus had wound down Steinsfjellet, our next stop was a short drive away to Kvalsvik, home to the striking Rising Tide sculptures by Jason DeCaires Taylor. This was the main reason I’d booked this tour, and I was very excited to see and explore this artwork.

Viking Adventures Tour of Haugesund

The sculpture is made up of four quite eerie statues of horses, made with and partly fused with oil extraction machinery. The horses and their riders look like they are paddling in the sea, and they are intended to make you think about how dependent on oil humans are. I imagine that these beautiful sculptures are somewhat controversial in oil rich Norway, and finding a balance between industry and nature must be a constant battle.

Viking Adventures Tour of Haugesund

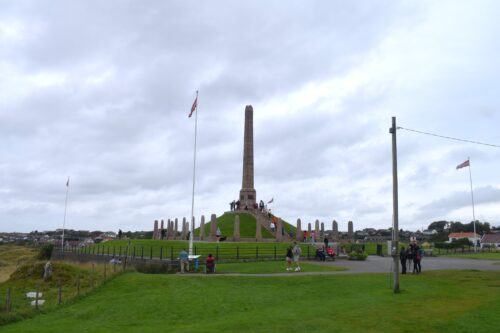
On our final stop before being dropped off back at the port was a visit to the National Monument, Haraldshaugen. The monument was erected in 1872 to commemorate Harald Fairhair, the Viking king who united Norway into a single kingdom. It is also believed to be his burial site. It was an eerily moving place to visit, I can’t put my finger on why, but I felt more moved here than at the Rising Tides sculpture.

Viking Adventures Tour of Haugesund

We were given ample time to explore each stop, and for those who didn’t want to get out and have a look around, they were welcome to stay on the minibus. The guide was very knowledgeable and I’m very glad I booked the tour, as I’m absolutely certain that we would never have packed in what we did if we were left to explore solo.

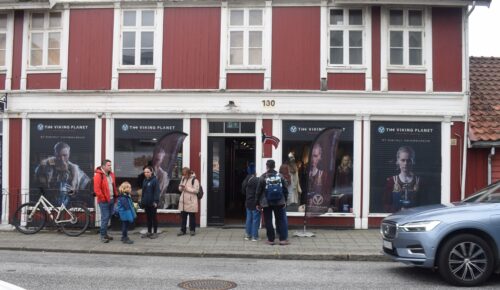
The tour takes around 90 minutes and afterwards you are returned to the port. We still had plenty of time left to explore Haugesund, so we walked back into the town and visited The Viking Planet, the local Viking museum. I confess, I was a bit disappointed by the museum, which had mostly digital displays to click through to read the text. The museum was very busy, so we read what we could before giving up to find some lunch and explore some more of the town.

Viking Adventures Tour of Haugesund

Visiting Haugesund was a rather special experience. Yes, it’s quite an industrial place to visit, but if you look, and walk beyond your first impressions, then you might surprise yourself. We had a fabulous lunch at Dattera Til Lothe, took in a local jazz festival and found some fantastic ice cream. Then we toddled back to the cruise ship with a bag full of freshly baked, and rather delicious pastries. I don’t feel like we even scratched the surface of what Haugesund has to offer, but there’s always the next time.

For more info about booking this tour with Viking Adventures, you can visit their website.

Happy 15th Birthday to my wonderful Son

Dear Ben,

Every November I sit down and write you a letter on your birthday. I write about all the things we’ve experienced in the previous 12 months, about the things you have learned, things you’ve loved and the way you’ve grown. You are my only child and although I’ve no one else to compare you to, I think you’re pretty smashing.

What a year it’s been for us both. It’s been a year of huge change, and sadness and learning life lessons along the way. It’s not a year we will forget quickly, and I imagine it will shape our lives for many years to come.

Ben 15th birthday

This time last year we were packing up the home you’d lived in since you were one. Your parents had divorced, so we sold our home and I was moving us into a flat for six months while I found a suitable house to buy. We loved the flat, it was handy for school and work, it was a lovely little adventure and it quickly became a great home for you, me and the dog.

After six months of living up three flights of stairs, we finally moved into a tiny terraced house, bought close enough for you to get to school quickly and near to the park to walk the dog easily. It’s tiny, but enough for us for now, and what’s more, it’s home and it’s safe. I’ve loved turning it from a house to our home, and working with you and helping put your stamp on it as well as mine is a beautiful thing.

For the last few years, we’d been watching my mum, your Nan and last remaining grandparent, battle cancer. She’d fought hard and we managed one last Christmas with her before she passed away in February this year. She died peacefully at home, loved and cared for, and very much missed. We were all heartbroken, but at the same time, glad that her battle was over and that she could rest now.

Two house moves in six months, and losing Nan meant I did struggle a bit, and I’m sorry for being sad and out of sorts for a while. I took some time off work to recover myself a bit, and to cheer us both up, I booked us on a mad holiday. It was a holiday I’d dreamed of taking you on for years.

In August we spent a wonderful week sailing on P&O’s cruise ship, Iona from Southampton to the Norwegian Fjords. We went to the top of a mountain and saw glaciers, we visited museums, went on tours, ate amazing food. We had the very best holiday and I’m so very glad I got to share that with you. I promise you that’s the first of many awesome holidays for us.

We’ve had adventures closer to home too. You still love trains and train journeys, so every chance we get (and while I still have a railcard) we go on a train based adventure. We’ve explored the Yorkshire Dales and the Ribblehead Viaduct. We’ve been to Southampton and back, we’ve been down to Birmingham New Street, visited Birmingham Moor Street and been on the smallest train line in the UK, from Stourbridge Junction to Stourbridge Town, a journey of just three minutes!

I couldn’t send you this letter without mentioning your love of Wigan Warriors and rugby in all its forms. It was a joy to watch the women’s rugby with you this summer, and I know one of the highlights of your year was meeting Morwenna Talling and having your photo taken with her. Sitting in the pub with you watching the final, both  of us a bit emotional at their win was a special memory for me in a few different ways.

Ben 15th birthday

We’ve always enjoyed going to the theatre together, and that’s one thing I’m trying to do more of with you. We loved Dear England and MC Grammar was an unexpectedly fun afternoon out. Part of the pleasure for me is watching your face as you take in new experiences. You may have grown into a man shaped human, but you’ve still got a lot of growing and learning to do, and I’m proud to walk by your side as you do this.

It’s been a tough year for you. Change is hard and there’s been a lot of it, but you seem to have weathered the storms we’ve endured in a way I really admire. You’re now starting your GCSEs and you’re smashing it as best you can. You make me proud every day, I mean, it couldn’t hurt to focus a bit more on your homework, but you’ve made a good start to Year 10.

What I most admire about you is your kindness. You spent several days over the October half term with a small gang of local children, sweeping the pavements and the roads in the local area. You’ve litter picked and unblocked drains. You’ve filled my garden waste bin ten times over, but you’ve made the street a tidier, cleaner and nicer place to be. The world needs more people like you, people who get things done. People who see a problem and they fix it. Thank you for that.

I really, really hope that the next year is more settled for you. I hope you continue to find your rhythm in life, that you carry on growing and gaining confidence. You’re doing so well in so many ways, so keep on being kind and helpful. Carry on being polite and engaging. Please continue being funny and a great friend. But also, you do need to focus on school and homework now, and start looking towards your future. You could do great things, and I hope you do.

I love you so much Ben, thank you for being my little mate for the last 15 years. I am so lucky to have you. Happy birthday to my best boy.

I love you always,

Mama xxx

Did we have the worst cabin on P&O Cruises Iona?

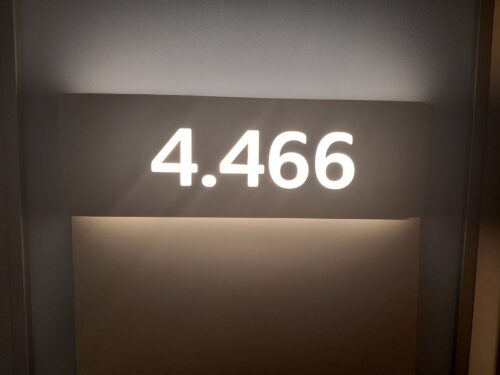
After saving hard for a few years, a few months ago I booked a cruise to the Norwegian fjords with P&O cruises for me and my son. I booked the cheapest option, an inside cabin and I was totally fine with that, but once the cabins were allocated, we’d been given cabin 4466 – on the lowest passenger deck, next to the laundrette and right by the lifts. I wondered, could this be the worst cabin on Iona?

P&O Crusies Iona

Once I’d booked, I did what most first time cruisers do, and I devoted my every waking moment to reading and watching everything I could about the ship, the cabins, the ports of call and anything and everything about this cruise. The more I read, the more I was a bit jealous of the people with balcony cabins, but I paid around £1650 for two of us for a week, so I knew we’d have a more basic accommodation.

In the weeks before embarkation, you do get the chance to bid to upgrade your cabin. I put several bids on in the hope that we might get a bigger or better cabin, but I was unsuccessful and decided just to try and make the best of it.

Did we have the worst cabin on P&O’s Iona?

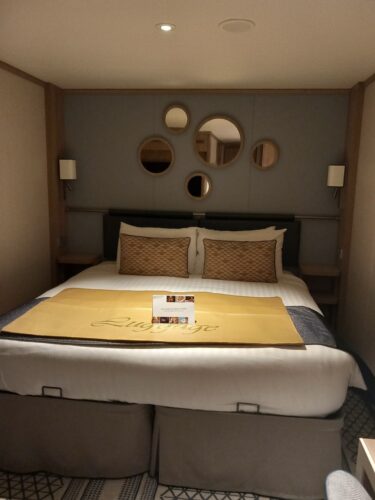
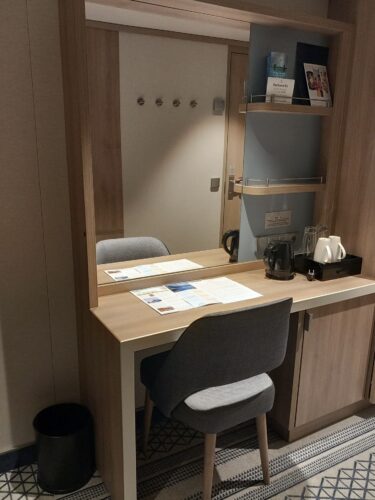
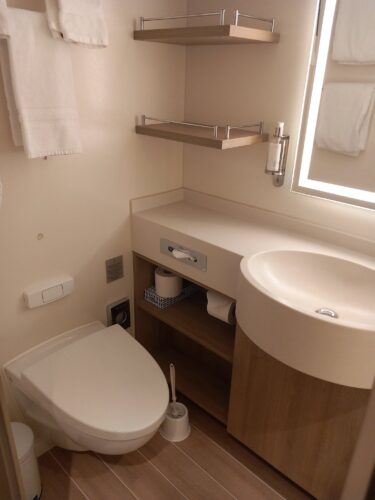
Once we embarked, we quickly found our cabin and our bags were waiting for us outside. We opened the door and the cabin was pretty small, but there was a large queen sized bed, a small desk and chair, a wardrobe and a little fridge. The bathroom was compact, but I was pretty happy with it all. It was a small inside cabin and the cheapest option on the ship.

Did we have the worst cabin on P&O’s Iona?

We were on deck four, and once we’d got our bearings, we found it to be a great deck to be on. It was pretty quiet, you would occasionally hear giggling families walking by, but it was so quiet, especially compared to other decks higher up in the ship. We didn’t spend a huge amount of time in our cabin, we preferred to be on deck 8, the promenade deck, we both liked to walk around the ship, getting some fresh air and sunshine.

One great thing about cabin 4466 is that it’s mid-ship, it’s quite low down and if you’re not keen on movement or you’re worried about feeling sea sick, then that’s the location you’ll probably feel it the least. During our cruise we were being chased across the North Sea by Storm Floris and the Captain did warn us a few times about stormy seas, but down in the cabin on deck 4, we didn’t feel too much of the swell, even though we could see it on the bow camera.

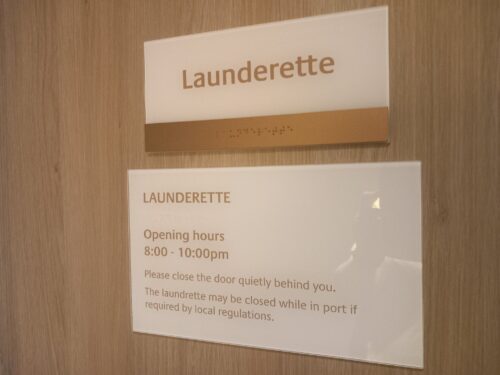
Iona laundrette

I was worried about being right next door to the laundrette. I did hear the machines going on occasion. However there were opening times on the door, though I don’t think anyone locked the door to stop people using the facilities. I decided to embrace the proximity and bring some laundry tablets, pack light and wash often.

The laundrette was really handy. I could wash and dry a load in about an hour. I did three washes while I was away, and just kept bobbing in from my room to check on things. I’d do a wash while we were getting ready for dinner, and by the time I’d finished dolling myself up, my wash would be done and put away. On the last night I did a wash while I was packing, because who really wants to take home a pile of dirty washing?

Did we have the worst cabin on P&O’s Iona?

Likewise with the lifts, they were close by and I think our cabin backed onto them, but we didn’t hear anything. It was handy to be close to the lifts, especially on such a quiet deck, but more often than not we used the stairs because it was quicker and it helped counteract the large fried breakfasts we had each day.

I really liked the cabin itself. I did worry that the lack of window would make me feel claustrophobic, and the lack of fresh air would have me a sweating, angry, menopausal mess, but I was wrong on both counts. The TV had a channel with the view from the bow on it, so we would often put that on to get a glimpse of the outside world. Plus the air con was excellent, we had it on its coldest setting and it was perfect for us.

It was a small room, but very comfortable and well decorated. The diminutive dimensions forced us to be tidier in our habits, and each morning someone kindly came in and gave it a clean and made the bed for us.

Iona celebration night

I’ve heard some people say that the beds on Iona are too firm, but it was perfect for me and my bad back. I am a terrible, terrible sleeper, but I think the darkness of the inside cabin helped me to have some of the best nights sleep I’ve had in years. It was very calming and restful, and the excellent sleep really sold me on inside cabins for future cruises, though I might stump up for a slightly larger one next time.

So, before we cruised I was worried about the too low deck, the location next to the laundrette, the rumble from the nearby lifts, a potentially claustrophobic inside cabin, lack of fresh air and no views of the Norwegian fjords. I came away very surprised that none of those things bothered me. Sure, it might have been nice to sit on a balcony and have a brew as we cruised down a fjord, but I was hugely grateful for the quietness of our deck. I loved the cabin and I would happily stay in that cabin again.

Did we have the worst cabin on P&O’s Iona?

Was cabin 4466 the worst cabin on Iona? Well, it depends what you’re looking for, but if you want a good nights sleep on a pretty quiet deck, with minimal movement whilst at the same time being handy for the laundrette and the lifts, then 4466 might well be the best cabin on the ship, or at least one of them. My advice would be, don’t fear the inside cabin, embrace the peace and the calm, dark nights. And if you need some fresh air, there’s always the promenade deck to enjoy.

Bon voyage!

Stress Reset – Switching Off Survival Mode by Elle Kay

This programme was gifted to me, but all images and opinions are my own. 

If you Google “most stressful life events,” it’s basically a bingo card of the last year of my life – and I’ve pretty much got a full house. From my mum being very poorly for a few years and passing away suddenly (but expectedly) in February, to the world’s longest divorce, moving house twice in six months, and working four jobs to make ends meet… it’s been a lot.

To the surprise of absolutely no one, at the start of June I completely crashed and burned. I woke up one morning, switched on my laptop to do some work, and just thought, “I can’t do this anymore.” I contacted my GP, got signed off with stress, and tried to figure out how to fix myself in a month. I knew a month wouldn’t even scratch the surface, but I needed a plan – something to help keep me sane over the coming months.

So, I decided to be a bit selfish. I joined a gym (still haven’t been), made myself take the dog out for three or four walks a day, and forced myself to shower, clean the house, and put fresh bedding on regularly. I did some gardening, watched a bit of telly, and cooked myself nice food – mostly to balance out my burgeoning Wagon Wheel habit.

Stress reset Elle Kay

While it was nice to take some time for myself, it didn’t feel like I was really sorting anything out. I knew I probably needed therapy, but that was expensive and funds were tight. Then I spoke to hypnotist Elle Kay, and she set me on a really good path to help me calm the heck down, deal with the feelings of overwhelm, and reset myself a bit.

Elle Kay is a certified and registered hypnotist with a range of different programmes on her website. When I spoke to her, she recommended the Stress Reset, which helps you switch off survival mode, deal with overwhelm, and find some long-term calm.

When I read the blurb, everything suddenly made sense. I’d been living off my nerves (and Wagon Wheels) for months. I was constantly anxious and panicked, always waiting for something else to go wrong. I was holding my world together – just about – and everything was carefully balanced… until it wasn’t. Until I wasn’t.

I waited until I was home alone and began the two-week programme. In Week One, there’s a workbook to download and three audio files to listen to. You’re encouraged to listen to at least one a day during the first week – sometimes I listened to them all if I had time.

Stress reset Elle Kay

The first time I listened, I got comfy on my bed and pressed play. I closed my eyes and let the words wash over me. Hearing phrases about how safe I was now really resonated – and I shed a few tears. I listened all the way through, and even though you’re meant to wake up at the end, I just turned over and fell into a deep, much-needed two-hour sleep. I was utterly exhausted – and had been for a long time. I was so grateful to finally rest and switch everything off for a while. I had high hopes that the Stress Reset would be a key part of getting back on track.

I continued with the audio sessions each day, mostly in the evenings to help me wind down. There’s a sleep audio and a subliminal one, which is 20 minutes of lovely, relaxing music. All the recordings are deeply soothing and great for winding down after a tough day.

Week One went well. I genuinely enjoyed the sessions. It was wonderful to set aside time each day just for me – to relax, unwind, and begin to unpick some of the causes of my stress. I was sleeping better than I had in years and felt hopeful again. I was looking forward to Week Two… but then my son and partner both arrived separately to stay for a week. It turns out that life with them is pretty incompatible with me having much time to myself.

Between working, cooking, cleaning, and making sure their needs were met, there was no time left for me. Even bedtimes weren’t my own, and I couldn’t manage even a single 20-minute session of quiet time. That week, I barely slept, my stress levels spiked, and my fragile sense of calm shattered. I think we might have identified part of my problem! I love being with the boys, but I also need to carve out time for myself going forward.

Once they’d both gone, the first thing I did was spend a couple of days re-listening to the Week One audio files – just to get myself back to where I was. It was bliss. I slept, I felt calmer, and I was ready to tackle Week Two.

Week Two is about making calm your new default. I knew this would be a challenge, but again I settled in and let Elle’s words ripple over me like calm waves. This week focused on setting new patterns for the future – continuing to calm my nervous system and move myself out of survival mode.

Home

Even though it’s a two-week programme, Elle encourages you to keep listening as often as you need to afterwards. I’m planning to keep it up and listen to at least one audio a day. I’ve found the programme deeply relaxing – it’s massively helped my sleep, and I’m even waking up feeling a bit more refreshed.

I think my stress levels had become dangerously high, and climbing out of the hole I was in will take time – definitely more than two weeks. But the Stress Reset has lit the path towards my recovery. It’s helped me step back from simply surviving and lurching from one crisis to the next. It’s made me realise that life isn’t just about getting through, it’s about remembering that I am safe now, and that things can and will get better.

Elle Kay’s Stress Reset costs £47. You get to keep the audio files and workbooks to use for as long as you like. For less than the cost of a single hour with a therapist, I’ve taken some very real steps toward finding and maintaining inner calm. I’ve stepped out of survival mode, and I’m starting to feel more like myself again.

This has genuinely been a life-saver. A life saver.

You can find out more about the Stress Reset programme, Elle Kay, and examples of other programmes on her website. If you’re struggling, then I can’t recommend the Stress Reset enough. It’s changed my life, and that’s no exaggeration.

PS. I went back to the gym this morning. Look at me go!