Crafts: Make Your Own Ladybird Flower Pot

This summer has been an absolute belter. We have loved having some actual summer for a change, but it hasn’t been that great for the garden. My lawn is brown and my plants are looking a bit sorry for themselves. We’ve been trying to keep them watered as well as we can using waste water from the bath and shower, but they could do with a really good drink. We’ve been doing a few garden crafts, such as these pretty cupcake case flowers and we’ve been painting some pots for inside the house, like this Ladybird Flower Pot.

Crafts: Make Your Own Ladybird Flower Pot

The ladybird flower pot does take a couple of craft sessions to do, mainly so paint can dry properly in between coats, but it’s worth it, it’s a very pretty pot and would make a nice gift with a little plant in it.

How to make a Ladybird Flower Pot

You will need – 
A small terracotta pot
Red paint
Black paint
A paintbrush
A pencil with a rubber on the top
Bostik White Glu
Bostik Glu Dots
A black foam circle
Googly eyes
A black pipecleaner
Sticky tape

How to make your ladybird flower pot:
Firstly, paint the outside of your plant pot all over with red paint, leave it to dry. It might need a few coats of red paint, so make sure you leave time for the coats to dry.

Crafts: Make Your Own Ladybird Flower Pot

Once the red paint is dry, take a fine paintbrush and paint a black line from the top to the bottom as neat as you can. Taking the pencil with the rubber top, dip the rubber into the black paint and carefully dab spots around the pot. Do as many or as few as you want. Leave the pot to dry, the black spots may take a little while to dry off.

Once all the paint is dry, paint the whole pot with PVA glue, this will stop the paint from running off if the pot gets wet. It won’t make it 100% waterproof, but it will be splash-proof at least.

Crafts: Make Your Own Ladybird Flower Pot

Once the glue has dried, make a pair of ladybird antennae out of your pipecleaner. Fix your googly eyes onto the circle of black foam with a glu dot, this will be your ladybird’s face. Stick the antennae to the back of the foam face with sticky tape and then stick the face onto the plant pot with some of the white glu. Leave it to dry.

Crafts: Make Your Own Ladybird Flower Pot

Once it’s all dry you can put a little plant in your pot. What a lovely, cheery little gift to give someone, or to keep for yourself.

If you enjoyed this, you might also like these bee and butterfly crafts.

Crafts: Make Your Own Ladybird Flower Pot

Disclosure: We are Tots100 Bostik Bloggers and we were sent a box of craft items to use to create this post.

Easy Crafts: Make your own Manchester Bee

This month we’ve been busy getting ready for Didsbury in Bloom. We’ve been sprucing up our front garden and helping to build a bug hotel on our road. This year Didsbury in Bloom celebrates our connection to the Royal Society for the Protection of Birds (RSPB) which was founded in the village and we’ve been learning about how we can help encourage birds and bugs into our gardens. 

We have plans to build our own bug hotel and we are collecting the materials we will need to put it together. We’ve also been searching in our garden to see what bugs we could find, with all the rain lately we’ve seen a lot of slugs and snails!

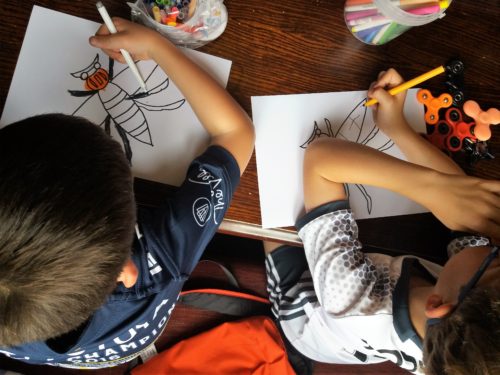
Rather fittingly, this month Craft Merrily have challenged the Bostik Bloggers to create a creepy crawlies craft. I wanted to do something simple, and knowing I had some kids to entertain on a play date, I sketched up these templates, one of a Manchester Bee and the other, a butterfly. I then printed them out and set the boys to work.Easy Crafts: Decorating Butterflies & Bees

To make and decorate your butterfly and Manchester Bee  you will need –

Templates printed out – they’re sturdier if printed on card
Colouring pens
Glitter or other embellishments
Bostik fine & wide glu pen
String or ribbon
A hole punch
Scissors

Download these templates for FREE here.

Easy Crafts: Make your own Manchester Bee decorations

Method –

This is a ridiculously easy craft. Just set the kids to work decorating the butterflies and bees however they like given the colouring in materials you have, then get the kids to embellish them however they like.

Easy Crafts: Make your own Manchester Bee decorations

I encouraged the boys to colour them in first, then to scatter glitter and stick on the paper flowers however they liked best. They came up with some lovely creative ideas, but my favourite was the yellow and black Manchester Bee.

Once they’re decorated how you want them to be, I’d leave them to dry for a few hours before cutting them out, or getting a grown up to cut them out for you.

Easy Crafts: Make your own Manchester Bee decorations

To turn them into tree decorations; using the hole punch, make a hole in one of the wings and thread through some string, tying a knot in the string to form a  loop. I think these would make really great bunting too, just punch two holes in and thread the string though each hole to hang it on the bunting.

Easy Crafts: Make your own Manchester Bee decorations

As you can see, they look really effective and several of the neighbours have commented how lovely they are. They’re not rain-proof, but they are quite fun to hang out on sunny days, especially when the Didsbury in Bloom judges are walking past.

Easy Crafts: Make your own Manchester Bee decorations

What other crafts can you think of to make with these Manchester Bee and butterfly templates?

Easy Crafts: Make your own Manchester Bee decorations

Note: I am a Bostik craft blogger and I was sent the materials to create this craft from Craft Merrily. 

Check out my other craft tutorials here!