Crafts: Chinese New Year Red Envelopes

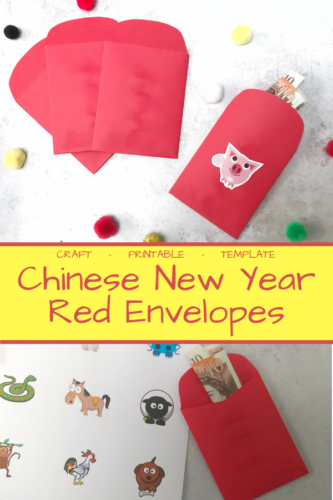
During Chinese New Year children are traditionally given red envelopes, or red packets containing money as a gift. The red envelopes are a symbol of good luck and the amount of money in your Chinese New Year Red Envelopes should end with an even number; though it’s important that the money should not be given in fours, or the number four should not appear in the amount, such as in 40, 400 and 444.

2019 is the Chinese Year of the Pig. Chinese New Year falls on 5th February and in Manchester there are already plans afoot for a parade and celebrations across Chinatown and beyond. Chinese New Year is a glorious, colourful celebration in what I think is the gloomiest month of the year.

Crafts: Chinese New Year Red Envelopes

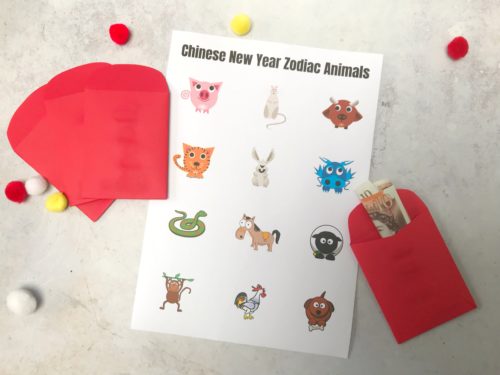
To celebrate Chinese New Year, I’ve created this simple template to make your own Chinese Red Envelopes. You can decorate your envelope however you like; perhaps with some Chinese writing, or with gold glitter. I’ve kept it simple by creating a sheet with all the animals of the Chinese Zodiac so you can print them out and stick them to the envelopes.

Click here to download the envelope template.

Click here to download the Chinese Zodiac animals.

Crafts: Chinese New Year Red Envelopes

Make your own Chinese Red Envelopes
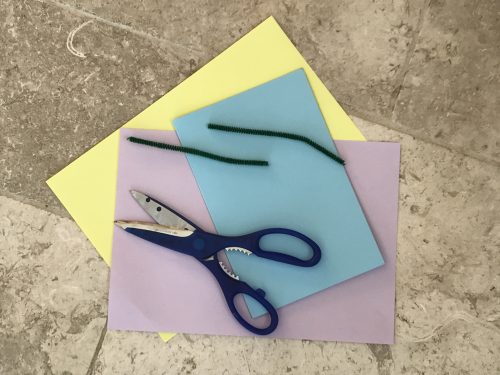
You will need:

Bostik Fine & Wide Glu Pen
Chinese Red Envelopes template printed on red paper
Scissors
Chinese Zodiac Animals print out

How to make your Chinese Red Envelopes:

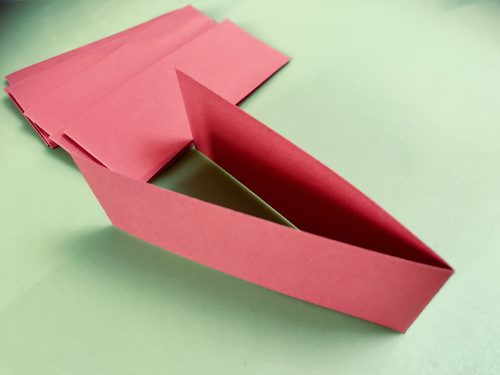
Print your envelope templates out on red paper. Using a pair of scissors cut around the template.

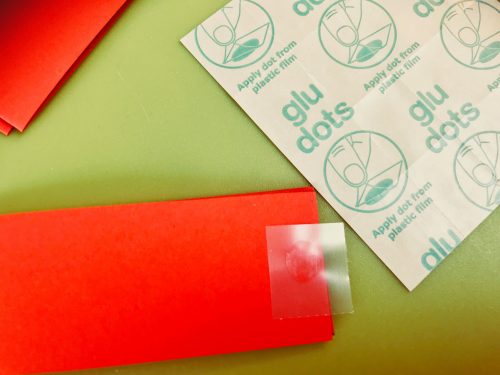
Fold along the lines of the template and using the Bostik Fine & Wide Glu Pen, fold the two side flaps into the centre and glue them together. Fold the bottom flap up and glue that into place. Put your envelope under a book or something which will keep it flat while the glue dries.

Crafts: Chinese New Year Red Envelopes

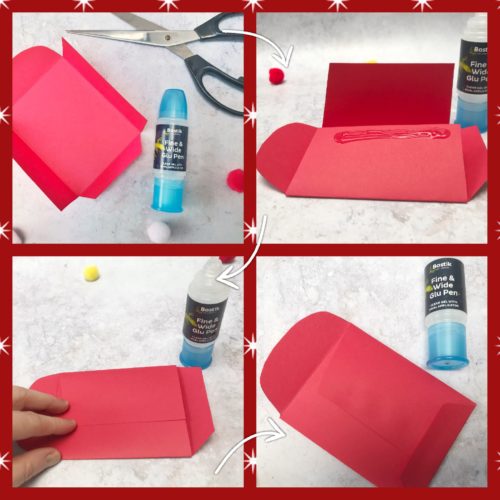
Once the glue is dry, cut out your Chinese Zodiac animal and glue that into place, slip some money into the envelope, tuck the top flap inside and it’s ready to gift for Chinese New Year.

Remember, you can decorate your Chinese New Year Red Envelopes however you want. My calligraphy isn’t great, but if yours is you could try your hand at writing some Chinese characters on the envelope. Gold glitter would also make this envelope look fabulous.

Here are some more Chinese New Year Crafts you might enjoy –

Crafts: Chinese New Year Red Envelopes

Christmas Crafts: Paper Plate Holly Wreath

I love a good wreath at Christmas. We always buy a nice foliage one from our local Community Farm and have it on the front door. Inside the house we have a few more delicate wreaths on some of the internal doors, it just makes the place look more festive. I really enjoy making wreaths with my son. Once you’ve got your paper plate base sorted, you just let your imagination run wild. This week we’ve made a Paper Plate Holly Wreath and we’re really quite pleased with it.

Christmas Crafts: Paper Plate Holly Wreath

I had the idea for this Paper Plate Holly Wreath, but I knew that I’d probably be the one who would be spending some time cutting out the individual holly leaves and my son (with direction) would be doing much of the sticking. I sat down with a giant mug of tea and Say Yes to the Dress on TV and got cutting. I’ve no idea how many holly leaves I cut out, but it was about two A4 sheets worth.

Now that I’ve seen the finished Paper Plate Holly Wreath, I am really pleased with it. I think it looks really effective and I’ll be pleased to have it hanging in my kitchen this Christmas.

How to make a Paper Plate Holly Wreath

You will need:

A paper plate
Scissors
Green paint
Paint brush
A pencil
Ribbon
3 or 4 different kinds of green card or foam
Bostik Glu Dots
Red embellishments – mini pom poms, beads, paper shapes etc

Christmas Crafts: Paper Plate Holly Wreath

How to make your Paper Plate Holly Wreath:

With a pair of scissors, cut the middle out of your paper plate so it looks like a ring. Near the top of your wreath, cut a small slit where you can thread your ribbon through later.

Paint the wreath all over, front and back with green paint and leave it to dry. If you’re impatient like me, you can use a hairdryer to speed up the process. Your ring might need a second coat of paint on the front if you think it’s a bit patchy looking. This process does take a bit of time, so factor that in if you’re crafting with slightly impatient kids.

While your paint is drying, take the piece of cardboard which you cut out of the paper plate and draw a holly leaf on it. It needs to be about 5cm long, but you can make your leaves as big or small as you want really. Cut out your leaf shape, this is now your template.

I found whatever green card I had in my craft cupboard, which was a nice piece of corrugated card, some shiny card and some glittery card. I also found a piece of glittery foam. Using the pencil I then drew around my holly leaf template all over the back of each piece of card. Try and do this so you get minimal waste when you cut them out.

Once you’ve drawn all your holly leaves, you need to cut them out. This takes a little bit of time, so do factor that in.

Christmas Crafts: Paper Plate Holly Wreath

Once you’ve got a big pile of leaves, it’s time to stick them onto your wreath. Before you start sticking, thread your piece of ribbon through the slit you cut earlier and tie a knot in the ends securely.

Take a Bostik Glu Dot and stick it to the back of each leaf, towards one end if you can. Then stick your leaves however you like all over your wreath. We chose to stick the corrugated leaves all around the outside of the wreath. I suggested he try to stick them in pairs, like holly leaves often are and I think he did a good job.

With the other types of holly leaf, we arranged them in an attractive way around the inner circle of the wreath. Ben then stuck them in place. All the holly wreath needed now was berries. Using the red embellishments; mini pom poms, paper shapes and stick on gems, we decorated some of the leaves with red “berries”. I find stick on gems a bit tricky, so I always use a glu dot on them to make sure they stick.

Your wreath is now complete. It looks pretty impressive yes?

Christmas Crafts: Paper Plate Holly Wreath

Check out my other craft tutorials here!

If you enjoyed this wreath craft, you might also like to try these –

I am a Bostik Craft Blogger and I was sent the materials to create this craft from Craft Merrily. I have not been compensated for this post. 

Crafts: Make Your Own Ladybird Flower Pot

This summer has been an absolute belter. We have loved having some actual summer for a change, but it hasn’t been that great for the garden. My lawn is brown and my plants are looking a bit sorry for themselves. We’ve been trying to keep them watered as well as we can using waste water from the bath and shower, but they could do with a really good drink. We’ve been doing a few garden crafts, such as these pretty cupcake case flowers and we’ve been painting some pots for inside the house, like this Ladybird Flower Pot.

Crafts: Make Your Own Ladybird Flower Pot

The ladybird flower pot does take a couple of craft sessions to do, mainly so paint can dry properly in between coats, but it’s worth it, it’s a very pretty pot and would make a nice gift with a little plant in it.

How to make a Ladybird Flower Pot

You will need – 
A small terracotta pot
Red paint
Black paint
A paintbrush
A pencil with a rubber on the top
Bostik White Glu
Bostik Glu Dots
A black foam circle
Googly eyes
A black pipecleaner
Sticky tape

How to make your ladybird flower pot:
Firstly, paint the outside of your plant pot all over with red paint, leave it to dry. It might need a few coats of red paint, so make sure you leave time for the coats to dry.

Crafts: Make Your Own Ladybird Flower Pot

Once the red paint is dry, take a fine paintbrush and paint a black line from the top to the bottom as neat as you can. Taking the pencil with the rubber top, dip the rubber into the black paint and carefully dab spots around the pot. Do as many or as few as you want. Leave the pot to dry, the black spots may take a little while to dry off.

Once all the paint is dry, paint the whole pot with PVA glue, this will stop the paint from running off if the pot gets wet. It won’t make it 100% waterproof, but it will be splash-proof at least.

Crafts: Make Your Own Ladybird Flower Pot

Once the glue has dried, make a pair of ladybird antennae out of your pipecleaner. Fix your googly eyes onto the circle of black foam with a glu dot, this will be your ladybird’s face. Stick the antennae to the back of the foam face with sticky tape and then stick the face onto the plant pot with some of the white glu. Leave it to dry.

Crafts: Make Your Own Ladybird Flower Pot

Once it’s all dry you can put a little plant in your pot. What a lovely, cheery little gift to give someone, or to keep for yourself.

If you enjoyed this, you might also like these bee and butterfly crafts.

Crafts: Make Your Own Ladybird Flower Pot

Disclosure: We are Tots100 Bostik Bloggers and we were sent a box of craft items to use to create this post.

Crafts: How to make an Egg Box Dragon

Egg boxes have long been used for all kinds of kids crafts. They lend themselves to so many things, so this month we’ve turned one into an egg box dragon.

Dragons are our favourite mythical creatures. In our world they’re mostly friendly and none of them need slaying. Of course dragons have been figures in fiction for hundreds of years but only recently they’ve developed a friendlier reputation. We’re very fond of our bright green dragon, we’ve called him Dave and he’s a bit sparkly.

Crafts: How to make an Egg box Dragon

Our egg box dragon took a couple of craft sessions to make. We painted him first and left him to dry overnight. The next day we decorated him and made him look all fierce and fancy.

How to make an egg box dragon

You will need:
One egg box
Green, red or orange paint
String or wool
Googly eyes
Sequins
Pipecleaners
Blu Tack Glitter Pens or glitter
Bostik Glu Dots
Red and yellow card
Black felt tip

Crafts: How to make an Egg box Dragon

How to make your egg box dragon:
Using whichever coloured paint you choose, paint your egg box, making sure it’s well covered with paint. Put the box to one side to dry, preferably overnight.

Once dry, cut the egg box up. we cut our six egg box into thirds, so each section had two egg spaces. You can do them individually if you prefer. Using a skewer carefully poke through holes where you want to thread your sting through and tie your dragon parts together. We also poked some holes through to thread pipecleaner horns and a ridge on it’s back. A grown up will probably need to help with the tricky cutting, poking and threading.

Crafts: How to make an Egg box Dragon

Thread the string though the holes and tie the ends together. Thread through your pipecleaner horns and using the glu dots, stick on the dragon’s eyes. Then you can go crazy decorating it. We added sparkles and sequins along its body and dabs of glitter from the glitter pens. I can’t sing the praises of glitter pens enough, all the sparkle of glitter but without the mess!

Crafts: How to make an Egg box Dragon

Draw on some details with your black felt tip, I added a snout detail on his face and leave the glitter to dry. While your glitter is drying, cut out some red and yellow flames and stick them to your egg box so it looks like your dragon is breathing fire. Your dragon is now ready for some dragon action.

If you enjoyed this blog post, you might also like to try some jelly bean architecture.

Kids Crafts: How to make Tulip Handprint Cards

This month Craft Merrily have set the Bostik Bloggers the task of creating a flower craft. We decided we would make tulip handprint cards. They’re really simple to make and would make a lovely card to give for a lot of different occasions such as Easter, Mother’s Day or for a birthday. The handprint adds a lovely personal touch too.

Kids Crafts: How to make Tulip Handprint Cards

We went away with some friends for a week, so I planned a few crafts for us to entertain the kids with while we were away. These tulip handprint cards were one of them. The children were all so pleased with their cards and I like to think the recipients were too.

How to make Tulip Handprint Cards

You will need:
1 piece of A4 card, I used pale blue
2 pieces of different coloured paper, I used yellow and pink
1 green pipecleaner
Bostik White Glu
A pencil
An envelope which will fit your A5 card

Kids Crafts: How to make Tulip Handprint Cards

How to make Tulip Handprint Cards
Fold your A4 piece of card in half. Cut out a large rectangle of coloured paper (we used yellow) and stick it onto one side of your card with Bostik White Glu.

Take a pencil and draw around a child’s hand, carefully cut out the hand shape. A grown up might need to help with any cutting out, especially the trickily shaped handprint. Stick this near the top of the rectangle.

Shape your green pipecleaner into the shape of a flower stem, you could make a loop about half way to make it look like a leaf if you want. Glue it on the card below the flower.

I sandwiched it under a glass dish and left the glue to dry overnight. I’ve no idea why I used a glass dish, it was just close to hand I guess. It worked though.

Kids Crafts: How to make Tulip Handprint Cards

Once the glue is dry, write your card and put it in the envelope ready to delight the lucky recipient!

It’s pretty cute isn’t it?

Check out my other craft tutorials here!

Kids Crafts: How to make Tulip Handprint Cards

I am a Bostik Craft Blogger and I was sent the materials to create this craft from Craft Merrily. 

Crafts: Simple Paper Plate Hot Air Balloons

This month Craft Merrily have set the Bostik Bloggers the task of creating a flying craft. I asked the boy what he wanted to make with his friends and he said hot air balloons. His wish is my command, and so I set to work gathering what we needed to make hot air balloons.

These hot air balloons are a really simple craft and a great excuse for the children to let their imaginations go wild and to decorate their balloons however they want. I did originally imagine that they would want to decorate the hot air balloons with pieces of coloured paper and sparkly embellishments, but on the day they were very keen to just draw pictures of the dog.

Crafts: Simple Paper Plate Hot Air Balloons

How to make Paper Plate Hot Air Balloons

You will need:
A paper plate
Some string or wool
A paper cup
Bostik White Glu
Scraps of colourful paper
Felt tips
Sparkly embellishments

How to make your hot air balloons:

Set up your craft table and set the kids to work decorating the back of the paper plates (this is so the balloon looks domed). I lay our Bostik White Glu, scraps of colourful paper, felt tips and some extra embellishments and let them get on with decorating their balloons how they wanted.

Crafts: Simple Paper Plate Hot Air Balloons

While they were busy decorating, I took the paper cups and made two small holes to thread the string through. I then cut a length of sting, threaded it through each hole and knotted it inside the cup.

Crafts: Simple Paper Plate Hot Air Balloons

Once they’d finished decorating their plates I sellotaped the loop of string to the back of the plate, making a loop at the top of the plate so it could be hung up. We then left them alone for a few hours for the glue to dry.

Crafts: Simple Paper Plate Hot Air Balloons

They were delighted with their hot air balloons and were really happy when we hung them up around the house. They filled the paper cup basket with all kinds of things too. Small teddies and little LEGO figures found themselves floating through the sky!

It’s such a simple craft, perfect for a rainy day and great for making use of any craft bits and pieces you’ve got in your craft box.

Check out my other craft tutorials here!

Crafts: Simple Paper Plate Hot Air Balloons

Easter Crafts: Make Colourful Easter Egg Suncatchers

This month Craft Merrily have set the Bostik Bloggers the task of creating a craft for Easter. I’ve been looking at suncatchers for a while and I thought they’d be just the thing for those bright late winter days we’ve been having lately. Easter lends itself to glorious splashes of colour, so we made some colouful Easter Egg Suncatchers to cast some jewel coloured sunbeams across our home.

I printed a couple of Easter egg shapes out on acetate and cut them out. You can draw your own, but I’ve made my template available for you to download, which might make things easier for you. Here’s how we made our Easter Egg Suncatchers.

Crafts: Make Colourful Easter Egg Suncatchers

How to make Easter Egg Suncatchers

You will need:
An Easter egg shape cut out of acetate or clear plastic
Selection of craft jewels or acrylic gems
Bostik White Glu
A piece of ribbon for hanging

Method:
Cut out your Easter Egg shapes and using a hole punch make a hole at the top. Thread a length of ribbon through the hole and tie a knot in it.

Crafts: Make Colourful Easter Egg Suncatchers

You can have a design in your head, a pattern or colour-scheme that you like, or you can glue the gems on randomly, whichever you prefer. Glue them onto the Easter Egg shape using a dab of glue on the back of each one.

Crafts: Make Colourful Easter Egg Suncatchers

Once you’re happy with your design, leave your Easter eggs to dry for a couple of hours. Once they’re dry, hang up at a window and prepare to be dazzled when the sun shines through your window.

Crafts: Make Colourful Easter Egg Suncatchers
Here’s the dazzle on our wall from the sun shining through our suncatcher!

These suncatchers are such a lovely simple craft, they’re perfect for tots and right up to bigger boys and girls. My 7 year old really enjoyed decorating his. We were both thrilled when the sun came out and shone through our suncatchers, casting a wonderful dazzle pattern on the wall.

Check out my other craft tutorials here!

Easter Crafts: Make Colourful Easter Egg Suncatchers

I am a Bostik Craft Blogger and I was sent the materials to create this craft from Craft Merrily. 

Crafts: Easy Valentine’s Paper Heart Wreath

This month Craft Merrily have set the Bostik Bloggers the task of creating a craft for Valentine’s Day. Last year I made a lovely découpage candle holder for Valentine’s Day, but this year I thought I’d make a Paper Heart Wreath.

I really like making paper wreaths, we have a place in the kitchen where I like to hang the seasonal wreaths I make. This is a little different to my usual style, this Paper Heart Wreath is put together with easy to make 3D hearts. It’s really quite easy to make, it looks very effective and it’s a lovely Valentine’s decoration.

Crafts: Easy Valentine's Paper Heart Wreath

How to make a Paper Heart Wreath

You will need
Colourful paper, A4 size
Scissors or a craft knife
A ruler
Bostik Glu Dots
A length of ribbon

How to make your Paper Heart Wreath

Using a ruler measure the long side of your piece of paper and divide that length by 7. Measure out 7 equal widths of paper and carefully cut into strips using a pair of scissors or a craft knife. If you’re doing this with children then you may want to be in charge of this bit.

Fold each strip in half, make sure you’ve got a neat, crisp fold here, this will be the pointy bottom of your heart shape.

Crafts: Easy Valentine's Paper Heart Wreath

Using a glue dot, stick a dot at the end of your strip and bend the edges together to create the heart shape. Press the paper together so the glu dot is holding the shape firmly in place. Do this with all 7 hearts.

Crafts: Easy Valentine's Paper Heart Wreath

Take two hearts and stick them together using the glu dots. Then take your ribbon and using the glu dots stick the ribbon to either side of the two hearts. Make sure the ribbon is positioned so the ends will be hidden between the hearts. Using the glu dots, carry on sticking the hearts together until all 7 hearts are stuck together.

Crafts: Easy Valentine's Paper Heart Wreath

Your paper heart wreath is now finished and you just need to find somewhere to hang it!

I am a Bostik Craft Blogger and I was sent the materials to create this craft from Craft Merrily. 

Check out my other craft tutorials here!

Crafts: Easy Valentine's Paper Heart Wreath

Crafts: How to make lolly stick Christmas decorations

Now it’s mid-November, I’m really starting to get stuck into some Christmas crafts. I made some beautiful button decorations at my craft club last week and over the weekend I had a root through my craft stash to see what we could make. I discovered a large and colourful lolly stick collection which were crying out to be turned into Christmas decorations.

Crafts: How to make lolly stick Christmas decorations

Crafts: How to make lolly stick Christmas decorations

You will need:
A selection of coloured lolly sticks
Bostik Glu Dots
Assorted embellishments – glitter, stars, sequins etc
Bostik White Glue
Scissors
Sticky tape
Ribbon

Crafts: How to make lolly stick Christmas decorations

How to make your lolly stick Christmas decorations

To make a Christmas tree, select some green lolly sticks and another stick for the trunk of the tree. With a pair of scissors carefully cut your lolly sticks to different lengths (see the photo). Using Glu Dots, stick a star to the top of your trunk and then stick the green branches across the trunk. Using white glue decorate your tree with sequins, stars and other embellishments. Leave to dry.

Crafts: How to make lolly stick Christmas decorations

Once dry, carefully attach a loop of ribbon to the back of the tree using sticky tape. Your lolly stick Christmas tree is now complete.

To make a Christmas star, select some colourful lolly sticks, I chose pink. Using Glu Dots, stick the lolly sticks across each other to make a start shape (see photo). Using white glue decorate your star with sequins, stars and other embellishments. Leave to dry.

Crafts: How to make lolly stick Christmas decorations

Once dry, carefully attach a loop of ribbon to the back of the star using sticky tape. Your lolly stick Christmas star is now complete.

My son and I really enjoyed making and decorating our Christmas tree and star. It’s a lovely craft to do with kids and they can really use their imagination when it comes to decorating them. These lolly stick crafts are a simple but effective craft to do in the run up to Christmas.

I am a Bostik craft blogger and I was sent the materials to create this lolly stick craft from Craft Merrily. 
Check out my other craft tutorials here!

Crafts: How to make lolly stick Christmas decorations

Crafts: Spooky Halloween Pom Pom Spiders

Pom poms are a pretty easy thing to make and with a little imagination you can turn them into all kinds of different creatures and characters. This month I was tasked by Craft Merrily to create a Halloween craft. I’d been wanting to master my new pom pom maker, so I decided to make some pom pom spiders. They’re easier than you think and an easy craft to do with children.

Crafts: Spooky Halloween Pom Pom Spiders

We’ve all made pom poms before using two rings of cardboard you laboriously wind wool around, then cut, tie and you’re done. I’ve bought a set of pom pom makers on the recommendation of my friend Lucy – an expert pom pom maker. She is right, they really are a pom pom game changer!

Lucy showed me how to use the pom pom maker. You wind your wool around two semi-circles of the maker, then wind it around the other two semi-circles, clip them together, cut them and the tie them around the middle and you’re done. Easy. Not just easy, but quick and easy.

Crafts: Spooky Halloween Pom Pom Spiders

You can make your pom pom spiders as big or as small as you want (if you’re not sure how to make pom poms, there’s a video you can watch here). Use whatever colours you think would work best.

How to make Pom Pom Spiders

You will need –
Pom pom makers (or make your own cardboard rings)
A ball of wool
Scissors
Pipecleaner
Googly eyes
Bostik Glu Dots

How to make your Pom Pom Spiders –
Wind your wool around your pom pom maker, make sure you are generous with the winding. The more wool you use, the fuller your pom pom will be.

Before you cut and tie your pom pom, cut your spider legs out of the pipecleaners. I used four identical lengths of pipecleaner (which make 8 spiders legs). Twist the pipecleaners together in the middle and put them through the centre of your pom pom.

Cut the wool around your ring and tie you pom pom together tightly with a long length of wool. You should have a pom pom now, it may need trimming up slightly so it is even all over.

Using the Bostik Glu Dots and the googly eyes, stick eyes onto your pom pom spider. Bend its legs to make spiders legs. You pom pom spider is now complete. You can leave the long piece of wool on him or cut it off if you prefer.

Your pom pom spiders are ready for Halloween. Hang them around the house, make a pom pom spider garland out of them or decorate your Halloween party table with them. How would you use your pom pom spiders?

Crafts: Spooky Halloween Pom Pom Spiders

I am a Bostik craft blogger and I was sent the materials to create this craft from Craft Merrily. 

Check out my other craft tutorials here!