Crafts: Chinese New Year Red Envelopes

During Chinese New Year children are traditionally given red envelopes, or red packets containing money as a gift. The red envelopes are a symbol of good luck and the amount of money in your Chinese New Year Red Envelopes should end with an even number; though it’s important that the money should not be given in fours, or the number four should not appear in the amount, such as in 40, 400 and 444.

2019 is the Chinese Year of the Pig. Chinese New Year falls on 5th February and in Manchester there are already plans afoot for a parade and celebrations across Chinatown and beyond. Chinese New Year is a glorious, colourful celebration in what I think is the gloomiest month of the year.

Crafts: Chinese New Year Red Envelopes

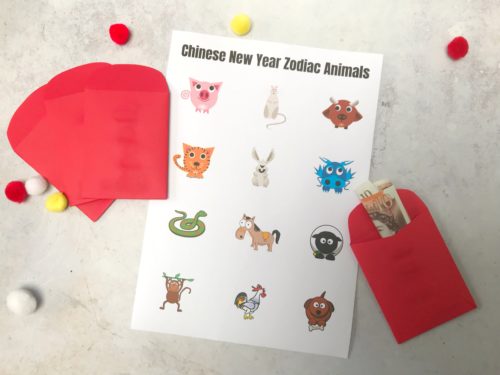
To celebrate Chinese New Year, I’ve created this simple template to make your own Chinese Red Envelopes. You can decorate your envelope however you like; perhaps with some Chinese writing, or with gold glitter. I’ve kept it simple by creating a sheet with all the animals of the Chinese Zodiac so you can print them out and stick them to the envelopes.

Click here to download the envelope template.

Click here to download the Chinese Zodiac animals.
Crafts: Chinese New Year Red Envelopes

Make your own Chinese Red Envelopes

You will need:

Bostik Fine & Wide Glu Pen
Chinese Red Envelopes template printed on red paper
Scissors
Chinese Zodiac Animals print out

How to make your Chinese Red Envelopes:

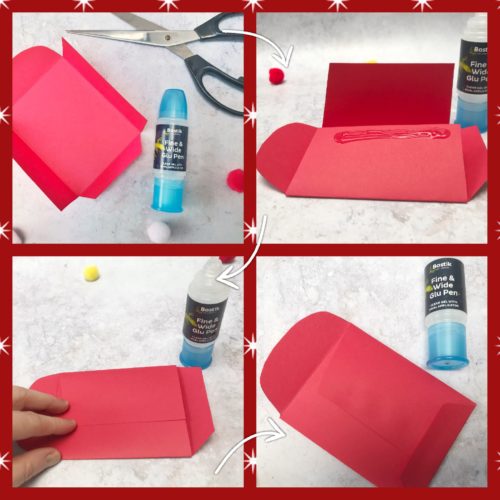
Print your envelope templates out on red paper. Using a pair of scissors cut around the template.

Fold along the lines of the template and using the Bostik Fine & Wide Glu Pen, fold the two side flaps into the centre and glue them together. Fold the bottom flap up and glue that into place. Put your envelope under a book or something which will keep it flat while the glue dries.
Crafts: Chinese New Year Red Envelopes

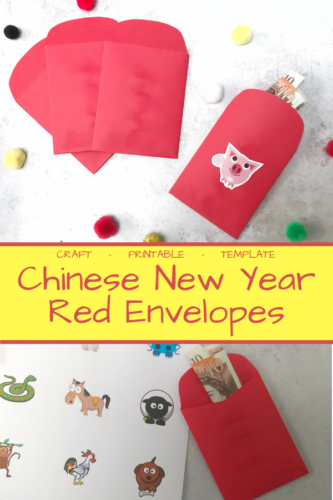
Once the glue is dry, cut out your Chinese Zodiac animal and glue that into place, slip some money into the envelope, tuck the top flap inside and it’s ready to gift for Chinese New Year.

Remember, you can decorate your Chinese New Year Red Envelopes however you want. My calligraphy isn’t great, but if yours is you could try your hand at writing some Chinese characters on the envelope. Gold glitter would also make this envelope look fabulous.

Here are some more Chinese New Year Crafts you might enjoy –
Crafts: Chinese New Year Red Envelopes

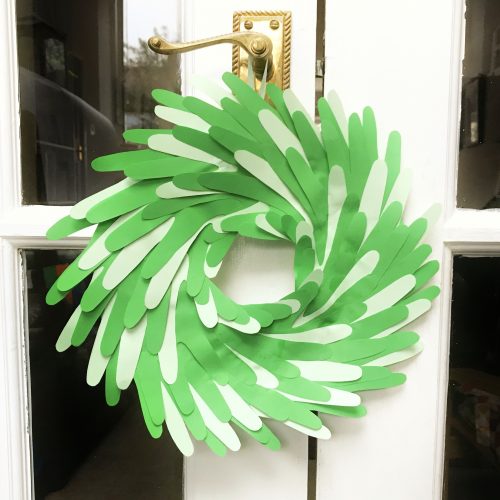
Kids Crafts: Simple Hand Print Christmas Wreath

I’m all about the Christmas wreaths at the moment and wanting to make a Hand Print Christmas Wreath before my son’s hands grow too big, this week we set our minds to making this lovely hand print wreath.

My son has just turned 8 years old and he’s growing so fast. A few days ago we were looking at some clay hand prints he did as a baby and we were marveling at how much he has grown. His hands are shaped like his father’s hands, square, stout and strong. In a year or two his hands will be the same size as mine. It’s going too fast, too fast.

Kids Crafts: Simple Hand Print Christmas Wreath

Wanting to preserve his hand print a little, this easy to make Hand Print Christmas Wreath is a lovely thing to do with children. Here’s what we did…

Make a Simple Hand Print Christmas Wreath

You will need:

A paper plate
A pencil
Scissors
Coloured paper, preferably two colours.
Glue, I used a Bostik Wide & Fine Glu Pen
Some ribbon

Kids Crafts: Simple Hand Print Christmas Wreath

How to make your Hand Print Christmas Wreath:

To begin with, take your paper plate and in the centre of the plate  draw around your child’s hand. Then carefully, making sure not to cut across the plate (because you’ll be making a ring out of it) cut out the hand shape, this will be your template.

Now carefully trim around the inner ring of the plate, so you have a nice ring to glue your hand prints too later. Cut a small slit in the top of the ring and thread a piece of ribbon through, knot the ribbon. This is how you will hang your wreath once it’s finished.

Kids Crafts: Simple Hand Print Christmas Wreath

Take your hand print template and draw around it on your coloured paper. I think I ended up using 8 pale hand prints and 22 darker hand prints, but the more you have, the better the effect I think.

When you’ve got all your hand shapes cut out, it’s time to sit down with the glue. Put a layer of glue all over the plate ring and then place your first hand print on it. Don’t press it down yet as you’ll have to slip another hand shape under it, and then under that.

Put a small dollop of glue on the palm of each hand shape and work around the ring layering the hands under each other. This will make sense when you’re doing it. If you’re using two colours of paper, make sure they are evenly distributed.

Once you’ve worked your way around the ring and the hand shapes are all overlapping each other pretty evenly, then you can press the shapes down onto the ring. Leave the glue to dry for a few hours. Once it’s dry it’s ready to be hung up. If you wanted you could add some embellishments, like little red pom poms or something.

Kids Crafts: Simple Hand Print Christmas Wreath

So there we have it, one very simple Hand Print Christmas Wreath – a great way to remember your children’s little hands. It’s a handmade Christmas decoration which will look great year after year.

If you enjoyed this, you might also like to try –

Kids Crafts: Simple Hand Print Christmas Wreath

Christmas Crafts: Paper Plate Holly Wreath

I love a good wreath at Christmas. We always buy a nice foliage one from our local Community Farm and have it on the front door. Inside the house we have a few more delicate wreaths on some of the internal doors, it just makes the place look more festive. I really enjoy making wreaths with my son. Once you’ve got your paper plate base sorted, you just let your imagination run wild. This week we’ve made a Paper Plate Holly Wreath and we’re really quite pleased with it.

Christmas Crafts: Paper Plate Holly Wreath

I had the idea for this Paper Plate Holly Wreath, but I knew that I’d probably be the one who would be spending some time cutting out the individual holly leaves and my son (with direction) would be doing much of the sticking. I sat down with a giant mug of tea and Say Yes to the Dress on TV and got cutting. I’ve no idea how many holly leaves I cut out, but it was about two A4 sheets worth.

Now that I’ve seen the finished Paper Plate Holly Wreath, I am really pleased with it. I think it looks really effective and I’ll be pleased to have it hanging in my kitchen this Christmas.

How to make a Paper Plate Holly Wreath

You will need:

A paper plate
Scissors
Green paint
Paint brush
A pencil
Ribbon
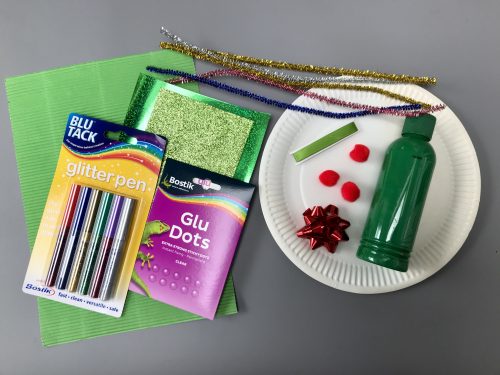
3 or 4 different kinds of green card or foam
Bostik Glu Dots
Red embellishments – mini pom poms, beads, paper shapes etc

Christmas Crafts: Paper Plate Holly Wreath

How to make your Paper Plate Holly Wreath:

With a pair of scissors, cut the middle out of your paper plate so it looks like a ring. Near the top of your wreath, cut a small slit where you can thread your ribbon through later.

Paint the wreath all over, front and back with green paint and leave it to dry. If you’re impatient like me, you can use a hairdryer to speed up the process. Your ring might need a second coat of paint on the front if you think it’s a bit patchy looking. This process does take a bit of time, so factor that in if you’re crafting with slightly impatient kids.

While your paint is drying, take the piece of cardboard which you cut out of the paper plate and draw a holly leaf on it. It needs to be about 5cm long, but you can make your leaves as big or small as you want really. Cut out your leaf shape, this is now your template.

I found whatever green card I had in my craft cupboard, which was a nice piece of corrugated card, some shiny card and some glittery card. I also found a piece of glittery foam. Using the pencil I then drew around my holly leaf template all over the back of each piece of card. Try and do this so you get minimal waste when you cut them out.

Once you’ve drawn all your holly leaves, you need to cut them out. This takes a little bit of time, so do factor that in.

Christmas Crafts: Paper Plate Holly Wreath

Once you’ve got a big pile of leaves, it’s time to stick them onto your wreath. Before you start sticking, thread your piece of ribbon through the slit you cut earlier and tie a knot in the ends securely.

Take a Bostik Glu Dot and stick it to the back of each leaf, towards one end if you can. Then stick your leaves however you like all over your wreath. We chose to stick the corrugated leaves all around the outside of the wreath. I suggested he try to stick them in pairs, like holly leaves often are and I think he did a good job.

With the other types of holly leaf, we arranged them in an attractive way around the inner circle of the wreath. Ben then stuck them in place. All the holly wreath needed now was berries. Using the red embellishments; mini pom poms, paper shapes and stick on gems, we decorated some of the leaves with red “berries”. I find stick on gems a bit tricky, so I always use a glu dot on them to make sure they stick.

Your wreath is now complete. It looks pretty impressive yes?

Christmas Crafts: Paper Plate Holly Wreath

Check out my other craft tutorials here!

If you enjoyed this wreath craft, you might also like to try these –

I am a Bostik Craft Blogger and I was sent the materials to create this craft from Craft Merrily. I have not been compensated for this post. 

Recycled Crafts: Robot Junk Modelling

My son is always coming home from school or from Beavers with things he’s created out of junk. They have a big box of little boxes, cardboard tubes, bottles, egg boxes and other junk which they can use to create all kinds of things. I fancied getting in on the action. So I gathered a some junk and a selection of crafty bits and bobs and we had an afternoon of robot junk modelling.

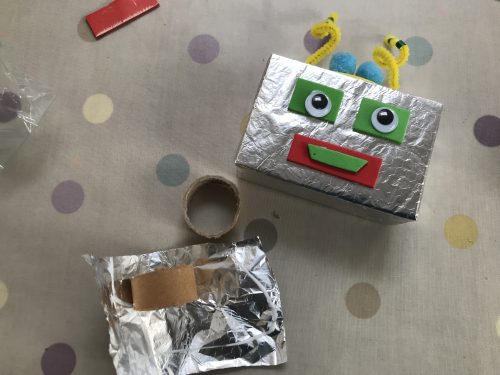
I had the idea of taking one of those small cereal boxes and covering it in tin foil, then letting our imaginations go wild. It was pretty simple to cover them in tin foil. I just cut a piece to size, covered it in glue and wrapped it up like a present.

Recycled Crafts: Robot Junk Modelling

Robot Junk Modelling

You will need:
A small cereal box
Tin foil
Bostik White Glu
Empty toilet roll
Sticky tape
Various crafty bits like pipe-cleaners, sticky foam pieces, googly eyes

Recycled Crafts: Robot Junk Modelling

How to get started with Robot Junk Modelling:
Take your cereal box and with some sticky tape, seal up the box. Take a piece of tin foil and cover it in a thin layer of the Bostik White Glu. Carefully wrap the foil around the box, folding the ends in like you would when you wrapped a present.

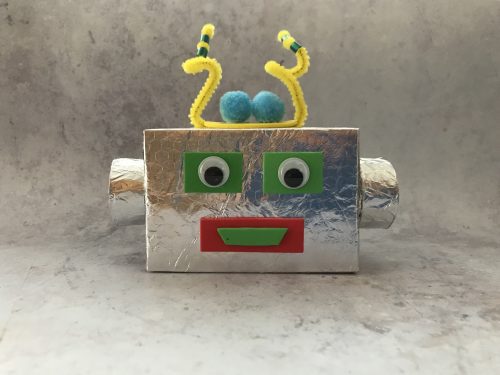
Grab whatever crafty bits you have. I found some pipe-cleaners, some self adhesive foam shapes, some googly eyes, little pom poms and some beads. Have a think about how you might use your craft pieces to create a robot face, just use your imagination. Use the glue to stick anything which isn’t self adhesive on.

Recycled Crafts: Robot Junk Modelling

I cut down some toilet rolls, covered them in foil and attached them to the sides of the robot head. I also twirled some pipe-cleaners for antennae and embellished them with some beads.

As you can see, both me and the boy had the same pile of crafty bits in front of us, but our robots are completely different. I think his is pretty cool, mine is pretty conventional. What will your robot look like?

Recycled Crafts: Robot Junk Modelling

Check out my other craft tutorials here!

Recycled Crafts: Robot Junk Modelling

Crafts: Make your own Space Themed Felt Busy Box

Over the summer holidays my son turned into the snack king. He seemed to be constantly hungry and as a result, we went through an awful lot of fruit, bread sticks and little pieces of cheese (he grew an inch over the summer, so we know where all those snacks went). I was throwing another empty box of cheese triangles into the recycling bin when I wondered if there might be a better use for this handy little box, so I put it to one side and got thinking. A few days later I’d hatched a plan to make a Space themed felt busy box.

A busy box is a box with a lid which you put together for children to play with when they’re out and about. Big fun in a little box if you will. Busy boxes usually have felt inside, with felt figures, shapes or characters to play with. I knew my son with his space themed bedroom, love of the night sky and slight obsession with Tim Peake would enjoy a space themed busy box. If I’m honest, I enjoyed making it for him too.

Crafts: Make your own Space Themed Felt Busy Box

Make your own Space Themed Felt Busy Box

You will need:
An empty cheese triangle box
Black paint
Bostik White Glu
Black felt
Coloured felt
Bostik Glu Dots
Scissors
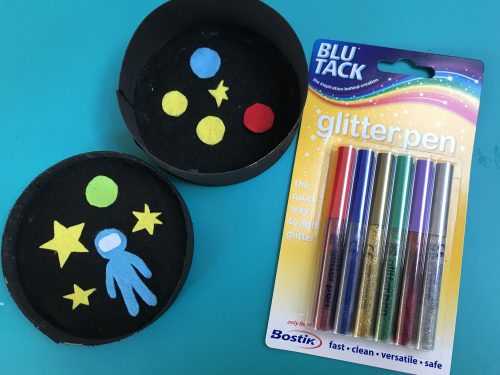
Blu Tack Glitter Pens

How to make your own Space Themed Felt Busy Box:
Take your empty cheese triangle box. I used a large one which had a double layer of triangles in. Paint the box inside and out with black paint, leave to dry. You might want to give it a second coat if you think it needs it.

Crafts: Make your own Space Themed Felt Busy Box

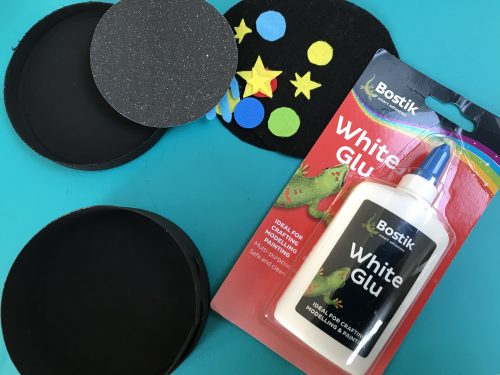
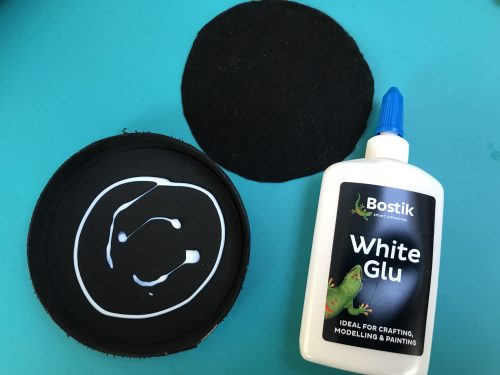
Once dry, use a pencil to draw around the box base and lid on the black felt and cut out your black circles. Check they fit in the box, you might need to trim them a little. Using the Bostik White Glu, glue one circle in the lid and another in the base, press in place and leave them until the glue is dry.

Crafts: Make your own Space Themed Felt Busy Box

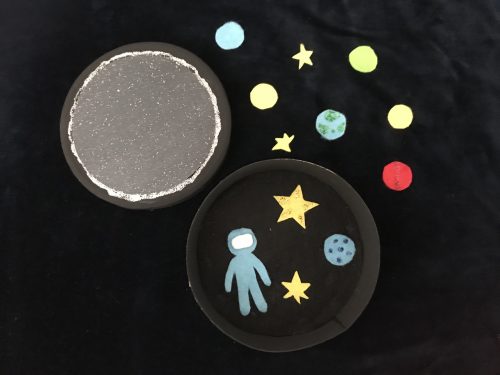
Meanwhile, with the coloured felt, cut out some space themed shapes. I made an astronaut with a visor which I stuck in with a Bostik Glu Dot. Then I cut out some planets and stars. I did all of this freehand which you can probably tell from the shape of my stars. I used some Blu Tack Glitter Pens to decorate some of the felt shapes. Put these aside and leave them to dry.

Crafts: Make your own Space Themed Felt Busy Box

I decorated the lid with a piece of shimmery card and a silver glitter pen. You could leave your lid plain black or you could stick on some paper stars, or whatever you want to do. The only limit is your imagination.

A busy box is a great way to entertain children on journeys or waiting for appointments, or if they just want or need a little focused quiet time. It can be good for developing their fine motor skills, it’s a great little sensory learning tool and can help develop their language and storytelling skills. It’s also great for sparking their imaginations. We really enjoy this kind of play and busy boxes can be made in all kinds of different themes.

Crafts: Make your own Space Themed Felt Busy Box

Check out my other craft tutorials here!

I am a Bostik Craft Blogger and I was sent the materials to create this craft from Craft Merrily. I have not been compensated for this post. 

Kids Craft: Make a Rainbow Lolly Stick Pen Pot

Summer is here and I’m busy tidying, decluttering and reorganising my house. Since the schools broke up for summer I feel like I’ve been living in chaos. My desk area and office leave a lot to be desired and I need to have a really good sort out. One thing I always have on my desk is a pen pot. Or rather, I have one for pens, one for pencils and one for felt tips too. That alone makes my often cluttered desk space look and feel a bit tidier. This week, in an effort to make my desk a brighter, cheerier space, we made a rainbow lolly stick pen pot.

Kids Craft: How to make a rainbow Lolly Stick Pen Pot

It’s a really simple craft, made from a washed out tin can and a handful of colourful lolly sticks (or popsicle sticks if you prefer). It looks really cheery on my desk, and knowing that my helpful son has had a hand in creating my new pen pot, it makes it extra special for me.

You can’t beat a good pen pot, we have them all over the house and it’s just handy to have a few spots around the place where you know you’ll be able to find a pen when you need one. The boy is moving into year 3 shortly, so he’s starting to want and need his own dedicated work-space. I can see us needing to make a few more of these lovely pen pots for his stationery supplies too.

How to make a rainbow Lolly Stick Pen Pot

You will need:
One clean tin can
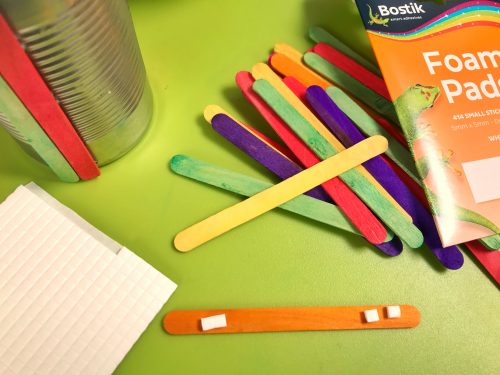
A handful of colourful lolly sticks
Bostik Foam Pads

Kids Craft: How to make a rainbow Lolly Stick Pen Pot

How to make a rainbow Lolly Stick Pen Pot:
Take a lolly stick and stick two small foam pads near the bottom of a lolly stick and two foam pads near the top. Peel off the backing tape and press the stick onto the tin can; making sure that the bottom of the lolly stick isn’t longer than the bottom of the tin can.

Kids Craft: How to make a rainbow Lolly Stick Pen Pot

Repeat this process until the whole of your tin can is covered in vertical lolly sticks. Press the sticks firmly into place and your colourful rainbow lolly stick pen pot is complete and ready for action.

Just make sure you’ve washed your tin out properly before you use it; or all of your pens and pencils will smell a bit like baked beans or dog food.

Check out my other craft tutorials here!

Kids Craft: How to make a rainbow Lolly Stick Pen Pot

I am a Bostik Craft Blogger and I was sent the materials to create this craft from Craft Merrily. I have not been compensated for this post. 

Crafts: Make Your Own Cupcake Case Prize Rosette

I’ve just got home from watching my son take part in school sports day. At our school sports day they try to have a range of activities so everyone has a chance to shine. Inevitably there are always children who win lots of the events and a few who don’t do quite so well. You don’t win a prize or rosette at our school sports day, but each team wins points which go towards the house total for the year.

Crafts: Make Your Own Cupcake Case Prize Rosette

My son is very prize focussed, so I thought it would be nice to make him a rosette to wear when he gets home from school later. The rosette is really easy to make and used a few craft items I had in my craft box, mostly cupcake cases and Bostik Glu Dots. You can make rosettes for all kinds of different occasions; from sports days, parties, birthdays or you could even do your own dog show and give them out to the prize winning pooches!

Make Your Own Cupcake Case Prize Rosette

You will need:
3 coloured cupcake cases
A safety pin
Some sticky tape
Two foam circles
Bostik Glu Dots
Some craft foam
Coloured sticky paper

Crafts: Make Your Own Cupcake Case Prize Rosette

To Make Your Own Cupcake Case Prize Rosettes:
Begin by sticking your cupcake cases together. I flattened mine out and glued them together with glu dots, so that the coloured side was facing up.

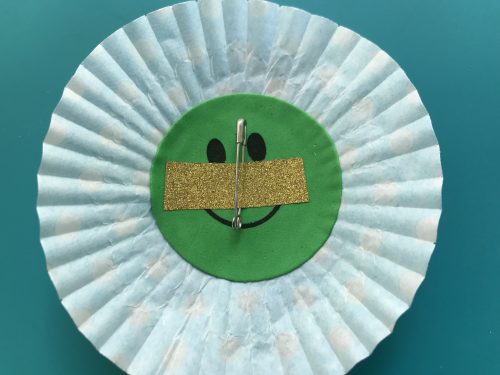
Take one of your foam circles and stick this to the back of the rosette, my foam circles were self adhesive, but use glue if yours aren’t. Using some sticky tape, tape the safety pin to the foam circle.

Crafts: Make Your Own Cupcake Case Prize Rosette

Take your craft foam and carefully cut two lengths of the foam to act as the rosette “ribbon”. Cut a V in the bottom of each one. Use sticky tape to fix this on the back of the rosette.

Turn your rosette over, you can start to decorate the front of it now. Take your last foam circle and stick this in the middle of the cupcake case. I then cut a number 1 out of sticky backed paper and stuck this to the foam circle. My rosette was now complete. All I needed was a sports day superstar to pin it to.

Crafts: Make Your Own Cupcake Case Prize Rosette

This is a very sweet little craft. It’s quick and easy with minimal mess and great for kids to make too. You can mix it up and use any colours or patterns you like!

If you enjoyed this craft, you might also enjoy making a bicycle card or making a clay thumbprint keepsake (which looks a bit like a medal).

Make Your Own Cupcake Case Prize Rosette

Crafts: Make Your Own Ladybird Flower Pot

This summer has been an absolute belter. We have loved having some actual summer for a change, but it hasn’t been that great for the garden. My lawn is brown and my plants are looking a bit sorry for themselves. We’ve been trying to keep them watered as well as we can using waste water from the bath and shower, but they could do with a really good drink. We’ve been doing a few garden crafts, such as these pretty cupcake case flowers and we’ve been painting some pots for inside the house, like this Ladybird Flower Pot.

Crafts: Make Your Own Ladybird Flower Pot

The ladybird flower pot does take a couple of craft sessions to do, mainly so paint can dry properly in between coats, but it’s worth it, it’s a very pretty pot and would make a nice gift with a little plant in it.

How to make a Ladybird Flower Pot

You will need – 
A small terracotta pot
Red paint
Black paint
A paintbrush
A pencil with a rubber on the top
Bostik White Glu
Bostik Glu Dots
A black foam circle
Googly eyes
A black pipecleaner
Sticky tape

How to make your ladybird flower pot:
Firstly, paint the outside of your plant pot all over with red paint, leave it to dry. It might need a few coats of red paint, so make sure you leave time for the coats to dry.

Crafts: Make Your Own Ladybird Flower Pot

Once the red paint is dry, take a fine paintbrush and paint a black line from the top to the bottom as neat as you can. Taking the pencil with the rubber top, dip the rubber into the black paint and carefully dab spots around the pot. Do as many or as few as you want. Leave the pot to dry, the black spots may take a little while to dry off.

Once all the paint is dry, paint the whole pot with PVA glue, this will stop the paint from running off if the pot gets wet. It won’t make it 100% waterproof, but it will be splash-proof at least.

Crafts: Make Your Own Ladybird Flower Pot

Once the glue has dried, make a pair of ladybird antennae out of your pipecleaner. Fix your googly eyes onto the circle of black foam with a glu dot, this will be your ladybird’s face. Stick the antennae to the back of the foam face with sticky tape and then stick the face onto the plant pot with some of the white glu. Leave it to dry.

Crafts: Make Your Own Ladybird Flower Pot

Once it’s all dry you can put a little plant in your pot. What a lovely, cheery little gift to give someone, or to keep for yourself.

If you enjoyed this, you might also like these bee and butterfly crafts.

Crafts: Make Your Own Ladybird Flower Pot

Disclosure: We are Tots100 Bostik Bloggers and we were sent a box of craft items to use to create this post.

Easy Crafts: How to Make Simple Cupcake Case Flowers

Cupcake cases have so many more uses other than for being used to bake delicious cakes. I use them a lot in crafts, the delicate paper cases make excellent petals for flowers. Whilst I loved the pretty little daffodil flowers I made a few months back, I thought it was about time to make a summery change to the paper flowers in my kitchen. I made these pretty cupcake case flowers and they’re so pretty in a little vase, they’re really made my day.

I spotted some colourful mini muffin cases when I was shopping in Booths a while ago. They’re just the thing to make these pretty flowers with. I also used some regular sized cupcake cases and together they made a many petaled wonder.

Easy Crafts: How to Make Simple Cupcake Case Flowers

How to make Simple Cupcake Case Flowers

You will need:
Two regular sized cupcake cases
Two coloured mini muffin cases
A button
Green lolly sticks or straws
Bostik Fine & Wide Glu Pen
Sellotape

Easy Crafts: How to Make Simple Cupcake Case Flowers

How to make your cupcake case flowers:
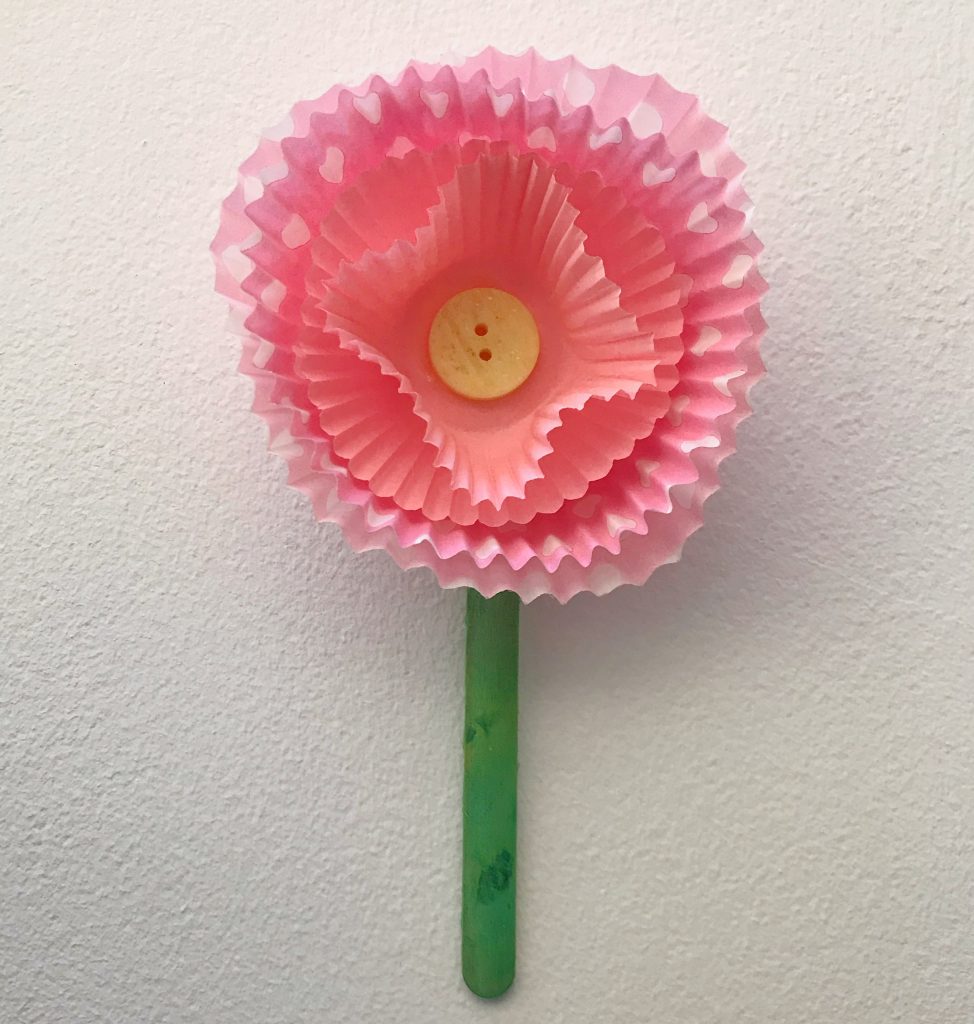
Take your two regular sized cupcake cases and turn one inside out. Put a dab of glue on the white side of one of the cases and press the white sides together, leaving the patterned or coloured sides on the outside. Leave that to one side to dry, you might want to weight them down with something so they stay pressed together while the glue sets.

Meanwhile take the smaller cupcake cases and do the same to them. Turn one of them inside out and glue them together. Put a dab of glue on the inside of the small case and glue your button, you could also use a little pom-pom or another embellishment of your choice.

Using more of the glue, glue the large and the small cases together and leave the whole thing to set for an hour or so. I pressed mine down using my little button tub.

Easy Crafts: How to Make Simple Cupcake Case Flowers

Once the whole thing is dry, take some sellotape and stick the lolly stick or straw to the back of the flower. Carefully tease the cupcake cases into a pleasing petal shape. I shaped the innermost case to make it look pretty. What do you think?

It’s as simple as that. They look great, we’ve made a few and put them in a little vase in my kitchen. They’re a cheery summery flower that is so simple and fun to make too.

If you enjoyed this craft, you might also like –

Easy Crafts: How to Make Simple Cupcake Case Flowers

Crafts: Make a Tour de France inspired Bicycle Card

This year’s Tour de France takes place from Saturday July 7th to Sunday July 29th 2018. This is the 105th Tour de France and it is made up of 21 stages, covering a total distance of 3,351 kilometres. The Tour de France is a real spectacle, especially for fans of cycling. One of the sponsors of this year’s event is Bostik, and as a Bostik Craft Blogger I’ve been asked to put together a craft to mark the 2018 Tour de France!

I admit to being a bit out of my depth talking about the Tour de France. I know very little about cycling, other than how to ride a bike. But I do know how to stick some buttons onto some card, so I will play to my strengths and tell you how I made this Tour de France inspired bicycle card.

Crafts: Make a Tour de France inspired Bicycle Card

How to make a Tour de France inspired Bicycle Card

You will need:
A blank greetings card and envelope
Two large buttons and one small one
Some coloured card
Some small coloured foam pieces
Bostik Foam Pads
Bostik White Glu
A pair of scissors

Crafts: Make a Tour de France inspired Bicycle Card

To make your Tour de France inspired Bicycle Card:

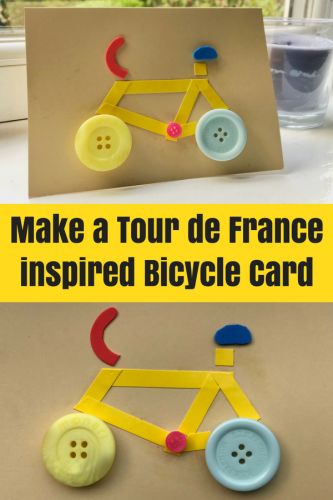
Decide where best to stick your two large buttons on the card. These will be the wheels of your bike. I fixed mine on with four little foam pads. Take the smaller button and stick that on where the chain goes, again using a foam pad.

Carefully using some scissors, cut out some thin lengths of card for the frame of the bike. It will take a few minutes to get the measurements and angles right. Glue the coloured card onto your greetings card with the Bostick White Glu. Press the edges down and leave the card to dry a little while. You could also make the frame out of pipecleaners if you’d like.

While the coloured card is drying, carefully cut out the shape of a pair of handlebars and a cycling seat out of the coloured foam. Glue these pieces into position and leave the card to dry. Your card is now ready to write and send off to anyone who is mad about bikes.

Unless, unless when you’ve finished it and put all your craft stuff away you realise you’ve forgotten the pedals. In which case you can either deem them non-essential, or you can draw them on with a pen. Failing that you could unpack all of your craft stuff and stick on a couple of small rectangular foam pieces where the pedals should be. I’ve left them off because my bike is fine without them. Obviously.

Crafts: Make a Tour de France inspired Bicycle Card

If you enjoyed this, you might also like these tulip handprint cards.
Disclosure: We are Bostik Bloggers and we were sent a box of craft items to use to create this post.