As much as I absolutely loved the summer this year, I’m pleased as punch that it’s autumn and we’re in that lovely crisp, crunchy leaves part of autumn, before everything goes soggy, slippy and a bit miserable. One thing we love doing is collecting the colourful fallen leaves and making things with them. For a bit of fun we made some autumn leaf faces with our leaves and gave them a bit of character. These simple leaf faces are really easy to make and with a bit of imagination you can really bring your leaf characters to life!

They’re so simple to do, just go on a little nature walk and collect some lovely leaves. If they’re freshly dropped and not dry and crisp I think they work better, but try to collect a variety of different leaves and colours.
Simple Autumn Leaf Faces
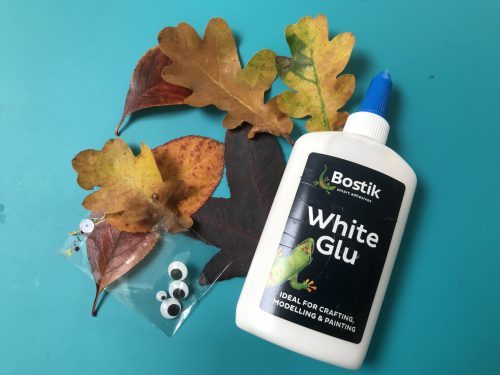
You will need:
A collection of leaves
Some googly eyes
PVA glue, I used Bostik White Glu
A black sharpie
How to make your Autumn Leaf Faces:
Take your leaf and dust it down so you rub any dirt off. Take your googly eyes and glue them on wherever you think they should go on the leaf. Just use a dab of glue on the back of each eye.
Think about what kind of character your leaf may be and think about how close together their eyes should be, should they be the same size eyes? Is your leaf a cyclops (one eye) or an alien (three or more eyes)?
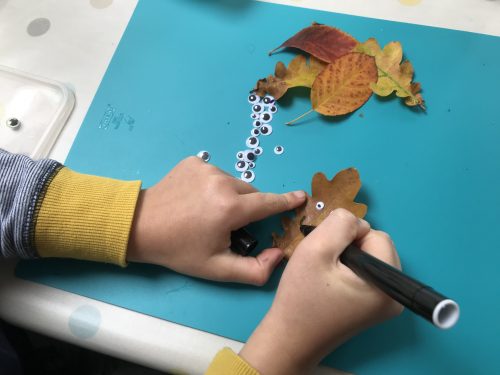
Using the black felt tip or sharpie, draw on a mouth and maybe some eyebrows. Again think about the character and what kind of features it might have.
Leave your leaf faces to one side for a little while to allow the glue to dry. If you really like your leaves, you could stick them to lolly sticks and make them into little leafy puppets.
Our leaf faces are full of character, they make me smile a lot. I think I will sew them onto some embroidery thread and make some leafy bunting out of them.
If you enjoyed this autumn leaf craft, you might also like to try these:
- Autumnal alphabet wreaths
- A children’s paper plate autumn leaf wreath
- Simple autumn leaf crafts for toddlers