Christmas Recipe: Danish Butter Cookies

I grew up in the 1980’s and you could always tell when Christmas was coming by the appearance of a blue tin of Danish Butter Cookies on top of the fridge. They were simple but incredibly moreish and they were to us at least, an exotic festive treat.

A few years ago, I started making my own Danish Butter Cookies with my son. They are incredibly easy to make and they are a nice predictable bake, meaning that they never fail. I’m pretty good at cake baking, but for some reason my kitchen confidence always leaves me when it comes to biscuits and cookies. Perhaps the dependability of the recipe is why I make them so often.

Christmas Recipe: Danish Butter Biscuits

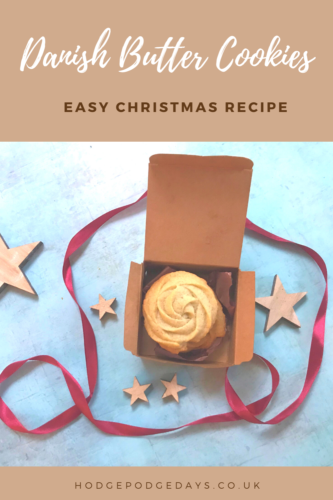
Because to me, and other children of the 80’s, Danish Butter Cookies are forever linked to Christmas, it’s at this time of year I tend to make them the most. A batch of cookies neatly wrapped in brown paper, or in a decorative bag or box make a lovely little edible gift for someone.

Danish Butter cookies

Ingredients:
375g butter, room temperature
250g caster sugar
1 egg
2 teaspoons vanilla essence
500g plain flour
Milk (entirely optional)

Method:
In a large mixing bowl, beat the butter and sugar until light and fluffy. Add the egg and vanilla essence and mix in thoroughly.

Beat in the plain flour, I tend to do this in batches so the kitchen doesn’t get covered in a flour cloud. Once it’s all mixed in, you need to decide if your mixture is loose enough to pipe, or if it needs letting down a bit. If it’s a bit stiff, add a couple of tablespoons of milk and beat the mixture again.

Heat the oven to 180° and line some large baking sheets with parchment paper. If you’re choosing to pipe your cookies, select a wide piping nozzle and put in your piping bag. I prefer to use disposable piping bags and a Wilton 1M nozzle, but you use whatever you’re comfortable with.

Carefully pipe circles of the biscuit dough onto your parchment paper. I used a knife to help poke them into shape as my piping was a bit rusty. Once you’ve piped a tray (leaving room for them to spread a little), put them in the oven to bake for 12-15 minutes. You don’t really want them to get brown, because like shortbread, these Danish Butter Cookies are supposed to be pale and interesting.

Christmas Recipe: Danish Butter Biscuits

Once you’ve removed them from the oven, leave on a cooling rack until they are properly cool. Resist the urge to eat them all, especially if you’ve baked them as gifts for Christmas.

These Danish butter cookies should keep in an airtight tin for a week or so, should you be able to resist them for that long!

If you enjoyed this, you might also like to try –

Danish Butter Cookies

Recipe: Heart Shaped Danish Butter Biscuits

Valentine’s Day is the ideal opportunity to show off your baking prowess to any potential or existing beau. During these long lockdown days, we’ve been baking a lot more than usual, so we needed to come up with a romantic treat which is a bit different to our usual bakes. Step forward, heart shaped Danish Butter biscuits.

Danish Butter Biscuits are a real classic. I remember tins of them around my Grandmother’s house at Christmas time. They seemed so fancy and posh at the time, and so different to the hard biscuits of my childhood. Danish butter biscuits are soft and short and crumbly in all the right ways. They’re also pretty easy to make, the hardest part is piping them out; but if you don’t fancy doing that, you can just bake dollops of them and they still taste as good.

Recipe: Heart Shaped Danish Butter Biscuits

Heart Shaped Danish Butter Biscuits

Ingredients:
375g butter, room temperature
250g caster sugar
1 egg
2 teaspoons vanilla essence
500g plain flour
Milk (entirely optional)
Glacé cherries

Method:

In a large mixing bowl, beat the butter and sugar until light and fluffy. Add the egg and vanilla essence and mix in thoroughly.

Beat in the plain flour, I tend to do this in batches so the kitchen doesn’t get covered in a flour cloud. Once it’s all mixed in, you need to decide if your mixture is loose enough to pipe, or if it needs letting down a bit. My hands are a bit arthritic, so I added a couple of tablespoons of milk and beat the mixture again.

Heat the oven to 180° and line some large baking sheets with parchment paper. If you’re choosing to pipe your biscuits, select a wide piping nozzle and put in your piping bag. I prefer to use disposable piping bags and a Wilton 1M nozzle, but you use whatever you’re comfortable with.

Carefully pipe heart shapes onto your parchment paper. I used a knife to help poke them into shape as my piping was a bit rusty. Once you’ve piped a tray (leaving room for them to spread a little), pop a glacé cherry in the centre of each one and sprinkle them with a little extra sugar. Put them in the oven to bake for 12-15 minutes. You don’t really want them to get brown, because like shortbread, these Danish Butter biscuits are supposed to be pale and interesting.

Once you’ve removed them from the oven, leave on a cooling rack until they are properly cool. Resist the urge to eat them all, as you’ve baked them for your paramour, but maybe you could sneak one or two for yourself.

Recipe: Heart Shaped Danish Butter Biscuits

If you’re gifting them, wrap them in tissue paper and pop them in a box for your intended. If you’re keeping them all for yourself, they keep very well in a tin for a couple of weeks; though I doubt they will last that long.

If you enjoyed this, you might like to try;

Recipe: Heart Shaped Danish Butter Biscuits