If you’ve ever spent any time on Pinterest, you will most likely have seen pictures of pretty painted jars used in a thousand different ways. For many months I’ve looked at these pretty pictures and wanted to try it for myself. Once I’d collected a few pretty jars, I decided to have a go at painting them, so here’s how to paint pretty jars, a method so simple a toddler could do it (under supervision).
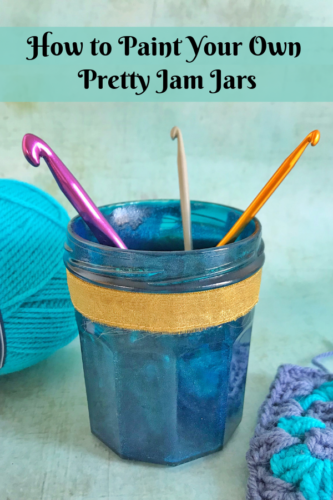
Jars have endless uses around the home. I use them as pencil holders a lot, but I’ve recently taken up crochet and I wanted something handy to keep my growing crochet hook collection in. I painted up my jar and just for a bit of extra protection for my hooks I put a circular cotton wool pad in the bottom. It’s worked out really great and my hooks now have a place of their own instead of lurking in my pencil jar.
The finish of this jar was really hard to capture in a photograph. In real life it’s iridescent and a little bit mermaidy.
How to Paint Your Own Pretty Jars
You will need:
A clean jar or two
PVA glue
Food colouring
A paintbrush
Maybe a nice ribbon to decorate your jar
How to paint your own pretty jars:
Begin by making sure your jar is clean and dry. In a bowl pour in a large dollop of the glue, you’ll need enough to paint the inside of your jar, be generous.
I chose to paint my jar a nice blue colour (as blue is my favourite colour); add a few drops of whatever colour of food colouring you’d like. Remember that the colour will darken quite a lot when it dries in the oven; so go for a couple of shades paler than you’d like and have faith.
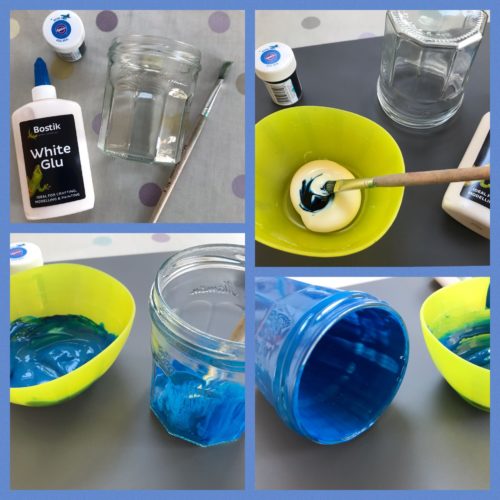
Using a paintbrush, paint a thick-ish layer of the coloured glue evenly all over the inside of the jar. Once you’ve finished, tip the jar upside down and leave it for about half an hour; hopefully any excess glue will drip out.
Put your painted jar in the oven at 180°, make sure it’s upside down. After about 15 minutes, carefully (very carefully) turn the jar the right way up and bake for another 15 minutes. You can either remove it from the oven or leave it to cool inside the oven. I put mine on a rack outside to cool which took about an hour.
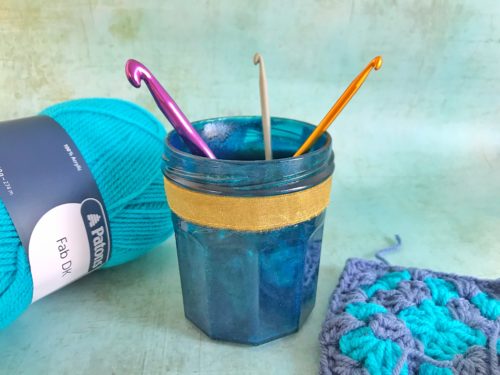
Once it’s cooled you can leave it as is, or you could tie a ribbon around it to finish it off nicely. It’s now ready for pens, pencils, crochet hooks or any number of uses you may have for it.
My jar is lovely, it’s really quite iridescent, but the photo doesn’t pick up on that. It’s a shade darker than I wanted, but I’ll know to mix a paler shade for next time.
What would you use your painted jar for?
If you enjoyed this, you might like to try making a jam jar snowglobe.