Last Updated on September 6, 2022 by HodgePodgeDays
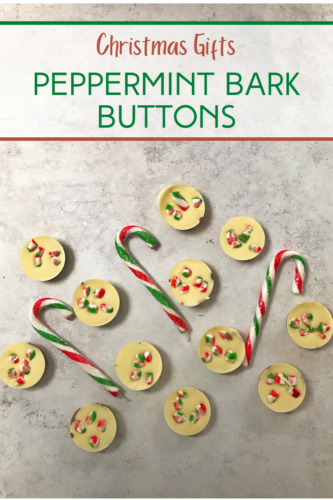
Homemade treats make for really lovely gifts at Christmas. These Peppermint Bark Buttons are really fun to make and they’re delicious too.
I’ve been making variations of these chocolate buttons since I found a silicone mould in a charity shop for £1 a couple of years ago. They couldn’t be more simple; melt some chocolate, pour it in the mould and decorate however you want.

These are a slightly tidier looking version of the classic Peppermint Bark we all know and love. Peppermint Bark is just layers of melted chocolate mixed with some peppermint extract, which is then sprinkled with crushed candy canes. It’s simple, but these Peppermint Bark Buttons look a bit more sophisticated and are ideal for bagging up and giving as Christmas gifts.

Peppermint Bark Buttons
Ingredients:
200g of milk chocolate
A few drops of peppermint extract
200g of white chocolate
3 candy canes
How to make your buttons…
Boil some water and pour the water into your pan so it’s about 3cm deep. Carefully place a glass bowl in the pan making sure the bottom of the bowl doesn’t touch the water. This is called a bain marie.
Break or chop your chocolate up into small pieces and put it in the glass bowl. The water in the pan needs to be at a gentle simmer, not bubbling and boiling. Stir the chocolate until it is melted.
OR… you can melt your chocolate in the microwave, I do it in 30 second bursts and I stir in between to help melt the chocolate. If you microwave it for too long the chocolate will go all grainy and will be ruined, so be careful.
At this point you need to put a few drops of the peppermint extract in the melted milk chocolate and give it a good stir. I put in 5 drops and that was enough, so go carefully, you can always add more but you can’t take it away once it’s in there.
Using a spoon, scoop out about a teaspoon of the melted milk chocolate into each of the moulds. Try and put an equal amount in each. Gently shake the silicone tray so the chocolate settles. Pop the tray into the fridge while you crack in with the next steps.

Now melt your white chocolate either in the microwave or on the hob in a bain marie. Once it’s melted, grab your mould from the fridge and scoop another teaspoon of white chocolate over the top. Once you’ve finished, give the tray a shake and all the melted chocolate should level off.
Now you need to crush your candy canes. You can do this by putting them in a zip lock bag and smashing them up with a rolling pin. If like me for some reason your candy canes were soft and bendy, then you can just cut them into small chunks with a pair of scissors. Sprinkle your little candy cane pieces over the top and then put your buttons in the fridge to chill for at least two hours. I left mine overnight.

If you don’t have anything like my lovely button mould, then you could make little circles of melted milk chocolate on some baking parchment, then top with a similar amount of while chocolate and then sprinkle your crushed candy canes over that. I am sure they will look just as pretty.
Once they’re set you can put them in little cellophane bags and decorate with ribbons ready to give as sweet little gifts for loved ones.
If you liked this recipe, you might also like to try these fruit and nutty buttons.

