Crafts: How to make a Christmas Button Wreath

If you’re looking for a simple but quite beautiful Christmas craft, then this is probably it. These lovely Christmas button wreath decorations are really simple to make and look great hanging on a tree. Not to mention, if you’re making them with the kids, then it’s excellent for their fine motor skills!

A few years ago I made a selection of button Christmas decorations, and each year when I hang them on the tree, I continue to be impressed by them. They’re so simple to make, but look really quite cool.

Crafts: How to make a Christmas Button Wreath

I have billions of buttons, so one quiet afternoon, I decided to try my hand at a simple Christmas button wreath decoration. I thought it would look pretty good on the tree and I was not wrong. They really are simple to make and you can make it as colourful or traditional as you want. Here’s how I made mine.

How to make a Christmas button wreath

You will need:
70-100 buttons in whatever colours you want
A length of craft or jewellery wire
Wire cutters (optional)
Ribbon for a bow and for hanging

Making your Christmas button wreath –

Start off by cutting a length of wire approximately 25cm long. Put a little bend in one end to stop the buttons slipping off.
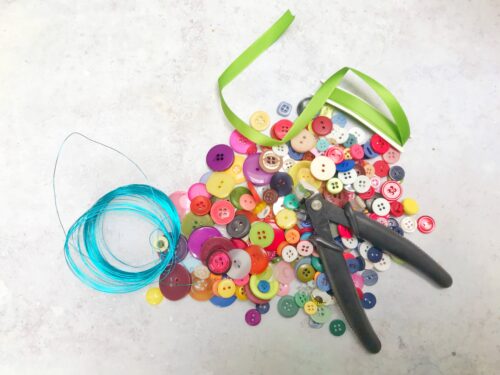
buttons

Next you can start threading the buttons onto the wire. I did this in red-green-white order, but you can use whatever colours in whatever order you want. My Christmas colour palette is very traditional, but yours can be as colourful as you like.

Once you’re threaded your buttons onto the wire and you’re happy with how they look (I tried to put the smaller buttons at each end and the larger ones in the middle), it’s time to tie it off.
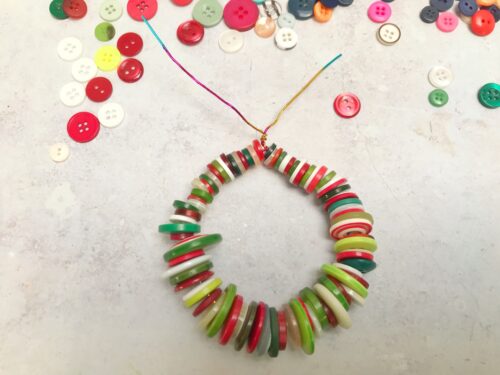
Crafts: How to make a Christmas Button Wreath

Take both ends of the wire and twist them together so the buttons can no longer slip off. Twist them together tightly, you may need to snip off the excess wire with your wire cutters. If you can, tuck the ends under and between the buttons so they are out of the way.

Gently pull the wire and buttons into a circle shape to make the wreath, this shouldn’t take very much effort at all.
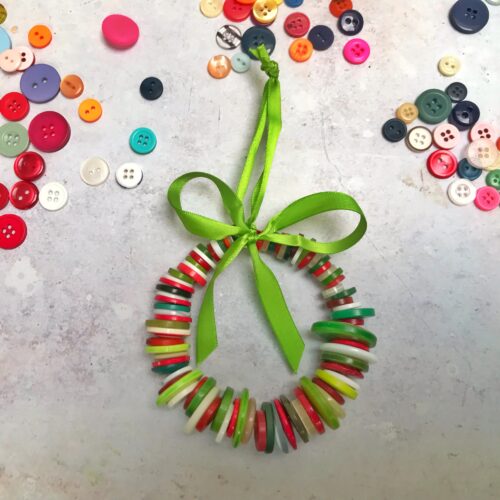
Crafts: How to make a Christmas Button Wreath

Next take a length of ribbon and tie it around the top of the wreath, tucking in the ends of the twisted wire. Tie the ends of the ribbon with a firm knot to make a hanging loop. Take another length of ribbon and tie a nice bow at the top of the wreath. It should now be ready to hang on your tree.

If you enjoyed this, you might also like to try –

Crafts: How to make a Christmas Button Wreath

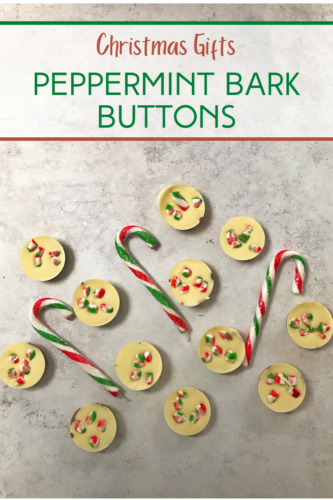
Homemade Gifts: Peppermint Bark Buttons

Homemade treats make for really lovely gifts at Christmas. These Peppermint Bark Buttons are really fun to make and they’re delicious too.

I’ve been making variations of these chocolate buttons since I found a silicone mould in a charity shop for £1 a couple of years ago. They couldn’t be more simple; melt some chocolate, pour it in the mould and decorate however you want.

Homemade Gifts: Peppermint Bark Buttons

These are a slightly tidier looking version of the classic Peppermint Bark we all know and love. Peppermint Bark is just layers of melted chocolate mixed with some peppermint extract, which is then sprinkled with crushed candy canes. It’s simple, but these Peppermint Bark Buttons look a bit more sophisticated and are ideal for bagging up and giving as Christmas gifts.

Homemade Gifts: Peppermint Bark Buttons

Peppermint Bark Buttons

Ingredients:

200g of milk chocolate
A few drops of peppermint extract
200g of white chocolate
3 candy canes

How to make your buttons…

Boil some water and pour the water into your pan so it’s about 3cm deep. Carefully place a glass bowl in the pan making sure the bottom of the bowl doesn’t touch the water. This is called a bain marie.

Break or chop your chocolate up into small pieces and put it in the glass bowl. The water in the pan needs to be at a gentle simmer, not bubbling and boiling. Stir the chocolate until it is melted.

OR… you can melt your chocolate in the microwave, I do it in 30 second bursts and I stir in between to help melt the chocolate. If you microwave it for too long the chocolate will go all grainy and will be ruined, so be careful.

At this point you need to put a few drops of the peppermint extract in the melted milk chocolate and give it a good stir. I put in 5 drops and that was enough, so go carefully, you can always add more but you can’t take it away once it’s in there.

Using a spoon, scoop out about a teaspoon of the melted milk chocolate into each of the moulds. Try and put an equal amount in each. Gently shake the silicone tray so the chocolate settles. Pop the tray into the fridge while you crack in with the next steps.

Homemade Gifts: Peppermint Bark Buttons

Now melt your white chocolate either in the microwave or on the hob in a bain marie. Once it’s melted, grab your mould from the fridge and scoop another teaspoon of white chocolate over the top. Once you’ve finished, give the tray a shake and all the melted chocolate should level off.

Now you need to crush your candy canes. You can do this by putting them in a zip lock bag and smashing them up with a rolling pin. If like me for some reason your candy canes were soft and bendy, then you can just cut them into small chunks with a pair of scissors. Sprinkle your little candy cane pieces over the top and then put your buttons in the fridge to chill for at least two hours. I left mine overnight.

Homemade Gifts: Peppermint Bark Buttons

If you don’t have anything like my lovely button mould, then you could make little circles of melted milk chocolate on some baking parchment, then top with a similar amount of while chocolate and then sprinkle your crushed candy canes over that. I am sure they will look just as pretty.

Once they’re set you can put them in little cellophane bags and decorate with ribbons ready to give as sweet little gifts for loved ones.

If you liked this recipe, you might also like to try these fruit and nutty buttons.

Peppermint Bark Buttons

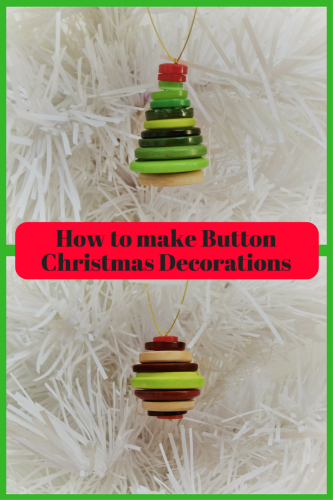
Crafts: How to make Button Christmas Decorations

If you’re looking for a simple but quite beautiful Christmas craft, then by Jove I think I’ve got it! These lovely button Christmas decorations are really simple to do and look great hanging on a tree.

I belong to a craft group and we are always on the lookout for interesting things to make and do on our craft evenings. We spotted a picture of some button Christmas decorations and thought we would give them a try. All we needed were a huge box of buttons, some craft wire and a bit of patience to experiment.

Crafts: How to make Button Christmas Decorations

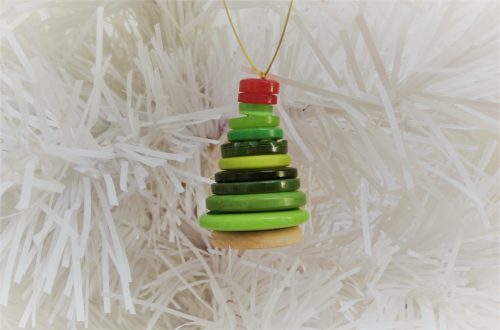
How to make a button Christmas Tree

You will need – 
A selection of buttons, mostly green in different shapes and sizes
Fine jewellery or craft wire

Method –
Sort a selection of buttons to make your tree. You’ll need something to be the tree trunk at the bottom, I used two wooden buttons. You will also need green buttons in decreasing sizes and in a variety of shades of green.

I found it best to find the right buttons and lay them out in order before threading them onto the fine wire.

Take a length of fine jewellery or craft wire, approximately 8 inches in length. Double up the wire and thread one end through one hole on your base button and the other end through the opposite hole. Do the same with all the buttons in your Christmas tree stack until your Christmas tree is complete.

Top your tree with a brightly coloured button, or a star-shaped button if you have one. If you’re happy with your tree, tie a knot on the last button and another knot in the ends of the jewellery or craft wire to create a hanging loop.

Crafts: How to make Button Christmas Decorations

How to make a button Bauble

You will need – 
A selection of buttons, in various colours, shapes and sizes
Fine jewellery or craft wire

Method –
Sort a selection of buttons to make your bauble. You’ll need to play about with your buttons a little to find a selection of matching buttons. You’ll need one fairly big central button, then some matching ones in various sizes and colours.

I found it best to find the right buttons and lay them out in order before threading them onto the fine wire.

Take a length of fine jewellery or craft wire, approximately 8 inches in length. Double up the wire and thread one end through one hole on your base button and the other end through the opposite hole. Do the same with all the buttons in your Christmas bauble stack until your bauble is complete.

If you’re happy with your bauble, tie a knot on the last button and another knot in the ends of the jewellery or craft wire to create a hanging loop. Easy.

These are a lovely, easy craft to make. One of my craft group friends also make a button Santa and a button snowman, but I’m all out of buttons ad I need to go and buy some more so I can make some more button Christmas decorations.

Check out my other craft tutorials here!

Crafts: How to make Button Christmas Decorations

Crafts: Make your own Button Craft Bag

Button craft is really popular at the moment. My craft group did some button art earlier in the year, although I missed the session I was keen to try it for myself. The world is your oyster when it comes to buttons, glue them, stick them, sew them, the only limit is your imagination. This month Craft Merrily have challenged the Bostik Bloggers to create a back to school themed craft, a tricky topic I think, but a decent challenge.

When I opened by box of craft goodies I found a bag, big enough to use as a book bag (or pop my iPad in). I also noticed a handful of buttons in the bottom of the box, not enough to do anything with but enough to give me ideas. I was a little bit inspired by a wedding dress we were sewing bright buttons onto at The Lost Carnival at Dunham Massey over the weekend. So off I went, hunting for my old button box. I think most households have one of these, an old sweetie tin filled with an assortment of buttons of all shapes, sizes and colours.

Crafts: Make your own Button Craft Bag

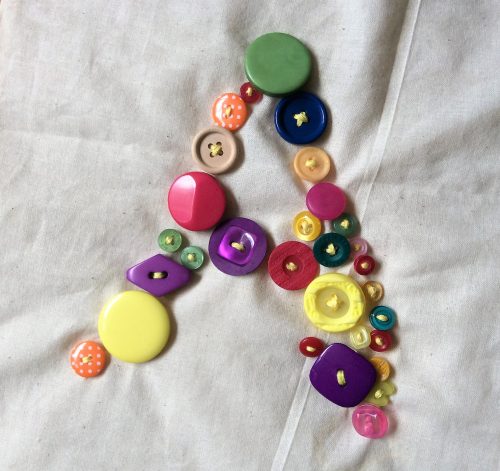
I had enough buttons to monogram the bag with the letter A. Choosing the brightest and the best, I set to work with my rudimentary sewing skills and an hour later I had something which I was fairly pleased with. It’s a simple enough craft and one I’d happily do with a child who was past the beginners sewing stage. 

HOW TO MAKE YOUR Button Craft bag

You will need:
1 fabric bag
A selection on buttons in different shapes, sizes & colours
A needle
Thread (I used cotton embroidery thread)
Scissors

Crafts: Make your own Button Craft Bag

How to make your Button Craft bag:

Have a look at your bag and visualise the letter or image you want to sew on it in buttons. You might want to softly sketch your design onto the bag with a pencil. This will help you to follow it when you’re sewing.

When you’re happy with our design, thread your needle with the thread and start sewing the buttons onto your design. Think carefully about where to sew your buttons. Make sure you’ve got a good spread of colours and sizes across your design. 

Keep sewing until you’ve finished your design. Make sure your buttons are secure. My design took me around an hour and I’m pretty average at sewing. 

Crafts: Make your own Button Craft Bag

I’m quite pleased with how my first foray into button craft has turned out. It has inspired me to raid the button box again and see what else I could rustle up.

Have you tried button craft? What would you make?

Crafts: Make your own Button Craft Bag

Note: I am a Bostik craft blogger and I was sent the materials to create this craft from Craft Merrily. 

Check out my other craft tutorials here!