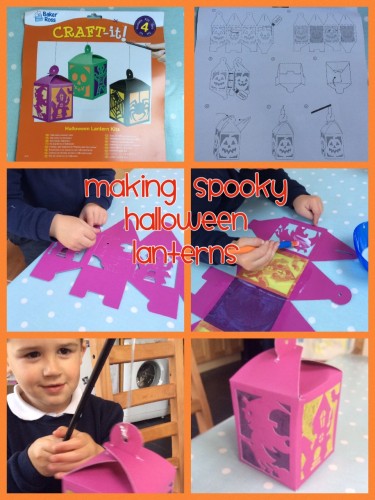
One of my favourite things about Halloween, apart from being given an excuse to dress up, is Halloween crafts. It’s one of those occasions when you and the kids can go all out on the spooky stuff.
Last year me made a few different Halloween crafts, but our favourites were the Spooky Lanterns from Baker Ross which you can find out how to make here. They are still available this year on the Baker Ross website and they do look really effective.

This month we’ve been starting to look at some more easy Halloween Crafts. We were sent a selection of Halloween and autumnal themed crafts to try (we will do the autumnal crafts in a separate blog post).
The Halloween crafts we were sent were –
- Day of the Dead colour in mini gift bags
- Halloween Dotty Art
- Halloween Pom Pom Decoration Kits

Day of the Dead has been very much in fashion for the last few years and is gaining in popularity. Indeed, last year I dressed as a Day of the Dead style zombie bride for Halloween. The little colour in gift bags (there are 6 in a pack) would be a great craft activity for a kid’s Halloween party, then they could fill their bags with sweets and take them home afterwards.

The Halloween Dotty Art kits would also be great for a Halloween Party (we are going to take ours on holiday with us over half term). The pack contains eight different Halloween designs (Monster, Spider, Cat, Ghost, Pumpkin, Owl, Bat & Skull) and packs of coloured stickers. You then stick the stickers on the spooky design and bring your Halloween picture to life. This kind of thing is great for strengthening little fingers and increasing dexterity, as well as being a fun activity you can do together without creating any mess.

I love pom pom crafts, so I was pleased to find these Halloween Pom Pom Decoration Kits in my box of seasonal crafts from Baker Ross. The pom pom kit contains everything you need to make a spider, a bat and a pumpkin.
Like most pom pom crafts they are a little fiddly to make and probably need a grown up to get it started and help tie it off at the end. Making pom poms is lots of fun and once you’ve snipped your threads you can start to see your spooky pom pom creature come to life.
The Baker Ross website has hundreds of easy to do craft kids for children and adults alike. Their kits are almost universally well designed and thought out, and there’s something for all ages, abilities and craft interests, often with minimal mess and fuss. For easy Halloween crafts, have a look at Baker Ross for inspiration.
We are Baker Ross Ambassadors.
