Blogging: Five ways to spring clean your blog

Being a blogger is a very public affair. I know I write about all aspects of my life and the things we do as a family. It’s all out there for all to see. But what people don’t see are the behind the scenes things a blogger has to do to keep things ship-shape. Is it time to spring clean your blog?

Blog admin and maintenance are rarely anyone’s favourite things to do and I’m often guilty of letting things pile up a bit before tackling them. I tend to keep a snag list of things to do and look at when I’ve got a bit of time. Once I’m in the zone I usually barrel through my list and wonder why I left things so long.

I have a five point checklist of general admin and maintenance I do every so often to try and keep on top of things. If I were sensible I would do this every month, but I’m not very sensible really. 

Blogging: Five ways to spring clean your blog

Five ways to spring clean your blog

Run a broken link checker
Broken links are bad news. Firstly, they can be annoying for anyone reading your blog and clicking through to a dead link. Having broken links on your blog can mean that Google ranks your blog lower than it would do otherwise. 

I use a free broken link checker about once a month (or when I can be bothered). It scans through my blog looking for dead links and lists them for me. They’re usually pretty easy to fix, the checker gives me both the broken url and allows me to click through to the blog post with the broken link.

Most of my broken links are from bloggers who aren’t blogging any more, or from companies no longer trading. For most of these I just delete the link but keep the content, but you could update the link with a new relevant one too. This is a good way of finding older content which you might want to refresh and update later, I add anything I want to look at again to a snag list.

Edit and SEO old posts / refresh old content

Looking through your stats page at what people are landing on, or finding a broken link in an old blog post can highlight some old content which is ready to be refreshed. I add these to my snag list and when I have some time I look back and see what I can do.

When I first started blogging nearly four years ago my posts were painfully short, had no SEO and the images were all over the place. I look back and cringe. It would be easy to just delete these old posts. But when I read them, for the most part the actual content is good, they just need a tidy up.

You should edit and tidy up your old blog posts so they meet your current standards. If you smarten up your SEO – so you get the green light from Yoast. When people land on your ancient blog post from a Google search (other search engines are available) they won’t be horrified and bounce straight off it. They will hopefully stick around and read more. That’s the goal right?

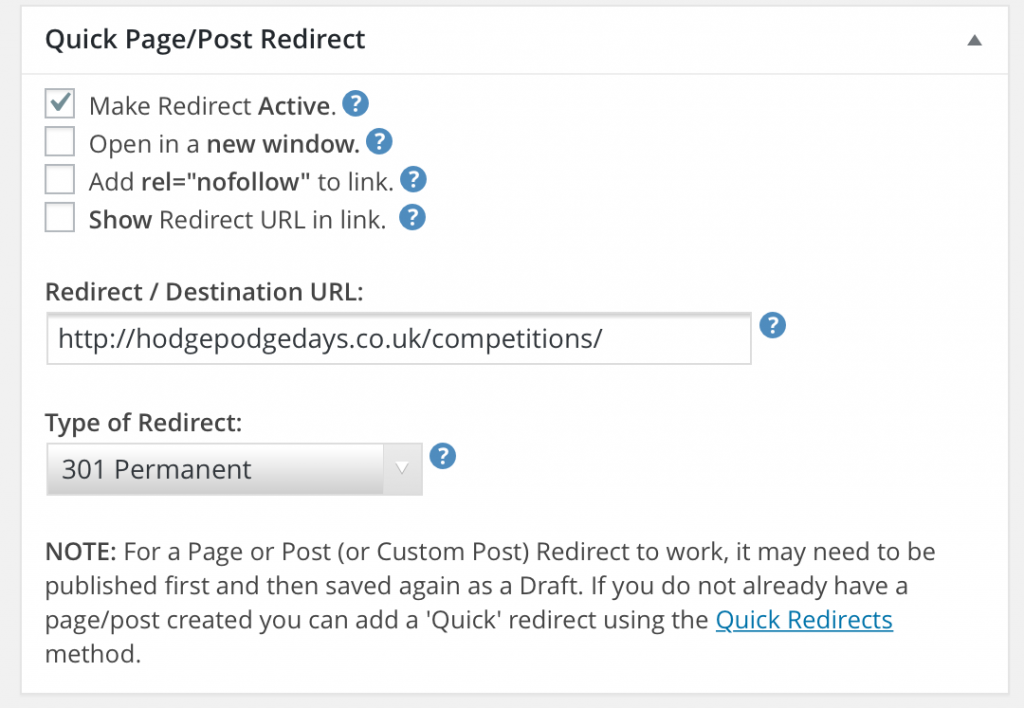
(Never, ever delete an old post by the way, redirect it instead if it’s not salvageable).

Tidy up side bars and buttons
Bloggers like a button and I’m as guilty as the next blogger about this. They are in some ways a necessary evil. Blogging networks like bloggers to host buttons and badges. If you’re an ambassador for a brand then they often provide one. It can be a quick way for you to show off your key brand relationships and achievements to your readers and to people who may want to work with you.

It’s worth casting your eye over your side bars and buttons every so often. Things might not be relevant anymore, or may need updating or moving around a bit. Sometimes just moving things about a bit can make your blog feel a bit fresher, if only to you.

If you host adverts on your blog, like Google Adsense, you might want to try moving these to a different position. This will help you test if you can get a better income from your advert if it’s positioned elsewhere.

Update your About Page
This is a fairly neglected page on my blog. Part of me tells me I’ve done it and don’t need to ever look at it again. But things change, I change, the things I blog about change, so it’s important to check your About Page every so often. Is it still relevant, has anything changed? Maybe update any photographs on there. Does it make you seem like an interesting and attractive proposition to your readers and for potential brand collaborations? 

Categories and tags
When I first started blogging I had no idea how categories and tags worked, what they were or how to use them. Nearly four years down the line I have a better idea of what I’m doing. I’ve looked back at my older blog posts and the categories and tags are all over the place. 

Last week I had an afternoon to myself and I made sure I wouldn’t be disturbed. I looked at my categories and decided that I was going to change a couple of them. This is fairly easy to do. BUT you do need to go back and redirect the old urls to your new ones. This is REALLY important, you don’t want to lose the links and link juice those old urls had already built up. You can read this blog post about how to redirect old urls to new ones if you need some help.

It’s well worth doing as it tidies up your blog and makes things easier to find for your readers. You will need  a quiet afternoon and some methodical working. You can do it!

Blogging: Five ways to spring clean your blog

There are lots of things you can do to spring clean your blog. But here are just five you could do to make a start and make a real difference to your SEO and the look of your blog. 

What are your suggestions to spring clean your blog?

How to set up a Redirect on your WordPress Blog

It’s good practice when you’ve got a blog to schedule in a bit of maintenance on a regular basis. One of the things I like to do is to remove old giveaway posts, mainly because I didn’t like the thought of someone clicking through thinking there is a live giveaway but its closing date was months ago. I had been either re-working them into more content based blog posts, or if that wasn’t possible I was deleting them altogether, which is in hindsight a stupid thing to do.

I decided it was time I figured out how to redirect my old giveaway blog posts to my giveaway page, so anyone clicking through could see what giveaways were live on my blog right now, rather than being disappointed and just leaving my blog entirely.

I am often daunted by a page of boxes to check and things to code, but trust me, this is really easy and will make a difference to your blog. Setting up a redirect in WordPress is remarkably easy and all it takes is a plugin.

Choose a redirect plugin

I went for the Quick Page/Post Redirect Plugin. It had good reviews and seemed to do everything I needed it to do, so I installed it.

redirect plugin

Once you install it you can take a look at the settings page, but it all looks a bit scary with too many questions I didn’t entirely understand (I always fear that I’ll tick the wrong box and delete everything I’ve ever done) and there is a better way. I wanted the plugin to redirect old giveaway blog posts to my giveaways page, which was a simple enough task. 

  1. Find the blog post you want to redirect and go to “Edit”.
  2. Scroll down to “Quick Page/Post Redirect” which for me was immediately below my blog post.
  3. In the “Redirect / Destination URL” box type or paste in the URL you want to redirect to.
  4. Select the “Type of Redirect” (more of which later). I always choose 301 Permanent.
  5. Tick the box with says “Make Redirect Active” and the click on “Update” in the Publish box and it’s done. (Go on, check it).

redirect plugin

Or for Quick Redirects, once you’ve installed the redirect plugin the option to do Quick Redirects will be in your dashboard sidebar. This is useful when you know the URL but you’ve maybe deleted the old blog post. Redirecting is simple –

  1. Put the URL you want to Redirect in the “Request URL” box
  2. Put the URL of where you want to Redirect it to in the “Destination URL” box
  3. Click “Add new Redirects” and you’re done. Easy yes?

If you need to edit the Redirect at any time you can do so if you scroll down a little further and click on the editing pencil icon.

redirect plugin

SEO

Is there any benefit to redirecting your blog posts instead of deleting them?

Yes, without a redirect, deleted pages just ‘drop’ out of the Google index and you lose any value you’ve built up in them. If you redirect, you retain that value AND effectively pass it on to the new target page. By setting up a redirect you’ve not only avoided losing the SEO value of your old post, but you’ve also assigned it elsewhere. From an SEO perspective it makes so much sense to redirect.

Which Redirect should I use?

The Redirect Plugin gives you four redirect options to choose from, which should you go for?

301 Permanent 
A 301 redirect is a permanent redirect which passes between 90-99% of link juice to the redirected page. A 301 redirect is generally considered the best option when putting redirects on a website.

302 Temporary
A 302 redirect is a temporary redirect. It passes absolutely no link juice to the redirected page and isn’t recommended for use.

307 Temporary
A 307 redirect is the successor of the 302 redirect. Again it doesn’t pass any of your hard won link juice on to the redirected page and should only really be used if content is really being moved only temporarily.

Meta Redirect
When I mentioned Meta Redirects to my friend who is an SEO expert he told me not to go near it with a bargepole. “It’ll make your blog look spammy to Google” he said and they will be slower and you will have seen websites with a five-second countdown with the text “If you are not redirected in five seconds, click here, that’s a Meta Redirect. They are not recommended as an SEO tactic due to poor usability and the loss of link juice passed on to the redirected post.

Any questions?

If you’re in the habit of tidying up and deleting old blog posts, then it’s definitely worth looking into installing and using a redirect plugin on your WordPress blog. I went for the Quick Page/Post Redirect Plugin and I really rate it. It’s simple to use for quick redirects and it’s quick. The redirects I’ve sent up load incredibly quickly, and I’m cross with myself for deleting so many posts when I could have easily just redirected them and kept all the lovely SEO link juice for myself. 

If you’ve got any questions feel free to comment here or Tweet me. Always happy to help!

redirect plugin

Blogging: Everything you need to know about Alt Tags

I realise that I may be teaching my (blogging) granny to suck eggs here; but a couple of friends have recently been asking me how to improve their SEO. So I thought it was worth putting a blog post together about Alt Tags and how they work.

An Alt Tag is an alternative title for an image you will use in your blog post. Your alt tag will not be visible to your blog readers; but search engines who “read” your page will pick it up as a keyword. Every tiny bit of SEO can help your blog post rank a bit higher in the search engines. An alt tag will not throw your blog post to the top of the search engine rankings, but it will help to improve your SEO just enough to make it worth doing.

The only people who may be aware of your alt tag would be visually impaired people. Alt tags were originally meant to provide a text description of pictures, so people with screen-reader software would get a spoken-word description rather than it just read “IMAGE 123” for example. Ideally your alt tags should  still accurately describe the image for visually impaired people.

We all like to add images to our blog posts; it makes them prettier and it breaks up the text a bit to make it easier to read. I use WordPress to blog, so I can only really tell you how to add an alt tag in WordPress. I can’t imagine it would be that much different on a different platform.

To add an Alt Tag to your image on WordPress you can do it one of two ways…

  • Go to “Add Media” and upload your image.
  • Select the image and the “Attachment Details” menu should appear on the right hand side of your screen. You should see a box called “Alt Text”. This is where you put your keyword. I am using my recipe for Lebkuchen Cake as an example, my chosen keyword for that blog post was “Lebkuchen Cake”, so my alt tag for that image was “Lebkuchen Cake”.
  • Enter your chosen keyword into the “Alt Text” box and click on “Insert into post”. You have added an alt tag to your post.

Blogging: Everything you need to know about Alt Tags

Or….

If your image is already inserted into the post and you want to add, change, check or update your alt tag, it’s pretty easy.

  • Make sure you’re in the “Visual” view (rather than the text view) and find the image you want to edit or check.
  • Click on the image and a small toolbar will appear with alignment options and a pencil icon; click on the pencil icon and it will take you into “Image Details”. This is where you can add or edit your alt tag.
  • Insert your chosen alt tag and click on “Update”. Remember to make it the same as your chosen keyword for your blog post.

Blogging: Everything you need to know about Alt Tags

You will need to alt tag every image you use in your blog post; but it’s really very simple and can make a difference to your SEO.

There are also title tags (eg title=”lebkuchen cake”) which do the same thing, but this is the pop-up caption that appears on-screen when you point to the image with your cursor. Another place for SEO keywords and again, keep it relevant because there’s even more chance a human will point to your picture and see this caption pop up.

It’s also worth noting that the WordPress template you use will need to pull the alt text from the image library into the page code. If the template’s not got anything in it about alt text, then it won’t get put into the HTML when the post is published, so you’ll have to add the alt tags in the second way I showed you. However, most of the most common WordPress templates have this built in as standard, but it’s worth checking on all the same.

So in a nutshell (or 678 words) that’s all you need to know about alt tags and what they do. Any questions?

Everything you need to know about alt tags