Recipe: Swedish love cake, or Kärleksmums

A little over a year ago I started learning Norwegian, so I’ve taken an interest in all things Scandinavian ever since. With Valentine’s Day approaching, and my friends at work in need of a little cheer up, I decided to make a Kärleksmums cake, also known as a Swedish love cake. It’s a surprisingly easy bake, but a delicious and incredibly light one to share with your one true love, or just your friends in the office.

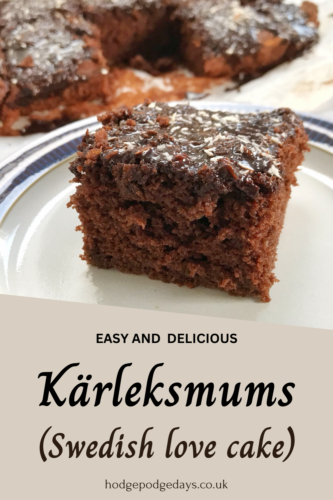
Essentially, it’s a light chocolate sponge traybake, topped with a lovely fudgy chocolate, coffee and coconut sauce. It feels indulgent, but that’s only because it is. But, importantly for busy people, or people less confident in their ability to decorate a pretty cake, it’s just a slap it on and go kind of decoration, which I think we can all get on board with.

Recipe: Swedish love cake, or Kärleksmums

It’s not designed to win any beauty contests, but for a mid-morning pick me up, or a simple expression of love, it’s a winner!

I tend to bake my traybakes in a small roasting tin lined with baking parchment. My bakes in this tin are great for cutting into 15 pretty decent cake portions, so it’s good for feeding a crowd. Kärleksmums also freezes incredibly well. I know there are people who I won’t see for a while who also deserve a piece of cake, so I just wrap up a slice, pop it in a suitably sized plastic container and into the freezer it goes.

I’ve made chocolate cake traybakes before, but the coffee and coconut topping really elevates it from nice cake, to very, very nice cake.

Swedish love cake, or Kärleksmums

Ingredients:
50g cocoa powder
100ml recently boiled water
100ml milk
200g butter or margarine, such as Stork
225g golden caster sugar
3 medium eggs
225g self raising flour
1 teaspoon vanilla essence
1 teaspoon of baking powder
A good pinch of salt

Recipe: Swedish love cake, or Kärleksmums

For the topping:
150g icing sugar
50g butter
1 large tablespoons of cocoa powder
½ teaspoon of vanilla essence
2 tablespoons of coffee granules
3 tablespoons of hot water
50g desiccated coconut, plus extra to sprinkle on top

How to make a Swedish love cake, or Kärleksmums:

Pre-heat your oven to 180°c and line your cake tin, or small roasting tin if you’re me.

Mix together the cocoa powder and hot water and leave to cool a little. Once it is cooler, add the milk to the cocoa mixture.

Using a hand mixer, cream the butter and sugar until pale and fluffy. Add the eggs one by one, taking care they are completely incorporated into the batter.

Sift the dry ingredients into a separate bowl – that’s the flour, a pinch of salt and the baking powder.

Add the flour and the milky cocoa mixture to the butter and sugar mixture, whilst beating the batter, taking care to ensure everything is well incorporated. As with all cakes, take care to make sure it’s all incorporated, but don’t over beat it.

Pour the batter into your lined tin and bake in the middle of the oven for approx. 20-25 minutes or until a skewer comes out clean. My over is a little on the slow side, so mine took 25 minutes.

Once baked, remove your Kärleksmums cake from the oven and leave to cool on a cake rack. While it is cooling, you can make your simple topping. The topping is ridiculously easy, you just put all the ingredients into a saucepan and warm gently, stirring regularly until it’s all combined and a lovely glossy sauce. Pour the topping over the cooled cake and sprinkle with a bit more desiccated coconut, or some other sprinkles if you like. It’s your cake, your rules!

Recipe: Swedish love cake, or Kärleksmums

Leave the topping to set in before serving. You can speed this up by popping it in the fridge if you’d like. Serve with a lovely pot of coffee. It doesn’t need anything else, but it would also be good with a scoop of vanilla ice cream!

If you enjoyed this, you might like to try;

Recipe: Swedish love cake, or Kärleksmums

Recipe: Easy Baileys Irish Cream Cupcakes

As Valentine’s Day approaches, my thoughts turn to little bakes I can do to gift to my loved ones. When I was younger, Valentine’s Day was reserved for the one special person in your life, but these days anything goes. I tend to make a slight fuss of my boy, he’s a bit too young for actual romance, but he’s never to old to be told his mum loves him. One of the ways I express my love for him and others is in the kitchen, so I whipped up a batch of these Baileys Irish Cream cupcakes and decorated them in a manner fit for Valentine’s Day!

Easy Baileys Irish Cream Cupcakes

These cupcakes are really easy and decorating them is pretty simple too. I piped buttercream roses into mine, and they’re a lot easier to do than you’d think. If you’re not sure how to do it, watch this short video. You can add sprinkles, chocolates, drizzles of sauce, whatever you want. I went for some simple heart shaped sweets I got from a local shop and some chocolate hearts I spotted which I thought might fit the bill.

This recipe makes about 24 cupcakes and if you’re quick, you can have them baked, decorated and ready to it in about an hour. I love quick and easy bakes, I’m a busy mum and finding loads of time to bake these days is a bit difficult at times.

Easy Baileys Irish Cream Cupcakes

Ingredients
225g soft butter or baking margarine like Stork
225g caster sugar
200g self-raising flour
25g cocoa powder
1 tsp baking powder
1 tsp vanilla essence
4 large eggs
6 tablespoons of Irish cream, I used Baileys

For the Irish cream buttercream
150g soft butter
300g icing sugar
1 tsp vanilla essence
20g cocoa powder
6 tablespoons of Irish cream, I used Baileys

Easy Baileys Irish Cream Cupcakes

Method
Preheat the oven to 190c. Grab a couple of bun trays and put a paper cupcake case in each of the holes. You need to have 24 paper cases ready.

Beat the butter (or margarine) and sugar together until pale and fluffy. I used an electric hand whisk, but you can use a wooden spoon if you prefer. Add the eggs, cocoa powder, vanilla and Irish cream and mix together. Gently tip in the flour and baking powder and combine until it’s all smooth.

Using a spoon, drop the mixture evenly into the cases. If you were feeling like being precise, you can weigh each one to make sure they are more or less the same weight. This will help them look more uniform, it’s not essential, measuring by eye also works.

Bake in the preheated oven for about 18 minutes or so, until they are cooked through and risen.

Turn your cupcakes out onto a wire rack and leave to cool fully. If you’re in a rush, you can pop them in the fridge for half an hour or so.

Easy Baileys Irish Cream Cupcakes

While you’re waiting for your buns to cool, it’s time to make the buttercream icing. Sift the icing sugar and mix with your softened butter in a mixing bowl until smooth. Beat in the Irish cream and cocoa powder with the vanilla essence.

Once your cupcakes are cool, put your Baileys buttercream in a piping bag with a star piping nozzle – I used a Wilton 2D nozzle. Starting in the middle of the cupcake, swirl your buttercream around until you’ve got a buttercream rose shape. If you’re not sure how to do it, watch this short video.

It’s really simple, and if you’ve not happy with your first few efforts, you can scrape the buttercream back into the piping bag and start again. Once you’re happy with your cupcakes, feel free to embellish them however you want, with sprinkles or hearts or whatever you fancy.

Tip: Once you’ve finished decorating your rose cupcakes, you could pop them in the fridge for an hour so the buttercream firms up a little before serving.

These Baileys Irish Cream Cupcakes are really pretty and very easy to bake. The icing is much easier that you’d think. I’m no expert cake decorator, but with a little bit of practice and patience, you’ll be piping buttercream roses like a pro!

if you enjoyed this, you might also like to try my simple Baileys Irish Cream cake, or these simple heart shaped Danish Butter Cookies.

Easy Baileys Irish Cream Cupcakes

Recipe: Heart Shaped Danish Butter Biscuits

Valentine’s Day is the ideal opportunity to show off your baking prowess to any potential or existing beau. During these long lockdown days, we’ve been baking a lot more than usual, so we needed to come up with a romantic treat which is a bit different to our usual bakes. Step forward, heart shaped Danish Butter biscuits.

Danish Butter Biscuits are a real classic. I remember tins of them around my Grandmother’s house at Christmas time. They seemed so fancy and posh at the time, and so different to the hard biscuits of my childhood. Danish butter biscuits are soft and short and crumbly in all the right ways. They’re also pretty easy to make, the hardest part is piping them out; but if you don’t fancy doing that, you can just bake dollops of them and they still taste as good.

Recipe: Heart Shaped Danish Butter Biscuits

Heart Shaped Danish Butter Biscuits

Ingredients:
375g butter, room temperature
250g caster sugar
1 egg
2 teaspoons vanilla essence
500g plain flour
Milk (entirely optional)
Glacé cherries

Method:

In a large mixing bowl, beat the butter and sugar until light and fluffy. Add the egg and vanilla essence and mix in thoroughly.

Beat in the plain flour, I tend to do this in batches so the kitchen doesn’t get covered in a flour cloud. Once it’s all mixed in, you need to decide if your mixture is loose enough to pipe, or if it needs letting down a bit. My hands are a bit arthritic, so I added a couple of tablespoons of milk and beat the mixture again.

Heat the oven to 180° and line some large baking sheets with parchment paper. If you’re choosing to pipe your biscuits, select a wide piping nozzle and put in your piping bag. I prefer to use disposable piping bags and a Wilton 1M nozzle, but you use whatever you’re comfortable with.

Carefully pipe heart shapes onto your parchment paper. I used a knife to help poke them into shape as my piping was a bit rusty. Once you’ve piped a tray (leaving room for them to spread a little), pop a glacé cherry in the centre of each one and sprinkle them with a little extra sugar. Put them in the oven to bake for 12-15 minutes. You don’t really want them to get brown, because like shortbread, these Danish Butter biscuits are supposed to be pale and interesting.

Once you’ve removed them from the oven, leave on a cooling rack until they are properly cool. Resist the urge to eat them all, as you’ve baked them for your paramour, but maybe you could sneak one or two for yourself.

Recipe: Heart Shaped Danish Butter Biscuits

If you’re gifting them, wrap them in tissue paper and pop them in a box for your intended. If you’re keeping them all for yourself, they keep very well in a tin for a couple of weeks; though I doubt they will last that long.

If you enjoyed this, you might like to try;

Recipe: Heart Shaped Danish Butter Biscuits