Recipe: Swedish love cake, or Kärleksmums

A little over a year ago I started learning Norwegian, so I’ve taken an interest in all things Scandinavian ever since. With Valentine’s Day approaching, and my friends at work in need of a little cheer up, I decided to make a Kärleksmums cake, also known as a Swedish love cake. It’s a surprisingly easy bake, but a delicious and incredibly light one to share with your one true love, or just your friends in the office.

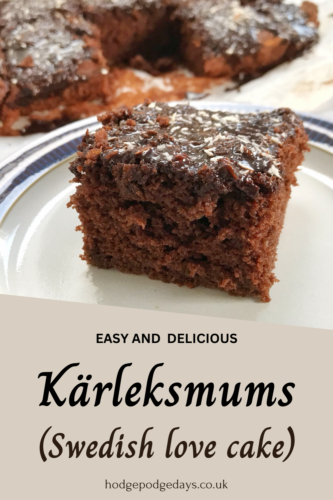
Essentially, it’s a light chocolate sponge traybake, topped with a lovely fudgy chocolate, coffee and coconut sauce. It feels indulgent, but that’s only because it is. But, importantly for busy people, or people less confident in their ability to decorate a pretty cake, it’s just a slap it on and go kind of decoration, which I think we can all get on board with.

Recipe: Swedish love cake, or Kärleksmums

It’s not designed to win any beauty contests, but for a mid-morning pick me up, or a simple expression of love, it’s a winner!

I tend to bake my traybakes in a small roasting tin lined with baking parchment. My bakes in this tin are great for cutting into 15 pretty decent cake portions, so it’s good for feeding a crowd. Kärleksmums also freezes incredibly well. I know there are people who I won’t see for a while who also deserve a piece of cake, so I just wrap up a slice, pop it in a suitably sized plastic container and into the freezer it goes.

I’ve made chocolate cake traybakes before, but the coffee and coconut topping really elevates it from nice cake, to very, very nice cake.

Swedish love cake, or Kärleksmums

Ingredients:
50g cocoa powder
100ml recently boiled water
100ml milk
200g butter or margarine, such as Stork
225g golden caster sugar
3 medium eggs
225g self raising flour
1 teaspoon vanilla essence
1 teaspoon of baking powder
A good pinch of salt

Recipe: Swedish love cake, or Kärleksmums

For the topping:
150g icing sugar
50g butter
1 large tablespoons of cocoa powder
½ teaspoon of vanilla essence
2 tablespoons of coffee granules
3 tablespoons of hot water
50g desiccated coconut, plus extra to sprinkle on top

How to make a Swedish love cake, or Kärleksmums:

Pre-heat your oven to 180°c and line your cake tin, or small roasting tin if you’re me.

Mix together the cocoa powder and hot water and leave to cool a little. Once it is cooler, add the milk to the cocoa mixture.

Using a hand mixer, cream the butter and sugar until pale and fluffy. Add the eggs one by one, taking care they are completely incorporated into the batter.

Sift the dry ingredients into a separate bowl – that’s the flour, a pinch of salt and the baking powder.

Add the flour and the milky cocoa mixture to the butter and sugar mixture, whilst beating the batter, taking care to ensure everything is well incorporated. As with all cakes, take care to make sure it’s all incorporated, but don’t over beat it.

Pour the batter into your lined tin and bake in the middle of the oven for approx. 20-25 minutes or until a skewer comes out clean. My over is a little on the slow side, so mine took 25 minutes.

Once baked, remove your Kärleksmums cake from the oven and leave to cool on a cake rack. While it is cooling, you can make your simple topping. The topping is ridiculously easy, you just put all the ingredients into a saucepan and warm gently, stirring regularly until it’s all combined and a lovely glossy sauce. Pour the topping over the cooled cake and sprinkle with a bit more desiccated coconut, or some other sprinkles if you like. It’s your cake, your rules!

Recipe: Swedish love cake, or Kärleksmums

Leave the topping to set in before serving. You can speed this up by popping it in the fridge if you’d like. Serve with a lovely pot of coffee. It doesn’t need anything else, but it would also be good with a scoop of vanilla ice cream!

If you enjoyed this, you might like to try;
Recipe: Swedish love cake, or Kärleksmums

How to make a Double Chocolate Twirl Cake

My nephew is brilliant company and whenever his birthday swings round, I always bake him a cake. This year he asked for a chocolate twirl cake; the details were up to me, he just wanted his favourite chocolate bar incorporated into his birthday cake. Say no more little man, your birthday wish is my command.

If you’ve ever read any of my cake recipes before, you’ll know that I favour the simplest options and that fancy decorations are best left to people more skilled than myself. I decided to make a chocolate sponge cake, with chocolate frosting between the layers and with almost 40 twirl bars glued around the side with even more chocolate frosting. It was very much a beast of a cake, but it impressed the recently turned 12 year old, and that’s all that mattered.

I baked the two sponge layers the night before so they’d cool properly before I put the cake together. With chocolate especially, you want to be working with cooled cakes. If you use still slightly warm cakes, there’s a danger that your chocolate decorations will melt, and that’s not a good thing.

How to make a Double Chocolate Twirl Cake

This is an absolute beast of a cake. It’s huge to start with and it’s also incredibly rich, so a little slice goes a long way. With this in mind, you can probably get a good 16 slices out of this cake.

Double Chocolate Twirl Cake

Ingredients:

220g unsalted butter or baking margarine
220g caster sugar
200g self-raising flour
4 large eggs
1 teaspoon baking powder
1 teaspoon vanilla extract
2 heaped tablespoons cocoa powder
2 tablespoons of milk

To decorate:
1 400g tub of chocolate frosting
Approx 35-40 Twirls

To make your double chocolate twirl cake:

Preheat the oven to 180°c. Grease and line 2 x 20cm cake tins and put to one side, ready for action.

In a large bowl, beat together the butter and sugar until pale and fluffy. Tip in the remaining sponge cake ingredients into your mixing bowl and beat together until the mixture is well combined. Then divide the mixture between the cake tins. I like to weigh them so they are of equal size.

Bake the chocolate sponge layers in the oven for 20-25 minutes until they are cooked through. Leave them to cool in the tins for 10 minutes or so, and then pop them on a cooling rack until they are completely cool. If you’re in a rush for this, after about an hour you can pop them in the fridge to chill for a little while.

When they are cool, put a blob of the frosting on your cake plate or stand; place the first layer of your sponge cake on top. The blob of frosting will anchor the cake in place and stop it from sliding about. Smother the top of your first layer with a thin-ish layer of the frosting, then sandwich the second layer on top of that.

I use an offset spatula to spread frosting and buttercream, so if you have one of these, now is a good time to dig it out of your kitchen drawer. An offset spatula is another name for a palette knife with a bend in it. If you make cakes on a semi-regular basis, then one of these is a really good investment to make.

Using an offset spatula, or similar, cover the whole cake – top and sides with the remaining chocolate frosting. Now it’s time to get busy with the twirls. I had to cut approx 1cm off the bottom of each one, as I didn’t want the twirls to be that much higher than the cake. So measure your twirls against the cake and decide how much you want to chop off. Once you’ve cut the bottoms off, put the offcuts to one side as we will be using them again later.

How to make a Double Chocolate Twirl Cake

Carefully stick the twirls around the cake, press them in so the chocolate frosting glues them on. I used 38 twirls on my cake, so you’ll need a similar amount. Please buy a few extra as some accidentally fell into my mouth as I was unwrapping them all, and this may well happen to you too.

Once you’ve stuck all the twirls to the cake, it’s a really good idea to take a length of string or ribbon and tie it around, this will help them stick to the cake and it can be removed just before you serve it.

For the top of the cake, I took all of the little pieces I’d chopped off the twirl bars and then I chopped them all up into smaller chunky pieces. I finely sliced some of them until they were almost like chocolate powder. Then I sprinkled all of these bits all over the top, pressing some of them into the frosting with the back of a spoon so they’d stick.

The cake looked tremendous. It was not for the faint hearted; it was a serious chocolate endeavour and exactly what my twirl loving nephew wanted for his birthday cake. This double chocolate twirl cake was really easy to make, it looked impressive and it took a little bit of time to put together; but it was worth it.

If you enjoyed this recipe, you might also like to try this school dinner style chocolate cake with chocolate custard recipe.

How to make a Double Chocolate Twirl Cake

Retro Recipe: Chocolate Cake with Minty Green Custard

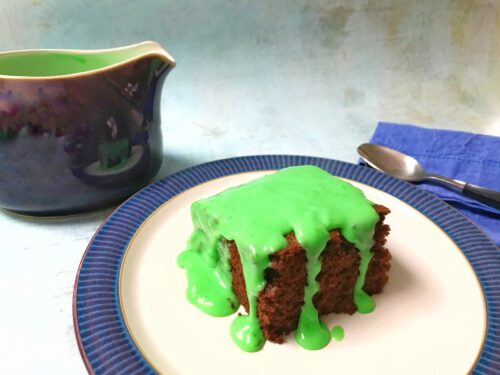
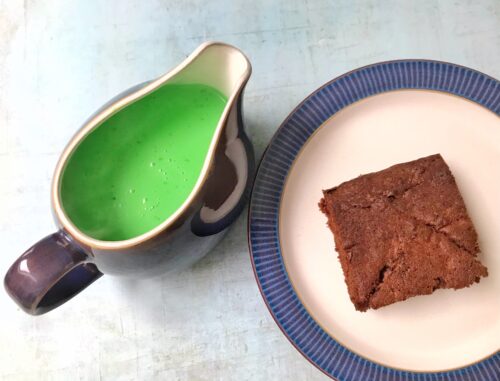
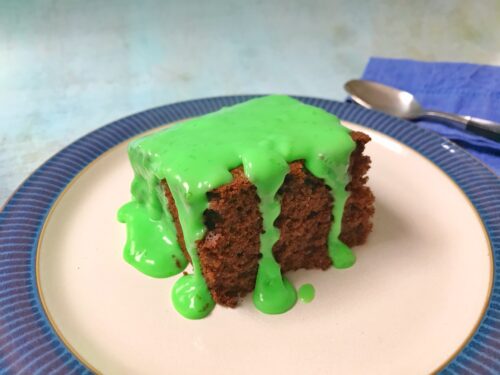
Ever since I served up a giant helping of school dinner style chocolate cake with chocolate custard to my family last year, I’ve been itching to make a version of that which many people who went to primary school in the 1980’s will remember fondly – chocolate cake with minty green custard. It’s a similar recipe, but the custard is green and flavoured with peppermint. 

If you didn’t go to primary school in the 1980’s, then this pudding may be a bit alarming to look at. I make no apologies for that. The version I remember was a slightly less vibrant shade of green, but this slightly too green version appealed to my son, who said it looked like a Minecraft block. I will take that as the compliment it was clearly intended to be.

Retro Recipe: Chocolate Cake with Minty Green Custard

Chocolate Cake with Minty Green Custard

Ingredients
250g baking margarine or unsalted butter
250g golden caster sugar
4 medium eggs, beaten
250g self-raising flour
1 tsp baking powder
2 tbsp dark cocoa powder
50g dark chocolate chips or dark chocolate, grated
1 tsp vanilla extract
100mls milk, warmed slightly

For the custard
1 pint of milk
3 tablespoons of cornflour
3 tablespoons of sugar
Green food colouring
Peppermint essence

Retro Recipe: Chocolate Cake with Minty Green Custard

How to make your Chocolate Cake with Minty Green Custard:

Preheat the oven to 180° degrees and grease and line a square 20cm cake or brownie tin with baking paper.

Beat the butter and sugar together until soft, light and fluffy; I use an electric hand mixer for this, but a wooden spoon or a stand mixer work just as well.

Add the eggs one by one, beat well after adding each egg. Sift the flour, baking powder and cocoa into the mixing bowl and mix well, once combined, add the chocolate chips or grated chocolate and stir through.

Add the vanilla extract and enough of the warm milk to create a smooth mixture with a dropping consistency. Pour into the tin and bake for 45-50 minutes or until a skewer inserted into the centre comes out clean. Once baked, pull it out of the oven and leave to cool a little on a baking tray. This cake is good served warm or cold.

To make the custard…

To make the custard, mix the cornflour, sugar and a dash or two of the milk and mix it together to make a smooth paste. Add more milk if you need to.

In the meantime, put the remaining milk in a pan and heat until it is almost at boiling point. Once it’s almost boiling, remove the pan from the heat and pout the hot milk into the bowl with the cornflour paste, keep whisking until it dissolves and there are no lumps.

Adding the paste to the milk instead of the powder should mean you don’t get a lumpy custard!

Pour the milk back into the pan and return to the heat, stirring continuously until thickens and the custard reaches almost boiling point again. Once it’s thickened and smooth, turn the heat off.

Now for the exciting bit, cautiously add a few drops of the green food colouring, whisk the colouring through and add more if you want until you get to your desired shade of green. Traditionally it’s a fairly pale but distinctively green shade, but you can go darker if you dare!

Similarly it’s time to add some of your peppermint essence. I urge caution at this stage, add a few drops at a time, whisk through and taste as you go. Too minty and it’ll taste like toothpaste, but a few drops is probably all you need.

To serve, cut your cake into handsome squares (warm or cold, your choice), and generously top with your minty green custard. Guaranteed clean plates all round.

Retro Recipe: Chocolate Cake with Minty Green Custard

If you enjoyed this, you might also like my recipe for school dinner style cornflake pie.

Retro Recipe: Chocolate Cake with Minty Green Custard

Retro Recipe: Chocolate Cake with Chocolate Custard

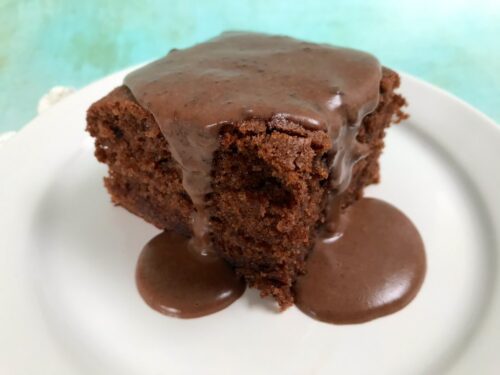
I think I sometimes look back on school dinners with misty eyes. I’m not sure my memory of them being the highlight of my school day is always accurate. In reality I think we remember the highlights more than the low points. I don’t think many people look back with much fondness at bowls of rice pudding and prunes; it’s more the thought of cornflake tart and chocolate cake with chocolate custard which bring back the good memories.

I’m not sure modern day school dinners are based on quite so much stodge, but sometimes stodge is good and you need a comforting hot pudding and custard. I’m usually a packet custard kind of girl, but this chocolate custard recipe is really simple and it works so well with the chocolate cake.

Retro Recipe: Chocolate Cake with Chocolate Custard

When I shared my photo of this chocolate cake with chocolate custard on Facebook, there were many people saying it needed to be green, mint flavoured custard, or even pink strawberry custard. I think all schools were different, mine did chocolate crunch and mint custard, something I might make at some point soon.

Chocolate Cake with Chocolate Custard

Ingredients
250g baking margarine or unsalted butter
250g golden caster sugar
4 medium eggs, beaten
250g self-raising flour
1 tsp baking powder
2 tbsp dark cocoa powder
50g dark chocolate chips or dark chocolate, grated
1 tsp vanilla extract
100mls milk, warmed slightly

For the chocolate custard
300ml whole milk
300ml double cream
4 large egg yolks
3 tbsp golden caster sugar
3 tbsp cocoa powder
1 tsp cornflour

Retro Recipe: Chocolate Cake with Chocolate Custard

How to make your Chocolate Cake with Chocolate Custard

Preheat the oven to 180 degrees and grease and line a square 20cm cake or brownie tin with baking paper.

Beat the butter and sugar together until soft, light and fluffy; I use an electric hand mixer for this, but a wooden spoon or a stand mixer work just as well.

Add the eggs one by one, beat well after adding each egg. Sift the flour, baking powder and cocoa into the mixing bowl and mix well, once combined, add the chocolate chips or grated chocolate and stir through.

Add the vanilla extract and enough of the warm milk to create a smooth mixture with a dropping consistency. Pour into the tin and bake for 45-50 minutes or until a skewer inserted into the centre comes out clean. Once baked, pull it out of the oven and leave to cool a little on a baking tray. This cake is good served warm or cold.

To make the custard, heat the milk and cream together in a saucepan until it is almost boiling, stir often. Whisk the egg yolks in a bowl with the sugar, cocoa and cornflour, then carefully and gradually pour the hot milk and cream over the top. This bit is really important as you don’t want the hot milk to scramble the eggs, so make sure you whisk it really well and add the hot milk gradually. Whisk well, then return to the pan.

Cook the mixture over a low-ish heat, stirring constantly until it forms a custard that thickly coats the back of a wooden spoon.

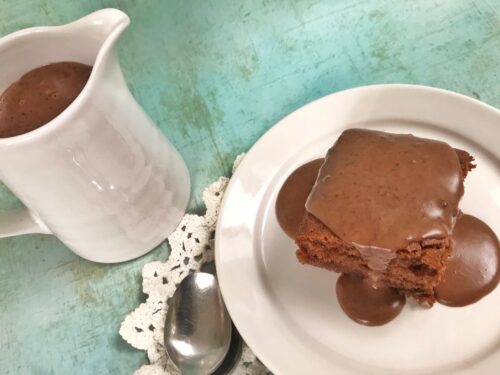
To serve, cut into 8 equal squares and serve warm with the chocolate custard poured over the top. School uniform optional!

If you enjoyed this, you might like this version of chocolate cake with minty green custard!

Retro Recipe: Chocolate Cake with Chocolate Custard

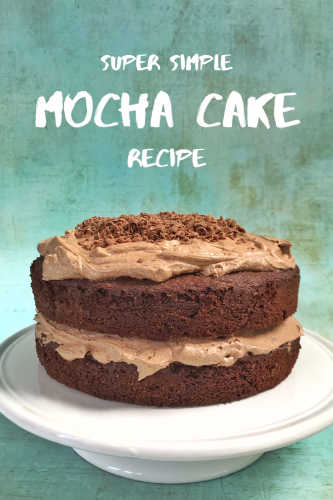
Recipe: Really Simple Mocha Cake

When all the coffee shops are shut and you’re missing your favourite mocha, what’s a girl to do but bake a mocha cake? This week there were two birthdays in our family; for the first, I produced a rocky road and for the second I whipped up this delicious mocha cake.

I looked all over the Internet for a mocha cake recipe I liked, but I couldn’t find one. The ones I’d looked at seemed a bit faffy for what is essentially a coffee and chocolate sponge cake. I do make good sponge cake, so I made up my own mocha cake recipe and thankfully it turned out well, much to the delight of my family.

Recipe: Really Simple Mocha Cake

Simple Mocha Cake

Ingredients

225g soft butter or baking margarine like Stork
225g caster sugar
200g self-raising flour
25g cocoa powder
1 tsp baking powder
1 tsp vanilla essence
4 large eggs
4 level tsp instant coffee, dissolved in 1 tbsp boiling water

For the coffee icing
150g soft butter
300g icing sugar
1 tsp vanilla essence
20g cocoa powder
4 level tsp instant coffee, dissolved in 1 tbsp boiling water

Method

Preheat the oven to 180C. Butter and line the base of two deep 20cm sandwich cake tins.

Beat the butter (or margarine) and sugar together until pale and fluffy. I used an electric hand whisk, but you can use a wooden spoon if you prefer. Add the eggs, cocoa powder, vanilla and coffee mixture and mix together. Gently tip in the flour and baking powder and combine until it’s all smooth.

Divide the mixture evenly between the two greased and lined baking tins.

Bake in the preheated oven for about 30 minutes until cooked through. I tend to open the oven door and leave my cakes in for five minutes so the shock of coming out of the oven is less. Maybe I just bake sensitive cakes.

Turn your cakes out onto a wire rack and leave to cool fully. If you’re in a rush, you can pop them in the fridge for half an hour or so.

Recipe: Really Simple Mocha Cake

To make the buttercream icing, sift the icing sugar and mix with your softened butter in a mixing bowl until smooth. Beat in the dissolved coffee and cocoa powder with the vanilla essence.

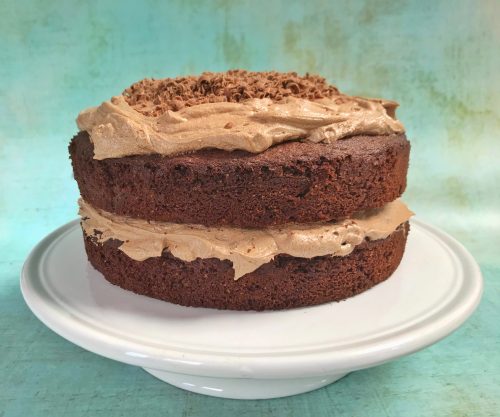
When they are cool, put a blob of the buttercream icing on your cake plate or stand; place the first layer of your sponge cake on top. The blob of buttercream will anchor the cake in place and stop it from sliding about. Smother the top of your first layer with about half of the buttercream, then sandwich the second layer on top of that. Swirl the rest of the buttercream on the top layer. I topped that with some grated chocolate, but you can leave it plain if you prefer.

I was very generous with the buttercream. If you think it’s far too much, then use what you want and put the rest in the fridge for topping cupcakes or whatever at a later date.

This mocha cake is really light, but rich. Full of lovely coffee chocolate flavour and a great family bake. To make mine even more family friendly, I made mine with decaf instant coffee, so there should be no sleepless nights in my house!

Recipe: Really Simple Mocha Cake

Recipe: Chocolate Marshmallow Cake

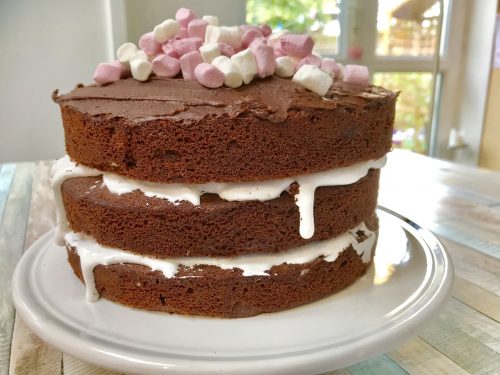
One day during the summer holidays my son asked if we could bake a cake. I usually have a store-cupboard of ingredients to make a batch or two of basic buns or a Victoria Sponge, but the boy wanted chocolate cake. Looking into my cupboard and I had just enough cocoa powder to make a cake, but what could I fill it with? I spied a jar of marshmallow fluff, I put two and two together and made a delicious Chocolate Marshmallow Cake.

Recipe: Chocolate Marshmallow Cake

The Chocolate Marshmallow Cake is pretty much a Victoria Sponge cake with a chocolate marshmallow twist. It was everything you’d want a chocolate marshmallow cake to be – chocolately and gooey and rich and lovely. I’m now keeping a jar of marshmallow fluff in my cupboard for chocolate marshmallow cake emergencies!

Chocolate Marshmallow Cake

Ingredients:
600 g caster sugar
600 g softened butter or margarine (I use Stork)
6 eggs, beaten
1 tsp vanilla extract
1.5 tbsp milk
200 g self-raising flour
7550g Dark cocoa powder
1 heaped tsp of baking powder

For the icing and filling:
1 jar of Marshmallow Fluff
100g Softened unsalted butter
100g sifted icing sugar
50g dark cocoa powder
Splash of milk
Half a pack of mini marshmallows

Method:
Heat your fan oven to 190c. Grease three 20cm sandwich tins, I also lined the bottom of each tin with a circle of baking parchment. In a large bowl, beat your butter and sugar together until fluffy (I used a hand mixer). Add the eggs, milk, cocoa powder and vanilla and combine, then add the flour and baking powder and mix together until you have a smooth batter.

Divide the mixture equally between the tins. You can weigh them to make sure they’re fairly equal if you’d like. Bake in your pre-heated oven for around 20 mins until cooked through. Remove from the tins and leave to cool on a cooling rack.

Once the cakes are cool, place the bottom layer on a serving plate and spoon about half a jar of marshmallow fluff into the middle. It should relax and even out by itself. While it’s doing this, make your chocolate frosting.

Recipe: Chocolate Marshmallow Cake

Using a hand mixer, work the butter until it is light and fluffy. Carefully add the icing sugar and cocoa powder and mix it in until the frosting is smooth. Add a splash or two of milk if you feel it needs it. It needs to be spreadable but not runny.

Take the middle layer of the cake and place it on top of the marshmallow. Put the rest of the marshmallow fluff on top and smooth it out a little with a knife. It will form a soft layer which will run down the sides of the cake, but I like the sticky, drippy effect.

Take  top layer of cake and put it on top of the marshmallow. Get your chocolate frosting and put it on the top of the cake, smooth it out with a knife. I like smooth ripples of frosting, but do what you feel best. Take a few handfuls of mini marshmallows and pile them up on the top of the cake.

Recipe: Chocolate Marshmallow Cake

You can store it in a cake tin for a few days, but the gooey marshmallow layer will likely ooze out entirely. It’s best to gobble the cake up quickly, or leave assembling it until the last moment.

It’s a great cake, it’s fun, it’s frivolous and it’s just the thing to make with a small boy who wants nothing more than a chocolatey spoon to lick and a big piece of chocolate cake for pudding.

Recipe: Chocolate Marshmallow Cake

Recipe: Chocolate and Cherry Bundt with Kirsch

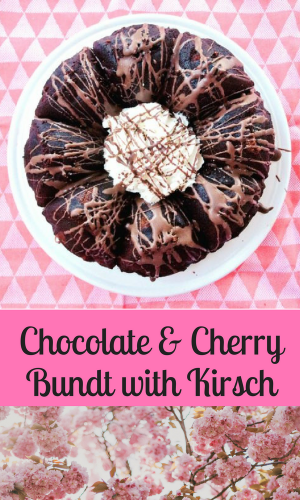
The Great British Bake Off has been a real game changer for amateur bakers like me. It’s given me the confidence to try new bakes and introduced the nation to previously unheard of treats from all over the world. Before GBBO I’d never seen or heard of a bundt before, but it soon became a cake I needed to bake. This week I made a Chocolate and Cherry Bundt with Kirsch and I became this week’s star baker (in my house only).

I’ve wanted a bundt tin for a long time. Every so often I’d have a look around for one but they were always a bit beyond my budget and I couldn’t justify spending that much on a cake tin. A few weeks before Christmas I spotted a Crofton bundt tin in Aldi for around £11 and I couldn’t resist. I’ve been itching to use my bundt tin ever since.

Recipe: Chocolate and Cherry Bundt with Kirsch

For my Chocolate and Cherry Bundt with Kirsch I used a 250g jar of Opies Black Cherries in Kirsch. I drained the cherries and set aside the kirsch for drizzling over the cake. It was really very good and the boys managed to demolish it in double quick time – always the sign of a successful bake.

Chocolate and Cherry Bundt with Kirsch

Ingredients (serves 16)
150g butter
150g sugar
4 eggs
200g self raising flour
100g cocoa powder
1 teaspoon baking powder
1 jar of Opies Black Cherries in Kirsch
1/2 tub of Dr Oetker Easy Milk Chocolate Icing

Method
Pre-heat the oven to 190°. Liberally butter your bundt tin and using 25g of your cocoa powder, dust the inside of your tin so that the powder is stuck to the butter.

Beat your butter and sugar together in a mixing bowl until light and fluffy. Add the flour, 75g of cocoa powder and baking soda and give them a quick stir, add the eggs and thoroughly combine. If your mixture seems a bit stiff or dry, add a splash of milk.

Drain your black cherries, reserving the kirsch for later. Stir your cherries into the cake batter and pour the lot into your bundt tin. Smooth the top of the batter.

Bake in the oven for 30 minutes at 190°. After 30 minutes, check it’s cooked through with a skewer and remove from the oven. Leave to cool in the tin for at least 15 minutes.

Once cool, turn out onto a suitable plate or cake stand and decorate. I used half a tub of Dr Oetker Easy Milk Chocolate Icing which you just microwave and then drizzle over with a spoon. I also whipped some cream to serve with it and spooned over some of the kirsch I’d set aside from the jar. Delicious.

Recipe: Chocolate and Cherry Bundt with Kirsch

It was a really lovely pudding and the kirsch made the cake extra moist and a little bit naughtier. I’m looking forward to getting another bundt in the oven.

Recipe: Chocolate and Cherry Bundt with Kirsch

Recipe: Easy Chocolate Malt Cake

Since joining “the motherhood” I’ve had to get acquainted with my mixing bowl. I’ve never been a great baker of cakes, but seemingly the minute you become a mother, someone thrusts a whisk into your hands and asks you to bake two dozen fairy-cakes for some occasion or other.

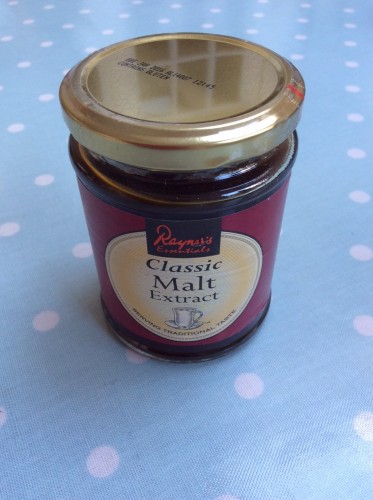
My go-to cake has been a Victoria Sponge and my Vicky-Sponge is generally pretty well received, but I have failed in my attempts to make a good chocolate version, until now that is. There was always something missing, a lack of depth of rich chocolateyness and I couldn’t figure out why. I was sent a jar of Rayner’s Classic Malt Extract to try, my first port of call was to tentatively add it to a chocolate sponge cake, and by Jove I’d cracked it!

Easy Chocolate Malt Cake Recipe

My easy chocolate malt cake recipe is by definition easy, quick to throw together in a cake emergency and tasty enough to offer the Vicar for tea. It probably won’t win any prizes for innovation or decoration, but it’s a delicious stand alone cake, or it works well with a dollop of ice cream and some fruit.

Easy Chocolate Malt Cake

Serves 8
A real simple, really tasty chocolate sponge cake with an undercurrent of malty richness.

Ingredients
4oz sugar
4oz butter or margarine
2 medium eggs
1/2 teaspoon baking powder
2 tablespoons Bourbon cocoa powder
2 teaspoons Rayner’s Malt Extract
4oz self raising flour
Splash of milk

Instructions
Beat the butter and sugar together until fluffy. Stir in the eggs, baking powder, cocoa powder and malt extract, mix until well combined. Gently fold in the self raising flour, add a small splash of milk if the mixture is too stiff.

Pour the cake batter into a lined loaf tin.

Bake in a pre-heated oven at 190 for 30 minutes, check if it is cooked through and if it is remove from the oven and leave to cool.

Easy Chocolate Malt Cake

Note: I was sent a jar of Rayner’s Classic Malt Extract free of charge to use in a recipe. All images and opinions are our own.