Simple Recipe: Easy Chocolate Orange Tart

Chocolate orange is one of those classic flavours. Growing up in the 1980’s, Christmas stockings were always bulked out with a hefty chocolate orange. It was such a treat, and over the years (decades!), chocolate orange has become more and more popular and available. Indeed, on my last trip around a supermarket, I found a box of Cadbury’s Chocolate Orange Fingers, and an idea for a pretty pudding was born; this simple chocolate orange tart!

Now, I just added some orange zest to my tart, and I thought the flavour was orangey enough; but if you want the full whack of chocolate orange goodness, then bars of actual chocolate orange are now available in the shops. You can easily swap out the milk chocolate for chocolate orange chocolate if that floats your boat. I feel like I’m saying the words “chocolate” and “orange” quite a bit here.

Easy Chocolate Orange Tart

This tart is rich and delicious, it didn’t last very long at all, which is always a good sign. If I’d have let him, my 11 year old would have probably eaten the lot in one sitting!

Easy Chocolate Orange Tart

Ingredients:
For the pastry –
4oz plain flour
2oz butter, cubed
A pinch of salt
2-3 tablespoons of cold water
-or- a packet of ready rolled shortcrust pastry

For the filling –
300g single cream
4 tablespoons of sugar
300g milk chocolate
Zest of one orange
Approx 1/3 of a box of Cadbury’s Chocolate Orange Fingers

Easy Chocolate Orange Tart

How to make a chocolate orange tart:

Tip the flour, salt and butter in a large mixing bowl. Using your fingers, rub the butter into the flour until it looks like breadcrumbs. Use a knife and stir in just enough cold water to bind the dough together. Do this gradually as you don’t want your pastry to be too wet. Once you’ve made the dough, cover the bowl and chill it in the fridge for 15 minutes or so before rolling out.

Or if you’re using shop bought, ready rolled pastry, take it out of the fridge about half an hour before you want to use it.

Pre-heat your oven to gas mark 5 or 190°

Take your pastry and roll it out to the thickness of a pound coin. You can either roll it out on a floured surface, or between two pieces of baking parchment. I find the baking parchment method quicker and a lot less messy.

Grease a 20cm tart tin and carefully put the pastry in the tin, pressing it against the sides. Let the pastry hang over the sides of the tin, you can trim it later. Prick the base all over with a fork. Top the pastry with a sheet of baking parchment and cover with baking beans, bake in your pre-heated oven for 10 minutes.

Easy Chocolate Orange Tart

Remove the baking beans and parchment and pop back in the oven for another 8 minutes. Remove from the oven and leave to cool. Once cool, carefully with a sharp knife trim the pastry so it is flush with the top of the tin.

While your pastry is cooling, warm up your cream and sugar in a saucepan. Finely chop the chocolate and once the cream is simmering, turn off the heat and add the chocolate to the pan. Leave for a minute and stir until the mixture is smooth, like really thick hot chocolate. Once it’s cooled a little, add around half of the finely grated orange zest and stir through.

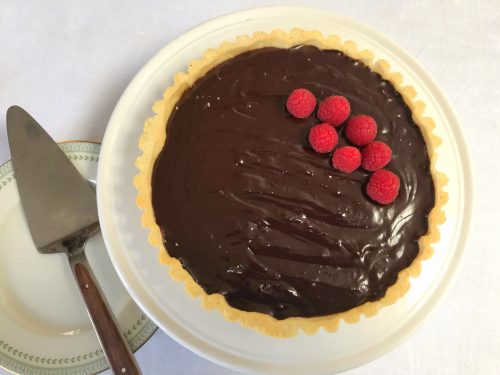
Carefully fill the tart case with the melted chocolate mix, level it off and make an artistic swirl or ripple on the top if you want. I decorated my tart by placing the chocolate orange fingers in regular intervals, so that when you slice the tart you’ll get a chocolate finger with each delicious wedge. I then scattered the remaining orange zest over the top of the tart. Put your chocolate tart in the fridge for a minimum of two hours, or overnight if you wish.

This chocolate orange tart is rich and delicious. I don’t think it needs anything with it, but you might want to add a drizzle of cream or a scoop of ice cream. For me, it’s just perfect served on its own.

If you enjoyed this recipe, you might like this Easter mini eggs chocolate tart.

Easy Chocolate Orange Tart

Recipe: Easy Easter Chocolate Tart

One of my favourite (and incredibly easy) things to make is an indulgent chocolate tart. Made with dark chocolate it is a delicious and pretty adult dessert. If dark chocolate isn’t your thing, you can swap it out for milk chocolate and enjoy a more family friendly pudding. I’ve jazzed up my usual chocolate tart for Easter and, well it was so popular that is disappeared within the hour!

Easter is undoubtedly a time for chocolate. If you can’t indulge your sweet tooth now, then when can you? This chocolate tart is really very simple to make, especially if you cheat and buy ready made pastry, and would be fun for kids to join in with too.

Recipe: Easy Easter Chocolate Tart

Easy Easter Chocolate Tart

Ingredients:
For the pastry –
4oz plain flour
2oz butter, cubed
A pinch of salt
2-3 tablespoons of cold water
-or- a packet of ready rolled shortcrust pastry

For the filling –
150g single cream
2 tablespoons of sugar
150g good quality dark chocolate, or milk chocolate if you prefer

2 bags of mini eggs to decorate, 3 if you’re a nibbler!

Recipe: Easy Easter Chocolate Tart

Method:
Tip the flour, salt and butter in a large mixing bowl. Using your fingers, rub the butter into the flour until it looks like breadcrumbs. Use a knife and stir in just enough cold water to bind the dough together. Do this gradually as you don’t want your pastry to be too wet. Once you’ve made the dough, cover the bowl and chill it in the fridge for 15 minutes or so before rolling out.

Or if you’re using shop bought, ready rolled pastry, take it out of the fridge about half an hour before you want to use it.

Pre-heat your oven to gas mark 5 or 190°

Take your pastry and roll it out to the thickness of a pound coin. You can either roll it out on a floured surface, or between two pieces of baking parchment. I find the baking parchment method quicker and a lot less messy.

Grease a 20cm tart tin and carefully put the pastry in the tin, pressing it against the sides. Let the pastry hang over the sides of the tin, you can trim it later. Prick the base all over with a fork. Top the pastry with a sheet of baking parchment and cover with baking beans, bake in your pre-heated oven for 10 minutes.

Remove the baking beans and parchment and pop back in the oven for another 8 minutes. Remove from the oven and leave to cool. Once cool, carefully with a sharp knife trim the pastry so it is flush with the top of the tin.

While your pastry is cooling, warm up your cream and sugar in a saucepan. Finely chop the chocolate and once the cream is simmering, turn off the heat and add the chocolate to the pan. Leave for a minute and stir until the mixture is smooth, like really thick hot chocolate.

Carefully fill the tart case with the melted chocolate mix, level it off and make an artistic swirl or ripple on the top if you want. Decorate with your mini eggs however you want. Put your tart in the fridge for a minimum of two hours, or overnight if you wish.

This chocolate tart is very, very rich, so a little goes a long way. It also makes an excellent pudding for Easter!

If you enjoyed this recipe, you might like these mini egg cookies or these peppermint crunch slices!

Recipe: Easy Easter Chocolate Tart

Recipe: Indulgent Chocolate Barleycup Tart

Last year I seriously cut down on my caffeine intake and now I just drink a couple of cups of tea or coffee a week. These days I seem to be very sensitive to caffeine and if I have a cup of coffee too late in the day, I just won’t sleep at night. I don’t want to cut it out completely, but I do have to keep an eye on just how much I drink. With this in mind, I was sent a jar of Barleycup to try.

I’ve swapped my lunchtime coffee for Barleycup and I’ve hardly noticed the difference. Barleycup is made from roasted cereal grains and chicory roots and is free-from caffeine and contains no artificial additives. Barleycup is also gluten-free and certified by Coeliac UK.

Recipe: Indulgent Chocolate Barleycup Tart

Recipe: Indulgent Chocolate Barleycup Tart

Not content with just drinking it, I wondered if it would be any good to bake with. It turns out that it was. I made a variation on a chocolate and coffee tart, I made a deliciously indulgent Chocolate and Barleycup Tart which was every bit as good as the original. Here’s my recipe…

Chocolate and Barleycup Tart

Ingredients:
For the pastry –
4oz plain flour
2oz butter, cubed
A pinch of salt
2-3 tablespoons of cold water
-or- a packet of ready rolled shortcrust pastry

For the filling –
150g single cream
2 tablespoons of sugar
150g good quality dark chocolate
2 tablespoons of Barleycup powder dissolved in 4 tablespoons of boiling water

Method:

Tip the flour, salt and butter in a large mixing bowl. Using your fingers, rub the butter into the flour until it looks like breadcrumbs. Use a knife and stir in just enough cold water to bind the dough together. Do this gradually as you don’t want your pastry to be too wet. Once you’ve made the dough, cover the bowl and chill it in the fridge for 15 minutes or so before rolling out.

Or if you’re using shop bought, ready rolled pastry, take it out of the fridge half an hour before you want to use it.

Pre-heat your oven to gas mark 5 or 190°

Take your pastry and roll it out to the thickness of a pound coin. You can either roll it out on a floured surface, or between two pieces of baking parchment. I find the baking parchment method quicker and a lot less messy.

Grease a 20cm tart tin and carefully put the pastry in the tin, pressing it against the sides. Let the pastry hang over the sides of the tin, you can trim it later. Prick the base all over with a fork. Top the pastry with a sheet of baking parchment and cover with baking beans, bake in your pre-heated oven for 10 minutes.

Remove the baking beans and parchment and pop back in the oven for another 8 minutes. Remove from the oven and leave to cool. Once cool, carefully with a sharp knife trim the pastry so it is flush with the top of the tin.

Recipe: Indulgent Chocolate Barleycup Tart

While your pastry is cooling, warm up your cream and sugar in a saucepan. Finely chop the chocolate and once the cream is simmering, turn off the heat and add the chocolate to the pan. Leave for a minute and stir until the mixture is smooth. Add in your Barleycup mixed with water and stir until combined.

Carefully fill the tart case with the Barleycup and chocolate mix, level it off and make an artistic swirl or ripple on the top if you want. Put your tart in the fridge for a minimum of two hours, or overnight if you wish.

To serve, garnish with raspberries or chopped nuts. It is very rich, so a little goes a long way.

I can confirm that Barleycup is a great coffee substitute in baking. It works really well, adding a slight bitter note and complexity to the tart. I’ll definitely be baking with it again, I wonder what a Barleycup and walnut cake would be like?

Recipe: Indulgent Chocolate Barleycup Tart

Note: I was set a jar of Barleycup to bake with. I have not been otherwise compensated for this post.


Introduction to Baking Class at Wilmslow Kitchen Cookery School

It’s August, which can only mean one thing – the nation goes Great British Bake Off crazy! I love baking and I class myself as an enthusiastic amateur rather than a master baker, my main problem is confidence, I look at the glorious show-stoppers on GBBO and I know my creations would be laughed out of the show tent. Thankfully (and excitingly) I was invited along to an Introductory Baking Class at the Wilmslow Kitchen Cookery School, an foodie blogger event hosted by kitchen legends – Kenwood and Currys PC World.

Wilmslow Kitchen Cookery School

We were introduced to the rather beautiful Kenwood kMix mixers, they come in a variety of lovely colours and I was drawn to the teal one, which perfectly matches my blog. I did point this fact out rather loudly and hopefully, but alas my request to take it home where it so clearly belonged fell on deaf ears.

Wilmslow Kitchen Cookery School

The Kenwood kMix is a contemporary version of the classic Kenwood mixer, it comes with the K beater, power whisk, flexi beater as well as a metal or glass bowl.

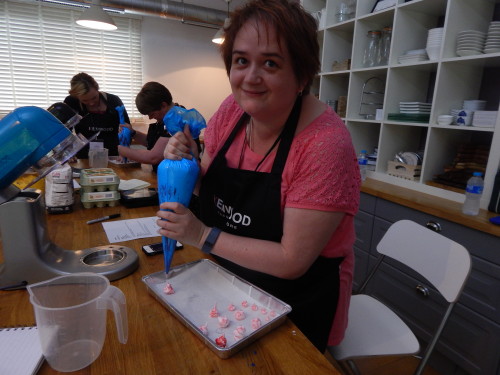
Sarah, David and Brian from Wilmslow Kitchen Cookery School gave us a run through of our busy afternoon of baking. In pairs (I was with Emma from Farmer’s Wife & Mummy) we were each going to make meringues, a Swiss roll and a rich chocolate tart. I was particularly excited (and terrified) as the thought of making and rolling a Swiss roll is an idea fraught with peril, the demonstration drew gasps of amazement from the watching crowd of bloggers.

Wilmslow Kitchen Cookery School

We were to tackle what I thought were some fairly difficult tasks, thankfully we were expertly walked through it all and what’s more it was all very enjoyable. I have long feared the meringue, but after trying my hand at the Intro to Baking session at Wilmslow Kitchen Cookery School I went home and made my own delicious batch.

The Swiss roll was, and still is frankly terrifying, but doable, and I’ve had a request to try and recreate the recipe at home. I am increasingly diary intolerant, so decided not to use cream in my Swiss roll and was given the option of a vegan buttercream, which was half a cup of vegan soy based spread whipped with half a cup of icing sugar and a lot (their words) of vanilla extract. It was pretty yummy and I didn’t miss the cream.

Wilmslow Kitchen Cookery School

Here’s what we made, the meringues were by far my favourite, the small boy liked them too. If you like a rich hit of chocolate then the chocolate tart is for you. But the Swiss roll was the winner – really light and if you’re brave, really easy to roll – honestly, if I can do it, you can too!