Halloween Recipe: Ghost Chocolate Brownies

In the UK, Halloween usually falls during half term, so it’s a great excuse to get the kids in the kitchen to whip up some terrifying treats. Recently I’ve been throwing together quick batches of chocolate brownies for my boy, they’re a speedy bake and so popular. I decided to make my regular recipe extra spooky by adding a handful of spooky spectres. Here are my easy ghost chocolate brownies, which make a fine addition to a Halloween party.

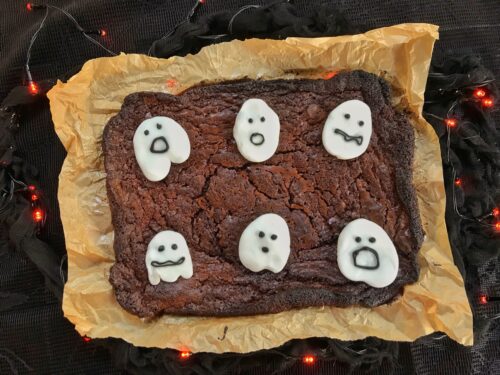
Essentially these are regular chocolate brownies, but with spooky ghost shapes popped on top. I cut my brownies into just six very greedy pieces, mostly becasue we’d made quite big ghosts, and party because we just really are that greedy. Sensible people could probably cut their brownies into 12 or even 16 pieces. Just make sure you have a little ghost for each one.

Halloween Recipe: Ghost Chocolate Brownies

The ghosts are really simple to make. I bought a pack of white royal icing, broke it into small pieces, and then the boy and I made ghost shapes by rolling them out and shaping them. We gave each spectre a spooky face with some black writing icing, which is pretty widely available in supermarkets and online. We had a great time making them, it’s a fun thing to do with the children.

This is my favourite chocolate brownie recipe. It uses very little flour and the brownies are so moreish. A ghostly plate of these brownies is sure to be popular at any Halloween gathering.

Ghost Chocolate Brownies

Ingredients:

250g milk chocolate
250g unsalted butter
4 medium eggs
250g sugar
2 heaped tablespoons self raising flour
2 heaped tablespoons cocoa powder
60ml of vegetable oil
1/3 pack of white ready to roll royal icing
1 tube of black writing icing
Halloween Recipe: Ghost Chocolate Brownies

How to make your Ghost Chocolate Brownies:

Pre-heat your oven to 185° and line a deep sided baking dish with baking parchment.

In a bowl, over a pan of simmering water, melt the chocolate and the butter together until smooth. In a separate bowl, mix the sugar and the eggs, whisk them until they’re light and fluffy.

Pass the flour, cocoa powder through a fine sieve and add to the eggs and sugar. Gently whisk the ingredients together until combined. Then mix in the melted chocolate and the vegetable oil to combine.

Bake for 35-45 minutes until the brownies have lost their wobble but are still a bit gooey inside. Take out and leave to cool. You want to almost under bake them so they are still soft in the centre.

Make your royal icing ghost shapes whenever you want. I prefer to make mine a day or two before I need them so they firm up a little. But it’s fine to make them just before you are decorating your brownies.

To make them, cut off blobs of the icing and roll them out. Try and guess the size of ghost you need for each brownie square. Using a spoon or a blunt butter knife, shape them into the kind of spooky shape you want. Put each one on a piece of baking paper so they’re not sticking to your work surface. Using a tube of black writing icing, draw a ghostly face on each one. Set them to one side for now. They can be happily left in the fridge or another cool place for a few days if you’re making them ahead of time.

Halloween Recipe: Ghost Chocolate Brownies

Once the chocolate brownies are cool, cut them into squares and then lay a ghostly figure on top of each square. These are my favourite brownies ever. I urge you to give them a try.

If you enjoyed this, you might also like to try these recipes…

Halloween Recipe: Ghost Chocolate Brownies

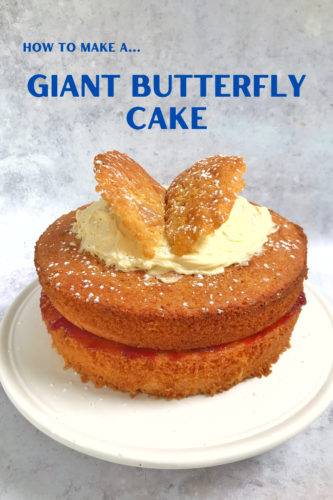
How to make a Giant Butterfly Cake

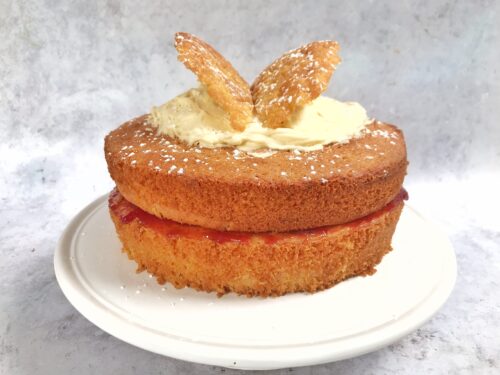
I’m a keen baker, but lack confidence in my decorating ability, so I tend to go for simple styles. Occasionally I’ll bake something incredibly pretty, like my lemon curd cake. It was so pretty, it was featured in BBC Good Food Magazine, which was nice. For my birthday this year, I was low on time and energy, but needed something tasty but pretty to share with my family. I’m quite big on whimsy, so I decided to bake a giant butterfly cake.

Here in the UK, butterfly cakes are a bit of a birthday tea staple. Little sponge buns, with their lids cut off, filled with buttercream, and the top put back on in the shape of butterfly wings. They’re incredibly simple, but they are quite a joyful little bun. Whilst I was wondering what to bake for my birthday, I thought an upgrade to my standard Victoria sponge, but with a butterfly cake top would be simple but really quite fun. I was not wrong.

How to make a Giant Butterfly Cake

I know my Victoria sponge cake recipe is a good one, but this re-working of it really made it extra brilliant. It was as light and airy as a butterfly wing, but the vanilla buttercream and butterfly wings really made it extra special.

Giant Butterfly Cake

Ingredients:
200 g caster sugar
200 g softened butter or margarine (I use Stork)
4 eggs, beaten
1 tsp vanilla extract
1.5 tbsp milk
200 g self-raising flour
1 tsp baking powder

Buttercream
200g butter, softened
200g icing sugar
A large slug of vanilla extract, approx. 10mls

To finish
1/3 of a jar of good quality raspberry jam
Icing sugar for dusting

How to make a Giant Butterfly Cake

Method:
Heat your fan oven to 190c. Grease two 20cm sandwich tins, I also lined the bottom of each tin with a circle of baking parchment. In a large bowl, beat your butter and sugar together until fluffy (I used a hand mixer). Add the eggs, milk and vanilla and combine, then add the flour and baking powder and mix together until you have a smooth batter.

Divide the mixture equally between the two tins. You can weigh them to make sure they’re fairly equal if you’d like. Bake in your pre-heated oven for around 20 mins until golden and they’re cooked through. Remove from the tins and leave to cool on a cooling rack.

Once your sponge layers are as cool as they can be, thickly spreading good quality raspberry jam between them and sandwich them together on a cake plate or stand.

To make the buttercream, sift your icing sugar to make sure there are no lumps. Then beat the softened butter and icing sugar together with the vanilla extract until it is fully combined and fluffy.

Take a sharp knife and carefully cut a circle out of the top cake layer. Don’t cut all the way through, you’re looking to create a small crater for the buttercream to sit in. Carefully remove your circle from the cake and set it aside.

You can either pipe or spoon your buttercream into your cake crater, it’s up to you. I used a spoon. Fill the crater and smooth the buttercream, I sort of made a small ravine in the middle so there was a dip where I’d be putting the butterfly wings.

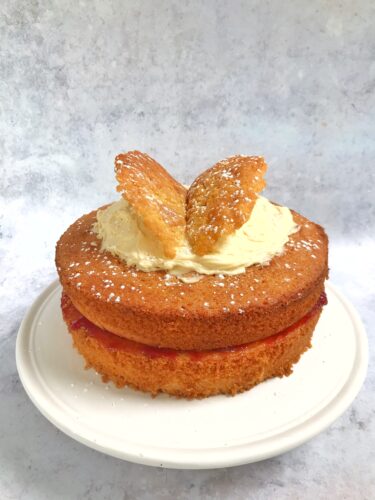
With a sharp knife, cut the circle of cake in half and place them onto the buttercream ravine. As this is much bigger than your average butterfly cake, I used my spoon to build up the buttercream underneath the wings to support them, which worked really well. Once you’re happy with how the wings look, you just need to sprinkle a tiny bit of icing sugar over the top, and it’s ready to be shared.

The cake did look awesome, everyone was oohing and ahhing over it, which is exactly the response I was going for. It’s a great, simple, fun bake and one I suspect I’ll be asked to make over and over.

How to make a Giant Butterfly Cake

Christmas: 12 favourite festive cakes and bakes

I was chatting about baking to a mum in the playground yesterday, we discovered a shared love of fairly unusual continental recipes, the kind Paul and Pru would give to Bake Off contestants to try and baffle them into submission. It got me thinking about some of my favourite things I’ve baked and blogged, so I thought I’d choose 12 of our favourite festive cakes, bakes and makes and give them another airing.

I promise you they’re all easy, I lack the patience, time and skill to do anything too fancy and time consuming; but they’re all delicious.

Mincemeat Flapjack

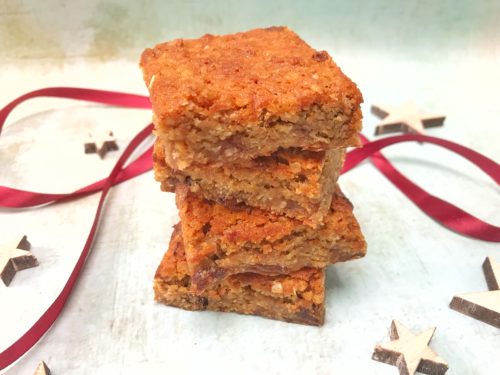
One of the most enduring and classic flavours of Christmas is mincemeat. Mince pies are an undeniable Christmas classic, but I’ve been throwing mincemeat into cakes and vol au vents for a few years now. It’s too good an ingredient just to use in little pies. So I baked a hearty batch of mincemeat flapjack and they all but disappeared in an afternoon. They’re simple, they’re filling and most of all, they’re delicious.

12 of our favourite festive cakes, bakes and makes

Lebkuchen Cake 

Traditionally a moreish soft biscuit, I decided to attempt a German Lebkuchen Cake with considerable success. The recipe is easier than it looks to make and the results are truly scrumptious. It’s one of our favourite festive cakes!

12 of our favourite festive cakes, bakes and makes

Danish Butter Cookies

Because to me, and other children of the 80’s, Danish Butter Cookies are forever linked to Christmas, it’s at this time of year I tend to make them the most. A batch of cookies neatly wrapped in brown paper, or in a decorative bag or box make a lovely little edible gift for someone.

Christmas Recipe: Danish Butter Biscuits

Joulutorttu

Traditionally Joulutorttu are made with puff pastry and a special Finnish prune jam. However I made mine with a Christmas preserve, but it does need a good firm set jam. Try plum or prune conserve for authenticity. They look a bit tricky to make, but it’s ready-roll puff pastry and jam and  a bit of arty twisting of the pastry.

Joulutorttu

Chocolate Dipped Candied Orange Slices

I like to make a big batch of these chocolate dipped candied orange slices at Christmas and give little bags of them as presents for people. They’re also a really nice treat to take away on holiday to nibble with a nice glass of good red wine in the evening.

Recipe: Chocolate Dipped Candied Orange Slices

Mincemeat Filo Rolls

I do love mince pies, but sadly the pastry doesn’t love me. Instead of the usual shortcrust pastry pies, I make these alternative mince pies, with filo pastry and in the style of a spring roll. These Mincemeat Filo Rolls were really, really lovely.

Easy Christmas Recipe: Mincemeat Filo Rolls

Mulled Cider Jellies

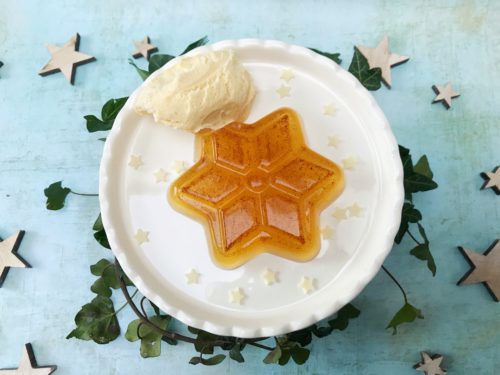
Sometimes, and this is not very often, I mull too much cider and I’ll have some left. Sure, I could heat it up again later, but I fancied making something different with it. I thought I’d make some Mulled Cider Jellies. It turns out they make a really interesting, different and delicious festive dessert. You could make them just as well with apple juice if you’re serving them to children or people who don’t drink alcohol. It’s a very pretty dessert and just a bit different.

Christmas Recipe: Mulled Cider Jellies

Christmas Pudding Ice Cream

This is an incredibly easy dessert, imagine a rich vanilla ice cream topped with Courvoisier soaked festive fruits. It’s utterly delicious, you can whip it up the night before, or make it up to a month ahead of the big day. It is delicious, incredibly simple and uses only four ingredients. I think we’ve found a winner!

12 of our favourite festive cakes, bakes and makes

Sticky Ginger Sponge Cake with Cinnamon Frosting

I love a bit of ginger cake and at this time of year it’s a lovely warming bake to make for the family. It’s sticky and spicy and you can dress it up for Christmas, or dress it down for every day cake eating if you prefer. This sticky ginger sponge cake with cinnamon frosting is special enough to serve for an occasion, or you could glitz it up a bit more and serve it as an alternative Christmas cake. It’s about as easy as can be.

Easy Recipe: Sticky Ginger Sponge Cake with Cinnamon Frosting

Cranberry and Pomegranate Jelly

Puddings at Christmas time can be a bit on the heavy side. All that booze soaked fruit and extra thick cream can get a bit much; plus if you’re feeding the whole family, Christmas pudding is not a universally popular choice. What is always, always popular is jelly. This is a jelly that everyone in the family can enjoy – cranberry and pomegranate jelly!

Recipe: Cranberry and Pomegranate Jelly

Peppermint Bark Buttons

Homemade treats make for really lovely gifts at Christmas. These Peppermint Bark Buttons are really fun to make and they’re delicious too.

Homemade Gifts: Peppermint Bark Buttons

Cinnamon & Raisin Shortbread

I originally created this shortbread recipe in 2013 in celebration of the Great British Bake Off; it’s been a favourite ever since. Cinnamon and raisin are a great combination and this lovely crumbly shortbread is a great bake all year round.

Recipe: Cinnamon & Raisin Shortbread

So that’s my little round up of my 12 of our favourite festive cakes, bakes and makes. What are your favourite favourite festive cakes, bakes or makes?

12 of our favourite festive cakes, bakes and makes

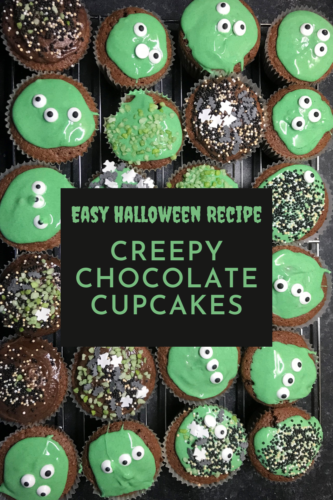
Halloween Recipe: Creepy Chocolate Cupcakes

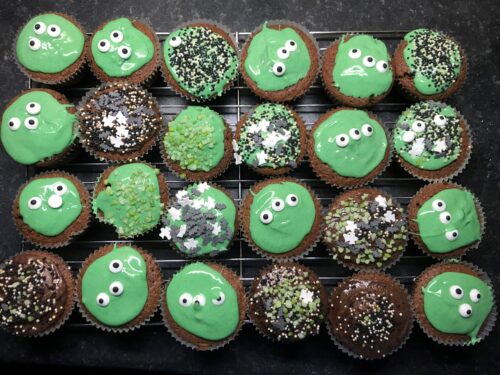
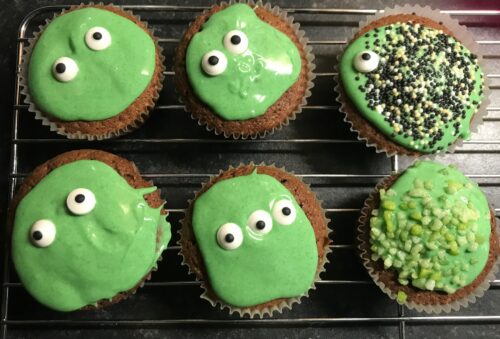
In the UK, Halloween usually falls during half term, so it’s a great excuse to get the kids in the kitchen to whip up some terrifying treats. This year time was short and energy was low, so we made a quick batch of creepy chocolate cupcakes and decorated them in a suitably spooky style.

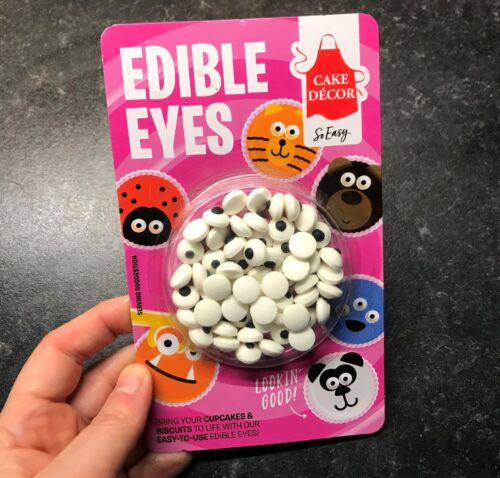
I usually have a decent selection of cake sprinkles in the cupboard, and I’d stocked up for the occasion with some edible eyes, food colouring and some Halloween sprinkles from Cake Angels. So we were well prepared to make some spooky bakes.

Halloween Recipe: Creepy Chocolate Cupcakes
This recipe makes approximately 24 cupcakes.

Creepy Chocolate Cupcakes

Ingredients:
200 g caster sugar
200 g softened butter or margarine (I use Stork)
4 eggs, beaten
1 tsp vanilla extract
1.5 tbsp milk
25g cocoa powder
175 g self-raising flour
1 tsp baking powder

To decorate
2 large bars of white chocolate
1 pack of edible eyes
Food colouring, we used green
Assorted Halloween sprinkles

Method:
Heat your fan oven to 190c. Get two bun trays and set out your cupcake liners in each tray. You will need about 24 of these.

In a large bowl, beat your butter and sugar together until fluffy (I used a hand mixer). Add the eggs, milk and vanilla and combine, then add the cocoa powder,  flour and baking powder and mix together until you have a smooth batter.

Using a dessert spoon, dollop an equal amount of the mixture in each cupcake liner and then bake in your pre-heated oven for 15-18 minutes. If you’re feeling like being precise, then you can weigh your cupcakes to make sure they are all the same size.

Once baked, take your cupcakes out of the oven and leave them to cool on a cooling rack. Once they are cool, you can set to work decorating them.
Halloween Recipe: Creepy Chocolate Cupcakes

Break up your two bars of white chocolate and put them in a microwave proof bowl. Microwave in short blasts until it is just about melting, stir with a small spoon until it is smooth and lump free. Beware! White chocolate melts much quicker than milk or dark chocolate, so this won’t take long.

Once melted, add a small splash of food colouring and mix it through, add more and stir until you get the shade of creepy you are looking for.

When you’re happy with your coloured chocolate, drop a small spoonful on the top of each bun. Swirl it around a bit with the back of the spoon to spread it around, the chocolate will naturally spread a bit. When you’re happy, it’s time to decorate with those edible eyes or the Halloween sprinkles.

Halloween Recipe: Creepy Chocolate Cupcakes

Once decorated, leave the creepy chocolate cupcakes somewhere cool and out of the way of hungry children (and adults) until the chocolate sets. Once it has set, they’re ready to eat.

We had a lovely time making these very simple little cakes. They were so easy to make, but light as a feather and they looked suitable spooky for Halloween.

If you enjoyed this, you might also like to try these recipes…

Halloween Recipe: Creepy Chocolate Cupcakes

Recipe: Ginger Loaf Cake with Zesty Lime Icing

With my son at home, I’m having to up my snack game. He gets the usual healthy offerings of fresh fruit and yoghurt, but sometimes a slice of cake can be just the motivation he needs to plough through his home learning for the afternoon. This simple ginger loaf cake is a quick and fairly frugal bake which will satisfy even the hungriest little learner.

Ginger Loaf Cake with Zesty Lime Icing

When I bake this, I usually double the recipe and make two. I wrap the second one up for later in the week and the cake is usually even better after a couple of days resting in an airtight tin.

Ginger loaf cake with zesty lime icing

Ingredients
200g self raising flour
200g soft brown sugar
5 teaspoons ground ginger
1 teaspoon of ground cinnamon
1 teaspoon of bicarbonate of soda
55g baking margarine, plus extra for greasing
1 medium egg, beaten
2 tablespoons of golden syrup
240mls hot but not boiling water
Lime icing
100g icing sugar, sifted
1/2 a lime
Zest of 1 lime

Ginger Loaf Cake with Zesty Lime Icing

How to make your Ginger Loaf Cake

Preheat the oven to 160c. Grease and line a 2lb loaf tin with baking parchment. I like to use loaf tin liners because they’re much easier.

Put all of the ingredients into a large mixing bowl, with an electric whisk (or a big spoon if you prefer) combine all the ingredients into a smooth batter. It will look a bit runny, but it’ll be ok once baked, I promise.

Pour the mixture into your prepared tin. Bake in your pre-heated oven for 50-60 minutes, or until golden brown and the top is springy to the touch. If the top is browning too quickly and you’re worried about it burning, cover the tin with tin foil.

Once your ginger loaf cake is baked, leave it to cool thoroughly, I usually leave mine overnight to make sure it’s properly cool.

Ginger Loaf Cake with Zesty Lime Icing

To ice your cake; zest a lime and put the zest to one side ready to sprinkle over the top. Sift your icing sugar into a bowl, then gradually add in the juice of half a lime, stirring until you get a stiff but spreadable consistency.

Spoon the lime icing over the top of your ginger loaf and then sprinkle the zest over the top. If you’re a neat and tidy person, you might want to leave it to one side for a few hours for the icing to set. Although if you’re greedy like me, then you can just slice it into thick pieces and gobble it down quickly with the icing still dripping.

If you enjoyed this recipe, you might also like to try these Grasmere ginger biscuits or this sticky ginger cake with cinnamon frosting.

Ginger Loaf Cake with Zesty Lime Icing

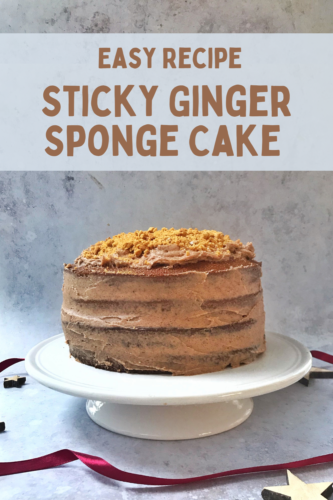
Easy Recipe: Sticky Ginger Sponge Cake with Cinnamon Frosting

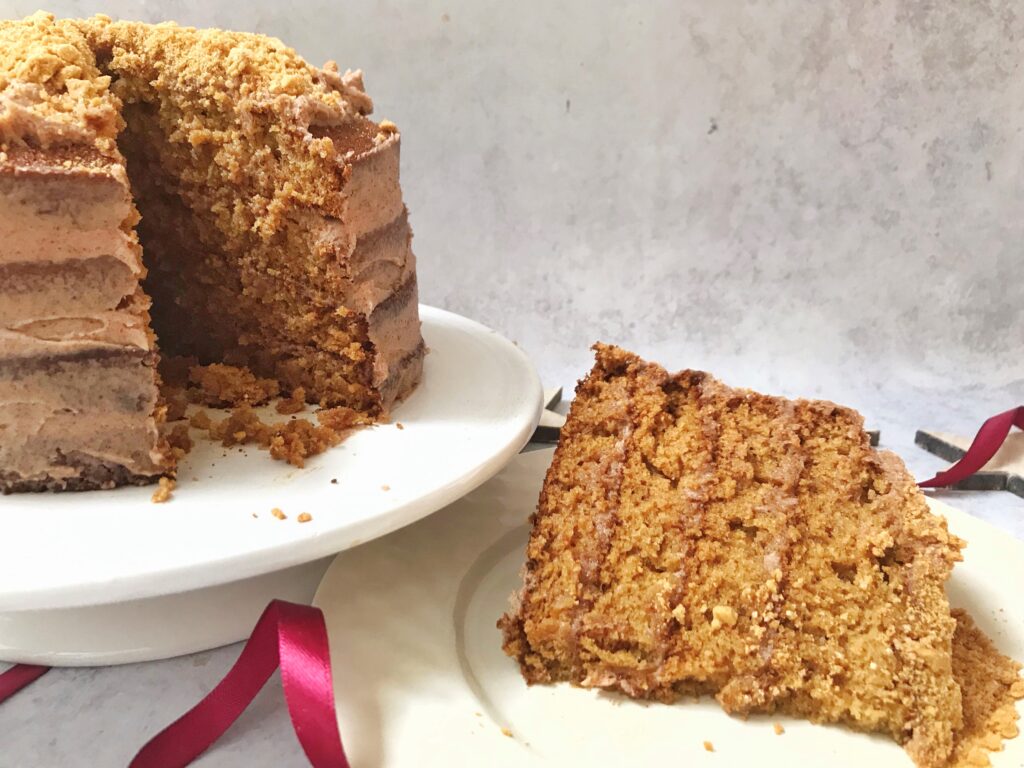
I love a bit of ginger cake and at this time of year it’s a lovely warming bake to make for the family. It’s sticky and spicy and you can dress it up for Christmas, or dress it down for every day cake eating if you prefer. This sticky ginger sponge cake with cinnamon frosting is special enough to serve for an occasion, or you could glitz it up a bit more and serve it as an alternative Christmas cake, and it’s about as easy as can be.

Easy Recipe: Sticky Ginger Sponge Cake with Cinnamon Frosting

It is a really simple bake, do not be alarmed by how much water you need to use, or how wet the batter is when you put it in the oven. It comes out beautifully. It’s also worth noting that if you can bake the layers and leave them wrapped up for a few days, the ginger flavour improves. So it’s a good make ahead bake if you need that.

If you like ginger but don’t want it to be too strong, you can always reduce the amount you use in the recipe. I like it to be quite feisty, so I’ve used quite a lot here.

Sticky Ginger Sponge Cake with Cinnamon Frosting

Ingredients
400g self raising flour
400g soft brown sugar
2 tablespoons ground ginger
1 teaspoon of ground cinnamon
2 teaspoons of bicarbonate of soda
110g baking margarine, plus extra for greasing
2 medium eggs, beaten
4 tablespoons of golden syrup
480mls hot but not boiling water
To make the frosting you will need…
250g unsalted butter
350g icing sugar
1-2 tablespoons of ground cinnamon
Milk, a couple of tablespoons
To decorate, 3 ginger nut biscuits and some gold glimmer sugar

Easy Recipe: Sticky Ginger Sponge Cake with Cinnamon Frosting

How to make your Sticky Ginger Sponge Cake

Preheat the oven to 180C/350FGas 4. Grease and line 4 8inch cake tins with baking parchment.

Put all of the ingredients into a large mixing bowl, with an electric whisk (or a big spoon if you prefer) combine all the ingredients into a smooth batter. It will look a bit runny, but it’ll be ok once baked, I promise.

Pour the mixture into your prepared tins, make sure there’s an equal (ish) amount in each tin. I weigh them to make sure they are more or less the same. Bake in your pre-heated oven for 25-30 minutes, or until golden brown and the top is springy to the touch.

Leave them to cool in the tin. Once cool, you’re ready to build your cake.

To make your buttercream frosting beat the butter and icing sugar, ground cinnamon and 1-2 tablespoons of milk together until smooth. Taste the buttercream, you can add more cinnamon if you prefer and more milk if you feel it needs to be softer.

To put you cake together, cut the domed tops off 3 out of your 4 cake layers, saving the best looking one for the top. Put your first later on your cake stand or plate, carefully spread some of the buttercream on top. Top with the second layer and cover that in more buttercream. Do the same with the third layer and then top with your prettiest layer.

You can decorate it however you want, there was enough buttercream for me to smooth some around the sides of my four layer cake tower, and I think it made the cake look a bit prettier. I piled the rest of the buttercream on the top of the cake and then crushed some ginger nut biscuits and mixed in a couple of teaspoons of some glittery sugar I had left over from another bake, then spooned them over the top.

This ginger sponge cake looked very pretty and tasted absolutely fantastic. This is such a good cake for a ginger lover. Lovely stuff.

For the people asking how do you make ginger cake sticky, I think it’s the golden syrup. I think it sort of seeps out of the sponge over time and makes it all sticky and lovely. I might be wrong, feel free to correct me in the comments!

If you enjoyed this recipe, you might also like to try these Grasmere ginger biscuits.

Easy Recipe: Sticky Ginger Sponge Cake with Cinnamon Frosting

Recipe: Easy Easter Chocolate Tart

One of my favourite (and incredibly easy) things to make is an indulgent chocolate tart. Made with dark chocolate it is a delicious and pretty adult dessert. If dark chocolate isn’t your thing, you can swap it out for milk chocolate and enjoy a more family friendly pudding. I’ve jazzed up my usual chocolate tart for Easter and, well it was so popular that is disappeared within the hour!

Easter is undoubtedly a time for chocolate. If you can’t indulge your sweet tooth now, then when can you? This chocolate tart is really very simple to make, especially if you cheat and buy ready made pastry, and would be fun for kids to join in with too.

Recipe: Easy Easter Chocolate Tart

Easy Easter Chocolate Tart

Ingredients:
For the pastry –
4oz plain flour
2oz butter, cubed
A pinch of salt
2-3 tablespoons of cold water
-or- a packet of ready rolled shortcrust pastry

For the filling –
150g single cream
2 tablespoons of sugar
150g good quality dark chocolate, or milk chocolate if you prefer

2 bags of mini eggs to decorate, 3 if you’re a nibbler!

Recipe: Easy Easter Chocolate Tart

Method:
Tip the flour, salt and butter in a large mixing bowl. Using your fingers, rub the butter into the flour until it looks like breadcrumbs. Use a knife and stir in just enough cold water to bind the dough together. Do this gradually as you don’t want your pastry to be too wet. Once you’ve made the dough, cover the bowl and chill it in the fridge for 15 minutes or so before rolling out.

Or if you’re using shop bought, ready rolled pastry, take it out of the fridge about half an hour before you want to use it.

Pre-heat your oven to gas mark 5 or 190°

Take your pastry and roll it out to the thickness of a pound coin. You can either roll it out on a floured surface, or between two pieces of baking parchment. I find the baking parchment method quicker and a lot less messy.

Grease a 20cm tart tin and carefully put the pastry in the tin, pressing it against the sides. Let the pastry hang over the sides of the tin, you can trim it later. Prick the base all over with a fork. Top the pastry with a sheet of baking parchment and cover with baking beans, bake in your pre-heated oven for 10 minutes.

Remove the baking beans and parchment and pop back in the oven for another 8 minutes. Remove from the oven and leave to cool. Once cool, carefully with a sharp knife trim the pastry so it is flush with the top of the tin.

While your pastry is cooling, warm up your cream and sugar in a saucepan. Finely chop the chocolate and once the cream is simmering, turn off the heat and add the chocolate to the pan. Leave for a minute and stir until the mixture is smooth, like really thick hot chocolate.

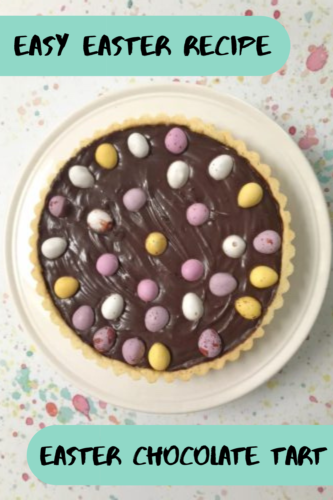
Carefully fill the tart case with the melted chocolate mix, level it off and make an artistic swirl or ripple on the top if you want. Decorate with your mini eggs however you want. Put your tart in the fridge for a minimum of two hours, or overnight if you wish.

This chocolate tart is very, very rich, so a little goes a long way. It also makes an excellent pudding for Easter!

If you enjoyed this recipe, you might like these mini egg cookies or these peppermint crunch slices!

Recipe: Easy Easter Chocolate Tart

Easy recipe: Homemade Chocolate Jazzies

A few weeks ago I was mooching around one of my local charity shops when I spotted a silicone baking mold for a pound. They can be quite expensive, so I snapped it up and took it home. I think it was originally designed for small cupcakes or muffins, but this had homemade chocolate jazzies written all over it.

As a working from home mum I am often called upon to help entertain a child or two for the odd day during the school holidays. I don’t mind this as for me it’s probably easier to entertain two seven years olds, than one seven year old who is just so “boorrEDDD” of my company. I like to have a few crafts, activities and bakes up my sleeve to entertain any young visitors we may have; so I thoroughly cleaned my silicone mold and tucked it away for a rainy day.

Easy recipe: Homemade Chocolate Jazzies

As a keen baker I always have a good variety of sprinkles in my cupboard. For some reason kids love sprinking almost as much as eating the sprinkles. I had quite a few little jars which probably needed using up. Making homemade chocolate jazzies is a really good way of using them up. You could give each child a different kind of sprinkle so they know which jazzies are theirs, or they can mix and match.

I made some sparkly chocolate cups for Mother’s Day back in the spring, they are very similar to those, but slightly smaller and with billions more sprinkles.

Homemade Chocolate Jazzies

Ingredients:
250g of milk chocolate
Cake decorating sprinkles, stars, silver balls, whatever you fancy

You will need:
A saucepan, a glass bowl which will sit in the pan, but so it doesn’t touch the bottom; a metal spoon, silicone baking molds.

How to make your chocolate jazzies:
Boil some water and pour the water into your pan so it’s about 3cm deep. Carefully place the glass bowl in the pan making sure the bottom of the bowl doesn’t touch the water. This is called a bain marie.

Break your chocolate up into small pieces and put it in the glass bowl. The water in the pan needs to be at a gentle simmer, not bubbling and boiling. Stir the chocolate until it is melted.

Easy recipe: Homemade Chocolate Jazzies

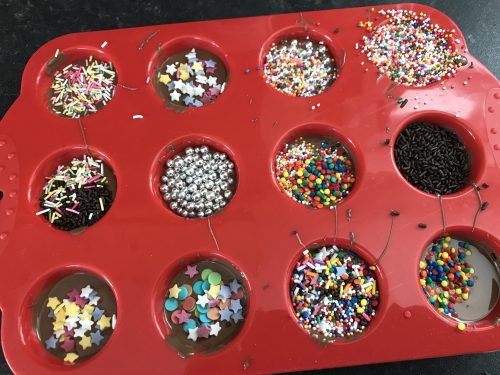
Once the chocolate is melted, with a spoon scoop out some melted chocolate into each of the molds. Try and put an equal amount in each. If you’re good at this there might be just enough left over for some spoon licking afterwards. Gently shake the silicone tray so the chocolate settles.

Once you’ve used all of your chocolate, take your chosen sprinkles and sprinkle as much or as little as you like over the top of each chocolate. Leave them to cool for at least two hours. If you need them to set a bit faster for impatient boys, pop them in the fridge.

Easy recipe: Homemade Chocolate Jazzies

To serve, make sure they are properly set and carefully pop them out of the molds. You might want to be careful and tip them out onto a tray or over a dish to catch any excess sprinkles. We had many excess sprinkles because the boys were very enthusiastic about the sprinkling.

Easy recipe: Homemade Chocolate Jazzies

The homemade chocolate jazzies went down an absolute storm. The boys really enjoyed making them. They’re incredibly simple to do and they also really enjoyed eating them and sharing them too. My chocolate jazzie experiment was a success!

PS. If you’re wondering they they’ve got blue hands, we played with blue slime while the jazzies set and the slime coloured their hands for the day. They do have clean hands, I promise!

Easy recipe: Homemade Chocolate Jazzies

Recipe: Spinach, Pesto and Mozzerella Pinwheels

Pinwheels are such a simple thing to make, and they’re ideal for a picnic or for a simple lunch. They can be quite hearty, depending on what you fill them with. This week I peered into my fridge and found some spinach which needed using, I grabbed a few other ingredients and set to work making a batch of Spinach, Pesto and Mozzerella Pinwheels.

Pinwheels are sheets of puff pastry, filled with a tasty filling, rolled up with a tasty filling and baked in the oven. They’re really simple to make; especially if you decide life is too short to make your own puff pastry and you buy the ready made stuff. It usually costs about £1 for a sheet so it’s quite economical.

Recipe: Spinach, Pesto and Mozzerella Pinwheels

Spinach, Pesto and Mozzerella Pinwheels

Makes 15

Ingredients
1 pack of ready-made puff pastry
Half a jar of your favourite pesto, I used tomato pesto
2 large handfuls of baby spinach, chopped
One ball of mozzerella cheese
Fresh black pepper
75g finely grated Cheddar cheese

Instructions
On a large board unroll the sheet of puff pastry, leave it on the paper it comes wrapped in. Spread the pesto all over the pastry leaving a bare edge along one of the long sides of the pastry. Spread it out as evenly as you can.

Recipe: Spinach, Pesto and Mozzerella Pinwheels

Scatter the chopped spinach and torn mozzerella as evenly as you can over the top of the pesto and season with black pepper. You can add a little salt if you like as mozzerella isn’t a salty cheese. Scatter about 25g of the finely grated Cheddar cheese over the top, this will melt and help it all stick it all together.

Roll the pastry up along its long side; roll it us as tight as you can, as if you were making a Swiss roll. Wrap it in the paper in came in and put it in the fridge for 10 minutes or so. Meanwhile, pre-heat the oven to 200 degrees.

Remove the pastry from the fridge and carefully cut into rounds approximately 1.5cm thick. You should get around 15 pinwheels from this.

Recipe: Spinach, Pesto and Mozzerella Pinwheels

Place each round on a greased baking tray and top each one with a little of the finely grated Cheddar cheese. Bake for 18-20 minutes or until golden brown.

Remove from the oven and leave to cool on a rack for 15 minutes or so. Leave them to cool a little before serving, though they’re great cold too.

Ideal for a picnic, or for a weekend lunch; these Spinach, Pesto and Mozzerella Pinwheels are delicious served with a big salad and a nice cold glass of white wine.

If you enjoyed this, you might also enjoy these Super Speedy Cheese and Onion Pinwheels or these Greek Inspired Olive, Spinach and Feta Pinwheels.

Recipe: Spinach, Pesto and Mozzerella Pinwheels

Easy Recipe: Chunky Rocky Road with M&Ms

Last weekend we celebrated my nephew’s birthday and as is tradition, we all brought along a sweet treat for the birthday party. I was short on time, so the night before I threw together a quick rocky road, mixed things up with a colourful bag of M&Ms and took it along to the party. It was a real hit and I suspect I’ll be asked to make my chunky rocky road with M&Ms on a regular basis now!

A little while ago I shared my recipe for Butterfinger Mini Cups Rocky Road and ever since then I’ve been knocking up trays of this easy treat for all kinds of occasions and sometimes just because we fancy it. It’s a great little crowd pleaser, especially if there are chocolate loving children in that crowd.

Easy Recipe: Chunky Rocky Road with M&Ms

These Chunky Rocky Road bars made with M&Ms really hit the spot, plus they’re really colourful and a great addition to a party table.

Chunky Rocky Road with M&Ms

Ingredients:
200g Milk Chocolate, broken into small pieces
2 Tablespoons of golden syrup
135g Unsalted butter
200g digestive biscuits
100g Mini marshmallows
75g Raisins
110g M&Ms

Method:
Line a high sided baking tray with baking parchment. I used a small roasting tin because it seemed up to the job.

Put the milk chocolate, golden syrup and butter in a glass bowl. Using a bain marie (put an inch or two of hot water in the pan and place the glass bowl over the top making sure the water doesn’t touch the bowl) over a gentle heat. Stir the chocolate, golden syrup and butter until everything has melted together.

While the chocolate mixture is slowly melting, put the biscuits into a plastic bag and bash them with a rolling pin until they’re broken up, but not crumbs. Ideally you want a mixture of chunky pieces and smaller, crumbly bits. Once bashed, tip them into a mixing bowl. Add the marshmallows and raisins.

Take the M&Ms and put a handful to one side for decoration. Take the rest and add them to the biscuit mix.

Once the chocolate mixture has melted, take it off the heat and carefully tip the biscuity mix into the chocolate. Stir it well and make sure everything is coated. Then tip it onto your baking tray spread the mixture out. It needs to be about 2cm deep as a minimum, but the thicker the better as far as I’m concerned.

Easy Recipe: Chunky Rocky Road with M&Ms

Take the M&Ms you’d put to one side and scatter them across the top of the rock road, press each one gently into the melted chocolate. Hopefully this will anchor them in place once it’s set. Chill in a cool place, preferably a fridge for at least two hours. Then slice into generous pieces and enjoy!

Easy Recipe: Chunky Rocky Road with M&Ms