I’m not sure there are much better ways to finish a meal than with a nice Irish coffee. That warming whiskey laced coffee drink is just caffeinated perfection. We were given a bottle of whiskey for Christmas, but we’re not the whiskey drinking house we once were, so it’s sat looking forlorn for weeks now. It was time it got used, so this week I whipped up a batch of deliciously creamy Irish Coffee Ice Cream. It’s a no-churn recipe, it takes all of five minutes to throw together and it is so simple. What’s not to like?

This Irish Coffee ice cream is so deliciously rich and creamy, a little goes a long way! If you’re tempted to slosh a bit more whiskey in, you do this at your peril, as adding too much alcohol could prevent it from freezing. Better to stick to 3 tablespoons in the ice cream and drizzle a bit of extra whiskey over the top of your scoop if you think it needs a bit more kick.
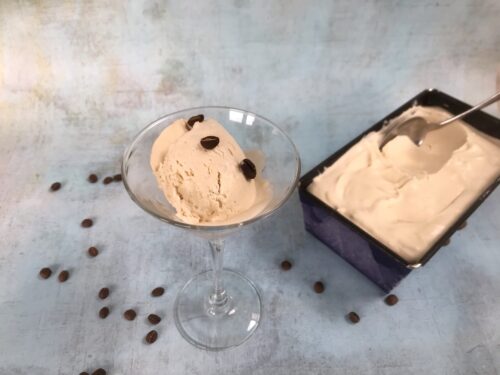
Irish Coffee Ice Cream
Ingredients:
500ml double cream
1 tin of sweetened condensed milk
3 heaped teaspoons of instant coffee dissolved into 1 tablespoon of hot water, left to cool
1 teaspoon of vanilla extract
3 tablespoons of whiskey, whatever you have to hand

How to make Irish Coffee Ice Cream:
Before you start making the ice cream, make your coffee solution. You need a tablespoon of boiling water and three heaped teaspoons of instant coffee. Mix them together and leave them to cool fully. You can speed this up by popping it in the fridge for a little while.
To make the ice cream, whip the cream in a bowl until it forms stiff peaks, this will take a few minutes with an electric whisk, if you’re doing it by hand, it might take a little while. Once you have achieved stiff peaks, gently fold in the condensed milk, vanilla extract, coffee and whiskey until it is well combined. Whip the mixture for 30 seconds to make sure it’s mixed properly.

Pour into a loaf tin, smooth the top and pop it in the freezer for 6 hours, or overnight if you can.
To serve, remove it from the freezer about ten minutes before you want to serve it. It should scoop pretty well once it’s been at room temperature for a short while.

Serve it however you like. I like to serve it in a pretty glass, or as an affogato style pudding, with a shot of espresso and a shot of whiskey poured over the top. Just the right kind of dessert for St Patrick’s Day, or any day really. Why limit ourselves?
If you enjoyed this recipe, you might also like to try –