Kids Crafts: Simple Hand Print Christmas Wreath

I’m all about the Christmas wreaths at the moment and wanting to make a Hand Print Christmas Wreath before my son’s hands grow too big, this week we set our minds to making this lovely hand print wreath.

My son has just turned 8 years old and he’s growing so fast. A few days ago we were looking at some clay hand prints he did as a baby and we were marveling at how much he has grown. His hands are shaped like his father’s hands, square, stout and strong. In a year or two his hands will be the same size as mine. It’s going too fast, too fast.

Kids Crafts: Simple Hand Print Christmas Wreath

Wanting to preserve his hand print a little, this easy to make Hand Print Christmas Wreath is a lovely thing to do with children. Here’s what we did…

Make a Simple Hand Print Christmas Wreath
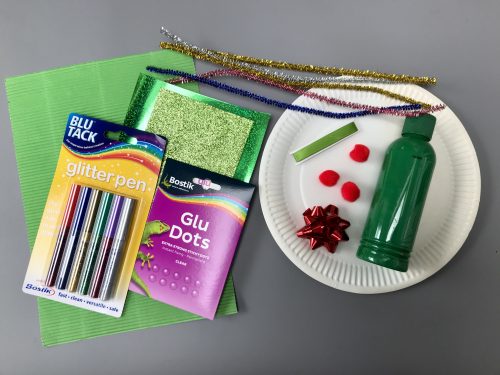
You will need:

A paper plate
A pencil
Scissors
Coloured paper, preferably two colours.
Glue, I used a Bostik Wide & Fine Glu Pen
Some ribbon

Kids Crafts: Simple Hand Print Christmas Wreath

How to make your Hand Print Christmas Wreath:

To begin with, take your paper plate and in the centre of the plate  draw around your child’s hand. Then carefully, making sure not to cut across the plate (because you’ll be making a ring out of it) cut out the hand shape, this will be your template.

Now carefully trim around the inner ring of the plate, so you have a nice ring to glue your hand prints too later. Cut a small slit in the top of the ring and thread a piece of ribbon through, knot the ribbon. This is how you will hang your wreath once it’s finished.

Kids Crafts: Simple Hand Print Christmas Wreath

Take your hand print template and draw around it on your coloured paper. I think I ended up using 8 pale hand prints and 22 darker hand prints, but the more you have, the better the effect I think.

When you’ve got all your hand shapes cut out, it’s time to sit down with the glue. Put a layer of glue all over the plate ring and then place your first hand print on it. Don’t press it down yet as you’ll have to slip another hand shape under it, and then under that.

Put a small dollop of glue on the palm of each hand shape and work around the ring layering the hands under each other. This will make sense when you’re doing it. If you’re using two colours of paper, make sure they are evenly distributed.

Once you’ve worked your way around the ring and the hand shapes are all overlapping each other pretty evenly, then you can press the shapes down onto the ring. Leave the glue to dry for a few hours. Once it’s dry it’s ready to be hung up. If you wanted you could add some embellishments, like little red pom poms or something.

Kids Crafts: Simple Hand Print Christmas Wreath

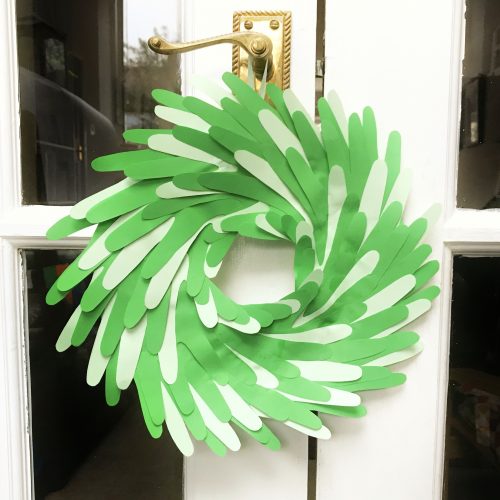
So there we have it, one very simple Hand Print Christmas Wreath – a great way to remember your children’s little hands. It’s a handmade Christmas decoration which will look great year after year.

If you enjoyed this, you might also like to try –

Kids Crafts: Simple Hand Print Christmas Wreath

Christmas Crafts: Paper Plate Holly Wreath

I love a good wreath at Christmas. We always buy a nice foliage one from our local Community Farm and have it on the front door. Inside the house we have a few more delicate wreaths on some of the internal doors, it just makes the place look more festive. I really enjoy making wreaths with my son. Once you’ve got your paper plate base sorted, you just let your imagination run wild. This week we’ve made a Paper Plate Holly Wreath and we’re really quite pleased with it.

Christmas Crafts: Paper Plate Holly Wreath

I had the idea for this Paper Plate Holly Wreath, but I knew that I’d probably be the one who would be spending some time cutting out the individual holly leaves and my son (with direction) would be doing much of the sticking. I sat down with a giant mug of tea and Say Yes to the Dress on TV and got cutting. I’ve no idea how many holly leaves I cut out, but it was about two A4 sheets worth.

Now that I’ve seen the finished Paper Plate Holly Wreath, I am really pleased with it. I think it looks really effective and I’ll be pleased to have it hanging in my kitchen this Christmas.

How to make a Paper Plate Holly Wreath

You will need:

A paper plate
Scissors
Green paint
Paint brush
A pencil
Ribbon
3 or 4 different kinds of green card or foam
Bostik Glu Dots
Red embellishments – mini pom poms, beads, paper shapes etc

Christmas Crafts: Paper Plate Holly Wreath

How to make your Paper Plate Holly Wreath:

With a pair of scissors, cut the middle out of your paper plate so it looks like a ring. Near the top of your wreath, cut a small slit where you can thread your ribbon through later.

Paint the wreath all over, front and back with green paint and leave it to dry. If you’re impatient like me, you can use a hairdryer to speed up the process. Your ring might need a second coat of paint on the front if you think it’s a bit patchy looking. This process does take a bit of time, so factor that in if you’re crafting with slightly impatient kids.

While your paint is drying, take the piece of cardboard which you cut out of the paper plate and draw a holly leaf on it. It needs to be about 5cm long, but you can make your leaves as big or small as you want really. Cut out your leaf shape, this is now your template.

I found whatever green card I had in my craft cupboard, which was a nice piece of corrugated card, some shiny card and some glittery card. I also found a piece of glittery foam. Using the pencil I then drew around my holly leaf template all over the back of each piece of card. Try and do this so you get minimal waste when you cut them out.

Once you’ve drawn all your holly leaves, you need to cut them out. This takes a little bit of time, so do factor that in.

Christmas Crafts: Paper Plate Holly Wreath

Once you’ve got a big pile of leaves, it’s time to stick them onto your wreath. Before you start sticking, thread your piece of ribbon through the slit you cut earlier and tie a knot in the ends securely.

Take a Bostik Glu Dot and stick it to the back of each leaf, towards one end if you can. Then stick your leaves however you like all over your wreath. We chose to stick the corrugated leaves all around the outside of the wreath. I suggested he try to stick them in pairs, like holly leaves often are and I think he did a good job.

With the other types of holly leaf, we arranged them in an attractive way around the inner circle of the wreath. Ben then stuck them in place. All the holly wreath needed now was berries. Using the red embellishments; mini pom poms, paper shapes and stick on gems, we decorated some of the leaves with red “berries”. I find stick on gems a bit tricky, so I always use a glu dot on them to make sure they stick.

Your wreath is now complete. It looks pretty impressive yes?

Christmas Crafts: Paper Plate Holly Wreath

Check out my other craft tutorials here!

If you enjoyed this wreath craft, you might also like to try these –

I am a Bostik Craft Blogger and I was sent the materials to create this craft from Craft Merrily. I have not been compensated for this post.