Halloween Recipe: Creepy Chocolate Bark

With half term in full swing and the weather being predictably dismal, we’ve got a packed week of baking and crafting planned to keep us busy. One of the easiest things we do is chocolate bark, I’ve no idea why is called chocolate bark, but it is. With Halloween just days away,  we thought I t would be rude not to make a batch of Halloween Chocolate Bark.

Chocolate bark is essentially melted chocolate with sweets, dried fruit or nuts sprinkled on top. Leave it to set and then chop it up into chucks to be gobbled down by the family. It’s easy and a fun thing for kids to get involved with.

Halloween Recipe: Creepy Chocolate Bark

When we’ve had play dates (in pre-covid times) we’ve often done something like this as an activity. At the start of the play date, they decorate their own melted chocolate puddle with sweets, and by the time it’s time to go home, they can take home their own little bag of chocolate bark.

You can theme these up depending on the time of the year. I’ve done Easter and Christmas bark, all with seasonal treats. This week, with it being Halloween at the weekend, we made Halloween chocolate bark. Lots of supermarkets and sweet shops have spooky themed sweets. I spotted some perfectly grim things in Co-op to make our Halloween chocolate bark extra gruesome. Go wild, go grim, let your imaginations run wild.

Halloween Recipe: Creepy Chocolate Bark

Halloween chocolate bark

Ingredients:
300g milk chocolate
A variety of sweets, I used brains, eyeballs and strawberry laces

How to make your Halloween chocolate bark:
Get a small baking tray and cover with baking paper, make some room in your fridge for the tray later.

Break the chocolate up into chunks and either carefully melt it in the microwave or over a Bain Marie (a bowl over a pan of hot water). I usually do this in the microwave in 30 second blasts, stirring in between. It took about 3 minutes to melt the chocolate for this. Do not do this all in one go as you risk your chocolate going grainy if you don’t keep an eye on it.

Once your chocolate is melted, carefully pour it out onto your baking paper and with a spoon smooth it out a little. You don’t want it spread too thinly, it needs to be at least the thickness of a pound coin.

Halloween Recipe: Creepy Chocolate Bark

Decorate the still warm chocolate with your spooky sweets. Once you’re happy, pop the tray in the fridge for an hour or so until it’s set. Once the chocolate has hardened, using a sharp knife, chop it up into chunky bite size pieces and gobble down greedily.

If you enjoyed this, you might also like to try these recipes…

Halloween Recipe: Creepy Chocolate Bark

Recipe: Yorkshire Creamery Macaroni Cheese

At the end of September I went to North Yorkshire for a foodie weekend away. While we were there, I wanted to visit the Wensleydale Creamery and have a look around. After enjoying the Cheese Experience we had worked up a good appetite and fancied lunch in Calvert’s Restaurant. Naturally we ordered fairly greedily, with an epic cheese board taking centre stage. Being hungry types, we also shared a gorgeous portion of Yorkshire Creamery macaroni cheese.

Recipe: Yorkshire Macaroni Cheese

The macaroni cheese was made with mature Yorkshire Cheddar and extra mature Yorkshire Red. They were the most delicious combination, so as we left, I picked up a wedge of each from the shop to make for myself once I got home. Here’s my recipe, and it’s not a bad recreation of the original.

This recipe feeds two heartily, and three or four as a side.

Recipe: Yorkshire Macaroni Cheese

Yorkshire Creamery Macaroni Cheese

Ingredients:
250g dried macaroni pasta
50g unsalted butter
50g plain flour
Approx one pint of milk, maybe more, maybe less
100g mature Yorkshire cheddar cheese, grated
100g extra mature Yorkshire red, grated
Salt and pepper
30g breadcrumbs

How to make this Yorkshire Creamery Macaroni Cheese:
To make this Yorkshire Creamery macaroni cheese; melt the butter in a saucepan, once melted, tip in the flour and mix well with a wooden spoon. Mix until it’s a paste and then cook the flour out for a minute. Add a splash of milk and stir until it turns into a paste again. Keep adding milk in splashes and mixing until it starts to turn into a silky sauce. The amount of milk will vary, but I’d say you need at least a pint of milk.

Leave your sauce to bubble gently on the hob while you put 250g of pasta to another saucepan of boiling water. Cook the pasta according to the instructions on the packet.

While your pasta cooks, grate your cheese and setting aside 70g of the Yorkshire red to top your bake with, add all of the rest of the cheese to your sauce. Stir, stir, stir your sauce and season with salt and pepper. I also like to add ground chilli flakes for a bit of a gentle kick, but you can leave that out if you prefer. Taste the sauce to check the seasoning; if it’s not cheesy enough for you, now is a good time to add more cheese. Now would also be a good time to pre-heat your oven to 220°.

Recipe: Yorkshire Macaroni Cheese

Once your pasta is cooked, drain it really well and tip it into your cheese sauce; stir that through and pour into a baking dish. Level the top gently with the back of a spoon.

Sprinkle over the remaining Yorkshire Creamery red cheese and the fresh breadcrumbs; pop it into the oven for 25 minutes, or until it’s brown and bubbly on top. Take it out of the oven and put to one side for five minutes. Serve with a big salad and crusty bread.

If you enjoyed this recipe, you might also like to try this ham hock macaroni cheese recipe.

Recipe: Yorkshire Creamery Macaroni Cheese

Halloween Recipe: Gingerbread Mummies

I love gingerbread, it’s one of my guilty pleasures. Often when I pass the bakery on the way to picking my boy up from school, I’ll slip in and buy a couple of gingerbread men, women or penguins for us both as a little treat. I like my gingerbread spicy, so I’m always a little generous when I make my own, like with these spicy gingerbread mummies for Halloween.

Halloween Recipe: Gingerbread Mummies

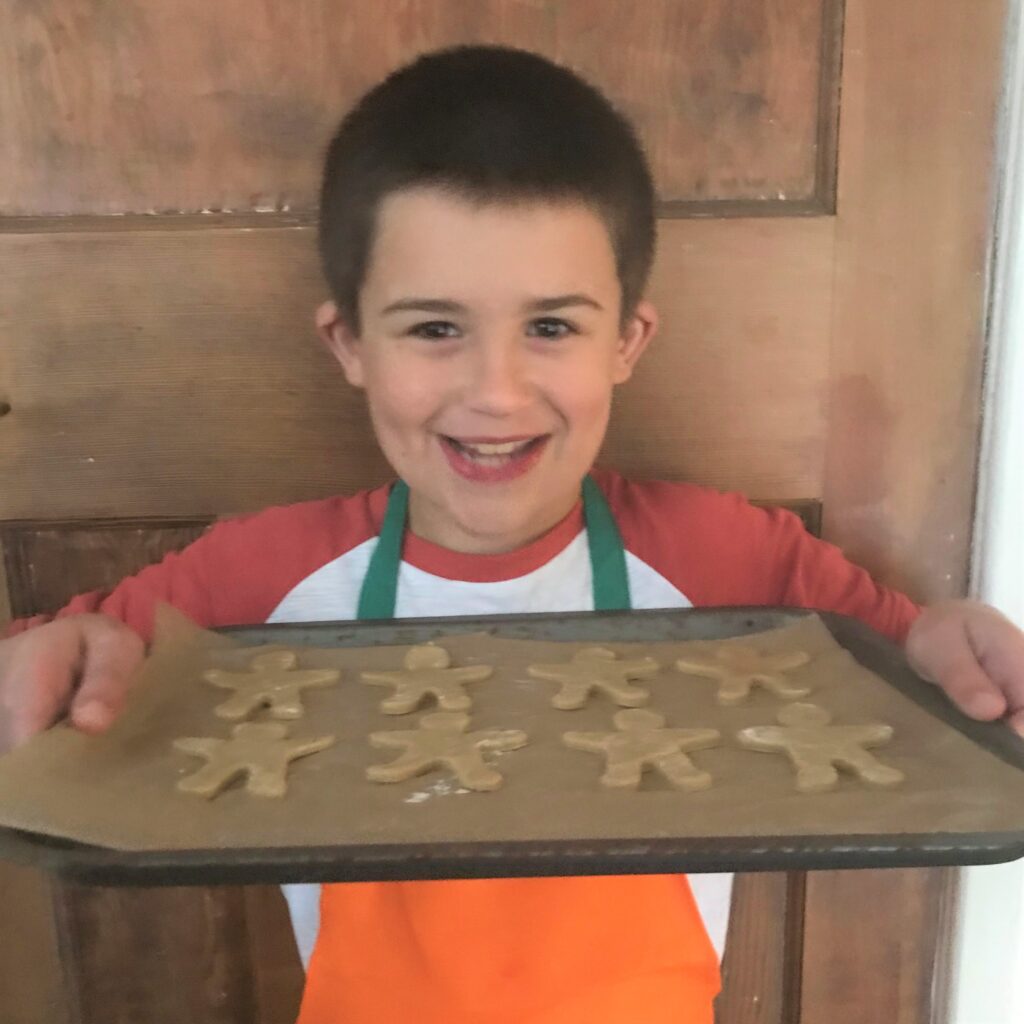
This week we got a new set of kids baking equipment, so we were keen to test it out and I was keen to bake a batch of gingerbread people for Halloween. The recipe is a tired and tested one; I’m not sure where it came from, but it’s been used many times over the years and my butter and flour splattered recipe book can attest. Like I said, I like it extra spicy, so if you want a milder gingerbread, then maybe halve the quantity of the spices.

As Halloween is round the corner, we wanted to make Gingerbread Mummies. These are especially easy for kids and for not very confident decorators to do. You just drizzle the icing over to look like bandages. If I’d been more on it, I’d have bought a pack of sugar eyes which you can stick on to add to the spookiness.

Halloween Recipe: Gingerbread Mummies

This recipe makes a surprising number of gingerbread men. Admittedly I use a pretty small cutter, but I managed to make 40 of them. They didn’t last the weekend though, not with my greedy family. They keep well in a sealed tin or container, so don’t feel like you too have to eat them all within 48 hours.

Spicy Gingerbread Mummies

Ingredients
350g plain flour, plus extra for rolling out
1 level teaspoon of bicarbonate of soda
2 fairly heaped teaspoons of ground ginger
2 fairly heaped teaspoons of allspice
125g baking margarine
175g caster sugar or soft brown sugar
1 large egg
4 tbsp golden syrup
To decorate
100g icing sugar
Warm water, a few drops at a time
Sugar eye decorations (optional)

Halloween Recipe: Gingerbread Mummies

Method
Using a large bowl, sift the plain flour, bicarb of soda, ginger and all spice and the pan mix together, I use a food processor as it saves getting overly sticky fingers and it’s quicker.

Tip in the margarine and mix until it looks like breadcrumbs. Stir in the sugar and then add a large egg and the golden syrup. This is where things get really sticky, mix thoroughly in the food mixer until it all comes together.

Wrap the dough in cling film, or pop in a clean plastic bag and refrigerate for half an hour or so. Once the dough is rested, it’s ready to roll!

At this point, I set up a bit of a gingerbread production line. I line two of my biggest baking trays with baking paper and pre-heat my oven to 180 degrees.
I divine the dough into four and on a floured surface, I roll out one of the pieces of dough. It needs to be about half a centimetre thick.

Carefully using your gingerbread cutter, cut out as many shapes as you can manage, roll out and cut again until you have filled your two trays. You need a bit of space around them, and I did trays of 8 figures, baking two trays at a time. In all I baked 5 trays, which is enough gingerbread mummies for a party!

Bake each tray for 12 minutes, maybe a minute it two more. They need to be lightly brown. Take them out of the oven and leave them to cool for 10 minutes or so. If you try to take them off the tray sooner, they will likely break. After 10 minutes, remove them from the baking paper and leave to cool fully on a wire rack.

Once they are cool, then you can decorate them. I sifted 100g of icing sugar into a bowl and gradually added drips and drops of water, mixing all the time. You need it to be thick but runny enough for it to drizzle off the spoon.

To decorate, I put my gingerbread mummies back on the baking paper I’d used (it saves you getting sticky icing everywhere) and using a teaspoon, I drizzled the icing across the mummies so it looks like bandages.

If I’d managed to get some sugar eyes, I would have stuck those on using some of my drizzly icing too. They looked pretty cool and my boy thought they were the perfect Halloween sweet treat.

If you enjoyed this, you might also like to try these recipes…

Halloween Recipe: Gingerbread Mummies


Recipe: Chilli Cheese Hot Dog Casserole

AD – I was sent some Ye Olde Oak Hot Dogs to create this Chilli Cheese Hot Dog Casserole recipe with. All images and opinions are our own. We have not been paid for this post.

I’m a big fan of cookery programmes and in the time before I got a proper job, I used to watch an awful lot of American cooking shows on Food Network. They generally made dishes fit for cowboys and truckers, but there was the odd recipe which really took my fancy.

In America they seem to be quite fond of something called a sandwich casserole. This is essentially a load of bread roll sandwiches put in a baking dish, brushed with butter and baked in the oven. I liked this idea, I liked it quite a lot, so when I was sent some Ye Olde Oak Hot Dogs I figured now was the time to make my American style sandwich casserole dreams come true.

Recipe: Chilli Cheese Hot Dog Casserole

They are really very easy to do. They’re great to make ahead and just bung in the oven for a quick feed. They make a lovely casual meal; ideal for play dates or if your BBQ has been rained off. They best thing is, you can mostly make them out of things you’d have in the cupboard already.

ye olde oak hot dogs

My recipe makes 6 hot dogs, but you can very easily double up, or triple up if you’re feeding a lot of hungry people.

Chilli Cheese Hot Dog Casserole

Ingredients
A packet of hot dog rolls
1 tin of Ye Olde Oak Hot Dogs
1 tin of tinned chilli (or homemade if you have it)
A packet of burger cheese slices
100g cheddar cheese, grated
50g butter
1 clove of garlic, crushed
Pepper, ground
2 good pinches of dried mixed herbs or finely chopped fresh parsley

Recipe: Chilli Cheese Hot Dog Casserole

How to make your Chilli Cheese Hot Dog Casserole

You will need a large oven proof dish. Melt your butter in a pan or microwave, add the crushed or minced garlic, a very good grind of pepper and your dried or fresh herbs. Using a pastry brush, brush the bottom of the dish with the melted garlicky butter and then put it to one side for later.

Slice your hot dog buns open, but not all the way through. Put a slice of burger cheese in each bun, then put a Ye Olde Oak Hot Dog on top of the cheese; top with some chilli. Fill the oven proof dish with your loaded hot dogs, nestle them in together so they’re almost spooning, but don’t squash them up too much.

Once you have filled your dish with chilli cheese hot dogs, brush the remaining garlic butter over the bread buns. Top with the grated cheddar cheese and cover the dish with foil.

Put into a pre-heated oven at 180°c for 20 minutes. Remove the foil and bake for a further 5 minutes or so; until the cheese is melted and everything is bubbling and delicious looking. Remove from the oven and serve.

Recipe: Chilli Cheese Hot Dog Casserole

This Chilli Cheese Hot Dog Casserole got the big thumbs up from my boy. You can top them however you want really, but the chilli and cheese combo is a winner! I was really impressed with how they came out of the oven; the bread bun was slightly crispy on top, but soft underneath. I’m so glad I tried the sandwich casserole idea, it’s one I’ll be playing with in various forms over the summer and beyond.

If you enjoyed this recipe, you might also like to try these pizza hot dogs.

Recipe: Chilli Cheese Hot Dog Casserole

Retro Recipe: Chocolate Cake with Chocolate Custard

I think I sometimes look back on school dinners with misty eyes. I’m not sure my memory of them being the highlight of my school day is always accurate. In reality I think we remember the highlights more than the low points. I don’t think many people look back with much fondness at bowls of rice pudding and prunes; it’s more the thought of cornflake tart and chocolate cake with chocolate custard which bring back the good memories.

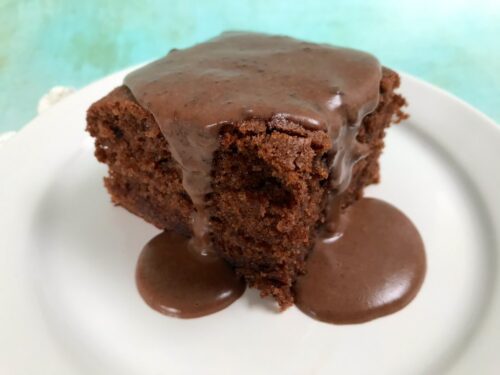
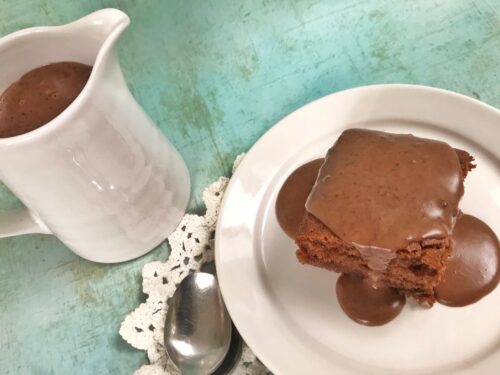
I’m not sure modern day school dinners are based on quite so much stodge, but sometimes stodge is good and you need a comforting hot pudding and custard. I’m usually a packet custard kind of girl, but this chocolate custard recipe is really simple and it works so well with the chocolate cake.

Retro Recipe: Chocolate Cake with Chocolate Custard

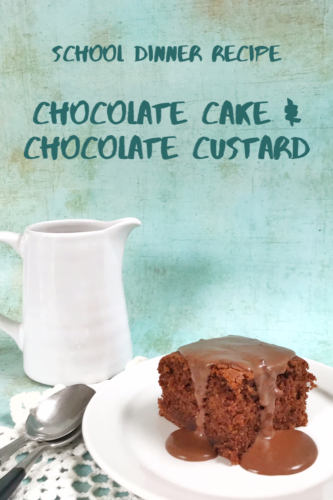
When I shared my photo of this chocolate cake with chocolate custard on Facebook, there were many people saying it needed to be green, mint flavoured custard, or even pink strawberry custard. I think all schools were different, mine did chocolate crunch and mint custard, something I might make at some point soon.

Chocolate Cake with Chocolate Custard

Ingredients
250g baking margarine or unsalted butter
250g golden caster sugar
4 medium eggs, beaten
250g self-raising flour
1 tsp baking powder
2 tbsp dark cocoa powder
50g dark chocolate chips or dark chocolate, grated
1 tsp vanilla extract
100mls milk, warmed slightly

For the chocolate custard
300ml whole milk
300ml double cream
4 large egg yolks
3 tbsp golden caster sugar
3 tbsp cocoa powder
1 tsp cornflour

Retro Recipe: Chocolate Cake with Chocolate Custard

How to make your Chocolate Cake with Chocolate Custard

Preheat the oven to 180 degrees and grease and line a square 20cm cake or brownie tin with baking paper.

Beat the butter and sugar together until soft, light and fluffy; I use an electric hand mixer for this, but a wooden spoon or a stand mixer work just as well.

Add the eggs one by one, beat well after adding each egg. Sift the flour, baking powder and cocoa into the mixing bowl and mix well, once combined, add the chocolate chips or grated chocolate and stir through.

Add the vanilla extract and enough of the warm milk to create a smooth mixture with a dropping consistency. Pour into the tin and bake for 45-50 minutes or until a skewer inserted into the centre comes out clean. Once baked, pull it out of the oven and leave to cool a little on a baking tray. This cake is good served warm or cold.

To make the custard, heat the milk and cream together in a saucepan until it is almost boiling, stir often. Whisk the egg yolks in a bowl with the sugar, cocoa and cornflour, then carefully and gradually pour the hot milk and cream over the top. This bit is really important as you don’t want the hot milk to scramble the eggs, so make sure you whisk it really well and add the hot milk gradually. Whisk well, then return to the pan.

Cook the mixture over a low-ish heat, stirring constantly until it forms a custard that thickly coats the back of a wooden spoon.

To serve, cut into 8 equal squares and serve warm with the chocolate custard poured over the top. School uniform optional!

If you enjoyed this, you might like this version of chocolate cake with minty green custard!

Retro Recipe: Chocolate Cake with Chocolate Custard

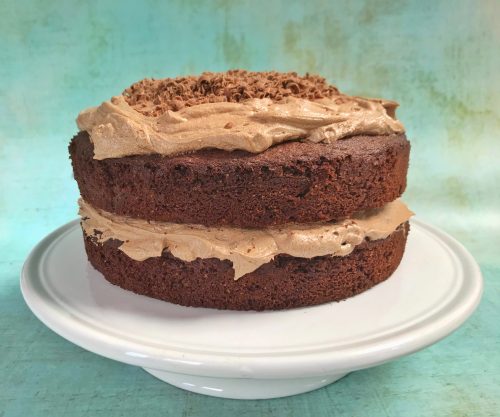
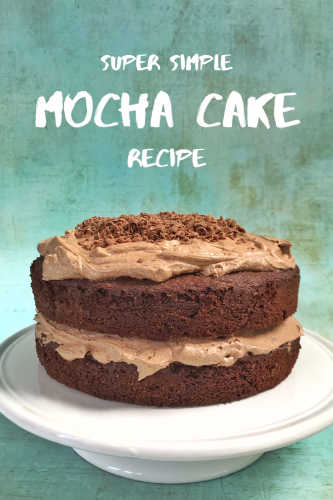
Recipe: Really Simple Mocha Cake

When all the coffee shops are shut and you’re missing your favourite mocha, what’s a girl to do but bake a mocha cake? This week there were two birthdays in our family; for the first, I produced a rocky road and for the second I whipped up this delicious mocha cake.

I looked all over the Internet for a mocha cake recipe I liked, but I couldn’t find one. The ones I’d looked at seemed a bit faffy for what is essentially a coffee and chocolate sponge cake. I do make good sponge cake, so I made up my own mocha cake recipe and thankfully it turned out well, much to the delight of my family.

Recipe: Really Simple Mocha Cake

Simple Mocha Cake

Ingredients

225g soft butter or baking margarine like Stork
225g caster sugar
200g self-raising flour
25g cocoa powder
1 tsp baking powder
1 tsp vanilla essence
4 large eggs
4 level tsp instant coffee, dissolved in 1 tbsp boiling water

For the coffee icing
150g soft butter
300g icing sugar
1 tsp vanilla essence
20g cocoa powder
4 level tsp instant coffee, dissolved in 1 tbsp boiling water

Method

Preheat the oven to 180C. Butter and line the base of two deep 20cm sandwich cake tins.

Beat the butter (or margarine) and sugar together until pale and fluffy. I used an electric hand whisk, but you can use a wooden spoon if you prefer. Add the eggs, cocoa powder, vanilla and coffee mixture and mix together. Gently tip in the flour and baking powder and combine until it’s all smooth.

Divide the mixture evenly between the two greased and lined baking tins.

Bake in the preheated oven for about 30 minutes until cooked through. I tend to open the oven door and leave my cakes in for five minutes so the shock of coming out of the oven is less. Maybe I just bake sensitive cakes.

Turn your cakes out onto a wire rack and leave to cool fully. If you’re in a rush, you can pop them in the fridge for half an hour or so.

Recipe: Really Simple Mocha Cake

To make the buttercream icing, sift the icing sugar and mix with your softened butter in a mixing bowl until smooth. Beat in the dissolved coffee and cocoa powder with the vanilla essence.

When they are cool, put a blob of the buttercream icing on your cake plate or stand; place the first layer of your sponge cake on top. The blob of buttercream will anchor the cake in place and stop it from sliding about. Smother the top of your first layer with about half of the buttercream, then sandwich the second layer on top of that. Swirl the rest of the buttercream on the top layer. I topped that with some grated chocolate, but you can leave it plain if you prefer.

I was very generous with the buttercream. If you think it’s far too much, then use what you want and put the rest in the fridge for topping cupcakes or whatever at a later date.

This mocha cake is really light, but rich. Full of lovely coffee chocolate flavour and a great family bake. To make mine even more family friendly, I made mine with decaf instant coffee, so there should be no sleepless nights in my house!

Recipe: Really Simple Mocha Cake

Party Recipe: Jam and Cream Sponge Cake

This week sees the 75th anniversary of VE Day and many people across the UK and beyond will be marking the date. We will be taking part in a community zoom celebration, so I’ve been busy baking a lovely Jam and Cream Sponge Cake to have with a nice pot of tea.

I baked this deliciously light sponge cake filled with lovely purple (the royal colour) mulled wine jam. I’d like to think the Queen would approve of my simple but very yummy jam and cream sponge cake.

Patriotic Jam and Cream Sponge Cake

To find out how to make my Jam and Cream Sponge Cake, read my recipe below…

Patriotic Jam and Cream Sponge Cake

Serves 16
A classic Victoria Sponge layered with Mulled Wine Jam and Chantilly Cream.

Ingredients
300g caster sugar
300g softened butter
6 eggs, beaten
2 tsp vanilla extract
3 tbsp milk
300g self-raising flour
1.5 tsp baking powder

For the filling
1/2 Jar Mackays Christmas Preserve (mulled wine jam)
200ml double cream
1 level tablespoon of icing sugar
1 teaspoon of vanilla extract

Instructions
Heat your fan oven to 190c. Butter three 20cm sandwich tins. In a large bowl, beat your butter and sugar together until fluffy (I used a hand mixer). Add the eggs, milk and vanilla and combine, then add the flour and baking powder and mix together until you have a smooth batter.

Divide the mixture equally between the three tins, you can weigh them to make sure they’re fairly equal if you’d like. Bake in your pre-heated oven for around 20 mins until golden and they’re cooked through. Remove from the tins and leave to cool on a cooling rack.

To make the Chantilly cream, beat the cream, sugar and vanilla until smooth and creamy. I used my hand mixer for this and it took just a few minutes.

To assemble the cake, choose the most attractive of the three sponge cakes and save that one to go on the top. You may need to cut the top of some of your layers to make them flatter so they sit more comfortably on each other. Put the bottom layer on your serving plate or cake board. Put a teaspoon of jam on the plate and put your bottom layer on that. It will help it stick to the board. Cover that first layer with your jam and put the second layer on top. Gently press the layers together. Top your second layer with the cream and put your top layer on top, sprinkle with icing sugar or decorate as you wish.

Notes

The cream is fresh so the cake will need to be eaten fairly quickly or refrigerated. If you want to keep it for a few days it might be best to not have the cream in between layers, maybe kept in the fridge to indulgently dollop on the side.

My Patriotic Jam and Cream Sponge Cake would make the prefect addition to a celebratory street party or a refined afternoon tea round at Buckingham Palace. It’s so quick and easy to make, it’ll leave you plenty of time to make a few plates of cucumber sandwiches and mix up a jug or two of Pimms for the party!

Patriotic Jam and Cream Sponge Cake

What’s your favourite celebratory bake?

Patriotic Jam and Cream Sponge Cake

I have to say, this sponge recipe is absolutely magic, I use it as the base for all my sponge cake bakes now; from butterfly cakes, cupcakes, sponge puddings and good old Victoria sponges, it’s light every single time. I can’t fault it.

Jam and Cream Sponge Cake

Recipe: Wild Garlic and Parmesan Focaccia

Being in lockdown isn’t easy. Some days I find myself going a little stir crazy, some days I’m listless in bed, other days I’m bursting with energy. I’m trying, where I can to just go with my mood rather than force myself to do things. Over the weekend the sun shone a little and I managed to leave the house and take the dog for a short walk on the field by my house. Along one shady side of the field is a path which in the spring in fringed with wild garlic. I can never resist pulling a few leaves and taking them home to make wild garlic scones or something equally lovely with them. Whilst it was quiet, I grabbed a handful of wild garlic, then headed home to bake some wild garlic and Parmesan focaccia, because everyone else is baking bread during lockdown, so why shouldn’t I?

Recipe: Wild Garlic and Parmesan Focaccia

Focaccia is a pretty simple bread to make, it just takes quite a lot of time. From picking my wild garlic, to pulling my bread out of the oven took the best part of five hours, but it was five hours very well spent. Before I began I checked in with my lovely Italian friend, Sherwin. He is a keen baker and gave me some top tips for tip top focaccia. His advice was as follows…

Focaccia is a high hydration dough so it is sticky and wet. Use oil instead of flour when hand kneading the dough on a work surface and preferably a slow first rise of 12 hours in the fridge, but an hour at room temperature will do. Use well oiled hands  when transferring and shaping the dough into a baking tray making sure not to knock out too much of the air. You can put rosemary, olives, cherry tomatoes, courgette or cheese. Enjoy!

I followed his excellent advice. I chose to prove my dough for an hour in the warmth of my bedroom and then topped it with wild garlic and Parmesan. The result was like the best garlic bread you’ve ever had.

Wild Garlic and Parmesan Focaccia

Ingredients
500g strong white bread flour
1 and a half teaspoons of salt
2 sachets dried easy blend yeast
Olive oil, lots
400ml cold water
More olive oil for drizzling
20g wild garlic leaves, washed and finely chopped
30g finely grated Parmesan
A sprinkle of sea salt
Freshly ground black pepper

Recipe: Wild Garlic and Parmesan Focaccia

Method
Place the flour, salt, yeast, olive oil and the water into a large bowl. Gently mix together with your hand to form a dough, then knead the dough in the bowl for five minutes.

Next you need to stretch and knead the dough by hand in the bowl for about five minutes.

Tip the dough onto a very well oiled work surface and then knead some more for about five more minutes. Put the dough back into the bowl, cover and leave somewhere warm to rise until doubled in size, this takes about an hour. I put mine on my bed as my bedroom is the warmest room in the house, but whatever works for you.

Line a large baking tray with baking paper. Tip the dough out of the bowl and flatten the dough onto the tray, push the dough into the corners, cover with a large plastic bag or cling film, making sure it does not touch the top of the dough, then leave to prove for one hour.

Preheat your oven to 220C or Gas mark 7.

Using the tips of your fingers, dimple the focaccia all over, so it is covered in little dents. Sprinkle over the wild garlic and Parmesan, adding a generous twist of freshly ground black pepper and some sea salt. Drizzle over some more olive oil and then put in your pre-heated oven for 20 minutes.

Once it’s baked and out of the oven; drizzle with a little more olive oil and it’s ready to eat, hot or cold.

It is the most delicious bread I’ve made and if you can get your hands on some wild garlic, it’s well worth making yourself.

If you enjoyed this, you might also like to try these wild garlic pesto twistswild garlic pesto or these wild garlic and cheese scones.

Recipe: Wild Garlic and Parmesan Focaccia

Recipe: Easy Easter Chocolate Tart

One of my favourite (and incredibly easy) things to make is an indulgent chocolate tart. Made with dark chocolate it is a delicious and pretty adult dessert. If dark chocolate isn’t your thing, you can swap it out for milk chocolate and enjoy a more family friendly pudding. I’ve jazzed up my usual chocolate tart for Easter and, well it was so popular that is disappeared within the hour!

Easter is undoubtedly a time for chocolate. If you can’t indulge your sweet tooth now, then when can you? This chocolate tart is really very simple to make, especially if you cheat and buy ready made pastry, and would be fun for kids to join in with too.

Recipe: Easy Easter Chocolate Tart

Easy Easter Chocolate Tart

Ingredients:
For the pastry –
4oz plain flour
2oz butter, cubed
A pinch of salt
2-3 tablespoons of cold water
-or- a packet of ready rolled shortcrust pastry

For the filling –
150g single cream
2 tablespoons of sugar
150g good quality dark chocolate, or milk chocolate if you prefer

2 bags of mini eggs to decorate, 3 if you’re a nibbler!

Recipe: Easy Easter Chocolate Tart

Method:
Tip the flour, salt and butter in a large mixing bowl. Using your fingers, rub the butter into the flour until it looks like breadcrumbs. Use a knife and stir in just enough cold water to bind the dough together. Do this gradually as you don’t want your pastry to be too wet. Once you’ve made the dough, cover the bowl and chill it in the fridge for 15 minutes or so before rolling out.

Or if you’re using shop bought, ready rolled pastry, take it out of the fridge about half an hour before you want to use it.

Pre-heat your oven to gas mark 5 or 190°

Take your pastry and roll it out to the thickness of a pound coin. You can either roll it out on a floured surface, or between two pieces of baking parchment. I find the baking parchment method quicker and a lot less messy.

Grease a 20cm tart tin and carefully put the pastry in the tin, pressing it against the sides. Let the pastry hang over the sides of the tin, you can trim it later. Prick the base all over with a fork. Top the pastry with a sheet of baking parchment and cover with baking beans, bake in your pre-heated oven for 10 minutes.

Remove the baking beans and parchment and pop back in the oven for another 8 minutes. Remove from the oven and leave to cool. Once cool, carefully with a sharp knife trim the pastry so it is flush with the top of the tin.

While your pastry is cooling, warm up your cream and sugar in a saucepan. Finely chop the chocolate and once the cream is simmering, turn off the heat and add the chocolate to the pan. Leave for a minute and stir until the mixture is smooth, like really thick hot chocolate.

Carefully fill the tart case with the melted chocolate mix, level it off and make an artistic swirl or ripple on the top if you want. Decorate with your mini eggs however you want. Put your tart in the fridge for a minimum of two hours, or overnight if you wish.

This chocolate tart is very, very rich, so a little goes a long way. It also makes an excellent pudding for Easter!

If you enjoyed this recipe, you might like these mini egg cookies or these peppermint crunch slices!

Recipe: Easy Easter Chocolate Tart

Vegetarian Recipe: Aubergine Bruschetta

AD/Complimentary ingredients. Aubergine is probably one of my favourite vegetables. Admittedly it took me a while to warm to it, if it’s not cooked properly it can be pretty disgusting. These days I am probably cooking with aubergine once a week. My recipe for imam bayildi is a firm family favourite, as well as the delicious dip, ikra, but I’ve also added Aubergine Parmigiana to my repertoire.

If I’m cooking a casual lunch for friends, I like to make a few simple things to go with a big salad. One of my favourite things to make are these tasty aubergine bruschetta. They’re packed full of vegetables, they’re pretty healthy and they always go down a storm.

Vegetarian Recipe: Aubergine Bruschetta

This week I ordered a Local Box from Creamline Diaries. With the Creamline Best of Local Box scheme, you can get brilliant locally produced food from independent producers delivered to your door. The meat is from my local butchers, the bread is from a fantastic local baker and fresh fish from the fishmongers. The fruit and veg are fresh from the market each day and you can even stock up your store cupboard. 

Vegetarian Recipe: Aubergine Bruschetta

My Creamline box was brilliant and contained pretty much everything I needed to make this delicious aubergine bruschetta. It’s just the thing if you want to shop local, but don’t really have the time to visit all your local shops, or if you just can’t carry all your shopping home. 

Aubergine Bruschetta

Ingredients:

1 large aubergine
1 medium onion, finely diced (I prefer red, but a white onion works too)
2 cloves of garlic
1 pepper, finely diced. It’s traditional to use green, but I used red for colour
Olive oil
12 ripe cherry tomatoes, quartered
Big handful of chopped parsley
Tomato purée, if you think it needs it
1 teaspoon of sugar
Salt & pepper
Ciabatta bread
A ball of mozzarella cheese.

Method:

I find it best to chop all the veg before I start cooking, so finely dice your onion and pepper, quarter your cherry tomatoes and put to one side while you prep the aubergine. Cut the aubergine in half lengthways and finely dice one half. With the other half, slice lengthways it in thick, 1cm slices.

Add a generous glug of olive oil to a deep sided frying pan, add the onions, pepper and aubergine and begin to soften the veg. This should take around half an hour on a low heat, stir occasionally. Add a splash of water to help the veg soften. After you’ve been cooking this for around 15 mins, add your tomatoes, garlic and a generous amount of salt and pepper. It’s cooked when all the veg are soft and the aubergine is melty and isn’t woolly. Once cooked, throw in a handful of chopped parsley and stir.

Vegetarian Recipe: Aubergine Bruschetta

As ever, taste the aubergine and add more seasoning if you think it needs it. I sometimes add a little bit of chilli sauce to add a bit of spice, but that’s up to you.

Meanwhile, take your aubergine slices and put them on a baking tray, add a very generous amount of olive oil and cook in a 200c oven, loosely covered in foil until they are soft and floppy, this will take about half an hour, turn them over about half way through.

To assemble your aubergine bruschetta, toast or griddle thick slices of ciabatta brushed with olive oil, top with your aubergine and veg mix, then artfully decorate with your slices of aubergine, some torn mozzarella and a sprinkle of chopped parsley. You can eat this hot or cold, though I like them still warm, but not piping hot.

For more information about Creamline Dairies, visit their website.

Vegetarian Recipe: Aubergine Bruschetta

Note, we were sent this box in exchange for a blog post mentioning the box scheme.