Crafts: How to make a Christmas Button Wreath

If you’re looking for a simple but quite beautiful Christmas craft, then this is probably it. These lovely Christmas button wreath decorations are really simple to make and look great hanging on a tree. Not to mention, if you’re making them with the kids, then it’s excellent for their fine motor skills!

A few years ago I made a selection of button Christmas decorations, and each year when I hang them on the tree, I continue to be impressed by them. They’re so simple to make, but look really quite cool.

Crafts: How to make a Christmas Button Wreath

I have billions of buttons, so one quiet afternoon, I decided to try my hand at a simple Christmas button wreath decoration. I thought it would look pretty good on the tree and I was not wrong. They really are simple to make and you can make it as colourful or traditional as you want. Here’s how I made mine.

How to make a Christmas button wreath

You will need:
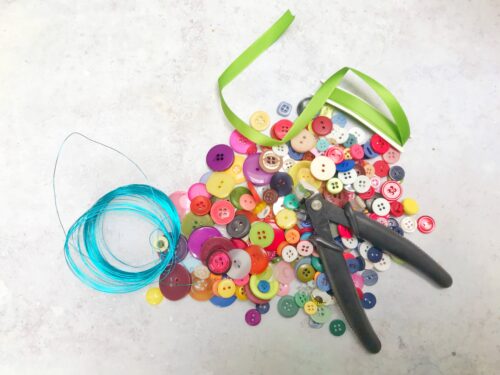
70-100 buttons in whatever colours you want
A length of craft or jewellery wire
Wire cutters (optional)
Ribbon for a bow and for hanging

Making your Christmas button wreath –

Start off by cutting a length of wire approximately 25cm long. Put a little bend in one end to stop the buttons slipping off.
buttons

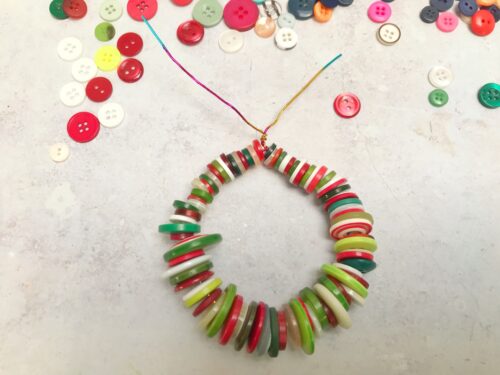
Next you can start threading the buttons onto the wire. I did this in red-green-white order, but you can use whatever colours in whatever order you want. My Christmas colour palette is very traditional, but yours can be as colourful as you like.

Once you’re threaded your buttons onto the wire and you’re happy with how they look (I tried to put the smaller buttons at each end and the larger ones in the middle), it’s time to tie it off.
Crafts: How to make a Christmas Button Wreath

Take both ends of the wire and twist them together so the buttons can no longer slip off. Twist them together tightly, you may need to snip off the excess wire with your wire cutters. If you can, tuck the ends under and between the buttons so they are out of the way.

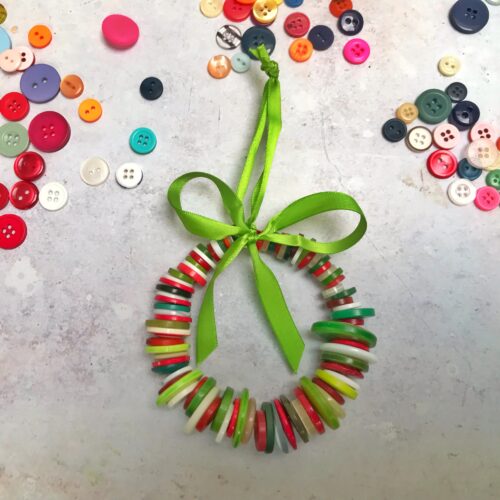
Gently pull the wire and buttons into a circle shape to make the wreath, this shouldn’t take very much effort at all.
Crafts: How to make a Christmas Button Wreath

Next take a length of ribbon and tie it around the top of the wreath, tucking in the ends of the twisted wire. Tie the ends of the ribbon with a firm knot to make a hanging loop. Take another length of ribbon and tie a nice bow at the top of the wreath. It should now be ready to hang on your tree.

If you enjoyed this, you might also like to try –

Crafts: How to make a Christmas Button Wreath

Christmas Crafts: How to make Pretty Paper Baubles

It’s the week before Christmas and I’ve got a million things to do. One of them is to plan some things for me and the boy to do on Friday. We have a whole day to ourselves before the madness begins, and he’s already requested crafts and baking. Those I can do. I’ve been wanting to try to make some paper baubles for a few weeks, I finally had the chance this morning.

These paper baubles are so simple to do, but they look pretty smart and I’m sure they cutting and sticking will appeal to my son. Paper bauble making will definitely be on our agenda for Friday.

Christmas Crafts: How to make Pretty Paper Baubles

How to make Pretty Paper Baubles

You will need:

Coloured or patterned paper
A glass
A pencil
Scissors
A glue stick
A length of ribbon

How to make Pretty Paper Baubles:

You’ll need coloured paper, I used plain red paper and a patterned red paper which I thought would work well together. On your coloured paper, draw around the rim of the glass to make a circle. You’ll need at least 8 circles to make your bauble.

Cut your circles out and fold them in half. If you’re using patterned paper, the pattern needs to be in the inside of the fold.

Christmas Crafts: How to make Pretty Paper Baubles

Using the glue stick, glue the folded halves together; if you’re using plain and patterned paper, alternate them. Make sure your circles are well stuck together, you might want to press them under a heavy book for half an hour to make sure they’re firmly glued together. I found it best to make two halves of the bauble before putting the ribbon on.

To fix the ribbon in place, give the inside half of one side of your bauble a really good rub with the glue stick. Lay your ribbon in place and having given the other half of the bauble a good rub with the glue stick, press the two sides together. Your bauble is complete and ready for hanging up on the tree.

It’s as simple as that!

If you enjoyed this, you might also like to try –

How to make Pretty Paper Baubles

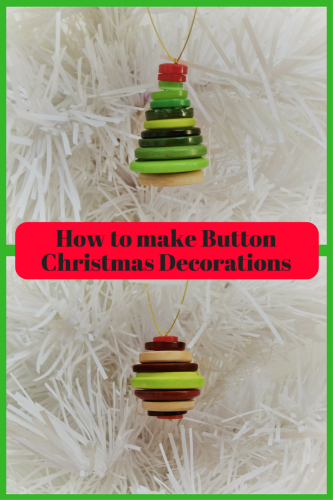
Crafts: How to make Button Christmas Decorations

If you’re looking for a simple but quite beautiful Christmas craft, then by Jove I think I’ve got it! These lovely button Christmas decorations are really simple to do and look great hanging on a tree.

I belong to a craft group and we are always on the lookout for interesting things to make and do on our craft evenings. We spotted a picture of some button Christmas decorations and thought we would give them a try. All we needed were a huge box of buttons, some craft wire and a bit of patience to experiment.

Crafts: How to make Button Christmas Decorations

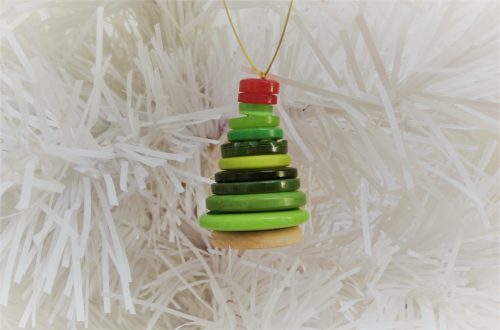
How to make a button Christmas Tree

You will need – 
A selection of buttons, mostly green in different shapes and sizes
Fine jewellery or craft wire

Method –
Sort a selection of buttons to make your tree. You’ll need something to be the tree trunk at the bottom, I used two wooden buttons. You will also need green buttons in decreasing sizes and in a variety of shades of green.

I found it best to find the right buttons and lay them out in order before threading them onto the fine wire.

Take a length of fine jewellery or craft wire, approximately 8 inches in length. Double up the wire and thread one end through one hole on your base button and the other end through the opposite hole. Do the same with all the buttons in your Christmas tree stack until your Christmas tree is complete.

Top your tree with a brightly coloured button, or a star-shaped button if you have one. If you’re happy with your tree, tie a knot on the last button and another knot in the ends of the jewellery or craft wire to create a hanging loop.

Crafts: How to make Button Christmas Decorations

How to make a button Bauble

You will need – 
A selection of buttons, in various colours, shapes and sizes
Fine jewellery or craft wire

Method –
Sort a selection of buttons to make your bauble. You’ll need to play about with your buttons a little to find a selection of matching buttons. You’ll need one fairly big central button, then some matching ones in various sizes and colours.

I found it best to find the right buttons and lay them out in order before threading them onto the fine wire.

Take a length of fine jewellery or craft wire, approximately 8 inches in length. Double up the wire and thread one end through one hole on your base button and the other end through the opposite hole. Do the same with all the buttons in your Christmas bauble stack until your bauble is complete.

If you’re happy with your bauble, tie a knot on the last button and another knot in the ends of the jewellery or craft wire to create a hanging loop. Easy.

These are a lovely, easy craft to make. One of my craft group friends also make a button Santa and a button snowman, but I’m all out of buttons ad I need to go and buy some more so I can make some more button Christmas decorations.

Check out my other craft tutorials here!

Crafts: How to make Button Christmas Decorations

Christmas Crafts: Make your own Glitter Tape Baubles

Christmas crafts are my favourite kinds of crafts. There’s something really lovely about sitting down with my son and making decorations for the tree, or little gifts for people. I’m always on the look out for new products to craft with and when I saw the Sellotape Glitter Tape I knew straight away they would be perfect to make some Glitter Tape baubles with.

Sellotape are currently celebrating their 80th anniversary and they very kindly sent me some craft goodies to have a little play with. I love this vintage style Limited Edition Sellotape tin too. Perfect for holding some little crafty bits and bobs once I’ve used all the tape!

Sellotape began life in 1937 and has been used in a wide variety of applications since then. It became a regular at the crafting table in the 1970s when it was used fairly extensively on Blue Peter. This iconic sticky tape is a year round essential, not only for wrapping presents, but for all manner of crafting and DIY jobs around the home.

Christmas Crafts: Make your own Glitter Tape Baubles

In my hamper of Sellotape goodies was an assorted pack of glitter tape. I really liked the different designs and it seemed a waste of something so glamorous to use the tape for just wrapping presents.

The glitter tape tears really easily, so you don’t need scissors or a dispenser to use it. It was beautiful and shimmery, so I thought I’d see how it worked on a bauble.

The tape sticks really well to the styrofoam ball, but slightly raises at the edges, which creates an effect I actually really quite like. But if the cracked ice on a frozen lake look isn’t your thing, then you could paint it all over with PVA glue to seal it all down.

Christmas Crafts: Make your own Glitter Tape Baubles

What I especially liked about this glitter tape was that the glitter stays on the tape. Not a speck of the sparkly stuff came off on my fingers, clothes or ended up shimmering on my face for three days. This sellotape glitter tape is really good stuff!

Make your own Glitter Tape Baubles

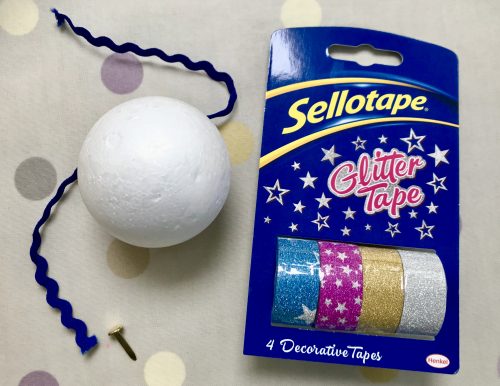
You will need:
A roll of sparkly glitter tape
One styrofoam ball
Ribbon
Brass paper fastener

How to make your Glitter Tape Baubles
The Sellotape glitter tape is easy to tear by hand. Tear small pieces of tape and stick in random places all over the styrofoam ball. Make sure the ball is completely covered in the tape; cup the ball in your hand and squeeze it to make sure the tape is in place.

Using the brass paper fastener; pierce the ribbon and create a hanging loop with your ribbon and press the fastener into the top of our bauble. Hang on your Christmas tree and enjoy.

Remember the tape does curl a little on the edges, but it doesn’t come off. I’ve had my bauble hung up for a couple of days and it looks the same.

Christmas Crafts: Make your own Glitter Tape Baubles

I really like my Glitter Tape Baubles, they’re a bit different and look quite stunning when the light catches them. I enjoyed working with the glitter tape, which does not shed and tears really easily. Watch this space for more Christmas craft ideas!

Christmas Crafts: Make your own Glitter Tape Baubles

We were sent a small hamper from Sellotape in return for this blog post. All images and opinions are our own.