Easy recipe: Homemade Chocolate Jazzies

A few weeks ago I was mooching around one of my local charity shops when I spotted a silicone baking mold for a pound. They can be quite expensive, so I snapped it up and took it home. I think it was originally designed for small cupcakes or muffins, but this had homemade chocolate jazzies written all over it.

As a working from home mum I am often called upon to help entertain a child or two for the odd day during the school holidays. I don’t mind this as for me it’s probably easier to entertain two seven years olds, than one seven year old who is just so “boorrEDDD” of my company. I like to have a few crafts, activities and bakes up my sleeve to entertain any young visitors we may have; so I thoroughly cleaned my silicone mold and tucked it away for a rainy day.

Easy recipe: Homemade Chocolate Jazzies

As a keen baker I always have a good variety of sprinkles in my cupboard. For some reason kids love sprinking almost as much as eating the sprinkles. I had quite a few little jars which probably needed using up. Making homemade chocolate jazzies is a really good way of using them up. You could give each child a different kind of sprinkle so they know which jazzies are theirs, or they can mix and match.

I made some sparkly chocolate cups for Mother’s Day back in the spring, they are very similar to those, but slightly smaller and with billions more sprinkles.

Homemade Chocolate Jazzies

Ingredients:
250g of milk chocolate
Cake decorating sprinkles, stars, silver balls, whatever you fancy

You will need:
A saucepan, a glass bowl which will sit in the pan, but so it doesn’t touch the bottom; a metal spoon, silicone baking molds.

How to make your chocolate jazzies:
Boil some water and pour the water into your pan so it’s about 3cm deep. Carefully place the glass bowl in the pan making sure the bottom of the bowl doesn’t touch the water. This is called a bain marie.

Break your chocolate up into small pieces and put it in the glass bowl. The water in the pan needs to be at a gentle simmer, not bubbling and boiling. Stir the chocolate until it is melted.

Easy recipe: Homemade Chocolate Jazzies

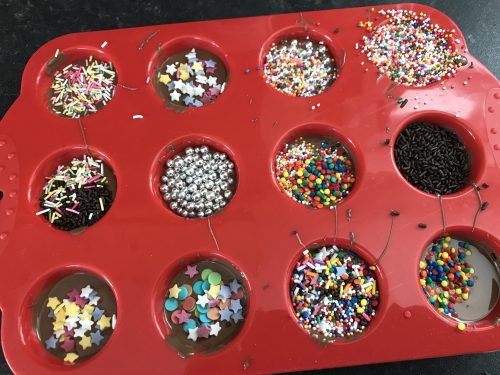
Once the chocolate is melted, with a spoon scoop out some melted chocolate into each of the molds. Try and put an equal amount in each. If you’re good at this there might be just enough left over for some spoon licking afterwards. Gently shake the silicone tray so the chocolate settles.

Once you’ve used all of your chocolate, take your chosen sprinkles and sprinkle as much or as little as you like over the top of each chocolate. Leave them to cool for at least two hours. If you need them to set a bit faster for impatient boys, pop them in the fridge.

Easy recipe: Homemade Chocolate Jazzies

To serve, make sure they are properly set and carefully pop them out of the molds. You might want to be careful and tip them out onto a tray or over a dish to catch any excess sprinkles. We had many excess sprinkles because the boys were very enthusiastic about the sprinkling.

Easy recipe: Homemade Chocolate Jazzies

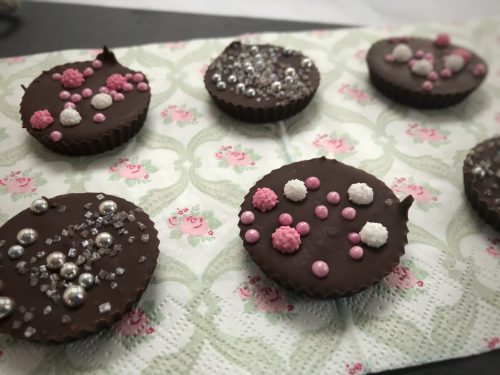
The homemade chocolate jazzies went down an absolute storm. The boys really enjoyed making them. They’re incredibly simple to do and they also really enjoyed eating them and sharing them too. My chocolate jazzie experiment was a success!

PS. If you’re wondering they they’ve got blue hands, we played with blue slime while the jazzies set and the slime coloured their hands for the day. They do have clean hands, I promise!

Easy recipe: Homemade Chocolate Jazzies

Easy Recipe: Sparkly Chocolate Cups

I love getting homemade cards and gifts from my son on Mother’s Day (and any other day he wants to make me something). As you can probably imagine, we’re quite big on baking at home and we bake for almost any occasion. I’m a firm believer in making life easy for myself. Whilst I’m happy to bake a fairly complex cake, there’s definitely space in my kitchen for incredibly simple recipes. I’ve made these Sparkly Chocolate Cups for Mother’s Day. They’re very, very easy to make and perfect for kids to make with a little adult supervision.

Easy Recipe: Sparkly Chocolate Cups for Mother's Day

Not only are they great for kids to make, if you lack confidence in the kitchen, these are so easy to make and look pretty impressive too.

Sparkly Chocolate Cups

Ingredients:
250g of good quality dark or milk chocolate
Cake decorating sprinkles, stars, silver balls, whatever you fancy

You will need:
A saucepan, a glass bowl which will sit in the pan, but so it doesn’t touch the bottom, a metal spoon, some cupcake cases – I used silicone but paper ones are fine.

How to make your chocolate cups:
Boil some water and pour the water into your pan so it’s about 3cm deep. Carefully place the glass bowl in the pan making sure the bottom of the bowl doesn’t touch the water. This is called a bain marie.

Break your chocolate up into small pieces and put it in the glass bowl, the water in the pan needs to be at a gentle simmer, not bubbling and boiling. Stir the chocolate until it is melted.

Once the chocolate is melted, with a spoon scoop about two dessert spoons of melted chocolate into each cupcake case. Gently shake each one so the chocolate settles.

Once you’ve used all of your chocolate, take your chosen sprinkles and sprinkle as much or as little as you like over the top of each chocolate. Leave them to cool for at least two hours.

Easy Recipe: Sparkly Chocolate Cups for Mother's Day

Once they’re cool you can either take the chocolates out of their cases and put them in a nice gift box or cellophane bag, or you could just present them as they are in their pretty cupcake cases.

They’re so easy to make and they look impressive, whoever you give these to will be as pleased as punch!

If you enjoyed this recipe, you might also like these super-easy love heart jam tarts.

Easy Recipe: Sparkly Chocolate Cups for Mother's Day

Easy Recipe: Love Heart Jam Tarts

Jam tarts are most people’s introduction to baking. I remember standing on a stool in my Grandma’s kitchen watching her roll the pastry out, I’d help her cut out pastry rounds and I’d spoon jewel coloured jam into the tarts. Waiting for the jam tarts to cool once they’d come out of the oven was torture.

I still love jam tarts today. These days I usually bake them with my son; him stood on the stool, spooning jam and waiting impatiently. They’re one of the easiest things to bake and are ideal if you’re baking with kids or if you’re a novice wanting to take your first steps into baking.

Easy Recipe: Love Heart Jam Tarts

I’ve jazzed these simple tarts up for Valentine’s Day. The addition of a heart makes these jam tarts whimsically romantic. Of course your tarts will be perfectly delicious without the pastry heart, but if you can’t push the boat out a bit for Valentine’s Day, when can you?

Love Heart Jam Tarts

Ingredients (makes 12 -15 tarts)

4oz plain flour
2oz butter, cubed
A pinch of salt
2-3 tablespoons of cold water
-or- a packet of ready rolled shortcrust pastry

Half a jar of strawberry or raspberry jam
Milk or a beaten egg to brush your pastry with
Extra butter for greasing your baking tray

Method

Put the flour, salt and butter in a large mixing bowl. Using your fingers, rub the butter into the flour until it looks like breadcrumbs. Use a knife and stir in just enough cold water to bind the dough together. Do this gradually as you don’t want your pastry to be too wet. Once you’ve made the dough, cover the bowl and chill it in the fridge for 15 minutes or so before using.

Or if you’re using shop bought, ready rolled pastry, take it out of the fridge half an hour before you want to use it. 

Pre-heat your oven to gas mark 5 or 190°

Take your pastry and roll it out to the thickness of a pound coin. You can either roll it out on a floured surface, or between two pieces of baking parchment. I find the baking parchment method quicker and a lot less messy.

Grease your bun or muffin tin with butter and cut your pastry into rounds. Gently press each round into the tin and prick the bottom of each one with a fork. With the remainder of the pastry, cut out enough heart shapes to top each of your tarts.

Carefully put a spoon of jam in each tart. Do not over fill the tarts as the jam will bubble up and ruin your hard work.

On a separate baking sheet, place a piece of baking parchment and lay your heart shapes flat, brush them with a little milk or beaten egg and put your hearts and your tarts in the oven for 12-15 minutes.

Once cooked and your hearts are golden, remove from the oven and quickly but carefully place a heart on the top of each tart. Gently press it in place taking care not to touch the hot jam with your fingers. Leave to cool for a few minutes before removing the tarts from the tray and putting them on a wire rack to cool.

Easy Recipe: Love Heart Jam Tarts

As you can see, my jam tarts didn’t come our perfectly round this time; but a rustic, imperfect looking jam tart is still a delicious jam tart.

These jam tarts with a heart are a simple way to share the love this Valentine’s Day. Who will you bake with love for this year?

Easy Recipe: Love Heart Jam Tarts