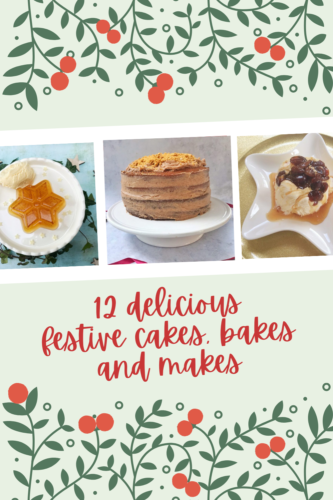
I was chatting about baking to a mum in the playground yesterday, we discovered a shared love of fairly unusual continental recipes, the kind Paul and Pru would give to Bake Off contestants to try and baffle them into submission. It got me thinking about some of my favourite things I’ve baked and blogged, so I thought I’d choose 12 of our favourite festive cakes, bakes and makes and give them another airing.
I promise you they’re all easy, I lack the patience, time and skill to do anything too fancy and time consuming; but they’re all delicious.
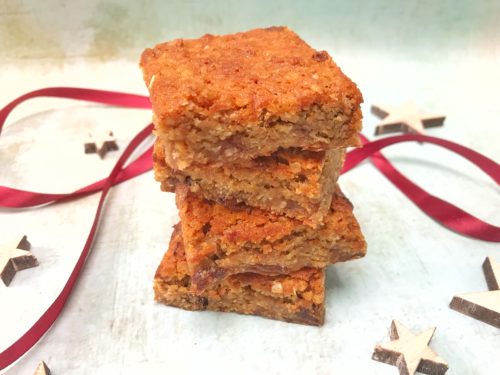
Mincemeat Flapjack
One of the most enduring and classic flavours of Christmas is mincemeat. Mince pies are an undeniable Christmas classic, but I’ve been throwing mincemeat into cakes and vol au vents for a few years now. It’s too good an ingredient just to use in little pies. So I baked a hearty batch of mincemeat flapjack and they all but disappeared in an afternoon. They’re simple, they’re filling and most of all, they’re delicious.
Lebkuchen Cake
Traditionally a moreish soft biscuit, I decided to attempt a German Lebkuchen Cake with considerable success. The recipe is easier than it looks to make and the results are truly scrumptious. It’s one of our favourite festive cakes!

Danish Butter Cookies
Because to me, and other children of the 80’s, Danish Butter Cookies are forever linked to Christmas, it’s at this time of year I tend to make them the most. A batch of cookies neatly wrapped in brown paper, or in a decorative bag or box make a lovely little edible gift for someone.

Joulutorttu
Traditionally Joulutorttu are made with puff pastry and a special Finnish prune jam. However I made mine with a Christmas preserve, but it does need a good firm set jam. Try plum or prune conserve for authenticity. They look a bit tricky to make, but it’s ready-roll puff pastry and jam and a bit of arty twisting of the pastry.

Chocolate Dipped Candied Orange Slices
I like to make a big batch of these chocolate dipped candied orange slices at Christmas and give little bags of them as presents for people. They’re also a really nice treat to take away on holiday to nibble with a nice glass of good red wine in the evening.

Mincemeat Filo Rolls
I do love mince pies, but sadly the pastry doesn’t love me. Instead of the usual shortcrust pastry pies, I make these alternative mince pies, with filo pastry and in the style of a spring roll. These Mincemeat Filo Rolls were really, really lovely.

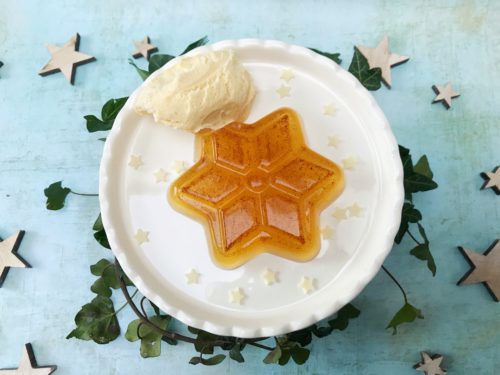
Mulled Cider Jellies
Sometimes, and this is not very often, I mull too much cider and I’ll have some left. Sure, I could heat it up again later, but I fancied making something different with it. I thought I’d make some Mulled Cider Jellies. It turns out they make a really interesting, different and delicious festive dessert. You could make them just as well with apple juice if you’re serving them to children or people who don’t drink alcohol. It’s a very pretty dessert and just a bit different.
Christmas Pudding Ice Cream
This is an incredibly easy dessert, imagine a rich vanilla ice cream topped with Courvoisier soaked festive fruits. It’s utterly delicious, you can whip it up the night before, or make it up to a month ahead of the big day. It is delicious, incredibly simple and uses only four ingredients. I think we’ve found a winner!

Sticky Ginger Sponge Cake with Cinnamon Frosting
I love a bit of ginger cake and at this time of year it’s a lovely warming bake to make for the family. It’s sticky and spicy and you can dress it up for Christmas, or dress it down for every day cake eating if you prefer. This sticky ginger sponge cake with cinnamon frosting is special enough to serve for an occasion, or you could glitz it up a bit more and serve it as an alternative Christmas cake. It’s about as easy as can be.

Cranberry and Pomegranate Jelly
Puddings at Christmas time can be a bit on the heavy side. All that booze soaked fruit and extra thick cream can get a bit much; plus if you’re feeding the whole family, Christmas pudding is not a universally popular choice. What is always, always popular is jelly. This is a jelly that everyone in the family can enjoy – cranberry and pomegranate jelly!

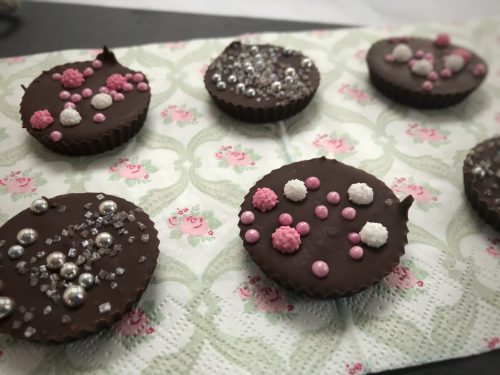
Peppermint Bark Buttons
Homemade treats make for really lovely gifts at Christmas. These Peppermint Bark Buttons are really fun to make and they’re delicious too.

Cinnamon & Raisin Shortbread
I originally created this shortbread recipe in 2013 in celebration of the Great British Bake Off; it’s been a favourite ever since. Cinnamon and raisin are a great combination and this lovely crumbly shortbread is a great bake all year round.

So that’s my little round up of my 12 of our favourite festive cakes, bakes and makes. What are your favourite favourite festive cakes, bakes or makes?