Summer Recipe: No Churn Plum Ice Cream

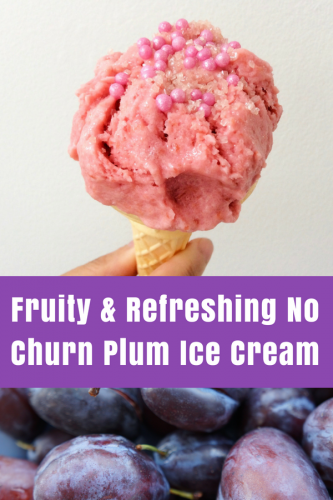
July is National Ice Cream Month and there’s no better month of the year to sit in the sunshine and eat a cool refreshing ice cream. We have two plum trees in our garden and each year we have more plums than we can cope with. In years gone by I’ve made plum tarts and crumbles and big batches of plum jelly. This year I put some aside to make a batch of fruity and refreshing plum ice cream.

This plum ice cream recipe is quite simple to make and you can do it even if you don’t have an ice cream maker. Sadly as we began to churn our first batch of this lovely ice cream, our ice cream maker churned its last and ended up in the bin.

I’ve called this no churn plum ice cream, but you can churn it if you want, it’s often easier if you have an ice cream maker, but not the end of the world if you haven’t.

Summer Recipe: No Churn Plum Ice Cream

No Churn Plum Ice Cream

Ingredients:
400g of ripe plums
200g caster sugar
200mls double cream
200mls vanilla yoghurt

Method:

Take your plums and give them a wash and check them over for nasties and rotten bits, discard if you’re not happy with the fruit. Use good ripe, juicy plums. Heat the plums in a large saucepan with a good splash of water. Boil them until soft, then rub them through a sieve to get rid of the stones and skins.

Pour the plum purée back into a clean pan and warm gently, add the sugar and stir until it has dissolved. Taste the purée, add more sugar if you think it needs it. Some plums can be quite tart. Leave the mixture to cool.

If you have an ice cream maker, add the cream and vanilla yoghurt to the purée and combine. Following the instructions on your ice cream maker, add the plum ice cream mixture and churn until it’s ready. Them store it in the freezer until you’re ready to use it.

If you’re not using an ice cream maker, perhaps because yours suddenly died; whip the cream before adding the vanilla yoghurt and the plum. Pour the ice cream mixture into a large tub with a secure lid and put it in the freezer. Remember to take it out of the freezer every 45 minutes or so and give it a good stir with a fork, this will stop ice crystals from forming.

Once your ice cream is frozen, it will be quite set, when you need a scoop or two, take it out of the freezer about 15 minutes before you need it, it’ll be easier to scoop!

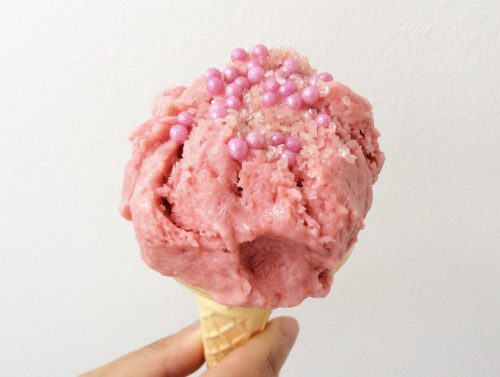
I’ve topped the plum ice cream with pink sprinkles, but crushed amaretti biscuits are just fabulous on it. Go forth and make plum ice cream with some of your summer fruit glut, you won’t regret it!

If you enjoyed this recipe for plum ice cream, you might also enjoy these recipes:

Summer Recipe: No Churn Plum Ice Cream

Grow Your Own Dinner In 6 Bite-Sized Steps

As the price of fresh produce goes up and up, more and more people are thinking about growing their own. This pastime was very popular decades ago, but now we have smaller gardens, and less time to tend to them, it has fallen out of favour. That means few of us have grown up knowing how to get started with growing our own fruit and vegetables. If you’ve never had a go at gardening in this way before, don’t panic. You can get started in 6 simple bite-sized steps:

Measure

Start by measuring just how much of your garden you’re willing to give up for growing your own. You don’t need much, and it is possible to grow some produce from just a few hanging baskets and balcony pots! It’s up to you how much you want to do, but consider how much you need to make a good meal. Each vegetable and fruit plant must be separate from the others. That’s why pots work well. Fruits like strawberries flourish in hanging baskets. What a pity they are seasonal!

Preparation

Now you know where you’re going to grow, it’s time to prepare the soil. You might have chosen to rent an allotment plot. Often, these have already been used for growing. If you know what was in there, you can choose to nurture it for next season, or turn it all over and start again. Soil needs feeding, watering and airing. A gardening fork might be enough to air it. Of course, if you’re working with raised beds or pots, you’ll do well to buy good quality soil to fill them. Make sure there is drainage.

Building It Up

If you are building raised beds, then opt for some sleepers. You can, of course, reclaim some wood if that helps. Building raised beds make gardening easier as you don’t have to be on the ground. You might have more chance at reducing the access to your produce for pests too. Raised beds can also be decorated to help keep your garden looking beautiful.

Greenhouses are ideal if you want to extend your growing season. These can be placed on any flat part of your garden. To maximise your growing season and protect what you grow, click here for more information about how a greenhouse might help. They vary in size from just a couple of metres square, to as big as you like!

Planting

Many people like the idea of planting leftover veggies and growing them up from there. In some cases, that can be the ideal way to do it. But it is important to remember that the produce you bought is of an unknown origin. You don’t know how or where it was farmed, or if that vegetable is fit and healthy to reproduce! You can buy exactly what you need from a garden centre if you want to grow your own. You’ll also find that there are ideal months and weather conditions to watch out for when you want to grow your own.

Choose wisely

You can grow carrots, tomatoes, potatoes, cabbage, peas, beans, broccoli, courgettes, cauliflower, and salad in a UK garden. That means you can put together quite a good meal from produce you grow yourself. If you use a greenhouse, you might be able to coordinate your harvest a little easier too.

As for fruit? You can grow strawberries, apples, pears, plums, raspberries, and blackberries with reasonable ease. Bear in mind that apples, pears, and plums grow on trees. These don’t fare well in pots, so you will need a good sized plot to plant them. Maturity for fruiting takes several years. Of course, you’ll be able to grow your own dessert then!

Tending and Protecting

All plants need looking after. Weeding will be your biggest gardening job once you’ve decided to grow your own. Of course, greenhouses save you from doing this almost completely. They can also be ideal for preventing the common garden pests all green fingered people hate. Slugs and snails can destroy a plant in minutes (and you thought they were slow!) Pellets can be safe when you have children and pets, but be wary of using them if you’re going organic. Natural remedies aren’t always entirely effective. Try the ones you dare, but do your research before selecting any.  

Harvest Time!

It takes trial and error to grow a good crop. Don’t be disappointed if things don’t work out the first time. You’ll soon be digging up a tasty dinner! Enjoy.

This is a contributed post.

Three risks every kitchen gardener needs to know

Once you get into growing your own food in your own garden, it can become something of an addiction. It saves you a lot of money on ingredients in meals or on simple treats like blueberries. When you grow your own food, something about it just tastes better, too. Knowing that you put the work in producing the food on your own plate is honestly more fulfilling than many expect to be, initially. But there are risks to growing your food at home that can result in all your efforts being for naught. Before you deal with the frustration of your hard work going down the drain, here are three risks, in particular, to watch out for.

Three risks every kitchen gardener needs to know

Get rid of the nibblers

Inviting some nature into the garden, whether it’s bringing in butterflies or making room with a hedgehog hut, can make the garden not only a much more relaxing and pleasant place to be. It can make it environmentally friendly, too. But if you let nature run wild, you can be certain your homegrown foodstuffs won’t last very long thanks to the pests. However, pesticides can often have a negative effect on the food you’re growing, too. Get to know which pests are likely to eat the foods you plant and find the companion plants that get rid of them. For instance, aphids are a very common concern when growing tomatoes. Aphids are repelled by catnip. Learn the pests that prove a risk to whatever you’re growing and the companion plants or predators you can introduce in the garden to keep them at bay.

Prepare for a cold snap

Planting foodstuffs is a seasonal job, and you’re best off planting when things are in-season. There’s plenty you can plant in the autumn and winter but, even then, a particularly cold snap can utterly ruin your chances of ending up with healthy vegetables. Controlling your climate with tools like Swallow greenhouses gives you some security that all your hard work won’t go down the drain because of one week’s bad weather. A little climate control allows you to have a greater variety of fresh vegetables the whole year round, too.

Keep the food healthy

Your vegetables might grow to a ripe old state no problem, but another issue is whether they’re really safe to eat or not. In urban gardening, in particular, there are risks that might make it less than trustworthy on the plate. As Treehugger suggests, there are real risks to contamination, whether it’s from the soil or the products you use on it. To minimize that risk, it’s a good idea to test the soil you want to use or even buy fresh, tested soil to create new plots. If you live by a road and you’re concerned about contaminated dust being blown in from the traffic, you can build a wall around the vegetable gardens to serve as a barrier against them, too.

Get over the three hurdles above and making your own berries and vegetables in the garden is going to be no issue at all. Now get out there and start growing.

This is a contributed post.

Easy Recipe: Plum Jelly – preserving summer

With three established plum trees in our garden we suddenly get quite popular at this time of year; people popping round on the off chance they can take a bag home to turn into a duff or a crumble or a sponge. This year has been an exceptionally good year for our plum trees and we couldn’t give the fruit away fast enough so I made a batch of plum jelly.

We used to be keen picklers and preservers (before we became parents), so I decided to make a batch of plum jelly. It’s very simple, you don’t need mad skills to make it, all you need is time and patience.

Recipe: Plum Jelly - preserving summer

Ingredients:
4.5 lbs of ripe plums (any variety)
1 pint of water
1.5 lbs of preserving sugar

Method:

  1. Halve the plums (you don’t need to remove the stones, I left most of them in, but if it popped out easily then I discarded it), and place into a very large pan. Pour in your water, put the lid on the pan and cook until the fruit has fallen apart, this should take about 10-15 minutes.
  2. Set up your jelly bag, if you haven’t got one of these don’t worry, you can put a sieve over a large bowl, line the sieve with a clean piece of muslin, this will work just as well.
  3. Once your plums are cooked, gradually ladle into the jelly bag or lined sieve and leave (preferably overnight) to drip. Don’t be tempted to squeeze the juice out as this may result in a cloudy jelly. You should get around 2 pints of juice from the plums.
  4. Put your plum juice into your very large pan with the preserving sugar and stir until the sugar melts into the juice. Turn the heat up and bring it to a low rolling boil. It’s better to take this slow and steady, than rush it and push it too far. At this stage put your clean jars in the oven to sterilise them.
  5. You should carefully taste the jelly at this stage to see if it needs any more sugar. This will vary depending on the ripeness of the fruit; remember you can always add but you can’t take away, so keep tasting. Personally I like a slightly tart jelly.
  6. Keep an eye on your plum jelly, keep stirring and you should feel it start to thicken. Scoop any foamy scum off the top (this is just impurities from the fruit and the sugar, it’s not harmful at all) and discard.
  7. Take a cold plate (if you put it in the fridge to chill, that’ll help) and put a dribble of the plum jelly on. Leave it to cool and if it sets to the consistency you want then your jelly is ready to be put in the jars; if not keep stirring and testing the jelly regularly.
  8. When it’s ready, carefully remove your jars from the oven; (they will be incredibly hot) and pour in your plum jelly. We use a wide necked funnel for this; but filling a jug and pouring it into the jar works just as well. Work quickly and carefully and get the lids on your jars while everything is still hot.

Leave to cool and and then it’s ready for slathering on crumpets.

plum jelly

Personally I like to put my jars of jewel coloured jams and jellies away until the winter months. It’s lovely to open a jar of something homemade, special and evocative of summer; just when you need the sunshine memory the most. But then I’m sentimental like that.

If you enjoyed this recipe, you might also like to try my No Churn Plum Ice Cream.

Easy Recipe: Plum Jelly - preserving summer

Planting Seeds – Gardening with kids

A little while ago I wrote that we’d ordered a shed load (literally) of gardening bits and pieces and that this year we were going to grow our own with the help of our own miniature Percy Thrower, Benjamin. We think gardening with kids is really important; it’s a great family activity and it helps them learn so much.

Last weekend when the sun shone we ventured outside to get cracking. He was helping to plant our courgette and pumpkin seeds. It’s a nice, simple job he can easily get involved with and the seeds are just the right size for little fingers to plant, and not too fiddly. gardening with kids He helped fill the little pots with compost, then we showed him how to poke and wiggle his finger in the soil to create a little hole for the seed. Then he dropped each individual seed in and covered it up; he then gave each one a good drink of water and we put the whole tray in our greenhouse and waited for them to grow.

As you can see from the photographs he really enjoyed helping Mummy and Daddy out in the garden. He’s been brilliantly helpful and watered his seeds, and now seedlings every night before bed.

Courgettes and pumpkins aren’t the only things growing in our garden, we’ve got tomatoes, potatoes, runner beans, swathes of herbs and some fruit. Alas it has been raining heavily for the last few days and so I can’t take a picture to show you how healthy everything is looking, so you’ll just have to wait for my next instalment of our grow your own adventure, or keep an eye on my instagram account where I’ll be posting some pictures when I get the chance.

I can’t wait to taste the fruits (and vegetables) of our labours.