Recipe: Delicious Armenian Red Cabbage Salad

For our wedding anniversary a few weeks ago, my husband and I went to the Armenian Taverna in Manchester for dinner. We used to go there a lot in the days before we became parents, partly because the food was absolutely fantastic and partly because my husband is half Armenian and it’s good to celebrate those roots. Together we feasted on the beautiful mezze plates and chatted like the old days. We both fought over the small but delicious portion of Armenian Red Cabbage Salad, a dish I’ve decided to recreate at home because it was that good!

Mezze is always my favourite part of any Armenian meal. I love piling my plate with little heaps of good salads and sides, with dollops of rich hummus served with still warm lavash bread. Delicious.
Recipe: Delicious Armenian Red Cabbage Salad

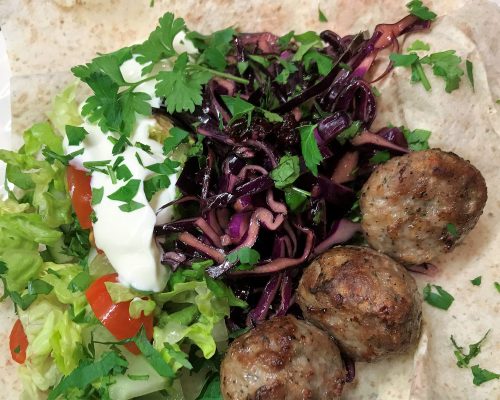
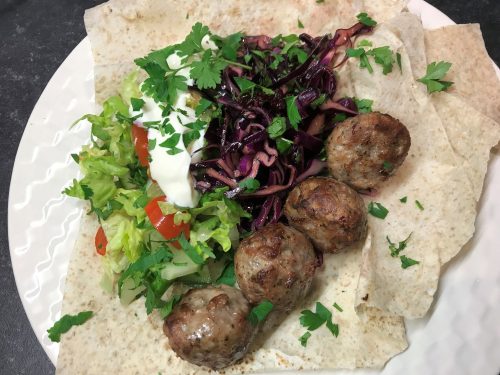
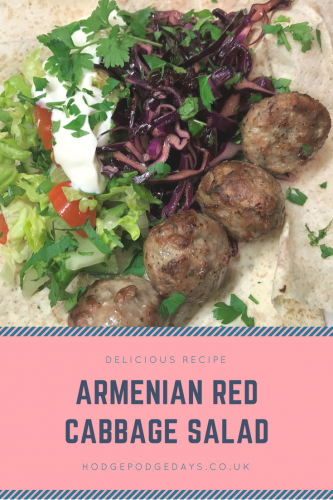
This Armenian Red Cabbage Salad is and always has been one of my favourite dishes. The salad is really simple to make and keeps for a few days in the fridge. I like to make a big bowl of it and serve it with almost anything. We had it this week with lamb koftas with a little salad and some lavash bread. It was so good I polished the rest of the bowl off for lunch.

It is better if you can make it the day before you need it as it really allows the flavours to develop. It’s so simple and I think a really flavoursome and slightly healthier alternative to coleslaw.

Armenian Red Cabbage Salad

Ingredients
1 small red cabbage, or half a large one
1 dessert spoon of caster sugar
2 dessert spoons of Balsamic vinegar
1 dessert spoon of good olive oil
A handful or sultanas or craisins
A good handful of fresh flat leaf parsley, finely chopped
Salt & pepper
Walnuts, optional

Method
Finely slice your red cabbage and toss in a bowl to separate all the slices. In a small jar add your sugar, balsamic vinegar, olive oil and some seasoning. Put the lid on the jar and shake it hard until it is well combined.

Pour the dressing over the red cabbage, add in your handful of sultanas or craisins and stir. Give the salad a taste and add more seasoning if you think it needs it. Cover the bowl and put in the fridge overnight.

Before serving, remove from the fridge and leave it out for an hour or so to bring it up to near room temperature. Stir through the chopped parsley and taste again to check the seasoning, adjust if you think it needs it. If I have any walnuts I sometimes like to chop them up a little and throw them into the salad too.
Recipe: Delicious Armenian Red Cabbage Salad

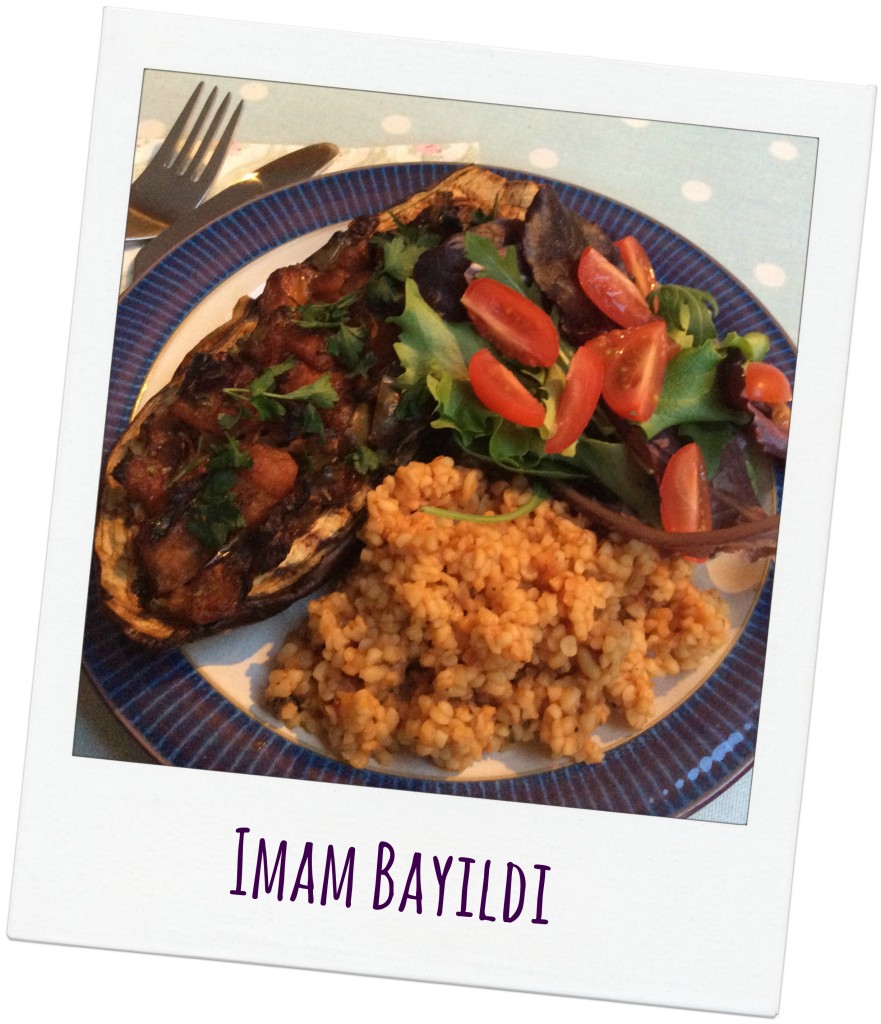
Serve however you want. We like our Armenian Red Cabbage Salad served with a mezze lunch or it’s great with lamb or this traditional Armenian Imam Bayildi recipe. This Armenian Red Cabbage Salad hits so many delicious sweet, sour and crunchy notes, I’m sure it’ll become a family favourite of yours too!
Recipe: Delicious Armenian Red Cabbage Salad

Recipe: Microwave Lemon & Thyme Sponge Puddings

A couple of years ago I made a bit of a breakthrough in making quick puddings for my family. I made a jam sponge in the microwave and that’s been our go to speedy pudding at home for a little while. As much as we all love jam sponge (and we really love jam sponge) I thought it was time to ring the changes. This weekend I made Lemon & Thyme Sponge Puddings in the microwave and they were really rather good. Good enough to give to guests who think you’re more Mary Berry than you actually are.

Easy Recipe: Microwave Lemon & Thyme Sponge Puddings

These fab little puddings are great to throw together in a hurry and take just 3 minutes to cook in the microwave. We have a microwave oven which is just the thing for cooking these speedy puds. Just make sure you cook the Lemon & Thyme Sponge Puddings one at a time and maybe check how your pudding is doing after two minutes or so.

I’ve used fresh thyme in these sponge puddings, which I admit is fairly unusual. We have fresh thyme in the garden and it is one of my favourite herbs. Don’t be tempted to used dried thyme in these puds, I don’t think dried would work. If you don’t have fresh then just leave the thyme out altogether.

Lemon & Thyme Sponge Puddings

Ingredients (serves four)
4oz butter or margarine
4oz sugar
2 eggs
Zest of 2 lemons
Juice of 1 lemon
1 teaspoon of thyme leaves, picked from the stalk
1 teaspoon baking powder
4oz self raising flour

To top the puddings –
Lemon curd
Thyme leaves
Custard

Method
With an electric hand mixer, beat the butter and sugar together until fluffy. Add the eggs, lemon zest, lemon juice and thyme leaves and combine. Tip the flour and baking powder into the bowl with the rest of the ingredients and beat together.

Lightly grease four microwave proof ramekins. Fill each one 3/4 of the way full with the sponge mix. Loosely cover with cling film, allowing some extra room for the sponge to steam and rise. Microwave each one individually for three minutes. You might want to check how they’re getting on after 2 minutes or so. Your sponges need to be cooked through but not overdone.

Once cooked, run a knife around the edge and tip them out onto a plate.

Put two heaped dessert spoons of lemon curd into a microwavable dish and warm through for 30 seconds. Stir until it is the consistency of a sauce and drizzle over the top of your sponge, scatter some fresh thyme leaves over and serve with custard. Delicious!

Easy Recipe: Microwave Lemon & Thyme Sponge Puddings

Lemon and thyme sponge pudding

Recipe: Pizza Hot Dogs – great to make with kids!

The school holidays can take a lot of filling. On our last day off school we met up with some friends and headed to Bella Italia for lunch, then for a play at the nearby Wacky Warehouse. Lunch for 7 lively kids and 4 weary Mums was a nice relaxed affair, the food was a crowd pleaser, but one thing caught my eye – the pizza hot dogs on the kid’s menu. It was something I knew I’d have to recreate at home. I had a hunch they’d be a hit and they really were.

Recipe: Pizza Hot Dogs - great to make with kids!

Not only are the pizza hot dogs great for kids to eat, but it turns out they’re lots of fun for them to make too. They are as junky as they sound, but as a once in a while treat they’re pretty blooming fantastic. If you’re feeding vegetarians you can use vegetarian hot dog sausages (which I’ve fed to both boys before and they’ve not noticed), if not, just choose your favourite frankfurter or hot dog sausage.

Recipe: Pizza Hot Dogs - great to make with kids!

I used a pizza base mix – most supermarkets have their own these days; a jar of pizza topping and some of those bright orange cheese slices you put on burgers. It’s up to you if you want to use a homemade sauce or a less processed cheese. These pizza hot dogs are a quick meal the kids can help you make. Perfect for a picnic lunch, movie nights at home, or for when you’ve got a crowd of little monkeys around for a playdate or party.

Pizza Hot Dogs

Ingredients – makes 8 
1 packet of pizza base mix (145g)
8 slices of burger cheese
1/2 jar of pizza topping sauce
8 frankfurters or hot dog sausages

Method

Make up the pizza dough following the instructions on the packet. Pre-heat your oven to the temperature suggested on the packet  – mine was 200°.

Cut the dough into 8 equal sized pieces and roll out into rectangles (on a floured surface). There needs to be about 2cms at the top and bottom and 3cm each side when you put your sausage on.

Recipe: Pizza Hot Dogs - great to make with kids!

Take each cheese slice and cut it in half. Then lay the cheese on top of the dough and spread a heaped teaspoon of the pizza topping sauce on top of the cheese. Put your hot dog on top of the tomato sauce.

Fold the top and bottom edges of the dough over the sausage and press the edges of the dough together. Pull one of the long edges over the sausage and tuck it under. Pull the other edge across so the sausage is hidden inside. Pinch all the edges together until they are sealed shut.

Recipe: Pizza Hot Dogs - great to make with kids!

Dust a baking tray with flour or polenta so the dough doesn’t stick. Lay your pizza hog dogs on the tray. You may want to brush them with olive oil at this point, but that’s up to you.

Bake in the oven for 20-25 minutes. The time will depend on how thickly you’ve rolled out your dough. When cooked, remove from the oven and leave to cool for a few minutes.

Recipe: Pizza Hot Dogs - great to make with kids!

They retain their heat very well, so it’s an idea to cut them open and leave them to cool before little ones get their hands on them.

These Pizza Hot Dogs are really fun to make and a real family treat. You could fill them with your favourite pizza toppings too – pepperoni pizza hot dog anyone?

if you enjoyed this recipe, you might also like to try this chilli cheese hot dog casserole recipe.

Recipe: Pizza Hot Dogs - great to make with kids!

Foodie Round Up: Vegetarian Christmas Dinner Ideas

I’ve been a vegetarian since I was 13 and one of the questions I’m asked the most is what do you have for your vegetarian Christmas dinner? The easy answer is, pretty much the same as everyone else, but without the turkey and with veggie gravy. We always do 800 different kinds of vegetables anyway, so I’ve never felt left out, and as the lone veggie at the table I never felt like it was worth the bother.

In 2001 my lovely sister in law came along. She was a veggie and when the percentage of vegetarians around the table had increased, we thought it was worth making a bit more of a culinary effort on Christmas Day. Over the years we’ve experimented with various vegetarian alternatives, but hand on heart my favourite has turned out to be the nut roast. I know it’s a terrible cliché, but I just love it.

I’ve picked out six delicious vegetarian Christmas dinner options (or maybe just for Sunday lunch), so if you’re catering for vegetarians this Christmas, there’s no need for them to feel left out.

galette

Go for my goats cheese and caramelised onion galette, it’s incredibly simple but utterly delicious. It’s a real family favourite. You could add a seasonal twist by swapping out the onions for stuffing and adding a dollop of cranberry sauce!

My good friend and fellow vegetarian, Jen from My Mummy’s Pennies has shared her recipe for Festive Stuffed Mushrooms. These hearty shrooms are filled with festive flavours, they’d be easy to put together on Christmas Eve and pop in the oven on the day. Easy peasy.

vegetarian Christmas dinner

Christmas isn’t Christmas without something chock full of chestnuts gracing the table, this Leek, Artichoke, Mushroom and Chestnut Pie from Inside the Wendy House certainly fits the bill. I imagine this would also be great cold on Boxing Day with some bubble and squeak.

vegetarian Christmas dinner

I love the look of this Vegetarian Beef Wellington from Jenny at The Brick Castle. It looks hearty enough to satisfy any rogue carnivores around the table, but quick and easy enough to be thrown together in a busy Christmas kitchen.

If you’ve got a vegan coming for Christmas, Inside the Wendy House has come up with this delicious sounding Sweet Potato, Chickpea and Nut Roast Pie. It looks super-simple but really. Wendy says it’s good served cold too – I bet it is!

vegetarian Christmas dinner

If you’re anything like me, you’ll enjoy a good stuffing at Christmas. I tend to favour fresh stuffings on Christmas Day, they just taste a bit more luxurious than the dried packets of stuffing. For a really simple vegetarian Christmas dinner option, Mr Crumb have a range of fresh microwavable gourmet stuffings to choose from. I think the apple and apricot is cracking and would be excellent in one of Jen’s stuffed mushrooms with some softly melting goats cheese on the top.

vegetarian Christmas dinner

I think there are lots of great ideas in this round up of vegetarian Christmas dinner ideas – I think most of them could easily be adapted to be vegan too. I do love a nut roast on Christmas Day, but if you don’t, there are plenty of other options available to you.

What will you be serving up on Christmas Day?

Six Sensational Vegetarian Christmas Dinner Ideas

Five Delicious Vegetarian Comfort Food Dishes

I turned vegetarian when I was 13 and there’s not a lot I miss, but on a cold winter night I do sometimes hanker after the slow cooked, deep flavoured chilli my Nan used to make. Thankfully after lots of practice I’ve finally nailed the recipe and managed to make it vegetarian too.

Most of the warming comfort food dishes from my childhood were meat based – family roast dinners, my Nan’s amazing beef chilli, corned beef hash, shepherd’s pie and bubbling stews cooked so long the meat almost melted in your mouth.

There’s something about cooking up some comfort food which makes you feel like you’re showing your family some extra love. I enjoy throwing a few things in the slow cooker and knowing that by tea time there will be a delicious meal ready for my family.

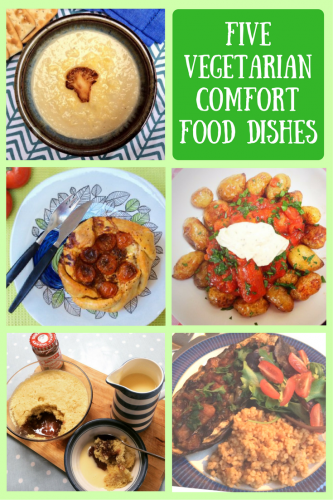
Vegetarian comfort food can feel a bit hard to come by, so I’ve created and shared some of our favourite family recipes on my blog, here are five of my favourite vegetarian comfort food recipes – 

Vegetarian Galletes

vegetarian comfort food

These are a recent addition to my comfort food repertoire. They’re really easy to make, utterly delicious and once you get the hang of it you can fill them however you want. I made a Goats Cheese, Caramelised Onion and Quince Galette and a Feta, Red Pesto & Tomato Galette. Both were absolutely bang on and real crowd pleasers.

Cauliflower Cheese Soup

vegetarian comfort food

Now autumn is here my soup making pot is starting to see some serious action. Cauliflowers are cheap and plentiful in the shops, so I recreated my favourite soup, but with a cheesy twist. Try my very delicious Norwegian inspired Cauliflower Cheese Soup.

Spanish Style Bravas Sausage Casserole

vegetarian comfort food

I’d had it in my head to make a big Spanish style bravas sausage casserole in my slow cooker for a while. This summer hadn’t been up to much and I was desperate to start rustling up comfort food dishes, and this was the first one of the season. I made my sausage casserole with Quorn sausages, but you could very easily make them with your favourite meaty sausages if you’d prefer. I made the sauce in the slow cooker and let it bubble away gently to itself for a few hours. The recipe is really simple and it’s now a firm family favourite.

Authentic Armenian style Imam Bayildi 

vegetarian comfort food

Imam Bayildi is basically stuffed, baked aubergines. They’re simple to make, you can prepare them ahead of time and then cook them when you need them and they are melt in the mouth gorgeous. I like to use good quality ingredients in this recipe as every single mouthful zings flavour. Fresh vegetables and herbs are essential, they’re packed full of flavour and these sunshiny aubergines are a little bit of summer on a cold autumn evening.

Easy Microwave Jam Sponge

vegetarian comfort food

No vegetarian comfort food round-up would be complete without a pudding. This incredibly easy to make and very quick to cook microwave jam sponge is just the ticket to warm your cockles on a cold winter evening. All you need are a few store cupboard ingredients, ten minutes of your time and you’ve got a good pud that’ll make your family smile.

Voucherbox.co.uk have a great blog post about the five healthy foods that can actually save you money, and if you want even more money off your online shop they also have plenty of Sainsbury’s vouchers which you can use.

vegetarian comfort food

Recipe: Malty Malteser Butterfly Cakes

In my family, September is birthday month and this week it was my brother’s turn to blow out the candles. We weren’t having a big bash for him, but you can’t successfully have a birthday without cake. My brother loves Maltesers, so I thought I’d make him some quick and easy butterfly cakes, but with a Maltesery twist.

I’ve had a jar of malt extract lurking in my cupboard for a little while now, so I knocked up a standard sponge recipe and added a big dollop of the lovely malty stuff. Baked my buns until they were golden and whipped up a chocolate buttercream icing complete with a big bag of smashed up Maltesers. There was no room for candles, but at his age they’re verging on a fire hazard anyway!

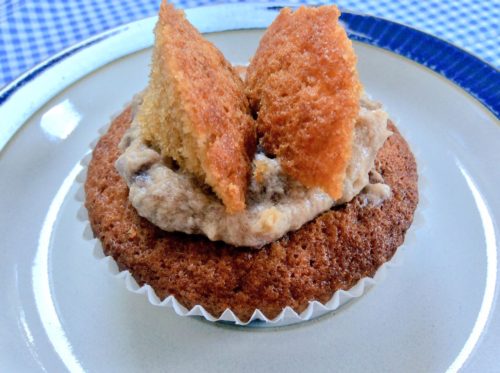
Malteser Butterfly Cakes

The little Malteser Butterfly Cakes came out a little darker than a plain sponge would. This is because the dark malt extract makes the mixture darker. They’re not overdone, that’s their natural bronzed colour.

This recipe makes around 12 malteser butterfly cakes.

Malteser Butterfly Cakes

4oz Butter or margarine
4oz sugar
1 dessert spoon of malt extract
2 medium eggs
1 teaspoon of baking soda
4oz self raising flour

For the buttercream:
4oz butter
4oz icing sugar
1 tablespoon of drinking chocolate powder
10oz of Maltesers

1. Beat the butter and sugar together until fluffy and the stir in the eggs and malt extract.
2. Carefully fold through the baking soda and self raising flour until combined.
3. Dollop into cake cases, there should be enough to make about 12 buns.
4. Bake in a preheated oven at 190c for around 15 minutes. Once cooked leave to cool.
5. To make the buttercream, beat the butter, icing sugar and hot chocolate powder until soft and fluffy. Bash up the Maltesers and gently fold in.
6. Carefully cut a circle out of the top of each of your cooled cakes, cut the circle in two, dollop a teaspoon of buttercream into the hole and top with the halves to make them look like butterfly wings.

Malteser Butterfly Cakes

If you love butterfly cakes, you might also enjoy my Peanut Butter Butterfly Cake recipe.

Casa Costello

Recipe: Spanish Style Bravas Sausage Casserole

When I go out for tapas I always order patatas bravas. I love the crispy pieces of potato smothered in the garlicky, tomatoey bravas sauce. I’ve had it in my head to make a big Spanish style bravas sausage casserole in my slow cooker for a while. This summer has not been up to much and the rainy days have had me guiltily rustling up comfort food dishes, instead of summery salads and such like.

I confess I made my sausage casserole with Quorn sausages, but you could very easily make them with your favourite meaty sausages if you’d prefer. Making the sauce in the slow cooker and letting it bubble away gently to itself for a few hours makes it extra delicious.

Bravas Sausage Casserole

I browned the sausages separately and popped them into the sauce for the last hour or so. The great thing about Quorn sausages is that they take on some of the flavour of the sauce.

To serve I roasted some new potatoes in some oil and once they were cooked I spooned over some sausages and bravas sauce and added a dollop of incredibly garlicky aioli.

Spanish Style Bravas Sausage Casserole

Serves 4
A super simple, delicious and fairly frugal family meal.

Ingredients
2 tablespoons of olive oil
1 large onion, chopped
3 garlic cloves, crushed
2 500g cartons of passata
2 tablespoons of tomato purée
1 tablespoon of sweet chilli sauce
2 teaspoons of smoked paprika
1 teaspoon of sugar
2 tablespoons of fresh parsley, chopped
1 teaspoon of dried oregano
Salt & Pepper to taste
8 sausages (two per person) I used Quorn sausages

Instructions
In a frying pan gently fry the onion in 1 tablespoon of olive oil until it’s soft but not brown. Add in the garlic towards the end of cooking and cook through.

Tip the fried onion and garlic into your slow cooker, add the passata, tomato purée, smoked paprika, sweet chilli sauce, sugar and oregano and cook on medium for about 3 hours. Taste and adjust seasoning if you feel it needs it.

In the frying pan, fry your sausages until they’re brown, drain and add to the sauce and leave to cook through for an hour. Before serving stir through 1 tablespoon of fresh parsley.

Serve the Bravas Sausage Casserole with crispy roasted potatoes and aioli. Scatter with the remaining chopped fresh parsley.

Notes
I sometimes finely dice some peppers, cook them off and add them to the sauce to bump up the veg content. This sauce is perfect for hiding secret veg from your children!
This does make lots of sauce. If you have lots left over, it’s delicious warmed up the next day with crusty bread.

The Bravas Sausage Casserole was delicious and something I will be making over and over again. What’s more it’s very simple, pretty quick to throw together and fairly frugal. What’s not to love?

Recipe: Spanish Style Bravas Sausage Casserole

Recipe: Raw Chocolate Truffles made with Nutriseed

My local health food shop and deli make a delicious selection of raw chocolate energy bars and truffles, I have long lusted after them and wanted to try my hand at making them for myself. I often think making things from scratch is part of the fun, and these days when I’m trying to cut a few things like dairy out of my diet it makes sense to make some things myself. I was asked by superfood aficionados Nutriseed to try out some of their products, so I seized my chance to try making raw chocolate truffles myself. I was not disappointed.

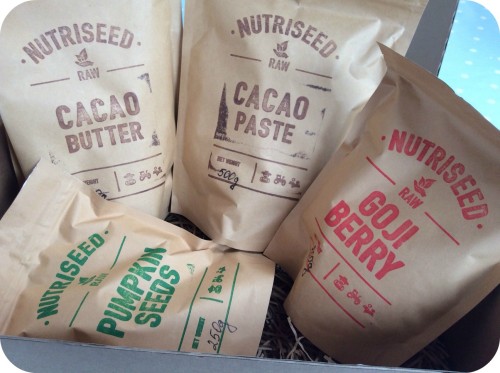
I was sent a Nutri Box, a box full of nutritional goodies. I’d asked if my box could have cacao butter and cacao paste and I was happy to see some yummy goji berries and pumpkin seeds in there too. Nutriseed are an online nutritional food company based in London, creating vegetarian friendly, all-natural, raw, nutritional goodies by hand. 

raw chocolate truffles

My Nutriseed box was well packed and I loved the individual packets of goodness inside. Each of these “brown paper” packages are foiled inside so everything is fresh and in perfect condition, and they’re resealable too.

The Nutriseed website has so many different products to choose from including teas, treats, seeds, cereals, cocoa, capsules and superfoods. I think they are good value, for example my 500g of cacao paste was just £8.99 which I thought was very reasonable having priced up raw chocolate products elsewhere; delivery is free too if you spend over £29.99. Their product descriptions are packed with information, with all of the benefits of each product listed as well as nutritional information.

The Nutriseed website suggests that I use my Cacao Paste to…

  • Blend into smoothies for an extra nutritional kick
  • Sprinkle over yoghurt for a delicious breakfast
  • Bake into muffins, pancakes, or sweet bread
  • Add some to your breakfast porridge
  • Stir into a coffee for a homemade Mocha
  • Create a guiltless hot chocolate

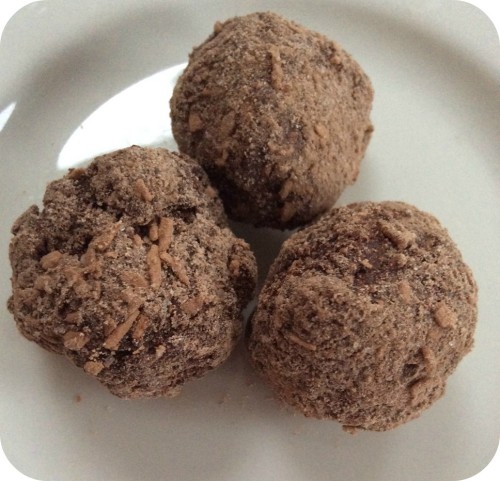
But I wanted to make some raw chocolate truffles. There aren’t really many recipes around for making raw chocolate truffles with cacao paste, so I had to experiment a little with the quantities until I got it right. My recipe below is for cherry and rum raw chocolate truffles, but you could add whatever you wanted. I rolled mine in cocoa powder and dessicated coconut, but I really fancy making some pistachio truffles. Basically once you’ve made your chocolate truffle mixture you can add whatever you want. Here is my method…

Cherry & Rum Raw Chocolate Truffles

Yields 12
Delicious raw chocolate truffles made with cacao paste and cacao butter.

Ingredients
100g cacao paste
50g cacao butter
5 dessert spoons of carob syrup or similar
12-15 cherries
1 cap of rum
1 tablespoon of cocoa powder
1 tablespoon of dessicated coconut

Instructions
Over a bain marie gently melt to cacao butter and cacao paste together, once melted remove from the heat and add the carob syrup, chopped cherries and a cap of rum, stir well. Put the mixture in the fridge to chill for two hours.

In a bowl mix the cocoa powder and coconut. Remove the chilled truffle mix from the fridge and using a teaspoon get enough mixture to make a truffle, shape in in your hands and roll in the cocoa powder and coconut mix, set aside. Make truffles with the remainder of the truffle mix.

Once all the truffles are made, chill in the fridge until they are to be eaten.

Notes
If you don’t want to shape the truffles using your hands, you could dust a silicon ice tray with the cocoa powder and pour in the warm runny truffle mix and leave that to set in the fridge. Just pop out a truffle as and when you need them.

I had a girls night in and offered my raw chocolate truffles around to my very discerning friends and they were a hit! We’ll be making some variations of these easy truffles in the run up to Easter and giving them as chocolatey gifts.

Raw Chocolate Truffles

I really loved my Nutriseed box, it’s the kind of grown up pick n mix of interesting and exciting ingredients a foodie can enjoy experimenting with. I’m already eyeing up several other of their hard to find ingredients for future recipes. 

Note: We were sent this Nutriseed box for review purposes, all images and opinions are our own.

Recipe: Sneaky Cauliflower Lasagne Sauce

Lasagne is one of those tried and tested family meals. It’s something everyone will happily tuck into and it’s perfect for sneaking a bit of extra veg into if you’ve got kids. I’ve taken things a step further; and for some think may be a step too far, but it’s just as delicious and a little bit healthier. Stick with me on this. I use blended cauliflower instead of béchamel sauce to make cauliflower lasagne sauce.

Don’t get me wrong, I adore béchamel sauce and find it to be incredibly easy to make and versatile. But, and here’s the big but. It’s just flour, butter, milk and seasoning and it doesn’t count as one of your five a day.

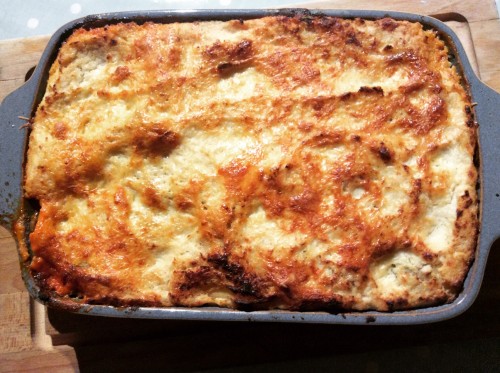
Over the weekend I made our current favourite lasagne. Generous portions of roasted butternut squash and parsnip, with handfuls of fresh baby spinach in a fresh tomato sauce, layered with lasagne sheets and topped with cauliflower sauce. It works, it really works and if you put enough cheese in it, it turns into an amazing lasagne-cauliflower cheese mash up.

Recipe: Sneaky Cauliflower Lasagne Sauce

Sneaky Cauliflower Lasagne Sauce

Sneak extra veg into your cooking with this delicious cauliflower lasagne sauce.

Ingredients
2 cauliflowers
400mls milk (I used semi skimmed)
200g mature cheddar cheese, grated
Salt & Pepper (chilli flakes & grated nutmeg optional)

Instructions
Chop up your heads of cauliflower, they don’t need to be in pretty florets as you’ll be blending them. Add as much stalk as you like, it’s full of flavour and very frugal. Boil or steam until cooked through.

Once cooked, drain and put into a blender (you may need to do this in batches). Season generously and add the milk, blend until smooth. If you want a smoother sauce you can pass it through a sieve at this point and/or add a little bit more milk.

Whilst the sauce is hot, stir through the cheese and taste. Add more seasoning if you feel it needs any. Layer the sauce into your lasagne as you would do with your normal white sauce.

Notes
You can add as much cheese to the sauce as you’d like. I haven’t added much at this point because I know I’ll be sprinkling more cheese on top of the lasagne when I cook it.
I sometimes add a spoon of soft cheese with garlic and herbs which give it a nice background flavour.
Try adding chilli flakes to add a bit of a kick, or a touch of grated nutmeg because it just works.

Recipe: Sneaky Cauliflower Lasagne Sauce

I think my cauliflower lasagne sauce has lots of potential. I can imagine it working really well in something like moussaka. It’s such a great way to sneak extra veg into your life.

This recipe could easily be adapted for vegans too. Just swap the milk for soy milk or similar and leave out the cheese.

Cauliflowers are incredibly cheap in the shops at the moment, so we’re cooking with them a lot. This would also work well with frozen cauliflower. But not broccoli, broccoli is a step too far!

Have you got any tips for sneaking veg into your family meals?


Recipe: Sneaky Cauliflower Lasagne Sauce

Recipe: Beautiful Blueberry and Buttermilk Scones

Over the weekend we experimented with making our own butter at home. One of the by-products of the butter making process is that you’re left with a jug of buttermilk. Buttermilk is supposed to be brilliant for making soda bread and scones with, though I’d not tried it in scones before. Waste not, want not, so I whipped up a batch of blueberry scones to use up the buttermilk. The result was the most incredible, light as air scones I’ve ever made – even my Nan would’ve been impressed with these blueberry and buttermilk scones!

blueberry and buttermilk scones

Blueberry and Buttermilk Scones

Ingredients
14 oz self raising flour
3 oz caster sugar
1 tsp bicarb of soda
1/4 tsp salt
6 oz butter or margarine
8 fl oz buttermilk
100g of fresh blueberries
1 egg (for egg wash)

Instructions

Preheat oven to 220 degrees or Gas Mark 7.
Mix the dry ingredients together in a bowl. Add your softened butter or margarine and rub until the mixture resembles breadcrumbs.

Add your buttermilk and mix, the dough will be a bit wetter than a standard scone recipe – this is normal, don’t be tempted to add more flour. Once combined, add your blueberries and gently mix in until fairly evenly distributed.

Roll the mixture out so it’s approx 2cm thick, I did this on a piece of greaseproof paper because the texture of the dough was quite wet.. Cut into 12 rounds and put on a lightly oiled baking sheet and bake for 15 minutes. I brushed the tops of my scones with a beaten egg before baking.

Notes
Serve plain, or with butter, or blueberry jam, or cream, or everything you can fit onto your scone. They’re delicious slightly warm with a little dollop of jam.

To date the picture I look of my luscious blueberry and buttermilk scones has been my most popular images on Instagram. I can’t look at it without feeling hungry and wanting to make a fresh batch.

These airy-fairly light blueberry and buttermilk scones were the best ones I’ve ever made, and I’ve made hundred of scones in my lifetime. They are delicious eaten plain, or lovely buttered or warmed and served with blueberry jam, cream and a pot of tea.

Once you’ve tried these delicious light as a feather buttermilk scones, you’ll never go back. I promise you’ve never had scones THIS good!

Recipe: Beautiful Blueberry and Buttermilk Scones