Christmas Recipe: Christmassy Rocky Road

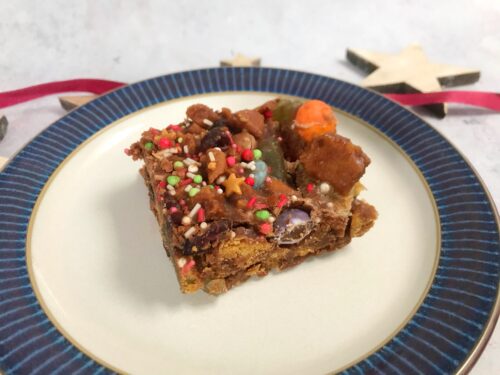
I love baking at Christmas, but sometimes I just want to step away from the oven and make something colourful, a bit silly and something that Will Ferrell’s Elf might fancy for breakfast. This Christmassy rocky road is a great thing to make with kids, it’s all bashing and stirring and waiting patiently (and impatiently) for it to set so it can be cut up and gobbled down greedily.

Rocky road usually has marshmallows in it, but I decided to swap these out for Haribo Christmas Trees to make each slice extra festive. If you want to leave the gummy sweets out and stick to the traditional marshmallows, then just swap them in the recipe.
Christmas Recipe: Christmassy Rocky Road

CHRISTMASSY ROCKY ROAD

Ingredients:
200g Milk Chocolate, broken into small pieces
2 Tablespoons of golden syrup
135g Unsalted butter
200g gingerbread men
100g Christmas sweets, I used Haribo Christmas Trees
75g Dried Cranberries
60g Smarties or M&Ms
Christmas sprinkles

Method:
Line a high sided baking tray with baking parchment. I used a square 20cm tin.

Put the milk chocolate, golden syrup and butter in a glass bowl. Using a bain-marie (put an inch or two of hot water in the pan and place the glass bowl over the top making sure the water doesn’t touch the bowl) over a gentle heat. Stir the chocolate, golden syrup and butter until everything has melted together.

While the chocolate mixture is slowly melting, put the gingerbread biscuits into a plastic bag and bash them with a rolling pin until they’re broken up, but not crumbs. Ideally you want a mixture of chunky pieces and smaller, crumbly bits. Once bashed, tip them into a mixing bowl. Add the marshmallows and raisins and the Smarties or M&Ms and add them to the biscuit mix.

Christmas Recipe: Christmassy Rocky Road

Once the chocolate mixture has melted, take it off the heat and carefully tip the biscuity mix into the chocolate. Stir it well and make sure everything is coated. Then tip it onto your baking tray spread the mixture out and gently press it down with the back of a spoon. It needs to be about 2cm deep as a minimum, but the thicker the better as far as I’m concerned.

Lastly, sprinkle over your Christmas sprinkles and put somewhere cool (or in the fridge) to chill and set for a few hours, preferably overnight if you can wait that long!

If you enjoy regular rocky road, then this Christmas version is so much extra. The gingerbread biscuits really make it extra special, and all the festive treats packed into it make feel like a bar full of festive joy.

If you enjoyed this, you might also like to try –

Christmas Recipe: Christmassy Rocky Road

Easy Recipe: Chunky Rocky Road with M&Ms

Last weekend we celebrated my nephew’s birthday and as is tradition, we all brought along a sweet treat for the birthday party. I was short on time, so the night before I threw together a quick rocky road, mixed things up with a colourful bag of M&Ms and took it along to the party. It was a real hit and I suspect I’ll be asked to make my chunky rocky road with M&Ms on a regular basis now!

A little while ago I shared my recipe for Butterfinger Mini Cups Rocky Road and ever since then I’ve been knocking up trays of this easy treat for all kinds of occasions and sometimes just because we fancy it. It’s a great little crowd pleaser, especially if there are chocolate loving children in that crowd.

Easy Recipe: Chunky Rocky Road with M&Ms

These Chunky Rocky Road bars made with M&Ms really hit the spot, plus they’re really colourful and a great addition to a party table.

Chunky Rocky Road with M&Ms

Ingredients:
200g Milk Chocolate, broken into small pieces
2 Tablespoons of golden syrup
135g Unsalted butter
200g digestive biscuits
100g Mini marshmallows
75g Raisins
110g M&Ms

Method:
Line a high sided baking tray with baking parchment. I used a small roasting tin because it seemed up to the job.

Put the milk chocolate, golden syrup and butter in a glass bowl. Using a bain marie (put an inch or two of hot water in the pan and place the glass bowl over the top making sure the water doesn’t touch the bowl) over a gentle heat. Stir the chocolate, golden syrup and butter until everything has melted together.

While the chocolate mixture is slowly melting, put the biscuits into a plastic bag and bash them with a rolling pin until they’re broken up, but not crumbs. Ideally you want a mixture of chunky pieces and smaller, crumbly bits. Once bashed, tip them into a mixing bowl. Add the marshmallows and raisins.

Take the M&Ms and put a handful to one side for decoration. Take the rest and add them to the biscuit mix.

Once the chocolate mixture has melted, take it off the heat and carefully tip the biscuity mix into the chocolate. Stir it well and make sure everything is coated. Then tip it onto your baking tray spread the mixture out. It needs to be about 2cm deep as a minimum, but the thicker the better as far as I’m concerned.

Easy Recipe: Chunky Rocky Road with M&Ms

Take the M&Ms you’d put to one side and scatter them across the top of the rock road, press each one gently into the melted chocolate. Hopefully this will anchor them in place once it’s set. Chill in a cool place, preferably a fridge for at least two hours. Then slice into generous pieces and enjoy!

Easy Recipe: Chunky Rocky Road with M&Ms

Easy Recipe: KitKat Rocky Road

A few weeks ago I made a batch (well, several batches) of rocky road with Butterfinger Mini Cups. They were a huge success and I’ve had almost daily requests for me to make some more. It’s a simple recipe and one which can be thrown together quickly, so I thought I’d make a batch of KitKat Rocky Road with the bag of KitKat bites I had in the cupboard for snack emergencies.

KitKats are really underrated. They’ve been a favourite of mine since I was a child, though I don’t eat them quite as often these days. KitKats have reinvented themselves in a hundred different ways, but you can’t beat the two finger classic  can you? I do like these new(ish) KitKat Bites. It’s hard to put them down after the recommended snack sized portion though.

Easy Recipe: KitKat Rocky Road

This KitKat Rocky Road recipe is probably the most popular rocky road I’ve made. All the ingredients are the kind of things that most people will have lurking in their cupboards, so it’s a great little store-cupboard recipe for emergency sweet treats! This recipe makes 12 generous slices.

KitKat Rocky Road

Ingredients:
200g Milk Chocolate, broken into small pieces
2 Tablespoons of golden syrup
135g Unsalted butter
200g digestive biscuits
100g Mini marshmallows
50g Raisins
100g KitKat Bites, or a normal KitKat chopped up

Easy Recipe: KitKat Rocky Road

Method:
Line a high sided baking tray with baking parchment. I used a small roasting tin because it was about the right size.

Put the milk chocolate, golden syrup and butter in a glass bowl. Using a bain marie (put an inch or two of hot water in the pan and place the glass bowl over the top making sure the water doesn’t touch the bowl) over a gentle heat. Stir the chocolate until it has all melted together and it looks so good you want to put your face in it.

While the chocolate mixture is slowly melting, put the biscuits into a plastic bag and bash them with a rolling pin until they’re broken up, but not crumbs. Ideally you want a mixture of chunky pieces and smaller, crumbly bits. Once bashed, tip them into a mixing bowl. Add the marshmallows and raisins.

Take the KitKat Bites and put a few to one side for decoration. Take the rest and chop them into chunks, add them to the biscuit mix. If you’re using a full sized KitKat fingers, chop each finger into chunks and add those.

Once the chocolate has melted, take it off the heat and carefully tip the biscuity mix into the chocolate. Stir it well and make sure everything is coated. Then tip it onto your baking tray spread the mixture out. It needs to be about 2cm deep as a minimum for maximum awesomeness.

Easy Recipe: KitKat Rocky Road

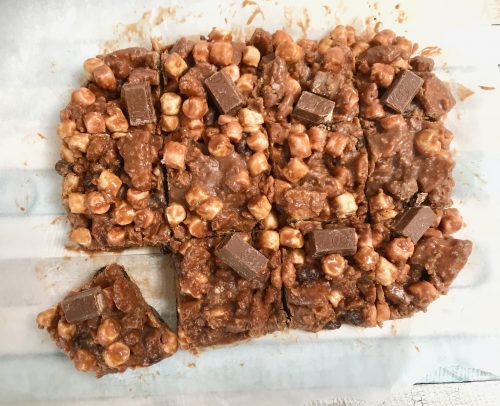
Take the KitKat pieces you’d put to one side and poke them into the mixture so they’re visible, but the melted chocolate will anchor them in place. Put the tray in the fridge or somewhere cool for at least two hours, better still overnight. Once set, cut into generous wedges and enjoy.

These KitKat rocky road treats will keep in an airtight tin for a few days, but I doubt they’ll last that long.

Easy Recipe: KitKat Rocky Road

Recipe: Butterfinger Mini Cups Rocky Road

I am and always have been very pro-peanut butter, my husband on the other hand is fiercely against it. This is great news for me, it means if I buy anything peanut buttery it won’t mysteriously vanish overnight. On a recent visit to my local Co-op I spotted something peanut butter fans will probably have been dreaming about for a while, Butterfinger Mini Cups. They were on offer for £1 a bag, so I bought two bags – one to scoff and one to bake with.

Firstly, each bag contains 85g of Butterfinger Mini Cups. Apparently they are “sharing bags”, no one is going to share a bag of these and they’re so addictive the bags don’t even have that resealable thing most sharing bags have. No one is saving some for later. They’re gone before you know it. This is a warning, especially if you’re a bit on the greedy side like me.

Recipe: Butterfinger Mini Cups Rocky Road

If you’ve never tried Butterfinger Mini Cups before, they’re a bit like Reece’s peanut butter cups, but smaller and with tiny crunchy pieces inside. I first had a Butterfinger bar a couple of years ago from a shop which sold American sweets and it wasn’t love at first bite. For some reason the Butterfinger Mini Cups really hit the spot for me, they really are mini, so I thought they would be great in rocky road, and they were.

Rocky road is one of those quick and easy things you can quickly throw together, you don’t need much skill and it’s a good thing to “bake” with children, although there’s no actual baking involved. Rocky road is what we used to call chocolate fridge cake when I was a child, except chocolate fridge cake doesn’t have marshmallows in it, you can leave them out if you’re vegetarian and just add some extra dried fruit or biscuits.

Recipe: Butterfinger Mini Cups Rocky Road

I’ve used digestive biscuits, but you could equally use rich tea biscuits, sometimes I use malted milk biscuits because I love them. Rocky road is a pretty forgiving recipe, you can add whatever extras you want. What would you add?

Butterfinger Mini Cups Rocky Road

Ingredients:
200g Milk Chocolate, broken into small pieces
2 Tablespoons of golden syrup
135g Unsalted butter
200g digestive biscuits
100g Mini marshmallows
50g Raisins
100g Butterfinger Mini Cups
50g white chocolate to decorate (optional)

Recipe: Butterfinger Mini Cups Rocky Road

Method:
Line a high sided baking tray with baking parchment. I used a small roasting tin because it seemed up to the job.

Put the milk chocolate, golden syrup and butter in a glass bowl. Using a bain marie (put an inch or two of hot water in the pan and place the glass bowl over the top making sure the water doesn’t touch the bowl) over a gentle heat. Stir the chocolate until everything has melted together.

While the chocolate mixture is slowly melting, put the biscuits into a plastic bag and bash them with a rolling pin until they’re broken up, but not crumbs. Ideally you want a mixture of chunky pieces and smaller, crumbly bits. Once bashed, tip them into a mixing bowl. Add the marshmallows and raisins.

Take the butterfingers and put a few to one side for decoration. Take the rest and chop them in half, add them to the biscuit mix.

Once the chocolate has melted, take it off the heat and carefully tip the biscuity mix into the chocolate. Stir it well and make sure everything is coated. Then tip it onto your baking tray spread the mixture out. It needs to be about 2cm deep as a minimum for maximum rocky road excellentness.

Take the Butterfinger Mini Cups you’d put to one side and poke them into the mixture so they’re visible, but the melted chocolate will anchor them in place. If you’re feeling fancy, you can melt the white chocolate (again over a bain marie) and drizzle over. Leave to set before slicing.

Recipe: Butterfinger Mini Cups Rocky Road

You can either put the tray in the fridge or somewhere to cool for a few hours. Once set, slice it into generous wedges and devour. If you can restrain yourself, it will keep in an airtight tin for a few days or so.

If you enjoyed this recipe, you might also like this recipe for sparkly chocolate cups.

Recipe: Butterfinger Mini Cups Rocky Road