Quick Recipes: Easy Peanut Butter Mousse

Since I started my new job last month, I am suddenly quite short on time and energy. I prefer to spend my downtime hanging out with my son than slaving in the kitchen, but meals still need to be prepared. He loves peanut butter, and it’s a good source of protein, so I thought I’d whip up a batch of peanut butter mousse to make puddings for a couple of nights between us.

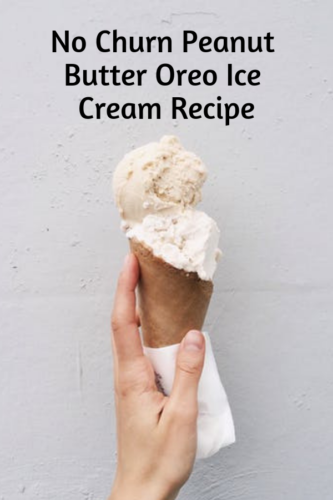
We are big fans of all things peanut butter in our house (this peanut butter ice cream is our favourite!). Our tastes lean towards the smooth, sticky and cheaper stuff, rather than the wholesome organic peanut butter. Yes, we are heathens, but we know what we like. In our last online shop, the supermarket had run out of the good cheap stuff, and sent us a jar of the wholesome organic stuff. My son turned his nose up at it, so instead of throwing it away, I decided to make peanut butter mousse with it.

Quick Recipes: Easy Peanut Butter Mousse

This peanut butter mousse made a delicious dessert and took hardly any time at all to make. It sits well in the fridge for a few days, and you can top it in a number of different ways to tickle your fancy.

My original attempt at this recipe was made without adding a good pinch of salt; but peanut butter thrives on salt and it really helps to bring out the peanutty flavour. If you’re unsure, feel free to leave the salt out, but that’s up to you.

I put the mousse into small glasses; it makes four decent sided portions. If you need to make more, just double up the recipe.

Easy Peanut Butter Mousse

Ingredients:

300ml double cream
125g peanut butter
50g icing sugar, sifted
1 teaspoon vanilla extract
A pinch of salt, optional

Quick Recipes: Easy Peanut Butter Mousse

How to make Peanut Butter Mousse:

In a large bowl, whip your double cream, sifted icing sugar, pinch of salt (optional) and vanilla extract until it forms stiff peaks.

Fold in your peanut butter and make sure it is well combined. If your peanut butter is too stiff, feel free to pop it in the microwave for a few seconds to soften it slightly.

Spoon or pipe the mousse into four small glasses or ramekins; I weighed them to make sure they were pretty equal is size. Refrigerate until you’re ready to serve. They are best left at least overnight and when you’re ready to serve, take them out of the fridge for half an hour or so to take the chill off.

I topped mine with chopped honey roasted peanuts, which was utterly delicious. I shared my mousse with a colleague at work who tried hers with crushed Oreos which she said were excellent. I’d also be tempted to put a small layer of melted chocolate on the top. It’s up to you, the world is your oyster!

If you enjoyed this, you might also like to try peanut butter milkshake, peanut butter cupcakes or these simple but excellent butterfinger rocky road.

Quick Recipes: Easy Peanut Butter Mousse

Recipe: Butterfinger Mini Cups Rocky Road

I am and always have been very pro-peanut butter, my husband on the other hand is fiercely against it. This is great news for me, it means if I buy anything peanut buttery it won’t mysteriously vanish overnight. On a recent visit to my local Co-op I spotted something peanut butter fans will probably have been dreaming about for a while, Butterfinger Mini Cups. They were on offer for £1 a bag, so I bought two bags – one to scoff and one to bake with.

Firstly, each bag contains 85g of Butterfinger Mini Cups. Apparently they are “sharing bags”, no one is going to share a bag of these and they’re so addictive the bags don’t even have that resealable thing most sharing bags have. No one is saving some for later. They’re gone before you know it. This is a warning, especially if you’re a bit on the greedy side like me.

Recipe: Butterfinger Mini Cups Rocky Road

If you’ve never tried Butterfinger Mini Cups before, they’re a bit like Reece’s peanut butter cups, but smaller and with tiny crunchy pieces inside. I first had a Butterfinger bar a couple of years ago from a shop which sold American sweets and it wasn’t love at first bite. For some reason the Butterfinger Mini Cups really hit the spot for me, they really are mini, so I thought they would be great in rocky road, and they were.

Rocky road is one of those quick and easy things you can quickly throw together, you don’t need much skill and it’s a good thing to “bake” with children, although there’s no actual baking involved. Rocky road is what we used to call chocolate fridge cake when I was a child, except chocolate fridge cake doesn’t have marshmallows in it, you can leave them out if you’re vegetarian and just add some extra dried fruit or biscuits.

Recipe: Butterfinger Mini Cups Rocky Road

I’ve used digestive biscuits, but you could equally use rich tea biscuits, sometimes I use malted milk biscuits because I love them. Rocky road is a pretty forgiving recipe, you can add whatever extras you want. What would you add?

Butterfinger Mini Cups Rocky Road

Ingredients:
200g Milk Chocolate, broken into small pieces
2 Tablespoons of golden syrup
135g Unsalted butter
200g digestive biscuits
100g Mini marshmallows
50g Raisins
100g Butterfinger Mini Cups
50g white chocolate to decorate (optional)

Recipe: Butterfinger Mini Cups Rocky Road

Method:
Line a high sided baking tray with baking parchment. I used a small roasting tin because it seemed up to the job.

Put the milk chocolate, golden syrup and butter in a glass bowl. Using a bain marie (put an inch or two of hot water in the pan and place the glass bowl over the top making sure the water doesn’t touch the bowl) over a gentle heat. Stir the chocolate until everything has melted together.

While the chocolate mixture is slowly melting, put the biscuits into a plastic bag and bash them with a rolling pin until they’re broken up, but not crumbs. Ideally you want a mixture of chunky pieces and smaller, crumbly bits. Once bashed, tip them into a mixing bowl. Add the marshmallows and raisins.

Take the butterfingers and put a few to one side for decoration. Take the rest and chop them in half, add them to the biscuit mix.

Once the chocolate has melted, take it off the heat and carefully tip the biscuity mix into the chocolate. Stir it well and make sure everything is coated. Then tip it onto your baking tray spread the mixture out. It needs to be about 2cm deep as a minimum for maximum rocky road excellentness.

Take the Butterfinger Mini Cups you’d put to one side and poke them into the mixture so they’re visible, but the melted chocolate will anchor them in place. If you’re feeling fancy, you can melt the white chocolate (again over a bain marie) and drizzle over. Leave to set before slicing.

Recipe: Butterfinger Mini Cups Rocky Road

You can either put the tray in the fridge or somewhere to cool for a few hours. Once set, slice it into generous wedges and devour. If you can restrain yourself, it will keep in an airtight tin for a few days or so.

If you enjoyed this recipe, you might also like this recipe for sparkly chocolate cups.

Recipe: Butterfinger Mini Cups Rocky Road

Recipe: No Churn Peanut Butter Oreo Ice Cream

When it comes to peanut butter, you either love it or hate it. I am firmly on the love side, whilst hubs is staunchly hate, which only means one thing…. more for me! The summer holidays so far have been a bit meh, and I’ve been having to come up with new and exciting indoor things to do. One boring morning we decided to whip up a batch of Peanut Butter Oreo Ice Cream, the small boy loves helping out in the kitchen almost as much as he likes eating the results.

I found two new and deliciously different flavours or Oreo cookie in my local shop; the Golden Oreo which is a lovely crunchy vanilla flavoured cookie and the limited edition Peanut Butter Oreo. They were both crying out to be whizzed up in a milkshake, but I thought it was time to ring the changes and try some no churn Peanut Butter Oreo Ice Cream.

peanut butter oreo ice cream

Peanut Butter Oreo Ice Cream

Ingredients

1/2 jar smooth peanut butter (I used reduced fat)
2 tablespoons hot water
1 tin of condensed milk
2 teaspoons vanilla extract
1 pint of double cream (whipped)
1 packet of Peanut Butter Oreos

Method

1. Put your peanut butter in a large bowl and add two tablespoons of hot water, stir thoroughly as this will help to loosen the peanut butter making it easier to work with. Once mixed, add your tin of condensed milk and vanilla extract to the peanut butter and combine.
2. In a separate bowl whip your cream until it forms peaks, gently fold your cream into the peanut butter mixture.
3. Chop up, or bash up a packet of Peanut Butter Oreo cookies and gently stir into your mixture, making sure the pieces are well distributed.
4. Pour into a tub and freeze for 6-8 hours. We also made peanut butter oreo ice cream popsicles with some of our mixture which worked very well.

You could also make this with normal Oreos if you can’t get hold of the peanut butter Oreo cookies.

peanut butter oreo ice cream

This is such a great recipe to make with kids, it’s incredibly simple and because there are no eggs, no cooking, no fuss; it’s quick and easy to put together – the hardest part is waiting for it to freeze!

peanut butter oreo ice cream

The recipe made a lot of ice cream – nearly two pints of it, so it was ideal for making into popsicles and also for spooning into a tub. It is very rich, so a little goes a long way. Don’t forget to take your tub out of the freezer about 10 minutes before serving too so it softens a little.

It is so simple and utterly delicious, if you love peanut butter then you’ll love this recipe! If you try it let me know what you think.

If you enjoyed this, you might also like to try these recipes –

Recipe: No Churn Peanut Butter Oreo Ice Cream

Recipe: Easy Peanut Butter Butterfly Cakes

I’ve been doing a lot of baking recently which can only mean one thing, I’m happy. I’m not sure why I’ve been blessed with the gift of temporary inner peace but I’m going with it and enjoying the cakey results. Yesterday on a whim I whipped up an experimental batch of Peanut Butter Cakes. They turned out to be pretty darn good, so I’m sharing the recipe. It’s really easy, if I can bake it then so can you.

Peanut butter cakes

Easy Peanut Butter Butterfly Cakes (makes approx 20)

Ingredients:
8oz Butter or margarine (I used stork)
8oz sugar
4 large eggs
2oz peanut hottie powder
1 teaspoon of baking soda
6oz self raising flour

For the icing:
2 big scoops of Betty Crocker vanilla buttercream style icing
2 heaped dessert spoons of Chocolate Peanut butter hottie

Method:
1. Beat the butter and sugar together until fluffy and the stir in the eggs.
2. Carefully fold through the peanut hottie powder, baking soda and self raising flour until combined.
3. Dollop into cake cases, there should be enough to make about 20 buns.
4. Bake in a preheated oven at 180c for 15 minutes. Once cooked leave to cool.
5. To make the icing (yes this is cheaty, but you can make your own buttercream if you want), beat the buttercream until soft and thoroughly mix in the chocolate peanut hottie powder, add a drop of hot water if it feels too stiff.
6. Carefully cut a circle out of the top of each of your cooled cakes, cut the circle in two, dollop a teaspoon of buttercream into the hole and top with the halves to make them look like butterfly wings.

Resist the temptation to eat them all in one go.

So there you have it, really, really easy peanut butter cakes, they’re something that would be great to bake with children, or just by yourself if you’re in your happy place like me.

Chocolate Peanut Hottie….. More boozy milkshakes!

In February I got to try out some Peanut Hottie. As a hot drink it’s warming, satisfying and a bit of a low-calorie treat, but me being me, I ended up making some pretty sexy, dirty, boozy, Peanut Hottie & bourbon milkshakes with it. Of course I blogged it and it is now without question one of my most popular blog posts. Turns out you lot love a dirty milkshake!

Last week I got my paws on some CHOCOLATE Peanut Hottie. Yup, you read that right. It’s like hot chocolate with a dollop of peanut butter stirred through it. Delicious, a little bit naughty and still only 83 calories a mug. But what could I do with this Chocolate Peanut Hottie? There was only one answer, make a milkshake and add booze! So I did.

chocolate peanut hottie

First off, for the small boy who was stood in the kitchen bellowing “I want a milkshake pleeeease!” I made a non-alcoholic version…

Chocolate Peanut Hottie Milkshake (serves one)
2 scoops of vanilla ice cream
4 teaspoons of Chocolate Peanut Hottie
350mls of milk

Put it all in a blender and whiz up for a minute, pour it into a glass, you can top it with squirty cream and a peanutty treat if you’re being fancy, I added a slice of a Snickers bar.

I spent ages thinking about what I should slosh into my milkshake, I did consider bourbon, which would still work a treat, but I wanted something different to what I’d had before. Amaretto (a delicious almond flavour liqueur) seemed a pretty good choice, I figured the nutty flavours would really work with the Chocolate Peanut Hottie and I was not wrong.

Chocolate Peanut Hottie & Amaretto Milkshake (serves one)
2 scoops of vanilla ice cream
4 teaspoons of Chocolate Peanut Hottie
2 shots of Amaretto liqueur
350mls of milk

Again, put everything in a blender and whiz it up for a minute. Pour it into a glass, add squirty cream and your slice of Snickers (only if you’re being fancy) and enjoy.

I used vanilla ice cream, but if you wanted to boost the chocolately flavours you could use chocolate ice cream, or a scoop of vanilla and a scoop of chocolate would be good too.

Chocolate Peanut Hottie

I have to say it was excellent, Peanut Hottie works so well in milkshakes and it does have fewer calories than just dolloping in actual peanut butter, though I guess if you’re drinking this you’re less concerned about calories and more concerned about putting awesome things in your mouth. And by god, this is an awesome thing.

You can find Peanut Hottie in Sainbury’s, Waitrose, Booths and Tesco.

Note: I was sent a jar of Chocolate Peanut Hottie free of charge for review purposes. All images and opinions are my own.

Peanut Hottie – Making Peanut Butter Milkshakes

Peanut butter is one of those love/hate things. I’m firmly on the side of loving it. I love it on toast, in salad sandwiches and a more recent love, in milkshakes.

I was uber excited when I got wind of Peanut Hottie which is a peanut butter hot drink like hot chocolate but peanut butter instead. Sounds weird. Looks weird. Is incredible. I know this because the moment the postman delivered me a sample, I put the kettle on.

Peanut Hottie
It’s easy to make, just four teaspoons in a mug of hot water, a vigorous stir and you’re in peanut butter heaven (or hell depending on if you’re one of those weird hater people).

With the sample came a note inviting my imagination to go wild, use Peanut Hottie in any culinary way I saw fit and to blog the results. I thought long and hard about this, then realised I needed to play to my strengths. Add lashings of booze was my answer!

My friend Lou has a cafe where I spend quite a lot of time. It is a lovely cafe with a massive selection of teas, as well as brilliant cake. Amongst those in the know (taps nose with finger) they also make pretty darn special milkshakes. It was to Lou I turned with my mad ideas, he had the equipment and expertise. I had a tub of Peanut Hottie and a crazy milkshake dream.

First off we tried Peanut Hottie and Caramel, here’s what we did…
2 scoops of vanilla ice cream
4 teaspoons of Peanut Hottie
1 dessert spoon of caramel sauce
350mls of milk

Whizz it all up in a blender, add optional squirty cream and decorate with whatever you fancy, maybe chopped peanuts or a cookie.

It was incredible. It was really peanutty with a slight undertone of caramel. It was sweet but not too sweet. Lou downed his in about 4 seconds and he was really impressed with the way the Peanut Hottie powder blended. I loved it. It’s up there with the greats.

Next we tried the game changer, the Peanut Hottie and Bourbon
2 scoops of vanilla ice cream
4 teaspoons of Peanut Hottie
2 shots of bourbon
350mls of milk

Whizz it all up in a blender, again add optional squirty cream and decorate with whatever you fancy, maybe chopped peanuts or a cookie.

This makes me happy just thinking about it. Yes it was boozy, but just the right level, it added a gentle background warmth and worked so incredibly, amazingly well with the peanut flavour, Lou was blown away. I loved it, I can’t ever imagine a peanut butter milkshake without bourbon in it now. It sounds wrong, but it is so right.

milkshake

I love Peanut Hottie and I’m pleased that it has fewer calories than the actual butter. However this is negated if you make a milkshake with ice cream, bourbon and caramel, but totally worth it!

What would you do with Peanut Hottie?

Disclaimer: I was sent a jar of Peanut Hottie to try free of charge with the proviso that I blog honestly about it. Peanut Hottie is available from Sainsbury’s and Waitrose.