Halloween Recipe: Ghost Chocolate Brownies

In the UK, Halloween usually falls during half term, so it’s a great excuse to get the kids in the kitchen to whip up some terrifying treats. Recently I’ve been throwing together quick batches of chocolate brownies for my boy, they’re a speedy bake and so popular. I decided to make my regular recipe extra spooky by adding a handful of spooky spectres. Here are my easy ghost chocolate brownies, which make a fine addition to a Halloween party.

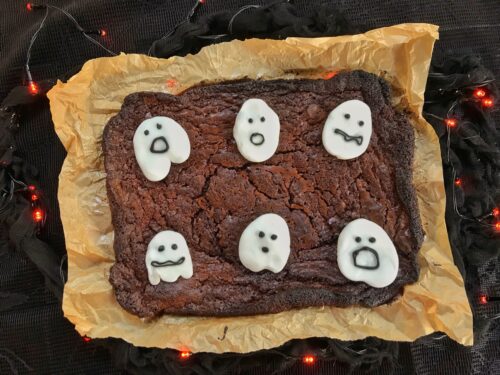
Essentially these are regular chocolate brownies, but with spooky ghost shapes popped on top. I cut my brownies into just six very greedy pieces, mostly becasue we’d made quite big ghosts, and party because we just really are that greedy. Sensible people could probably cut their brownies into 12 or even 16 pieces. Just make sure you have a little ghost for each one.

Halloween Recipe: Ghost Chocolate Brownies

The ghosts are really simple to make. I bought a pack of white royal icing, broke it into small pieces, and then the boy and I made ghost shapes by rolling them out and shaping them. We gave each spectre a spooky face with some black writing icing, which is pretty widely available in supermarkets and online. We had a great time making them, it’s a fun thing to do with the children.

This is my favourite chocolate brownie recipe. It uses very little flour and the brownies are so moreish. A ghostly plate of these brownies is sure to be popular at any Halloween gathering.

Ghost Chocolate Brownies

Ingredients:

250g milk chocolate
250g unsalted butter
4 medium eggs
250g sugar
2 heaped tablespoons self raising flour
2 heaped tablespoons cocoa powder
60ml of vegetable oil
1/3 pack of white ready to roll royal icing
1 tube of black writing icing
Halloween Recipe: Ghost Chocolate Brownies

How to make your Ghost Chocolate Brownies:

Pre-heat your oven to 185° and line a deep sided baking dish with baking parchment.

In a bowl, over a pan of simmering water, melt the chocolate and the butter together until smooth. In a separate bowl, mix the sugar and the eggs, whisk them until they’re light and fluffy.

Pass the flour, cocoa powder through a fine sieve and add to the eggs and sugar. Gently whisk the ingredients together until combined. Then mix in the melted chocolate and the vegetable oil to combine.

Bake for 35-45 minutes until the brownies have lost their wobble but are still a bit gooey inside. Take out and leave to cool. You want to almost under bake them so they are still soft in the centre.

Make your royal icing ghost shapes whenever you want. I prefer to make mine a day or two before I need them so they firm up a little. But it’s fine to make them just before you are decorating your brownies.

To make them, cut off blobs of the icing and roll them out. Try and guess the size of ghost you need for each brownie square. Using a spoon or a blunt butter knife, shape them into the kind of spooky shape you want. Put each one on a piece of baking paper so they’re not sticking to your work surface. Using a tube of black writing icing, draw a ghostly face on each one. Set them to one side for now. They can be happily left in the fridge or another cool place for a few days if you’re making them ahead of time.

Halloween Recipe: Ghost Chocolate Brownies

Once the chocolate brownies are cool, cut them into squares and then lay a ghostly figure on top of each square. These are my favourite brownies ever. I urge you to give them a try.

If you enjoyed this, you might also like to try these recipes…

Halloween Recipe: Ghost Chocolate Brownies

School dinner style Chocolate Concrete with Pink Custard

I was chatting to my son about his school dinners earlier, and whilst things have come a long way since the spam fritters of my 80’s childhood, it seems that pudding wise at least, he’s missing out big time. His puddings tend to be ice cream, cookies, fruit and occasionally cake and custard, and there’s none of the cornflake pie or sprinkle cake from my childhood. I was telling him about chocolate concrete, something which was a regular and popular feature of our school dinner menu. It’s hard to describe, it’s sort of like chocolate shortbread but quite hard, and it was usually served with a bright pink custard. There was nothing else for it, I had to make a batch to show him what he was missing out on.

The chocolate concrete is really easy to make, and I’ve found an exceptionally good cheat for the custard, which is well worth a try. It’s a real store cupboard classic and it got the double thumbs up from my 11 year old, which is high praise indeed!

School dinner style Chocolate Concrete with Pink Custard

Chocolate Concrete with Pink Custard

For the chocolate concrete:

225g plain flour
60g cocoa powder
114g granulated sugar (plus a bit extra for sprinkling)
114g melted butter or margarine

For the pink custard:

600mls Strawberry milkshake (I used Yazoo)
3 egg yolks
25g caster sugar
2 teaspoons of cornflour
Red food colouring, a few drops

How to make your chocolate concrete:

Preheat your oven to 180°c and grease and line a 7 inch square baking tin.

Sift all of the dry ingredients into a bowl and mix thoroughly. Pour in the melted butter or margarine and mix until it forms a pretty stiff dough.

Tip the mixture into the baking tin and press it down with the back of a spoon until it’s pretty evenly spread and is level on top.

Bake for around 30 minutes, remove from the oven and sprinkle the top with some extra sugar. Leave to cool.

It’s best to cut it while it’s still a little bit warm and not fully cool and brittle. I found this cut into 9 good sized pieces of concrete. This can be eaten on it’s own, but it’s traditional to eat it with pink strawberry flavoured custard.

School dinner style Chocolate Concrete with Pink Custard

To make your pink custard:

Tip your strawberry milkshake into a saucepan and warm through. While the milk is coming up to temperature, mix the egg yolks, sugar, cornflower and a few drops of the red food colouring in a large bowl.

Once your milkshake is hot, using a ladle, add some of your hot milk to the paste and whisk thoroughly. Keep adding ladle after ladle until it’s all combined. At this point you might want to add a bit more food colouring to get the shade of pink you’re hoping for.

Return the mixture to the pan and whisk continuously over a low heat until it thickens. You’ll know it’s the right consistency if the custard coats the back of a metal spoon, if you draw a line in the custard on the back of the spoon and the line holds, you’ve got custard! Pour into a jug and get ready to serve it.

There’s something about pink custard that just brings a smile to your face. Replacing the milk in the standard custard recipe with milkshake is such a brilliant cheat, it really gives a great strawberry flavour, and although the natural pink of the milkshake is very pale and needs boosting with a bit of food colouring, it means it’s already well on the way to pink custard heaven. I urge you to try this recipe. It’s a belter!

If you enjoyed this, you might also like to try these peppermint crunch slices, or the classic chocolate cake with chocolate cake with minty green custard.

School dinner style Chocolate Concrete with Pink Custard

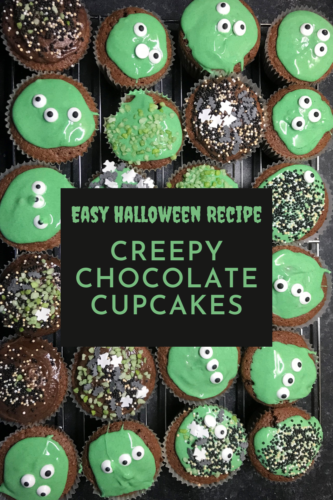
Halloween Recipe: Creepy Chocolate Cupcakes

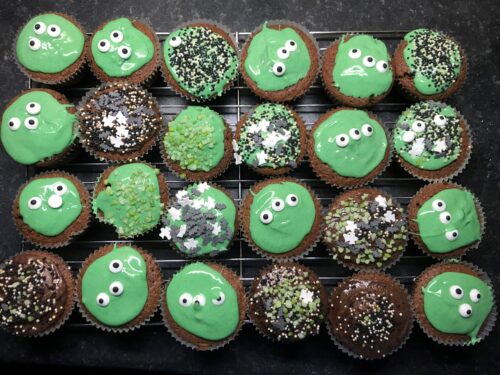
In the UK, Halloween usually falls during half term, so it’s a great excuse to get the kids in the kitchen to whip up some terrifying treats. This year time was short and energy was low, so we made a quick batch of creepy chocolate cupcakes and decorated them in a suitably spooky style.

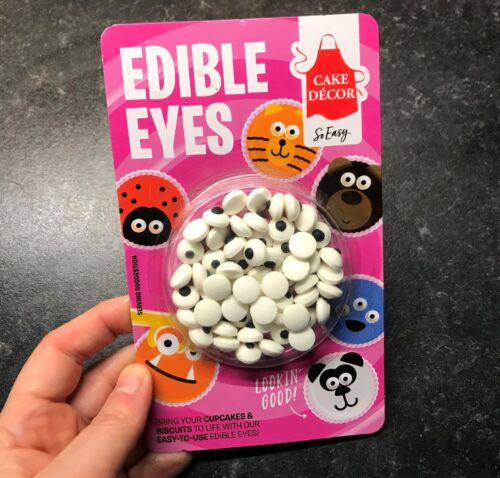
I usually have a decent selection of cake sprinkles in the cupboard, and I’d stocked up for the occasion with some edible eyes, food colouring and some Halloween sprinkles from Cake Angels. So we were well prepared to make some spooky bakes.

Halloween Recipe: Creepy Chocolate Cupcakes
This recipe makes approximately 24 cupcakes.

Creepy Chocolate Cupcakes

Ingredients:
200 g caster sugar
200 g softened butter or margarine (I use Stork)
4 eggs, beaten
1 tsp vanilla extract
1.5 tbsp milk
25g cocoa powder
175 g self-raising flour
1 tsp baking powder

To decorate
2 large bars of white chocolate
1 pack of edible eyes
Food colouring, we used green
Assorted Halloween sprinkles

Method:
Heat your fan oven to 190c. Get two bun trays and set out your cupcake liners in each tray. You will need about 24 of these.

In a large bowl, beat your butter and sugar together until fluffy (I used a hand mixer). Add the eggs, milk and vanilla and combine, then add the cocoa powder,  flour and baking powder and mix together until you have a smooth batter.

Using a dessert spoon, dollop an equal amount of the mixture in each cupcake liner and then bake in your pre-heated oven for 15-18 minutes. If you’re feeling like being precise, then you can weigh your cupcakes to make sure they are all the same size.

Once baked, take your cupcakes out of the oven and leave them to cool on a cooling rack. Once they are cool, you can set to work decorating them.

Halloween Recipe: Creepy Chocolate Cupcakes

Break up your two bars of white chocolate and put them in a microwave proof bowl. Microwave in short blasts until it is just about melting, stir with a small spoon until it is smooth and lump free. Beware! White chocolate melts much quicker than milk or dark chocolate, so this won’t take long.

Once melted, add a small splash of food colouring and mix it through, add more and stir until you get the shade of creepy you are looking for.

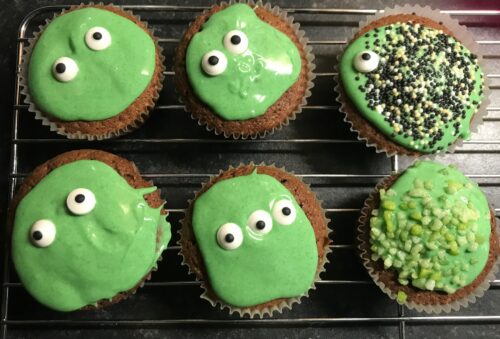
When you’re happy with your coloured chocolate, drop a small spoonful on the top of each bun. Swirl it around a bit with the back of the spoon to spread it around, the chocolate will naturally spread a bit. When you’re happy, it’s time to decorate with those edible eyes or the Halloween sprinkles.

Halloween Recipe: Creepy Chocolate Cupcakes

Once decorated, leave the creepy chocolate cupcakes somewhere cool and out of the way of hungry children (and adults) until the chocolate sets. Once it has set, they’re ready to eat.

We had a lovely time making these very simple little cakes. They were so easy to make, but light as a feather and they looked suitable spooky for Halloween.

If you enjoyed this, you might also like to try these recipes…

Halloween Recipe: Creepy Chocolate Cupcakes

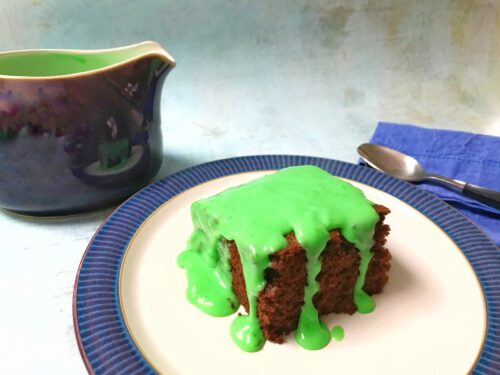
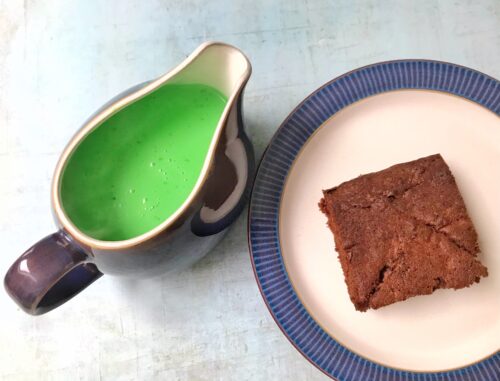
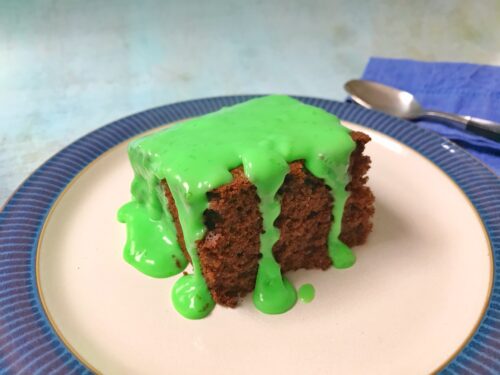
Retro Recipe: Chocolate Cake with Minty Green Custard

Ever since I served up a giant helping of school dinner style chocolate cake with chocolate custard to my family last year, I’ve been itching to make a version of that which many people who went to primary school in the 1980’s will remember fondly – chocolate cake with minty green custard. It’s a similar recipe, but the custard is green and flavoured with peppermint. 

If you didn’t go to primary school in the 1980’s, then this pudding may be a bit alarming to look at. I make no apologies for that. The version I remember was a slightly less vibrant shade of green, but this slightly too green version appealed to my son, who said it looked like a Minecraft block. I will take that as the compliment it was clearly intended to be.

Retro Recipe: Chocolate Cake with Minty Green Custard

Chocolate Cake with Minty Green Custard

Ingredients
250g baking margarine or unsalted butter
250g golden caster sugar
4 medium eggs, beaten
250g self-raising flour
1 tsp baking powder
2 tbsp dark cocoa powder
50g dark chocolate chips or dark chocolate, grated
1 tsp vanilla extract
100mls milk, warmed slightly

For the custard
1 pint of milk
3 tablespoons of cornflour
3 tablespoons of sugar
Green food colouring
Peppermint essence

Retro Recipe: Chocolate Cake with Minty Green Custard

How to make your Chocolate Cake with Minty Green Custard:

Preheat the oven to 180° degrees and grease and line a square 20cm cake or brownie tin with baking paper.

Beat the butter and sugar together until soft, light and fluffy; I use an electric hand mixer for this, but a wooden spoon or a stand mixer work just as well.

Add the eggs one by one, beat well after adding each egg. Sift the flour, baking powder and cocoa into the mixing bowl and mix well, once combined, add the chocolate chips or grated chocolate and stir through.

Add the vanilla extract and enough of the warm milk to create a smooth mixture with a dropping consistency. Pour into the tin and bake for 45-50 minutes or until a skewer inserted into the centre comes out clean. Once baked, pull it out of the oven and leave to cool a little on a baking tray. This cake is good served warm or cold.

To make the custard…

To make the custard, mix the cornflour, sugar and a dash or two of the milk and mix it together to make a smooth paste. Add more milk if you need to.

In the meantime, put the remaining milk in a pan and heat until it is almost at boiling point. Once it’s almost boiling, remove the pan from the heat and pout the hot milk into the bowl with the cornflour paste, keep whisking until it dissolves and there are no lumps.

Adding the paste to the milk instead of the powder should mean you don’t get a lumpy custard!

Pour the milk back into the pan and return to the heat, stirring continuously until thickens and the custard reaches almost boiling point again. Once it’s thickened and smooth, turn the heat off.

Now for the exciting bit, cautiously add a few drops of the green food colouring, whisk the colouring through and add more if you want until you get to your desired shade of green. Traditionally it’s a fairly pale but distinctively green shade, but you can go darker if you dare!

Similarly it’s time to add some of your peppermint essence. I urge caution at this stage, add a few drops at a time, whisk through and taste as you go. Too minty and it’ll taste like toothpaste, but a few drops is probably all you need.

To serve, cut your cake into handsome squares (warm or cold, your choice), and generously top with your minty green custard. Guaranteed clean plates all round.

Retro Recipe: Chocolate Cake with Minty Green Custard

If you enjoyed this, you might also like my recipe for school dinner style cornflake pie.

Retro Recipe: Chocolate Cake with Minty Green Custard

Halloween Recipe: Creepy Chocolate Bark

With half term in full swing and the weather being predictably dismal, we’ve got a packed week of baking and crafting planned to keep us busy. One of the easiest things we do is chocolate bark, I’ve no idea why is called chocolate bark, but it is. With Halloween just days away,  we thought I t would be rude not to make a batch of Halloween Chocolate Bark.

Chocolate bark is essentially melted chocolate with sweets, dried fruit or nuts sprinkled on top. Leave it to set and then chop it up into chucks to be gobbled down by the family. It’s easy and a fun thing for kids to get involved with.

Halloween Recipe: Creepy Chocolate Bark

When we’ve had play dates (in pre-covid times) we’ve often done something like this as an activity. At the start of the play date, they decorate their own melted chocolate puddle with sweets, and by the time it’s time to go home, they can take home their own little bag of chocolate bark.

You can theme these up depending on the time of the year. I’ve done Easter and Christmas bark, all with seasonal treats. This week, with it being Halloween at the weekend, we made Halloween chocolate bark. Lots of supermarkets and sweet shops have spooky themed sweets. I spotted some perfectly grim things in Co-op to make our Halloween chocolate bark extra gruesome. Go wild, go grim, let your imaginations run wild.

Halloween Recipe: Creepy Chocolate Bark

Halloween chocolate bark

Ingredients:
300g milk chocolate
A variety of sweets, I used brains, eyeballs and strawberry laces

How to make your Halloween chocolate bark:
Get a small baking tray and cover with baking paper, make some room in your fridge for the tray later.

Break the chocolate up into chunks and either carefully melt it in the microwave or over a Bain Marie (a bowl over a pan of hot water). I usually do this in the microwave in 30 second blasts, stirring in between. It took about 3 minutes to melt the chocolate for this. Do not do this all in one go as you risk your chocolate going grainy if you don’t keep an eye on it.

Once your chocolate is melted, carefully pour it out onto your baking paper and with a spoon smooth it out a little. You don’t want it spread too thinly, it needs to be at least the thickness of a pound coin.

Halloween Recipe: Creepy Chocolate Bark

Decorate the still warm chocolate with your spooky sweets. Once you’re happy, pop the tray in the fridge for an hour or so until it’s set. Once the chocolate has hardened, using a sharp knife, chop it up into chunky bite size pieces and gobble down greedily.

If you enjoyed this, you might also like to try these recipes…

Halloween Recipe: Creepy Chocolate Bark

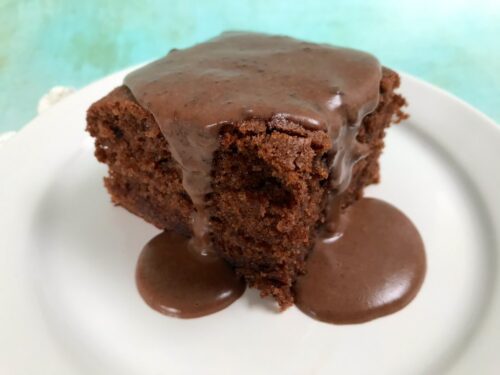
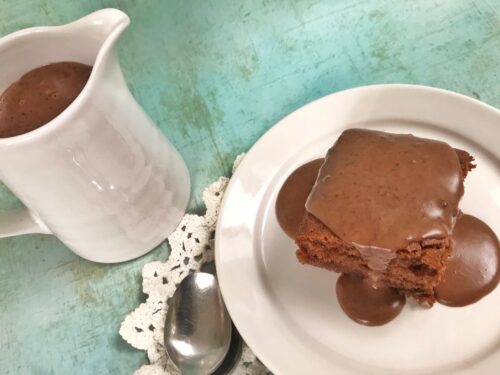
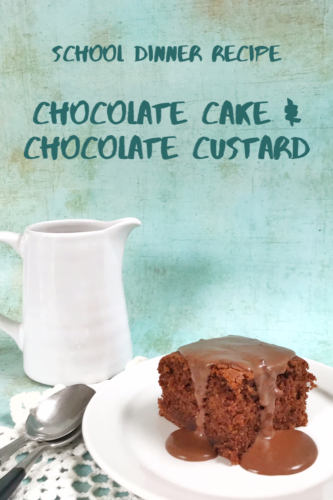
Retro Recipe: Chocolate Cake with Chocolate Custard

I think I sometimes look back on school dinners with misty eyes. I’m not sure my memory of them being the highlight of my school day is always accurate. In reality I think we remember the highlights more than the low points. I don’t think many people look back with much fondness at bowls of rice pudding and prunes; it’s more the thought of cornflake tart and chocolate cake with chocolate custard which bring back the good memories.

I’m not sure modern day school dinners are based on quite so much stodge, but sometimes stodge is good and you need a comforting hot pudding and custard. I’m usually a packet custard kind of girl, but this chocolate custard recipe is really simple and it works so well with the chocolate cake.

Retro Recipe: Chocolate Cake with Chocolate Custard

When I shared my photo of this chocolate cake with chocolate custard on Facebook, there were many people saying it needed to be green, mint flavoured custard, or even pink strawberry custard. I think all schools were different, mine did chocolate crunch and mint custard, something I might make at some point soon.

Chocolate Cake with Chocolate Custard

Ingredients
250g baking margarine or unsalted butter
250g golden caster sugar
4 medium eggs, beaten
250g self-raising flour
1 tsp baking powder
2 tbsp dark cocoa powder
50g dark chocolate chips or dark chocolate, grated
1 tsp vanilla extract
100mls milk, warmed slightly

For the chocolate custard
300ml whole milk
300ml double cream
4 large egg yolks
3 tbsp golden caster sugar
3 tbsp cocoa powder
1 tsp cornflour

Retro Recipe: Chocolate Cake with Chocolate Custard

How to make your Chocolate Cake with Chocolate Custard

Preheat the oven to 180 degrees and grease and line a square 20cm cake or brownie tin with baking paper.

Beat the butter and sugar together until soft, light and fluffy; I use an electric hand mixer for this, but a wooden spoon or a stand mixer work just as well.

Add the eggs one by one, beat well after adding each egg. Sift the flour, baking powder and cocoa into the mixing bowl and mix well, once combined, add the chocolate chips or grated chocolate and stir through.

Add the vanilla extract and enough of the warm milk to create a smooth mixture with a dropping consistency. Pour into the tin and bake for 45-50 minutes or until a skewer inserted into the centre comes out clean. Once baked, pull it out of the oven and leave to cool a little on a baking tray. This cake is good served warm or cold.

To make the custard, heat the milk and cream together in a saucepan until it is almost boiling, stir often. Whisk the egg yolks in a bowl with the sugar, cocoa and cornflour, then carefully and gradually pour the hot milk and cream over the top. This bit is really important as you don’t want the hot milk to scramble the eggs, so make sure you whisk it really well and add the hot milk gradually. Whisk well, then return to the pan.

Cook the mixture over a low-ish heat, stirring constantly until it forms a custard that thickly coats the back of a wooden spoon.

To serve, cut into 8 equal squares and serve warm with the chocolate custard poured over the top. School uniform optional!

If you enjoyed this, you might like this version of chocolate cake with minty green custard!

Retro Recipe: Chocolate Cake with Chocolate Custard

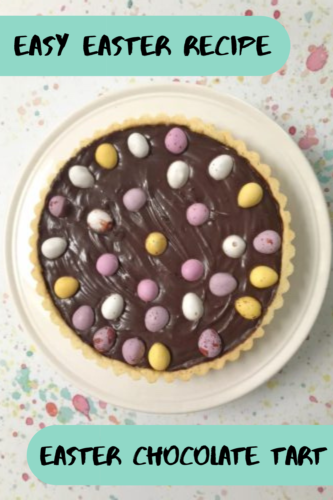
Recipe: Easy Easter Chocolate Tart

One of my favourite (and incredibly easy) things to make is an indulgent chocolate tart. Made with dark chocolate it is a delicious and pretty adult dessert. If dark chocolate isn’t your thing, you can swap it out for milk chocolate and enjoy a more family friendly pudding. I’ve jazzed up my usual chocolate tart for Easter and, well it was so popular that is disappeared within the hour!

Easter is undoubtedly a time for chocolate. If you can’t indulge your sweet tooth now, then when can you? This chocolate tart is really very simple to make, especially if you cheat and buy ready made pastry, and would be fun for kids to join in with too.

Recipe: Easy Easter Chocolate Tart

Easy Easter Chocolate Tart

Ingredients:
For the pastry –
4oz plain flour
2oz butter, cubed
A pinch of salt
2-3 tablespoons of cold water
-or- a packet of ready rolled shortcrust pastry

For the filling –
150g single cream
2 tablespoons of sugar
150g good quality dark chocolate, or milk chocolate if you prefer

2 bags of mini eggs to decorate, 3 if you’re a nibbler!

Recipe: Easy Easter Chocolate Tart

Method:
Tip the flour, salt and butter in a large mixing bowl. Using your fingers, rub the butter into the flour until it looks like breadcrumbs. Use a knife and stir in just enough cold water to bind the dough together. Do this gradually as you don’t want your pastry to be too wet. Once you’ve made the dough, cover the bowl and chill it in the fridge for 15 minutes or so before rolling out.

Or if you’re using shop bought, ready rolled pastry, take it out of the fridge about half an hour before you want to use it.

Pre-heat your oven to gas mark 5 or 190°

Take your pastry and roll it out to the thickness of a pound coin. You can either roll it out on a floured surface, or between two pieces of baking parchment. I find the baking parchment method quicker and a lot less messy.

Grease a 20cm tart tin and carefully put the pastry in the tin, pressing it against the sides. Let the pastry hang over the sides of the tin, you can trim it later. Prick the base all over with a fork. Top the pastry with a sheet of baking parchment and cover with baking beans, bake in your pre-heated oven for 10 minutes.

Remove the baking beans and parchment and pop back in the oven for another 8 minutes. Remove from the oven and leave to cool. Once cool, carefully with a sharp knife trim the pastry so it is flush with the top of the tin.

While your pastry is cooling, warm up your cream and sugar in a saucepan. Finely chop the chocolate and once the cream is simmering, turn off the heat and add the chocolate to the pan. Leave for a minute and stir until the mixture is smooth, like really thick hot chocolate.

Carefully fill the tart case with the melted chocolate mix, level it off and make an artistic swirl or ripple on the top if you want. Decorate with your mini eggs however you want. Put your tart in the fridge for a minimum of two hours, or overnight if you wish.

This chocolate tart is very, very rich, so a little goes a long way. It also makes an excellent pudding for Easter!

If you enjoyed this recipe, you might like these mini egg cookies or these peppermint crunch slices!

Recipe: Easy Easter Chocolate Tart

Recipe: Chocolate Marshmallow Brownies

I am late to the party when it comes to chocolate brownies. I’ve always found them to be either a bit too gooey, or a bit too dry. I’ve discovered that the secret to the perfect brownie is to bake them yourself, that way you are in control of how gooey your brownie is. This week I baked a batch of Chocolate Marshmallow Brownies and after years of being entirely indifferent to brownies, I ended up making the best brownies ever!

Baking brownies is such a lovely thing to do with children, my son loves stirring the chocolate and butter and watching them melt over the gentle heat of the bain marie. He’s 8 now, so only just trusted to do this job knowing the dangers of naked flames, hot water and inattention.

After school on Tuesdays, the boy and I like to have a couple of hours of baking and crafts together. It’s my favourite time of the week, his too I think. Of course, the secret to craft and baking success is planning, something I entirely forgot to do. Thankfully I had everything we needed to bake our usual chocolate brownies with cherries, everything that is apart from the cherries. No fear, I thought, I’ll improvise.

Recipe: Chocolate Marshmallow Brownies

Hiding in my coffee cupboard was a bag of marshmallows which I sprinkle on top of hot chocolates. I wondered how they’d be if I used them in the brownies, it turns out they were excellent. You could stir them through the brownie batter, or you can just sprinkle them on top before they go in the oven. They go all toasted and gooey, just like round the campfire.

Chocolate Marshmallow Brownies

Ingredients:

250g milk chocolate
250g unsalted butter
4 medium eggs
250g sugar
2 heaped tablespoons self raising flour
2 heaped tablespoons cocoa powder
60ml of vegetable oil
2 handfuls of Marshmallows

How to make your Chocolate Marshmallow Brownies:

Pre-heat your oven to 185° and line a deep sided baking dish with baking parchment.

In a bowl, over a pan of simmering water, melt the chocolate and the butter together until smooth. In a separate bowl, mix the sugar and the eggs, whisk them until they’re light and fluffy.

Pass the flour, cocoa powder through a fine sieve and add to the eggs and sugar. Gently whisk the ingredients together until combined. Then mix in the melted chocolate and the vegetable oil to combine.

If you want to stir your marshmallows through the batter, do that now. if you want to sprinkle them on top, pour the batter into the baking dish and sprinkle them all over the top.

Bake for 35-45 minutes until the brownies have lost their wobble but are still a bit gooey inside. Take out and leave to cool. You want to almost under bake them so they are still soft in the centre.

Once they are cool, cut them into squares, sprinkle them with icing sugar if you prefer. These are my favourite brownies ever. I urge you to give them a try.

Recipe: Chocolate Marshmallow Brownies

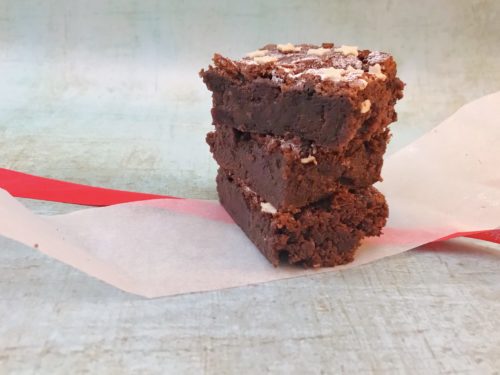
Recipe: Chocolate Brownies with Boozy Cherries

Chocolate brownies are universally popular. I know my family absolutely adore them and whenever I make a batch, they usually disappear far too quickly. Brownies are the kind of thing you can easily adapt for different occasions or tastes.

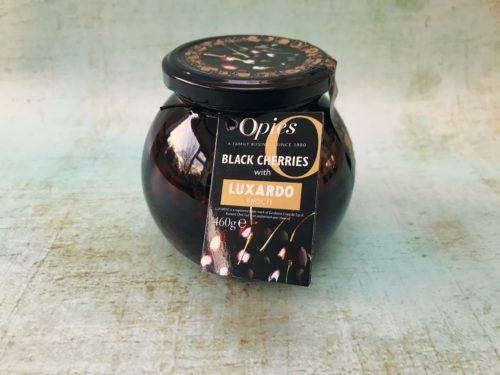
This week I’ve decided to bake the classic – chocolate and cherry brownies, but I gave them a festive twist and baked them with Opies Black Cherries with Luxardo Kirsch. They were so gooey and good – the perfect brownie!

Recipe: Chocolate Brownies with Boozy Cherries

Chocolate Brownies with Boozy Cherries

Ingredients:

250g milk chocolate
250g unsalted butter
4 medium eggs
250g sugar
60ml of vegetable oil
2 heaped tablespoons self raising flour
2 heaped tablespoons cocoa powder
150g drained Opies Black Cherries with Luxardo Kirsch
2 shots of the Luxardo Kirsch which the cherries had been in

How to make your Chocolate Brownies with Boozy Cherries:

Pre-heat your oven to 185° and line a deep sided baking dish with baking parchment.

In a bowl, over a pan of simmering water, melt the chocolate and the butter together until smooth. In a separate bowl, mix the sugar and the eggs, whisk them until they’re light and fluffy.

Pass the flour, cocoa powder through a fine sieve and add to the eggs and sugar. Gently whisk the ingredients together until combined. Then mix in the melted chocolate and the vegetable oil to combine. Stir through the cherries and kirsch and pour the batter into the tin.

Recipe: Chocolate Brownies with Boozy Cherries

Bake for 35-45 minutes until the brownies have lost their wobble but are still a bit gooey inside. Take out and leave to cool. You want to almost under bake them so it’s still soft in the centre.

Once they are cool, cut them into squares. I sprinkled my brownies with white chocolate stars and icing sugar to make them look a bit more festive.

Recipe: Chocolate Brownies with Boozy Cherries

I did have plans to make cherry chocolate brownie sundaes with them; layering them up with ice cream, whipped cream and drizzling more kirsch and cherries over the top. But I went out to work and when I came home they’d all gone, so you’ll have to use your imagination instead. The sundae sounded pretty tasty in my imagination!

Recipe: Chocolate Brownies with Boozy Cherries

Note: We were sent a jar of Opies Black Cherries with Luxardo Kirsch and I decided to use them in this recipe. I’ve not been compensated for this post.

Easy recipe: Homemade Chocolate Jazzies

A few weeks ago I was mooching around one of my local charity shops when I spotted a silicone baking mold for a pound. They can be quite expensive, so I snapped it up and took it home. I think it was originally designed for small cupcakes or muffins, but this had homemade chocolate jazzies written all over it.

As a working from home mum I am often called upon to help entertain a child or two for the odd day during the school holidays. I don’t mind this as for me it’s probably easier to entertain two seven years olds, than one seven year old who is just so “boorrEDDD” of my company. I like to have a few crafts, activities and bakes up my sleeve to entertain any young visitors we may have; so I thoroughly cleaned my silicone mold and tucked it away for a rainy day.

Easy recipe: Homemade Chocolate Jazzies

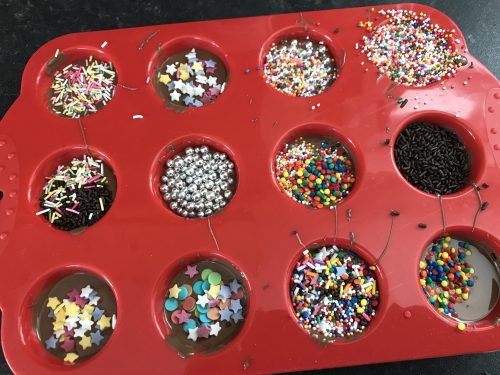
As a keen baker I always have a good variety of sprinkles in my cupboard. For some reason kids love sprinking almost as much as eating the sprinkles. I had quite a few little jars which probably needed using up. Making homemade chocolate jazzies is a really good way of using them up. You could give each child a different kind of sprinkle so they know which jazzies are theirs, or they can mix and match.

I made some sparkly chocolate cups for Mother’s Day back in the spring, they are very similar to those, but slightly smaller and with billions more sprinkles.

Homemade Chocolate Jazzies

Ingredients:
250g of milk chocolate
Cake decorating sprinkles, stars, silver balls, whatever you fancy

You will need:
A saucepan, a glass bowl which will sit in the pan, but so it doesn’t touch the bottom; a metal spoon, silicone baking molds.

How to make your chocolate jazzies:
Boil some water and pour the water into your pan so it’s about 3cm deep. Carefully place the glass bowl in the pan making sure the bottom of the bowl doesn’t touch the water. This is called a bain marie.

Break your chocolate up into small pieces and put it in the glass bowl. The water in the pan needs to be at a gentle simmer, not bubbling and boiling. Stir the chocolate until it is melted.

Easy recipe: Homemade Chocolate Jazzies

Once the chocolate is melted, with a spoon scoop out some melted chocolate into each of the molds. Try and put an equal amount in each. If you’re good at this there might be just enough left over for some spoon licking afterwards. Gently shake the silicone tray so the chocolate settles.

Once you’ve used all of your chocolate, take your chosen sprinkles and sprinkle as much or as little as you like over the top of each chocolate. Leave them to cool for at least two hours. If you need them to set a bit faster for impatient boys, pop them in the fridge.

Easy recipe: Homemade Chocolate Jazzies

To serve, make sure they are properly set and carefully pop them out of the molds. You might want to be careful and tip them out onto a tray or over a dish to catch any excess sprinkles. We had many excess sprinkles because the boys were very enthusiastic about the sprinkling.

Easy recipe: Homemade Chocolate Jazzies

The homemade chocolate jazzies went down an absolute storm. The boys really enjoyed making them. They’re incredibly simple to do and they also really enjoyed eating them and sharing them too. My chocolate jazzie experiment was a success!

PS. If you’re wondering they they’ve got blue hands, we played with blue slime while the jazzies set and the slime coloured their hands for the day. They do have clean hands, I promise!

Easy recipe: Homemade Chocolate Jazzies