Cool Drinks Ideas: Chamomile and Lime Iced Tea

We were sent the ChillFactor Neon Slushy Maker to test in exchange for using it in a recipe. All images and opinions are our own.

I love iced tea, and it’s a love which I share with my son. During the hot summer months, I quite often make up a batch of cool iced tea to keep in the fridge. It’s so refreshing and easy to make too. We were sent a ChillFactor Neon Slushy Maker to try out, and my first thought was GIN, but then I had a better second thought, which was chamomile and lime iced tea slushies. With the first sunny days of spring warming our bones, I whipped up a batch of my chamomile and lime iced tea and got to work making slushies with it. I am a genius.

Cool Drinks Ideas: Chamomile and Lime Iced Tea

The ChillFactor Slushy Maker is a simple bit of kit. It’s a silicone cup which you freeze, I freeze overnight for maximum slush. When you’re ready to make your slushy, pour your drink in and squeeze it and keep squeezing it for about a minute (this is where my 11 year old comes into his own). You should see slush form before your very eyes.

The slushy maker comes with a straw/spoon, so you can eat/drink/slurp your slushy from the cup. Though I prefer to have mine in a glass, if you keep it in the cup then it will keep it cooler for longer. Once you’ve finished, the slushy maker is reusable, just wash in warm soapy water after each use, re-freeze and its ready for you to make your next slushy.

We’ve used our slushy maker quite a lot since we got it. I like using it to make iced coffee even more icy. My son likes mixing fruit juices and creating his own frozen blend. We are really impressed with it, and it’ll really come into its own come summer. Here’s an Instagram reel of my son showing you how quick and easy it is to use the ChillFactor Slushy Maker.

Cool Drinks Ideas: Chamomile and Lime Iced Tea

Now, if you fancy the look of my chamomile and lime iced tea, which is somehow even more delicious in slushy form, then here’s my recipe.

Chamomile and Lime Iced Tea

Ingredients:

500mls boiling water
2 chamomile tea teabags
2 tablespoons of sugar
1 lime

How to make your chamomile and lime iced tea:

Boil the kettle and pour 500mls of boiling water into a heatproof jug. Drop in the teabags and sugar. Cut the lime into wedges and drop about half of the lime into the tea. Stir well and leave it to steep until it is cool. Once cool, cover and put in the fridge to chill for a few hours.

Remove the tea bags and lime, and serve over ice with some fresh lime wedges.

If you’re turning your delicious iced tea into an ice tea slushy, remove the tea lags and lime, pour approx 200-250mls into your frozen and prepared ChillFactor Slushy Maker and squeeze for approximately one minute. Either drink it from the slushy cup, or pour it into a glass and serve with some fresh lime wedges. It is divine!

We are big fans of the ChillFactor Slushy Maker. It’s perfect for turning individual drinks into slushy heaven. Now, I did say that my first thought was gin, it might be time for me to explore that in more depth! The ChillFactor Slushy Maker is available to buy online and in store now.

Cool Drinks Ideas: Chamomile and Lime Iced Tea

Beautiful Bakes: Lemon Curd Sponge Cake

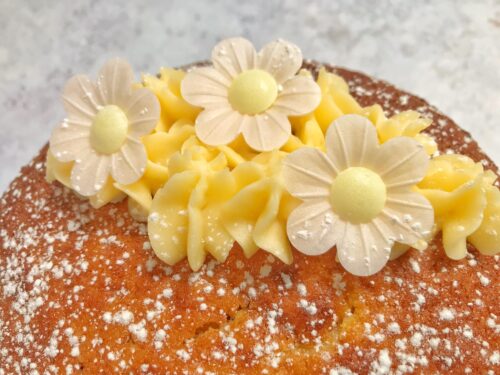
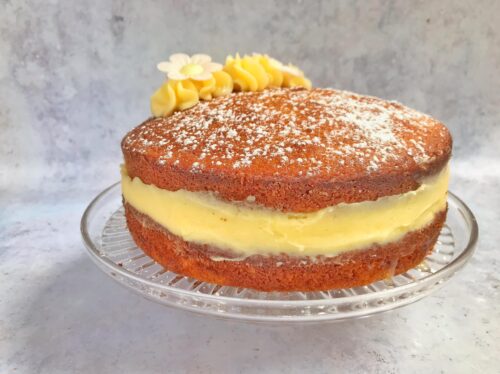
As the person who does most of the baking in my family, I was tasked with bringing a cake to our Mother’s Day get together. I’m not saying my family are picky, but there’s a big list of things people can’t or won’t eat, but everyone loves a lemon cake. It was suggested I make a lemon drizzle cake, but I had a jar of lemon curd in the cupboard and I wanted to put it to good use. Instead I baked this lemon curd sponge cake, and it was as delicious as it was pretty.

It’s based on my failsafe Victoria Sponge recipe, but it uses a whole jar of zingy lemon curd. It’s definitely a cake I’ll be baking again and again. Because I was baking for Mother’s Day, I did pipe some buttercream on the top and add some pretty daisies, but you don’t have to do this if you don’t want. It’s still an absolute banger of a bake without its fancy hat!

Beautiful Bakes: Lemon Curd Sponge Cake

I added some lemon curd into my sponge mix, which did make the sponge layers a little darker than you may like. If you wanted a lighter coloured cake with the lemon flavour, you could swap this out for the zest of a lemon and a tablespoon of lemon juice.

Beautiful Bakes: Lemon Curd Sponge Cake

Lemon Curd Sponge Cake

Ingredients:
200g caster sugar
200g softened butter or margarine (I use Stork)
4 medium eggs, beaten
2 tablespoons of lemon curd
1.5 tbsp milk
200g self-raising flour
1 tsp baking powder

For the buttercream:
150g softened unsalted butter
300g icing sugar
2 tablespoons of lemon curd

Optional extras:
1 more tablespoon of lemon curd for spreading between the layers
Dr. Oetker Wafer Daisies, or similar
Icing sugar, a sprinkle

How to make a Lemon Curd Sponge Cake:

Heat your fan oven to 190c. Grease two 20cm sandwich tins. I also lined the bottom of each tin with a circle of baking parchment. In a large bowl, beat your butter and sugar together until fluffy (I used a hand mixer). Add the eggs, milk and lemon curd and combine, then add the flour and baking powder and mix together until you have a smooth batter.

Divide the mixture equally between the two tins. You can weigh them to make sure they’re fairly equal if you’d like. Bake in your pre-heated oven for around 20 mins until golden and they’re cooked. Remove from the tins and leave to cool on a cooling rack.

Leave your cakes to cool fully. While your cakes are cooling, now is a good time to make your lemon curd buttercream. In a bowl and using a mixer or electric hand whisk, beat your butter until it is soft. Add your icing sugar, and taking care not to create an icing sugar cloud, beat the butter and sugar together. Add the lemon curd and once that’s combined, taste it and see if you want to add a bit more lemon curd, which you absolutely can do. Once you’re happy with you buttercream, it’s time to assemble your cake.

Put your first layer on a cake board, or cake stand, or whatever you’re presenting it on. If you’re worried about it sliding around, a small dollop of buttercream on the bottom will stick your first layer in place and stop it moving around. Generously top the first layer with some of the buttercream, spread it evenly across the cake.

Just to really hammer home that it was a lemon curd sponge cake, I then spread a thin layer of lemon curd over the buttercream, and sandwiched the second layer on top of that.

Beautiful Bakes: Lemon Curd Sponge Cake

Now, if you’re wanting to decorate it further, like I did, then now is the time to get a piping bag and a nozzle. I use a Wilton 2D nozzle and I’d like to make it clear than I’m firmly am amateur level cake decorator; so if I can do this, you can too! Fill the piping bag with your leftover buttercream and just practice a few times on a chopping board or plate. I was wanting to do a crescent shape of little start shaped dollops. These are easy to do as you just squeeze equal amounts on, and then if you top with a scattering of wafer daises; then they can hide any imperfections. Here’s some more expert guidance on the wilton blog, which I do recommend you take a look at.

I didn’t love the look of the small gap between the layers, so I piped around the gaps and then smoothed it out with the back of a knife. It does look like there’s a huge amount of buttercream inside, but there really isn’t.

Beautiful Bakes: Lemon Curd Sponge Cake

For one final flourish, a small dusting of icing sugar makes it look at least 5% prettier. And that’s it, your lemon curd sponge cake is ready to be cut up into greedy slices and devoured.

It’s such a pretty cake and really light and spring-like. It’s a good store cupboard bake too, and worth keeping a jar of lemon curd in for, for when the baking mood strikes!

Beautiful Bakes: Lemon Curd Sponge Cake

Simple Recipe: Easy Chocolate Orange Tart

Chocolate orange is one of those classic flavours. Growing up in the 1980’s, Christmas stockings were always bulked out with a hefty chocolate orange. It was such a treat, and over the years (decades!), chocolate orange has become more and more popular and available. Indeed, on my last trip around a supermarket, I found a box of Cadbury’s Chocolate Orange Fingers, and an idea for a pretty pudding was born; this simple chocolate orange tart!

Now, I just added some orange zest to my tart, and I thought the flavour was orangey enough; but if you want the full whack of chocolate orange goodness, then bars of actual chocolate orange are now available in the shops. You can easily swap out the milk chocolate for chocolate orange chocolate if that floats your boat. I feel like I’m saying the words “chocolate” and “orange” quite a bit here.

Easy Chocolate Orange Tart

This tart is rich and delicious, it didn’t last very long at all, which is always a good sign. If I’d have let him, my 11 year old would have probably eaten the lot in one sitting!

Easy Chocolate Orange Tart

Ingredients:
For the pastry –
4oz plain flour
2oz butter, cubed
A pinch of salt
2-3 tablespoons of cold water
-or- a packet of ready rolled shortcrust pastry

For the filling –
300g single cream
4 tablespoons of sugar
300g milk chocolate
Zest of one orange
Approx 1/3 of a box of Cadbury’s Chocolate Orange Fingers

Easy Chocolate Orange Tart

How to make a chocolate orange tart:

Tip the flour, salt and butter in a large mixing bowl. Using your fingers, rub the butter into the flour until it looks like breadcrumbs. Use a knife and stir in just enough cold water to bind the dough together. Do this gradually as you don’t want your pastry to be too wet. Once you’ve made the dough, cover the bowl and chill it in the fridge for 15 minutes or so before rolling out.

Or if you’re using shop bought, ready rolled pastry, take it out of the fridge about half an hour before you want to use it.

Pre-heat your oven to gas mark 5 or 190°

Take your pastry and roll it out to the thickness of a pound coin. You can either roll it out on a floured surface, or between two pieces of baking parchment. I find the baking parchment method quicker and a lot less messy.

Grease a 20cm tart tin and carefully put the pastry in the tin, pressing it against the sides. Let the pastry hang over the sides of the tin, you can trim it later. Prick the base all over with a fork. Top the pastry with a sheet of baking parchment and cover with baking beans, bake in your pre-heated oven for 10 minutes.

Easy Chocolate Orange Tart

Remove the baking beans and parchment and pop back in the oven for another 8 minutes. Remove from the oven and leave to cool. Once cool, carefully with a sharp knife trim the pastry so it is flush with the top of the tin.

While your pastry is cooling, warm up your cream and sugar in a saucepan. Finely chop the chocolate and once the cream is simmering, turn off the heat and add the chocolate to the pan. Leave for a minute and stir until the mixture is smooth, like really thick hot chocolate. Once it’s cooled a little, add around half of the finely grated orange zest and stir through.

Carefully fill the tart case with the melted chocolate mix, level it off and make an artistic swirl or ripple on the top if you want. I decorated my tart by placing the chocolate orange fingers in regular intervals, so that when you slice the tart you’ll get a chocolate finger with each delicious wedge. I then scattered the remaining orange zest over the top of the tart. Put your chocolate tart in the fridge for a minimum of two hours, or overnight if you wish.

This chocolate orange tart is rich and delicious. I don’t think it needs anything with it, but you might want to add a drizzle of cream or a scoop of ice cream. For me, it’s just perfect served on its own.

If you enjoyed this recipe, you might like this Easter mini eggs chocolate tart.

Easy Chocolate Orange Tart

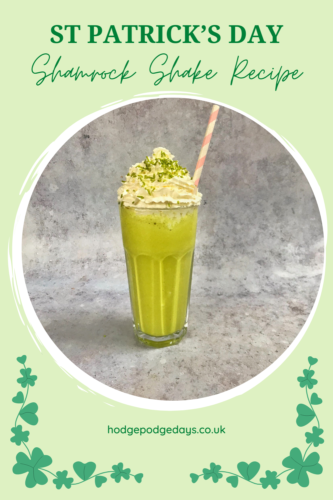
Milkshake Recipe: St Patrick’s Day Shamrock Shake

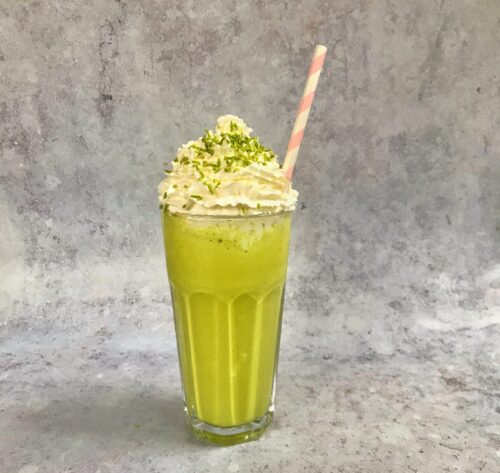
If you, like my son love mint flavoured things, this minty green shamrock shake for St Patrick’s Day might be the ideal treat. It’s rich, it’s delicious, it’s minty and it’s got a lovely mint green colour which really catches the eye.

These milkshakes are really simple to make if you have a blender. I tend to whip milkshakes up in my Nutribullet, but any blender will work well for this.

The shamrock shake is made with vanilla ice cream, mint flavouring and some green food colouring. It’s important you choose a vanilla ice cream which is as white as you can get. If you choose a yellow vanilla ice cream, it will be harder to colour and it might look a bit swampy.

Milkshake Recipe: St Patrick’s Day Shamrock Shake

St Patrick’s Day Shamrock Shake

Ingredients
200mls milk
3 scoops of vanilla ice cream
3 or four drops of peppermint essence
Green food colouring
Squirty cream
Green sprinkles

Milkshake Recipe: St Patrick’s Day Shamrock Shake

How to make your shamrock shake:

When you add your peppermint essence and food colouring, go easy, a few drops at a time. Taste as you go, you can always add more, but you can’t take any away if you add too much!

Put your milk, ice cream, peppermint essence and a few drops of food colouring in the blender. Whizz it all up together. Taste and check if it’s minty enough, if not add a drop or two more peppermint essence. If it’s not green enough for you, add more food colouring until you’re happy with the shade. Add more milk if the milkshake is too thick.

Pour into a tall glass and top with a generous swirl of squirty cream and green sprinkles, you can even add a cherry if you’re feeling fancy.

Milkshake Recipe: St Patrick’s Day Shamrock Shake

If you enjoyed this, you might like to try my green velvet cake, or this Guinness cheesecake.

Milkshake Recipe: St Patrick’s Day Shamrock Shake

Easy Recipe: Vegan Baked Camembert with Candied Walnuts

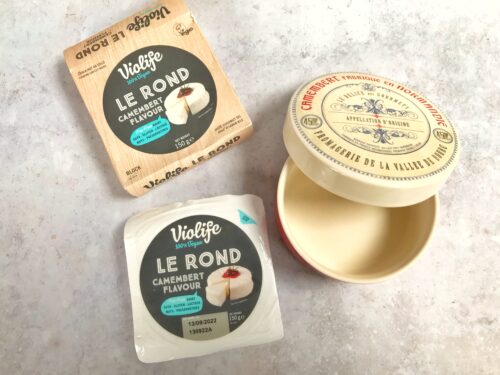
We were sent a selection of Violife vegan cheese to try, so we made this vegan cheese baked camembert with candied walnuts. All images and opinions are our own.

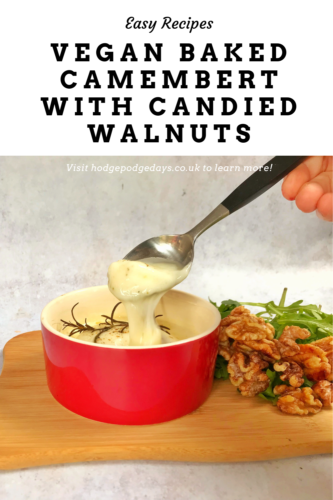
Since I became lactose intolerant five or more years ago, I’ve been reducing the amount of dairy I’ve been eating. Rich dairy, things like soft cheese, brie, camembert and halloumi all seem to make me quite poorly. I can take tablets to lessen the symptoms, but sometimes it’s just easier to avoid them altogether. Baked Camembert is one of those things I really miss. Sharing an oozy baked cheese with some crusty bread and a nice glass of crisp white wine is, or was in the past for me. However, vegan cheese makers, Violife have created a camembert which melts when you bake it, and it’s perfect for dunking crusty bread in and sharing with a friend; glass of crisp white wine optional.

I baked my camembert very simply, with a good crack of black pepper and a drizzle of olive oil, but there are all kinds of different vegan recipes and suggestions on the Violife website. I adore candied walnuts and their nutty sweetness really brings out something special with the cheese. They’re also something I make quite a lot of just for snacking. Walnuts are one of my favourite nuts and they’re packed full of the good stuff.

Vegan Baked Camembert with Candied Walnuts

This recipe makes enough for a nice lunch for two, with crusty bread.

Vegan Baked Camembert with Candied Walnuts

Ingredients:
A Violife Le Rond Vegan Camembert
A drizzle of olive oil
Some ground black pepper
Fresh thyme or rosemary, optional

For the candied walnuts:
100g walnut halves
2 tablespoons of water
25g of sugar

Vegan Baked Camembert with Candied Walnuts

How to make your Vegan Baked Camembert with Candied Walnuts:

Begin by candying your walnuts. To do this, toss your walnut halves in the water and shake off the excess. Toss the damp nuts in the sugar and place on a baking tray and pop them in the oven at 200° for five minutes, check them regularly as you don’t want them to burn. Once they’re starting to brown a tiny bit, remove them from the oven and tip onto a plate to cool down. While your nuts are cooling, it’s time to turn your attention to the vegan cheese.

I’ve got a camembert baking dish, but any ceramic or cast iron dish would work well. Put your vegan cheese in the baking dish, drizzle over about half a tablespoon of olive oil and add some black pepper. If you have it, some fresh thyme or rosemary works well on top. Bake the cheese in your oven until it’s melting and bubbly, this took me around 15 minutes.

Vegan Baked Camembert with Candied Walnuts

Serve your baked vegan camembert with crusty bread, a heap of fresh rocket and a lovely, crunchy handful of the candied walnuts. Delicious!

If you enjoyed this recipe, you might also like to try my vegan sausage rolls or these Vegan cheese and baked bean pasties.

Vegan Baked Camembert with Candied Walnuts

FREE Printables: St George’s Day Colouring Sheets

St George’s Day is on 23rd April each year, it is believed this he died on this day in 303 AD. St George is the patron saint of England and his cross is part of the Union Flag. He is celebrated throughout the world and there are many feast days devoted to him. It used to be a national holiday in England. These days it’s not celebrated as such, but flags with the St George’s cross are flown on some buildings.

St George is a heroic figure, and I’ve created some colouring printables for families and colouring enthusiasts to do to celebrate St George’s Day.

St George’s Day Colouring Sheets

Download this St George printable here.

Here in England, we know St George as a brave knight who (may or may now have) stayed a dragon. Even though he is the patron saint of England, he wasn’t born here, he was born in what would now be Turkey. Saint George is also the patron saint of other countries including Venice, Portugal, Catalonia, Genoa and Ethiopia.

FREE Printables: St George’s Day Colouring Sheets

Download this St George’s flag printable here.

St George is considered to have a number of positive traits, and stories told to children about him always underline his bravery and courage, not to mention his devotion, piety, leadership, truthfulness and dedication to the cause. St George was said to be one of the heroes of the crusades, which is one of the reasons he’s known to be such a heroic character.

FREE Printables: St George’s Day Colouring Sheets

Download this design your own shield printable here.

If you are marking St George’s Day, I’ve made some FREE colouring printables which your family might enjoy. From St George on his horse; St George’s flag to colour in; a shield to design; to a cute knight and dragon to colour in; these free printables will help your family celebrate this special saints day.

FREE Printables: St George’s Day Colouring Sheets

Download this St George and the dragon printable here.

St George’s Day isn’t as well celebrated as St David, St Patrick or St Andrew, which is a bit of a shame. How will you be celebrating St George’s Day?

FREE Printables: St George’s Day Colouring Sheets

Easy Recipe: Vegan Cheese and Baked Bean Pasties

We were sent a selection of Violife vegan cheese to try, so we made these vegan cheese and baked bean pasties. All images and opinions are our own.

At some point in my late 30’s I started to develop what turned out to be lactose intolerance. As a cheese lover, this was something of a blow to me. I’ve been a vegetarian for 32 years now, and I find myself more and more cutting out dairy from my diet. I can take tablets to help me digest non-vegan cheese, but it’s just nice to be able to sit down and enjoy a meal that I know won’t make me poorly. Vegan cheese has come a long way since I first tried it several years ago, and Violife seem to be leading the way in making a range of vegan cheese products for all kinds of different vegan recipes.

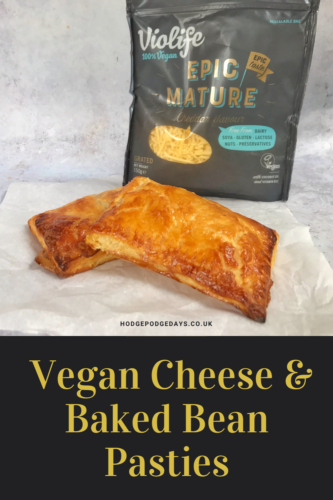
I was chatting to a girl I work with who is vegan, and she recommended the epic extra mature cheddar as being the best vegan cheese she’d tried. So following her recommendation, I made a batch of vegan cheese and baked bean pasties for my hungry family. They are ridiculously easy to make, you don’t need any extra special culinary skills and they are so good, my 11 year old was scrabbling for more!

Easy Recipe: Vegan Cheese and Baked Bean Pasties

This recipe makes four pasties, to make more, just double it, or triple it. It’s so simple to throw together and they make a lovely warming lunch, or pre-swimming snack in our case.

Vegan Cheese and Baked Bean Pasties

Ingredients:
A sheet of ready made puff pastry
1/2 tin of baked beans
4 big pinches of grated vegan cheese
Vegan egg wash, I used melted vegan spread.

How to make your Vegan Cheese and Baked Bean Pasties:

Pre-heat your oven to 200°. Unroll your sheet of ready made puff pastry and cut into four rectangles – have a look at the picture below which shows you the process.

Easy Recipe: Vegan Cheese and Baked Bean Pasties

Open your tin of beans and tip them into a sieve to drain off some of the excess bean juice. Some brands are juicer than others, ideally you don’t want to add too much juice to your pasty as that will encourage them to leak out. Once they’ve drained off a bit, add about a tablespoon of beans to one side of the pastry and top with a large pinch of grated cheese.

Fold the pastry over and press the edges together. Using a fork, press the fork around the edges to seal them together. Arrange your pasties on a baking tray so they’re not touching and then brush with your preferred vegan “egg wash”. I used melted vegan spread and I was rather generous with it.

Easy Recipe: Vegan Cheese and Baked Bean Pasties

Bake in your pre-heated oven for 15-20 minutes, until they are golden and gorgeous. Take them out of the oven and leave them to cool for a few minutes. Do not be tempted to dive right in as the filling will be as hot as molten lava!

Easy Recipe: Vegan Cheese and Baked Bean Pasties

Once they’ve cooled off a little, eat them however you like. We ate ours on a park bench after school on our way to swimming, and very excellent they were too!

If you enjoyed this recipe, you might also like to try my vegan sausage rolls.

Vegan Cheese and Baked Bean Pasties

How to make a Minecraft Block Birthday Cake

My now 11 year old is mad on Minecraft and has been for a couple of years now. He loves everything Minecraft and asked for a Minecraft block birthday cake for his 11th birthday. I lack the skills (and time and enthusiasm) to bake and decorate something really complex, but I can bake a good sponge cake. I figured if I did some kind of grass block, then if it looked a bit rough and ready, it would be all the better for it.

Although this is fairly simple, it is a bit time consuming. Baking the cake layers took me a couple of hours and I made sure I had an hour or so free the next day to put it together and decorate it. I did cheat and use ready-made tubs of frosting, but you can make your own if you want to.

We baked four layers of sponge using a 20cm square cake tin. My son loves the look of rainbow sponge cakes, so I coloured each one a different shade using some Wilton cake colourings I had. I always find they work really well; just remember that once you bake the cake, the colour gets darker, so go easy.

How to make a Minecraft Block Birthday Cake

We used my regular sponge cake recipe, but instead of splitting it into two tins, I just threw it all in one tin and had an extra thick cake. I needed to adjust my baking time upwards, to around 35 minutes. But just bake until you get a clean skewer when you poke it in the middle.

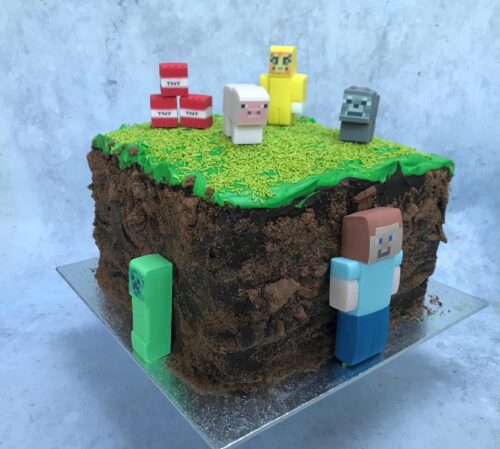
I baked four of these thick sponge cakes, but you may need more or less. I wanted my cake to be as tall as it was wide, in other words, it needed to look like a cube, or a Minecraft block. We bought sugar paste Minecraft figures off the internet, because I lack the skill and time to tackle making those for myself.

I try and make a cake every year for my son’s birthday and he really, really loved this cake. It was worth the fairly small amount of effort I put into it. I’m not an exert cake decorator by any stretch of the imagination, but this was pretty impressive.

How to make a Minecraft Block Birthday Cake

You will need:

4 layers of sponge cake, rainbow coloured if you like
2 tubs of vanilla buttercream
Green food colouring
Green sprinkles
3 tubs of chocolate buttercream frosting, I used chocolate orange flavour
A packet of chocolate biscuits, I used bourbon creams
A cake board
Sugar Minecraft figures, optional
Birthday cake candles, mandatory

How to make a Minecraft Block Birthday Cake

How to make a Minecraft Block Birthday Cake

Once you’ve baked your layers, it’s time to build your cake. You may need to trim the tops off your sponge layers to level them out a bit. The important thing about this cake is that it’s level and a cube shape.

To build the cake, using a palette knife put a dab of the buttercream in the centre of the cake board. If you’re using rainbow cake; decide which order your rainbow layers will go and place the bottom layer on top of the blob of buttercream. This will help to anchor your cake in place and stop it sliding about.

Spread a layer of buttercream on top of your first layer and top it with your next sponge layer. Cover that with buttercream and continue until all the layers are stacked. With the top layer, even if you’ve trimmed the top off the cake to make it level, if you flip it upside down. It will guarantee that the top of the cake will be perfectly level, which is what you want.

Once it is approximately a cube shape, it’s time to decorate it. I began by covering the sides of the cube with the chocolate frosting. While I was doing this, I gave my son the job of smashing up a packet of chocolate biscuits into crumbs. This was so I could press the crumbs into the buttercream to make it look like soil. I wasn’t too bothered about the crumbs being uniform in size; in fact some bigger crumbs just made it look muddier. Once you’ve covered the sides of the cube with chocolate frosting, carefully press the crumbs into the sides until they sides are covered.

How to make a Minecraft Block Birthday Cake

For the grass layer, I mixed two tubs of vanilla frosting with some green food colouring. Just add a few drops until you get to the shade of green you’re happy with. Carefully spoon the frosting onto the top of the cake; making sure it stays on the top and doesn’t run down the sides. Once I’d done this, I used green sprinkles on top to add some grassy texture and then I put it in the fridge for a couple of hours to firm up.

When you’re ready to present and serve your cake, arrange your Minecraft figures however you’d like, light the candles and sing Happy Birthday in your best voice.

How to make a Minecraft Block Birthday Cake

Recipe: Super Easy Shreddies Pancakes

I’ve been making these Shreddies pancakes for a few years now. They’re an easy way of getting some of the good stuff into my son, whilst at the same time he feels like I’ve given him a bit of a treat. Shreddies have long been one of my favourite cereals, they’re delicious just in a bowl with milk, or whipped up into these hearty pancakes.

Shreddies contain wholegrains, and are high in fibre. They’re also fortified with five B vitamins and iron. They’re a healthy start to the day, and if you can spare a couple of bowls of Shreddies from your box, these pancakes are well worth making.

Recipe: Super Easy Shreddies Pancakes

This recipe makes thick, American style pancakes. Making around 6 thick pancakes, they are very filling and this is enough for my little family of three to have a hearty breakfast. You can easily double up the recipe if you have more mouths to feed.

Top them however you like. We like them best with fresh fruit and a drizzle of golden syrup, sometimes with blueberry jam. Sometimes we add squirty cream, sometimes I add some cinnamon to the mix and top them with sweetened apple purée. If you wanted to up the protein, a drizzle of warmed peanut butter would work well with a chopped banana. These pancakes can stand up to being topped with pretty much anything you fancy.

Recipe: Super Easy Shreddies Pancakes

Super Easy Shreddies Pancakes

Ingredients
80g Shreddies cereal
80mls milk
3 medium sized eggs
2 tablespoons of sugar
Oil or butter for frying

Recipe: Super Easy Shreddies Pancakes

How to make your Shreddies pancakes

Using a food processor (I tend to use my Nutribullet for little things like this), blend your Shreddies into powder. If you don’t have a food processor, putting them in a sealed plastic bag and smashing them up with a rolling pin works just as well.

Recipe: Super Easy Shreddies Pancakes

In a large bowl, mix your powdered Shreddies and the rest of the ingredients until they are well combined. I use a whisk for this just to make sure I can beat a bit of air into the mixture. Once you’ve done this, set the bowl aside for ten minutes, this will help it thicken up a bit so you can dollop the pancake batter more easily. When you’re ready to cook your pancakes, give the batter another quick stir and you’re good to go. If you think it is too thick, add a little bit more milk until you’re happy with how it is.

Put some oil or butter in a non-stick frying pan and when the pan is hot, dollop a couple of tablespoons of the thick batter into the pan. This makes one pancake. Have the pan on a low-medium heat; the pancakes are thick and need to cook through without browning them too much. When I see little bubbles start to appear around the edges of the pancake, it’s time to flip it over and cook the other side, I use a fish slice for this. Cook this pancake until it is nicely brown on both sides. Repeat the process until you have used up all the batter.

Super Easy Shreddies Pancakes

Recipe: Luxurious Hazelnut Hot Chocolate

Here in Manchester, we are currently being battered by our third big storm in a week. To say our February half term has been a wash out might be an understatement. We’ve battened down the hatches, snuggled ourselves in blankets and done the most sensible thing possible, we baked and ate a lot of cakes, and I’ve made several batches of my delicious hazelnut hot chocolate.

It’s properly good, rich and silky and something you’d probably pay nearly a fiver for in a fancy coffee shop. Really it is very easy to make, it takes hardly any time at all, and even my son likes to get in on the whisking action.

Hazelnut hot chocolate recipe

It’s excellent on its own, but we usually top ours with squirty cream and marshmallows, but you can do what you want. Add crushed nuts, chocolate sprinkles, or even a cherry. Do what makes you happy, because when the wild winds rage outside, a mug of extra rich hot chocolate just hits the spot.

This recipe makes two big mugs, but the recipe can be easily doubled, or quadrupled if you are making hot chocolate for a crowd.

Hazelnut hot chocolate

Luxurious Hazelnut Hot Chocolate

Ingredients

500mls milk, I used semi skimmed, but use whatever milk you like
50g milk chocolate, broken into squares
2 tablespoons of JimJams hazelnut chocolate spread, or similar chocolate spread

Top with squirty cream, chopped nuts, marshmallows, chocolate sprinkles, whatever you fancy!

Recipe: Luxurious Hazelnut Hot Chocolate

Method

Heat the milk in a pan until just before it starts to boil.

Break your chocolate into chunks and after taking the pan off the heat, add the chocolate chunks and whisk through until it has melted.

Add the spoons of hazelnut spread and whisk again until the spread has melted. Make sure you whisk until the milk is frothy.

Carefully pour your hot chocolate into mugs and top with squirty cream, chopped nuts, marshmallows, chocolate sprinkles; or whatever you fancy!

This is such a brilliant, rich hot chocolate, it always goes down a storm. It’s really quick to make too, and perfect for warming your cockles on a cold winters day.

If you enjoyed this recipe, you might also like to try this speculaas hot chocolate.

Hazelnut hot chocolate