Review: Nadiya’s Deluxe Baking Set for Kids

We were sent the Nadiya Hussain Deluxe Baking Set for Kids for review purposes. All images and opinions are our own.

The boy and I have been baking together for years, he’s keen to make and eat the fruits of our kitchen labours, but he sometimes finds some of my grown-up equipment a bit big or heavy to use. This is clearly a bit of a universal problem, as Great British Bake Off winner, Nadiya Hussain has launched a range of kids baking kits, making it easier for kids to get involved in the kitchen with their own utensils.
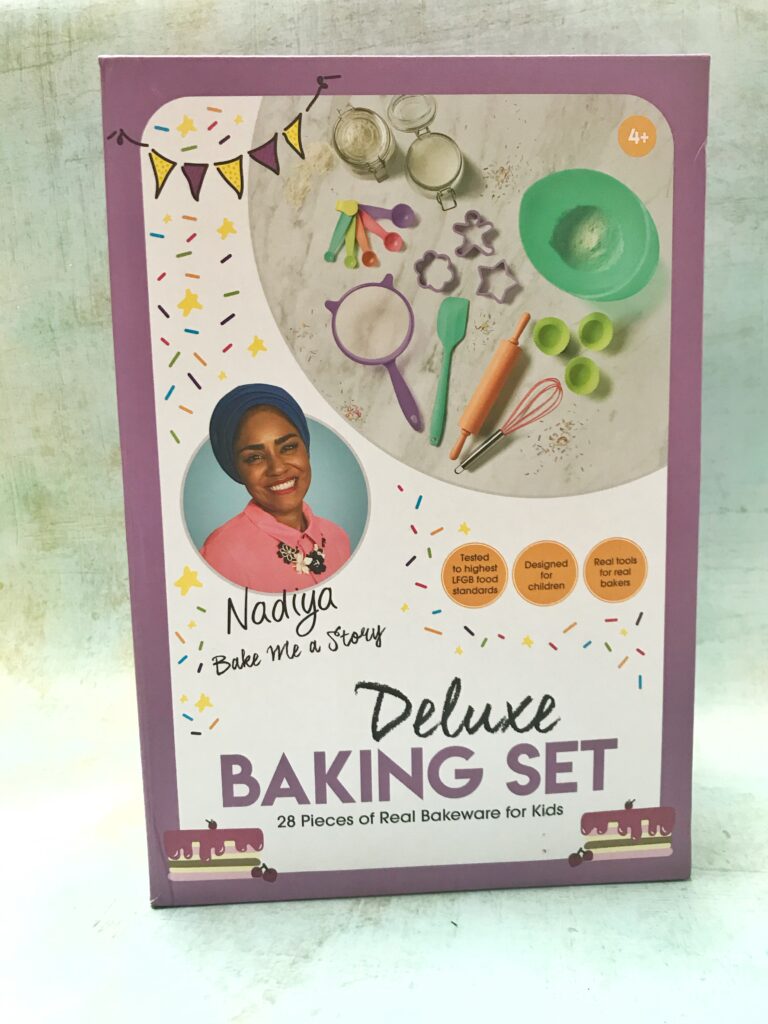
Nadiya's Deluxe Baking Set for Kids worth £25

The new range of Nadiya Hussain’s Bake Me a Story baking sets come in three different styles – Deluxe, Savoury and Simple. Each set includes a set of special recipe cards from Nadiya’s new book and is designed to give children the confidence to bake from scratch.

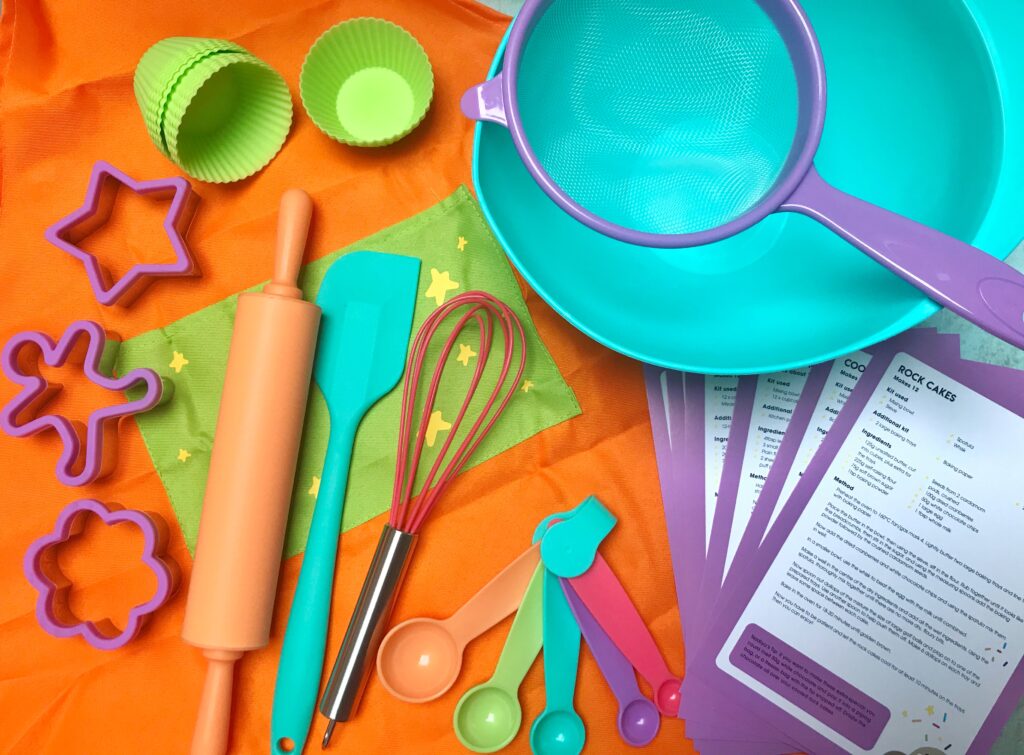
The Deluxe Set we were sent costs around £25 and provides all the tools needed to bake the recipes that are included in the box. The set includes a whisk, spatula, rolling pin, 12 silicone cupcake cases, a sieve, 3 cookie cutters, a mixing bowl, measuring spoons, the all important apron and six easy to make recipes written by Nadiya.
Nadiya's Deluxe Baking Set for Kids worth £25

I was really impressed when I unpacked the box. The set is so good that most of it had made its way into general baking use in my kitchen. Even if I’m baking by myself, I will likely reach for some of the kit included, it’s so good. I was especially impressed with the cookie cutters, which have a silicone edge on one side, so when you are pressing out the cookies you’re not in danger of cutting your fingers too.

I also like the silicone cupcake cases, which are great for saving on waste. The rolling pin was as lightweight as it could get away with and was really easy for my son to use. Together we baked a batch of gingerbread biscuits and we both enjoyed using all of the colourful equipment provided.

Nadiya's Deluxe Baking Set for Kids worth £25

There are other sets in the range and they are all great for encouraging kids to get in the kitchen.

The Savoury set (costing around £19.99) again includes all the tools needed to make the recipes on the five included recipes and includes a spoon, measuring spoons, a chopping board, mixing bowl, apron and a safety knife and a fish slice.

For those taking their first bite at baking opt for the Simple Set (£14.99). This contains a rolling pin; whisk, spatula, three cookie cutters and six silicone cup case cases. Everything needed to make the three recipes included.

Nadiya's Deluxe Baking Set for Kids worth £25

Everything is designed to be safe for kids to use and fun too. Everything is easy to clean and dishwasher safe too. The Deluxe Baking Set has so much in it; and would make a great gift for an aspiring baker or keen cook. It’s made for children aged 4+ and it was just right for my 9 year old son. It wasn’t too babyish, it is just good quality baking equipment for kids.

Cooking with Kids: Quick Herby Flatbreads

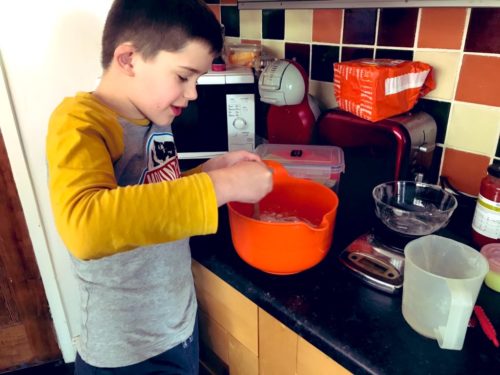
When school finished on Friday, my son was sent home with a pack of work to keep him busy while the schools are closed. The pack was full of maths and English worksheets, instructions for projects and lots of serious academic stuff. He’s in Year 4 and the emphasis right now is getting them up to speed for a big times tables test. In amongst the serious stuff was a copy of the curriculum for the rest of the year, tucked away in a dark corner were the words “bread making” so I’ve decided to break up the hardcore academic stuff with a series of bread making sessions, starting with these herby flatbreads.

I think that learning to bake bread is a pretty essential life skill. Where I live I’ve been struggling to find bread in the shops, so we’ve been mostly going without. I reckon being able to knock up some simple bread at home will tide us over. Bread making isn’t just about feeding ourselves, you can learn other lessons too, like maths (measuring out) and science (how yeast makes bread rise, etc).

Cooking with Kids: Quick Herby Flatbreads

Lunchtime was nearly upon us, so bellies rumbling we put together these really simple herby flatbreads. You can make them without the dried herbs if you prefer, but they were so much nicer with them. We ate them with hummus and carrot sticks, but they’d be brilliant with a curry or stew. They’re more snappable than bendy, almost like an Armenian lavash bread than a tortilla. Delicious.

Cooking with Kids: Quick Herby Flatbreads

Quick Herby Flatbreads

Ingredients
200g plain flour
¼ teaspoon of salt
100ml warm water
2 tablespoons of oil, I used vegetable, but olive or sunflower would work too, plus extra for cooking
1 teaspoon of dried mixed herbs
Ground pepper

Method
Put the flour and salt in a mixing bowl, make a well in the middle and trickle in the warm water, mixing as you go. We used a metal knife to mix with, but if you don’t mind getting messy, you can use your (very clean) hands.

Once the flour, salt and water are all mixed together, add the oil, the dried herbs and some black pepper and knead the dough with your hands. If the dough is too sticky, add a some more flour, if it is too dry add a drop more water.

Tip the dough out onto a floured surface and knead the dough for five minutes. Try stretching the doings and folding it back on itself, my son loved punching the dough. You knead the dough to develop the gluten in it, this is what makes the bread springy and nice to eat.

Cooking with Kids: Quick Herby Flatbreads

Divide the dough into six balls, and on a clean, floured surface roll out each ball of dough using a rolling pin. Try and roll them into circles, but don’t worry if they aren’t perfect. They need to be as thin as you can make them; that way they will cook all the way through and be crispy and delicious.

Heat a frying pan, if you have a pastry brush, brush some oil over the pan; if not, dribble a tiny bit of oil in the pan and swirl it around. Once your pan has heated up a little, put your first herby flatbread in the pan. Cook each flatbread for about two minutes on each side, flip it over with a spatula. Ben said it looked like a bit like a pancake.

Cooking with Kids: Quick Herby Flatbreads

Once each side was cooked, we gobbled them up with some hummus. Ben said they tasted like the kind of bread we had with curry. If you wanted, you could try making your own butter to go with your herby flatbreads, it’s easy and lots of fun too!

These quick herby flatbreads are really easy to make with children. They’re quick, tasty and are a good introduction to bread making. We have plans for soda bread, focaccia, a crusty loaf and maybe some brioche. He will be a bread making genius by the time he goes back to school!

Cooking with Kids: Quick Herby Flatbreads

Kitchen Essentials: Fail-Safe Sponge Cake Recipe

As a parent one of the key skills you need is the ability to quickly knock up a tray of cakes for the school bake sale, or for a party you’ve forgotten about, or maybe just because it’s Thursday and you and your brood fancy some cake.

Before I became a mum I was a competent cook, but a terrible baker. After several years of trial and error and a bin full of failed bakes, I’ve finally found a recipe and method which works every – single – time for me.

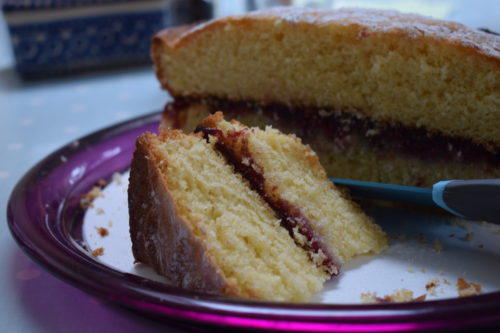
sponge cake recipe

Over the years I’ve tried everything; Delia recipes, Nigella recipes, recipes passed down through the generations. I’ve tried a thousand different bakes and finally hit upon this – it’s my “Works Every Time” Sponge Cake Recipe. And it does, it really does.

I use this recipe as the basis for every sponge recipe I ever make now. If I’m baking buns or cupcakes, I just cut the recipe down by a third (so 200g of sugar instead of 300g etc). This is enough to make a three layer show-stopper of a cake, over the weekend I used this sponge recipe to make two lemon drizzle cakes in loaf tins – much to the delight of my family.

If I find myself with too much cake batter and not enough tin, then it’s just an excuse to make a few little buns on the side for a teatime treat for the boys.

Malteser Butterfly Cakes

One of the key things you need to do is to really, really beat your butter (or margarine) and sugar together until they are really light and fluffy. This makes a massive difference to the texture of your cake (trust me, a Dutchman who made incredible cakes give me that tip).

Works-Every-Time Sponge Cake

If you need a sponge cake recipe which works every single time – try this. You won’t regret it!

Ingredients:
300 g caster sugar
300 g softened butter or margarine (I use Stork)
6 eggs, beaten
2 tsp vanilla extract
3 tbsp milk
300 g self-raising flour
1.5 tsp baking powder

Method:
Heat your fan oven to 190c. Grease three 20cm sandwich tins. In a large bowl, beat your butter and sugar together until fluffy (I used a hand mixer). Add the eggs, milk and vanilla and combine, then add the flour and baking powder and mix together until you have a smooth batter.

Divide the mixture equally between the three tins, you can weigh them to make sure they’re fairly equal if you’d like. Bake in your pre-heated oven for around 20 mins until golden and they’re cooked. Remove from the tins and leave to cool on a cooling rack.

I’ve made quite a few things with this sponge cake recipe. Looking back I’ve not really blogged many of those bakes, but here they are some examples of great bakes…

My easy sponge cake recipe which works every time! #Baking #EasyBakes #Cakes

Recipe: Malty Malteser Butterfly Cakes

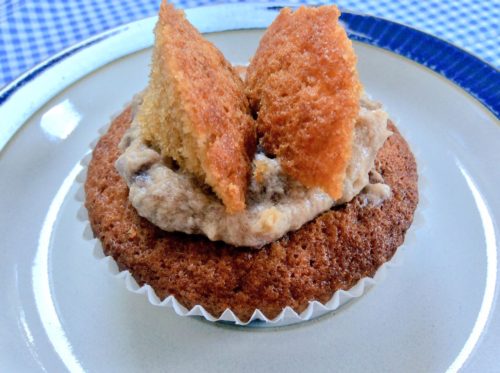
In my family, September is birthday month and this week it was my brother’s turn to blow out the candles. We weren’t having a big bash for him, but you can’t successfully have a birthday without cake. My brother loves Maltesers, so I thought I’d make him some quick and easy butterfly cakes, but with a Maltesery twist.

I’ve had a jar of malt extract lurking in my cupboard for a little while now, so I knocked up a standard sponge recipe and added a big dollop of the lovely malty stuff. Baked my buns until they were golden and whipped up a chocolate buttercream icing complete with a big bag of smashed up Maltesers. There was no room for candles, but at his age they’re verging on a fire hazard anyway!

Malteser Butterfly Cakes

The little Malteser Butterfly Cakes came out a little darker than a plain sponge would. This is because the dark malt extract makes the mixture darker. They’re not overdone, that’s their natural bronzed colour.

This recipe makes around 12 malteser butterfly cakes.

Malteser Butterfly Cakes

4oz Butter or margarine
4oz sugar
1 dessert spoon of malt extract
2 medium eggs
1 teaspoon of baking soda
4oz self raising flour

For the buttercream:
4oz butter
4oz icing sugar
1 tablespoon of drinking chocolate powder
10oz of Maltesers

1. Beat the butter and sugar together until fluffy and the stir in the eggs and malt extract.
2. Carefully fold through the baking soda and self raising flour until combined.
3. Dollop into cake cases, there should be enough to make about 12 buns.
4. Bake in a preheated oven at 190c for around 15 minutes. Once cooked leave to cool.
5. To make the buttercream, beat the butter, icing sugar and hot chocolate powder until soft and fluffy. Bash up the Maltesers and gently fold in.
6. Carefully cut a circle out of the top of each of your cooled cakes, cut the circle in two, dollop a teaspoon of buttercream into the hole and top with the halves to make them look like butterfly wings.

Malteser Butterfly Cakes

If you love butterfly cakes, you might also enjoy my Peanut Butter Butterfly Cake recipe.

Casa Costello

Four fun ways with Mega Marshmallows

I love cooking and baking, but I have genuinely never laughed so much, nor had so much fun making anything as I have done today making and playing around with these Mega Marshmallows.

I was sent a couple of bags of Mega Marshmallows to try and I was dying to start experimenting with them. There’s something a bit silly and frivolous about marshmallows and you can’t help but smile when you eat them.

mega marshmallows

I’ve spent the morning in my kitchen experimenting with these huge marshmallows. They are 5cm tall, and are 84 calories each and contain 0% fat. I made three different things with just a few ingredients, I had SO MUCH FUN and I’m certain my son would (and will) enjoy recreating these recipes with me again.

Chocolate Marshmallow Teacakes

mega marshmallows

I love a Tunnocks Teacake and nothing on earth could ever come close to that level of chocolately perfection, but it’s still a lot of fun to try. To make six teacakes you will need…

6 chocolate digestive biscuits
3 Mega Marshmallows
1 bar of melted Chocolate

In a warm oven put your digestive biscuits on a tray, chocolate side up, watch carefully and remove once the chocolate has melted. Cut your Mega Marshmallow into two pieces and squash the cut side on top of the melted chocolate. Leave them somewhere cool to set and stick together.

Melt your chocolate and then carefully cover each marshmallow and biscuit with the chocolate, put on a rack and leave them to cool.

Chocolate Covered Marshmallows

mega marshmallows

I found I had some melted chocolate left over from making the teacakes, so never one to waste anything I dipped some marshmallows in the chocolate and put some sprinkles on top. They’re really cute and they look great. If I had some cake pop sticks they’d make pretty pops too.

Chocolate & Marshmallow Krispie Bites

mega marshmallows

I am not going to pretend that this is my recipe, I saw Nigella make these once and always wanted to try it. She used plain rice krispies, I used the chocolate covered ones. I think if you were keen to up your calorific intake you could add some chopped up chocolate digestive pieces too. This is a real sticky treat which was really fun to make.

Chocolate Digestive S’mores

mega marshmallows

I’ve never had a S’more but I know people rave about them. I have an understanding of the concept so I decided to put theory into practice, but with chocolate digestive biscuits.

Take two chocolate digestive biscuits and sandwich half of a Mega Marshmallow in between them and put them into a warm oven for a few minutes. Keep an eye on them and remove them from the oven once the chocolate has melted. The marshmallow will by this point be warmed through and gooey. Eat quickly and carefully, the marshmallow oozes out unctuously from between the biscuits.

Mega Marshmallows are probably the most fun ingredient I’ve ever used in my baking and I’ve enjoyed being a bit experimental and a bit silly with them. They cost £3 for a 700g pack (I made all of these things with one bag and still had a few left over to scoff taste test).  They are currently available from Tesco, Sainsbury’s Ocado, Bargain Buys, B&M, Family Bargains, Poundworld and Farm Foods.

Go out and have some fun with them, you won’t regret it!

Four fun ways with Mega Marshmallows

Note: We were sent some Mega Marshmallows to try, all images and opinions are our own.

Cooking with Kids: Homemade Butter

At the end of September I was lucky enough to spend a day at River Cottage with a gorgeous group of food bloggers and Foodies100. It was a marvellous day and you can read about it all here. But for me one of the highlights was making homemade butter from scratch. It was something I did at school about 25 years ago, but this was quicker and much more fun. So it was one of the first things I wanted to try with the boy when I got home.

It was very easy, fun to do and with an educational element we can all get behind. By chance I’d spied some yellow stickered cream in my local supermarket and at 25p for a big carton, it had “make me into butter” written all over it.

making butter

The recipe is from the River Cottage team, it’s not mine so I won’t even try and claim it as my own. On the day we all picked a variety of herbs, chopped them up and incorporated them into the butter, or you could just salt it like we did at home (it’s hard to get green bits in butter past the rigorous quality control standards of a small child). It’s the kind of recipe you can adapt however you want. Tarragon butter? Garlic butter? Thyme butter? You choose!

Homemade Butter

Make your own creamy homemade butter. It’s so easy and a lovely fun thing to do with the kids.

Ingredients
200ml double cream
Pinch salt, optional

Instructions
Using an electric whisk, whip the cream until it looks like very stiff scrambled eggs. Keep mixing using a spatula until the mixture separates into butter and buttermilk. Set aside the buttermilk.

Using your cold hands, squeeze the excess buttermilk from the butter. Rinse the butter in iced water, squeeze any further moisture out and pat dry.

Put your homemade butter on a piece of baking parchment and flatten into a rectangle and sprinkle with salt, adding any herbs if you are making a herb butter.

Roll up like a swiss roll and put it in the fridge to chill. It is ready to use however you wish.

Notes

You can save the buttermilk and use it in another recipe, maybe in scones or soda bread.

It’s pretty quick to make if you use an electric whisk, you could beat it by hand if you wanted, but it might take forever. The small boy loved helping to whisk the cream, insisted on trying it when it looked (but did not taste) like scrambled eggs and he enjoyed helping to pat it flat, like play-dough but all slippy. 

making butter

It’s a lovely thing to do with kids, I think it’s good to teach them where food comes from and how it is made. Cookery, maths and science go hand in hand. It’s edible education and I think we can all agree that’s a very good thing indeed!

Recipe: No Churn Peanut Butter Oreo Ice Cream

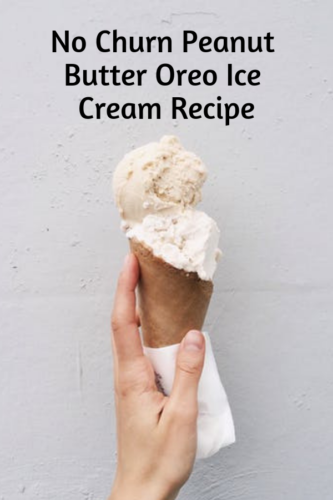
When it comes to peanut butter, you either love it or hate it. I am firmly on the love side, whilst hubs is staunchly hate, which only means one thing…. more for me! The summer holidays so far have been a bit meh, and I’ve been having to come up with new and exciting indoor things to do. One boring morning we decided to whip up a batch of Peanut Butter Oreo Ice Cream, the small boy loves helping out in the kitchen almost as much as he likes eating the results.

I found two new and deliciously different flavours or Oreo cookie in my local shop; the Golden Oreo which is a lovely crunchy vanilla flavoured cookie and the limited edition Peanut Butter Oreo. They were both crying out to be whizzed up in a milkshake, but I thought it was time to ring the changes and try some no churn Peanut Butter Oreo Ice Cream.

peanut butter oreo ice cream

Peanut Butter Oreo Ice Cream

Ingredients

1/2 jar smooth peanut butter (I used reduced fat)
2 tablespoons hot water
1 tin of condensed milk
2 teaspoons vanilla extract
1 pint of double cream (whipped)
1 packet of Peanut Butter Oreos

Method

1. Put your peanut butter in a large bowl and add two tablespoons of hot water, stir thoroughly as this will help to loosen the peanut butter making it easier to work with. Once mixed, add your tin of condensed milk and vanilla extract to the peanut butter and combine.
2. In a separate bowl whip your cream until it forms peaks, gently fold your cream into the peanut butter mixture.
3. Chop up, or bash up a packet of Peanut Butter Oreo cookies and gently stir into your mixture, making sure the pieces are well distributed.
4. Pour into a tub and freeze for 6-8 hours. We also made peanut butter oreo ice cream popsicles with some of our mixture which worked very well.

You could also make this with normal Oreos if you can’t get hold of the peanut butter Oreo cookies.

peanut butter oreo ice cream

This is such a great recipe to make with kids, it’s incredibly simple and because there are no eggs, no cooking, no fuss; it’s quick and easy to put together – the hardest part is waiting for it to freeze!

peanut butter oreo ice cream

The recipe made a lot of ice cream – nearly two pints of it, so it was ideal for making into popsicles and also for spooning into a tub. It is very rich, so a little goes a long way. Don’t forget to take your tub out of the freezer about 10 minutes before serving too so it softens a little.

It is so simple and utterly delicious, if you love peanut butter then you’ll love this recipe! If you try it let me know what you think.

If you enjoyed this, you might also like to try these recipes –

Recipe: No Churn Peanut Butter Oreo Ice Cream

Recipe: How to make a Malteser Milkshake

One of  the most popular posts I’ve ever written on this blog were some recipes for peanut butter milkshakes. They were incredibly good, but they also contained a healthy slug of bourbon, which made them a bit adult. Today we fancied a sweet treat, so we raided the cupboards and made this delicious Malteser Milkshake.

Recipe: How to make a Malteser Milkshake

How to make a Malteser Milkshake

You will need – 
2 scoops of vanilla ice cream
1 packet of maltesers
350mls of milk
Squirty cream

Method –
Whizz the maltesers up in a blender until they’re crumbs (but not too fine, you still want a hint of crunch). Add the ice cream and the milk and whizz up together until blended. Pour into a glass and top with squirty cream and decorate with whatever you fancy, I put a couple of maltesers aside and popped them on top.

Many hands make light work, so I enlisted the help of the small boy to help make the milkshake. As you can see from his little face he was pretty happy with his creation.

What’s your favourite flavour milkshake?

Bahlsen Bake Off – Small boy becomes a Big star!

Biscuits. They’re the parents friend. Providing much needed energy to get through traumatic children’s bedtimes, afternoon energy lulls and for scoffing greedily with friends over a cup of tea. They’re also excellent for staving off the pre-dinner starvation which the small boy seems to get around 4.30pm.

It was not with undue levels of excitement that we opened a box of biscuit awesomeness sent by Bahlsen. They make a much admired and rather too moorish biscuit; you know the sort, plain biscuit one side, and a thick slab of chocolate on the other. It’s impossible to take just one of these out of the packet and leave it at that. Impossible.

We were given our mission (which we chose to accept) which was to take part in the Bahlsen Bake Off. The small boy loves helping in the kitchen, especially making cakes. Alas I am not gifted in the arena of baking, so my specialty pud is usually an Eton Mess, it’s basically an assembly job of all my favourite things, cream, broken meringue and strawberries.

For ease we prepped the component parts beforehand; whipping the cream into stiff peaks, smushing up the meringue and cutting the strawberries. At this was the Bahlsen Bake Off we added nearly a whole packet of the Bahlsen Leibniz Zoo biscuits which we broke up and mixed with the meringue.

We then set to work, you can see what we did in this short, pretty cute video. What do you think of our budding chef?

Bahlsen Bake off