Kids Crafts: Make a Popsicle Stick Scottish Thistle

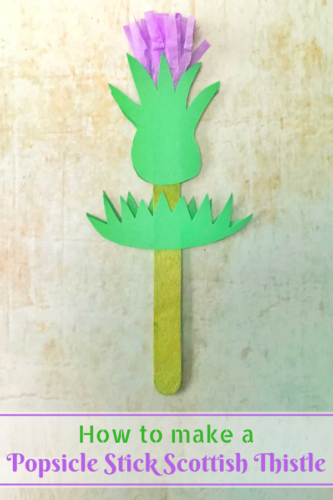
Celebrate Burns Night or St Andrews Day with this simple popsicle stick Scottish thistle craft for kids!

Kids Crafts: Make a Popsicle Stick Scottish Thistle

Every year on 25th January the good people of Scotland (and beyond) celebrate Burns Night. Burns Night is the annual celebration of  the birth of  the famous Scottish poet, Robert Burns who was born in 1759.

Burns Night celebrations typically involve the eating of haggis, neeps and tatties; drinking drams of whisky and lots of speeches and singing. It’s also a good opportunity to do some crafts with the children and talk to them about his poetry.

This is a super-simple craft which is really great to do with kids. They might need a bit of help with the cutting out, but the result is really effective.

How to make a Popsicle Stick Scottish Thistle

You will need:

Some green paper or card, card is better
Green popsicle sticks or straws
Purple tissue paper
A glue stick
Two pegs (optional)
A pencil
Scissors
Kids Crafts: Make a Popsicle Stick Scottish Thistle

How to make your Popsicle Stick Scottish Thistle:

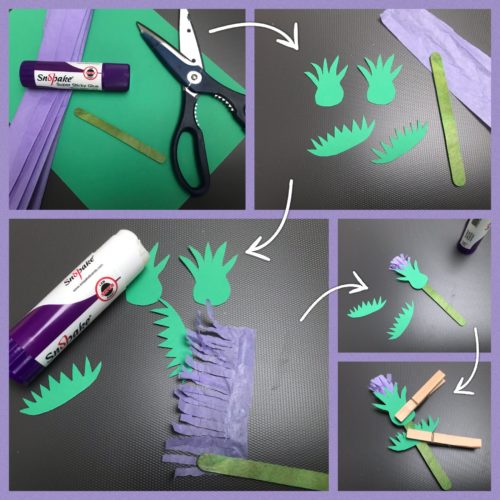
Using a pencil, draw the outline of your thistle leaves and thistle head on your green card and carefully cut it out. I drew one of each, cut them out and drew around them again as templates for the other side. An adult might want to help with this part.

Take a strip of the purple tissue paper about 10cm long and cut a fringe about 2/3 of the way down the width of the paper at regular intervals. Using the glue stick, glue along the edge which hasn’t been cut and carefully wrap this around the top of the popsicle stick.

Using the glue, stick the green thistle head at the top of the stick so it covers the base of the tissue paper, stick the other head on the other side. Put a peg on the head to press the green card into place.

Glue the thistle leaves in place about halfway down the stick and hold those in place with another peg. Leave the glue to dry for 15 minutes or so, remove the pegs and your Scottish thistle is ready to be admired. You don’t need the pegs if you don’t have them. I just find they’re good at holding things in place while the glue sets.

It’s as simple as that. They look great, we’ve made a few and stuck them around our kitchen. They’re a simple craft which you can do for Burns Night, St Andrews Day or for just celebrating Scotland!

If you enjoyed this, you might also like these other blog posts:

Kids Crafts: Make a Popsicle Stick Scottish Thistle

Easy Crafts: How to Make Simple Cupcake Case Flowers

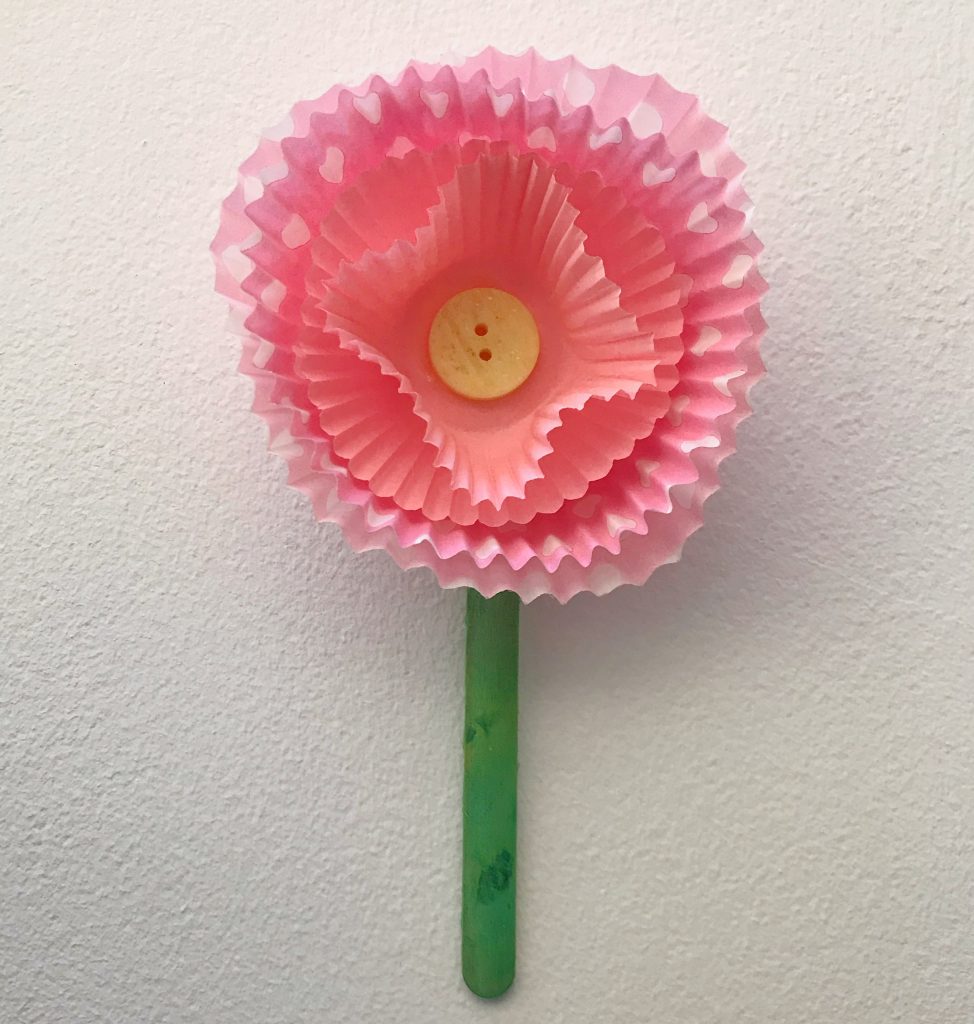
Cupcake cases have so many more uses other than for being used to bake delicious cakes. I use them a lot in crafts, the delicate paper cases make excellent petals for flowers. Whilst I loved the pretty little daffodil flowers I made a few months back, I thought it was about time to make a summery change to the paper flowers in my kitchen. I made these pretty cupcake case flowers and they’re so pretty in a little vase, they’re really made my day.

I spotted some colourful mini muffin cases when I was shopping in Booths a while ago. They’re just the thing to make these pretty flowers with. I also used some regular sized cupcake cases and together they made a many petaled wonder.

Easy Crafts: How to Make Simple Cupcake Case Flowers

How to make Simple Cupcake Case Flowers

You will need:
Two regular sized cupcake cases
Two coloured mini muffin cases
A button
Green lolly sticks or straws
Bostik Fine & Wide Glu Pen
Sellotape

Easy Crafts: How to Make Simple Cupcake Case Flowers

How to make your cupcake case flowers:
Take your two regular sized cupcake cases and turn one inside out. Put a dab of glue on the white side of one of the cases and press the white sides together, leaving the patterned or coloured sides on the outside. Leave that to one side to dry, you might want to weight them down with something so they stay pressed together while the glue sets.

Meanwhile take the smaller cupcake cases and do the same to them. Turn one of them inside out and glue them together. Put a dab of glue on the inside of the small case and glue your button, you could also use a little pom-pom or another embellishment of your choice.

Using more of the glue, glue the large and the small cases together and leave the whole thing to set for an hour or so. I pressed mine down using my little button tub.

Easy Crafts: How to Make Simple Cupcake Case Flowers

Once the whole thing is dry, take some sellotape and stick the lolly stick or straw to the back of the flower. Carefully tease the cupcake cases into a pleasing petal shape. I shaped the innermost case to make it look pretty. What do you think?

It’s as simple as that. They look great, we’ve made a few and put them in a little vase in my kitchen. They’re a cheery summery flower that is so simple and fun to make too.

If you enjoyed this craft, you might also like –

Easy Crafts: How to Make Simple Cupcake Case Flowers

Kids Crafts: How to make Tulip Handprint Cards

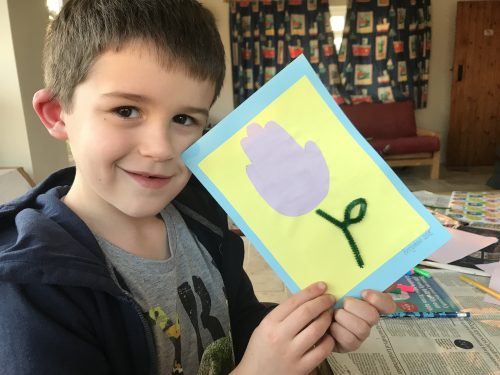
This month Craft Merrily have set the Bostik Bloggers the task of creating a flower craft. We decided we would make tulip handprint cards. They’re really simple to make and would make a lovely card to give for a lot of different occasions such as Easter, Mother’s Day or for a birthday. The handprint adds a lovely personal touch too.

Kids Crafts: How to make Tulip Handprint Cards

We went away with some friends for a week, so I planned a few crafts for us to entertain the kids with while we were away. These tulip handprint cards were one of them. The children were all so pleased with their cards and I like to think the recipients were too.

How to make Tulip Handprint Cards

You will need:
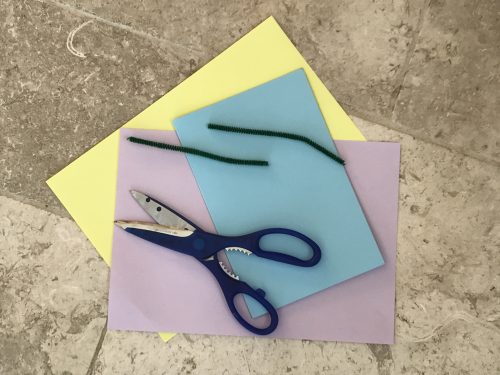
1 piece of A4 card, I used pale blue
2 pieces of different coloured paper, I used yellow and pink
1 green pipecleaner
Bostik White Glu
A pencil
An envelope which will fit your A5 card

Kids Crafts: How to make Tulip Handprint Cards

How to make Tulip Handprint Cards
Fold your A4 piece of card in half. Cut out a large rectangle of coloured paper (we used yellow) and stick it onto one side of your card with Bostik White Glu.

Take a pencil and draw around a child’s hand, carefully cut out the hand shape. A grown up might need to help with any cutting out, especially the trickily shaped handprint. Stick this near the top of the rectangle.

Shape your green pipecleaner into the shape of a flower stem, you could make a loop about half way to make it look like a leaf if you want. Glue it on the card below the flower.

I sandwiched it under a glass dish and left the glue to dry overnight. I’ve no idea why I used a glass dish, it was just close to hand I guess. It worked though.

Kids Crafts: How to make Tulip Handprint Cards

Once the glue is dry, write your card and put it in the envelope ready to delight the lucky recipient!

It’s pretty cute isn’t it?

Check out my other craft tutorials here!

Kids Crafts: How to make Tulip Handprint Cards

I am a Bostik Craft Blogger and I was sent the materials to create this craft from Craft Merrily. 

Kids Crafts: How to make a cheery Daffodil flower

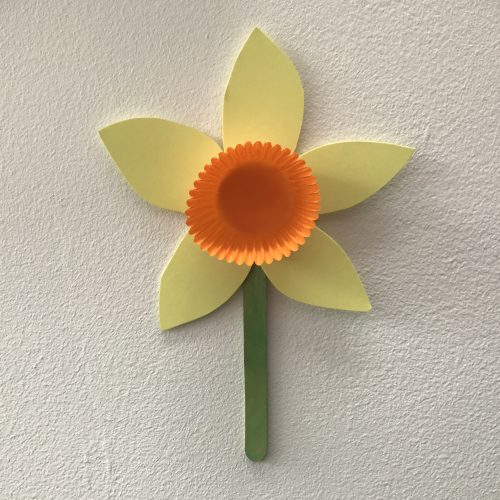
With the first signs of spring slowly making an appearance, and with St David’s Day around the corner, what better craft to make than a cheery daffodil or two. This lovely daffodil craft is perfect for toddlers and small children to make. It’s very simple to make and little ones will be as pleased as punch with their efforts.

St David’s Day is on 1st March and is a day of celebration of both St David’s life and the Welsh people and their culture. St David is the patron saint of Wales and on 1st March it is traditional for Welsh people to wear daffodils or leeks, both of these are the symbols of Wales. The wearing of a daffodil on St David’s Day was made popular by the Victorians, in Wales it is also known as “Peter’s leek” and its Welsh name is “Cenhinen Bedr”.

Kids Crafts: How to make a cheery Daffodil flower

Daffodils are a lovely, bright, cheery spring flower, they’re hard to find at other times of the year. Bring a bit of sunshine in with this cheery daffodil craft!

How to make a cheery Daffodil

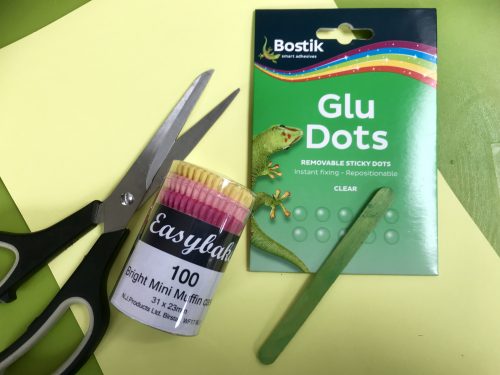
You will need:
Some yellow paper or card, card is better
Green lolly sticks or straws
Some yellow or orange mini muffin cases
Bostik Glu Dots

Kids Crafts: How to make a cheery Daffodil flower

How to make your daffodil:

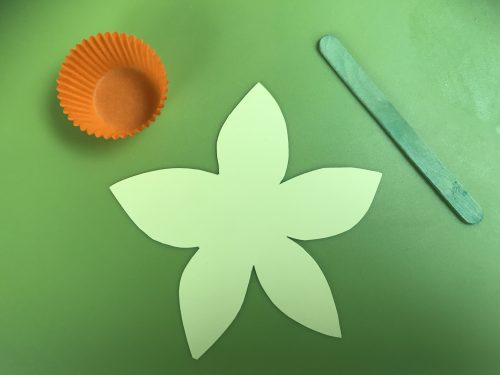
Using a pencil, draw the outline of your flower on your yellow card and carefully cut it out. An adult might want to help with this part.

Using the Glu Dots, stick the green lolly stick or straw to the back of the flower.

Kids Crafts: How to make a cheery Daffodil flower

Using another Glu Dot, stick the mini muffin case in the middle of the flower. Now admire your pretty daffodil!

It’s as simple as that. They look great, we’ve made a few and stuck them around our kitchen. They’re a cheery reminder that spring is nearly sprung and that winter will soon be behind us for another year.

If you enjoyed this, you might also like these other Crafts:

Kids Crafts: How to make a cheery Daffodil flower