Kids Crafts: Make a Popsicle Stick Scottish Thistle

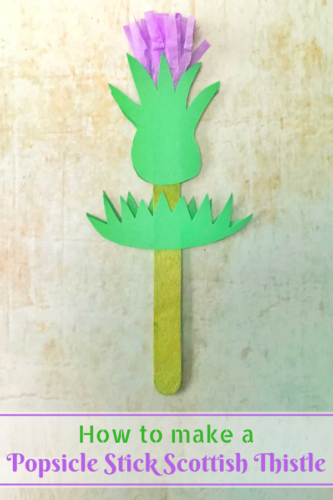
Celebrate Burns Night or St Andrews Day with this simple popsicle stick Scottish thistle craft for kids!

Kids Crafts: Make a Popsicle Stick Scottish Thistle

Every year on 25th January the good people of Scotland (and beyond) celebrate Burns Night. Burns Night is the annual celebration of  the birth of  the famous Scottish poet, Robert Burns who was born in 1759.

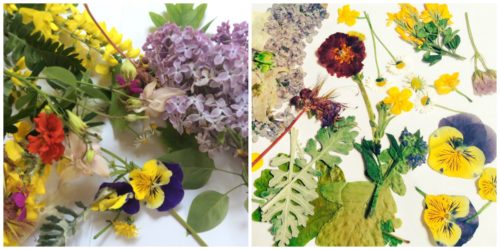
Burns Night celebrations typically involve the eating of haggis, neeps and tatties; drinking drams of whisky and lots of speeches and singing. It’s also a good opportunity to do some crafts with the children and talk to them about his poetry.

This is a super-simple craft which is really great to do with kids. They might need a bit of help with the cutting out, but the result is really effective.

How to make a Popsicle Stick Scottish Thistle
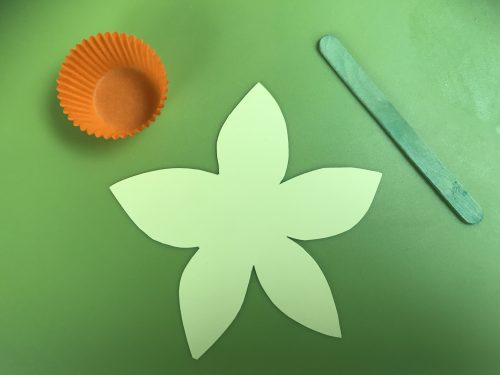
You will need:

Some green paper or card, card is better
Green popsicle sticks or straws
Purple tissue paper
A glue stick
Two pegs (optional)
A pencil
Scissors

Kids Crafts: Make a Popsicle Stick Scottish Thistle

How to make your Popsicle Stick Scottish Thistle:

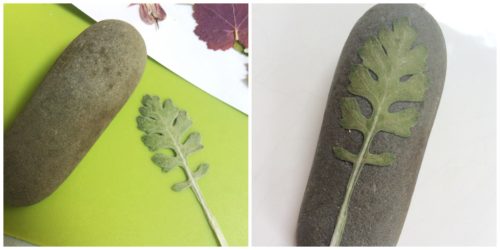
Using a pencil, draw the outline of your thistle leaves and thistle head on your green card and carefully cut it out. I drew one of each, cut them out and drew around them again as templates for the other side. An adult might want to help with this part.

Take a strip of the purple tissue paper about 10cm long and cut a fringe about 2/3 of the way down the width of the paper at regular intervals. Using the glue stick, glue along the edge which hasn’t been cut and carefully wrap this around the top of the popsicle stick.

Using the glue, stick the green thistle head at the top of the stick so it covers the base of the tissue paper, stick the other head on the other side. Put a peg on the head to press the green card into place.

Glue the thistle leaves in place about halfway down the stick and hold those in place with another peg. Leave the glue to dry for 15 minutes or so, remove the pegs and your Scottish thistle is ready to be admired. You don’t need the pegs if you don’t have them. I just find they’re good at holding things in place while the glue sets.

It’s as simple as that. They look great, we’ve made a few and stuck them around our kitchen. They’re a simple craft which you can do for Burns Night, St Andrews Day or for just celebrating Scotland!

If you enjoyed this, you might also like these other blog posts:

Kids Crafts: Make a Popsicle Stick Scottish Thistle

Easy Crafts: How to Make Simple Cupcake Case Flowers

Cupcake cases have so many more uses other than for being used to bake delicious cakes. I use them a lot in crafts, the delicate paper cases make excellent petals for flowers. Whilst I loved the pretty little daffodil flowers I made a few months back, I thought it was about time to make a summery change to the paper flowers in my kitchen. I made these pretty cupcake case flowers and they’re so pretty in a little vase, they’re really made my day.

I spotted some colourful mini muffin cases when I was shopping in Booths a while ago. They’re just the thing to make these pretty flowers with. I also used some regular sized cupcake cases and together they made a many petaled wonder.

Easy Crafts: How to Make Simple Cupcake Case Flowers

How to make Simple Cupcake Case Flowers

You will need:
Two regular sized cupcake cases
Two coloured mini muffin cases
A button
Green lolly sticks or straws
Bostik Fine & Wide Glu Pen
Sellotape

Easy Crafts: How to Make Simple Cupcake Case Flowers

How to make your cupcake case flowers:
Take your two regular sized cupcake cases and turn one inside out. Put a dab of glue on the white side of one of the cases and press the white sides together, leaving the patterned or coloured sides on the outside. Leave that to one side to dry, you might want to weight them down with something so they stay pressed together while the glue sets.

Meanwhile take the smaller cupcake cases and do the same to them. Turn one of them inside out and glue them together. Put a dab of glue on the inside of the small case and glue your button, you could also use a little pom-pom or another embellishment of your choice.

Using more of the glue, glue the large and the small cases together and leave the whole thing to set for an hour or so. I pressed mine down using my little button tub.

Easy Crafts: How to Make Simple Cupcake Case Flowers

Once the whole thing is dry, take some sellotape and stick the lolly stick or straw to the back of the flower. Carefully tease the cupcake cases into a pleasing petal shape. I shaped the innermost case to make it look pretty. What do you think?

It’s as simple as that. They look great, we’ve made a few and put them in a little vase in my kitchen. They’re a cheery summery flower that is so simple and fun to make too.

If you enjoyed this craft, you might also like –

Easy Crafts: How to Make Simple Cupcake Case Flowers

Kids Crafts: How to make a cheery Daffodil flower

With the first signs of spring slowly making an appearance, and with St David’s Day around the corner, what better craft to make than a cheery daffodil or two. This lovely daffodil craft is perfect for toddlers and small children to make. It’s very simple to make and little ones will be as pleased as punch with their efforts.

St David’s Day is on 1st March and is a day of celebration of both St David’s life and the Welsh people and their culture. St David is the patron saint of Wales and on 1st March it is traditional for Welsh people to wear daffodils or leeks, both of these are the symbols of Wales. The wearing of a daffodil on St David’s Day was made popular by the Victorians, in Wales it is also known as “Peter’s leek” and its Welsh name is “Cenhinen Bedr”.

Kids Crafts: How to make a cheery Daffodil flower

Daffodils are a lovely, bright, cheery spring flower, they’re hard to find at other times of the year. Bring a bit of sunshine in with this cheery daffodil craft!

How to make a cheery Daffodil

You will need:
Some yellow paper or card, card is better
Green lolly sticks or straws
Some yellow or orange mini muffin cases
Bostik Glu Dots

Kids Crafts: How to make a cheery Daffodil flower

How to make your daffodil:

Using a pencil, draw the outline of your flower on your yellow card and carefully cut it out. An adult might want to help with this part.

Using the Glu Dots, stick the green lolly stick or straw to the back of the flower.

Kids Crafts: How to make a cheery Daffodil flower

Using another Glu Dot, stick the mini muffin case in the middle of the flower. Now admire your pretty daffodil!

It’s as simple as that. They look great, we’ve made a few and stuck them around our kitchen. They’re a cheery reminder that spring is nearly sprung and that winter will soon be behind us for another year.

If you enjoyed this, you might also like these other Crafts:

Kids Crafts: How to make a cheery Daffodil flower

My Sunday Photo 24.7.16

I don’t know what this plant is. We rescued it from the disaster that was our garden when we moved into our house five years ago. I suspect it’s something like a hydrangea (answers on a postcard please). 

When we moved in the garden was a jungle of ivy. You literally had to hack your way through it to get anywhere. It was a “designer” garden which had been left to run wild. Occasionally I’d find an especially lovely plant drowning in the ivy. I’d carefully dig it up, plant it in a pot and put it to one side until the garden had been cleared and we could plant it up properly.

hydrangeaThis is by far my favourite find and I always look forward to it flowering. Even when the flowers fade we’re left with fragile looking papery flower heads. Yjeu mostly last through winter providing some interest until we cut them off in spring. 

I’m still struggling to get my head around everything that’s been going on for me at the moment. I’ve been making a point of going outside each day and looking at some of the nice things in the garden. A bit of fresh air and nature will always do me some good and I’m just trying to be kind to myself.

So what is it? Does anyone have a better idea than me? 

Crafts: Dried Flower Craft Ideas

This week I became the proud and excited owner of an Instant Flower Press from Interplay. Admittedly it’s designed for children, but both my son and I had great fun with it and we’ve created some pretty little dried flower craft items yesterday afternoon with some flowers we picked on the way home from school.

Dried Flower Craft Ideas

The Instant Flower Press is really simple to use and comes with an instruction booklet. You open up the press, put a layer of the felt pads and the pieces of cotton material in the plastic press, place your flowers inside. Put another layer of cotton and more felt pads (all supplied) and close the press. Pop it in the microwave for 20-30 seconds and you’ve got dried pressed flowers. Slightly more moist flowers may take a little longer in the microwave, but once you start pressing your flowers you’ll quickly be able to judge what will take an extra ten seconds and what will dry more quickly.

As a child my Grandma had a flower press and I loved using it with her, carefully picking pansies from her garden and pressing them between thick parchment and screwing the press shut, then leaving it for months before seeing the fruits of our labour.

Dried Flower Craft Ideas

With the microwave flower press the whole process is done and dusted in minutes and perfect if you need some pressed flowers for some quick dried flower craft.

Quick and easy Dried flower craft ideas

Pretty Jam Jar Candle Holders

You will need:
A clean jam jar
A selection of dried flowers and leaves
PVA glue
A paint brush

These are so simple. Take a clean jam jar and some PVA glue and a paint brush, brush the glue onto the jar where you want to stick your dried flowers. Carefully press the flower onto the glued area to stick it on, then gently cover the flower with PVA glue to seal it in place. Leave to dry.

You can be as creative as you want with this, I’ve left mine quite simple, but I love the delicate little blue flowers and the daisies. It took hardly any time at all to glue on, but maybe an hour to dry properly. They look so pretty and I can see me using this idea on so many things around the house.

Dried Flower Craft Ideas

Pebble Paperweight 

You will need:
A clean stone
A selection of dried flowers and leaves
PVA glue
A paint brush

Again, this is very simple. We have a pile of lovely smooth pebbles in the garden, so I picked one the right size and gave it a good scrub and left it to dry. Then I selected a suitable leaf which I’d dried in the flower press and brushed PVA glue onto the pebble and pressed the dry leaf into place. I left it for a few minutes to stick, then I painted PVA over the leaf to seal it in place and then I left it to dry properly for a few hours.

I’ve now got a lovely paperweight, or a pebble to stop my napkins flying off the table when we eat in the garden.

Dried Flower Craft Ideas

Dried Flower Sun Catchers 

You will need:
A laminator and pouches or some sticky backed plastic
A selection of dried flowers and leaves

Borrowing a laminator I arranged some dried flowers in an artistic way in the laminator pouch, I then put it through the laminator a few times until I was happy. I then cut my A4 sheet down into a circle and using a clear sticky dot stuck it to the window.

It’s really quite pretty and I’ve got a nasty window in the downstairs loo which needs replacing, which I’m now going to cover in these lovely dried flowers to pretty the place up a bit!

Dried Flower Craft Ideas

These are just three very quick ideas I had for dried flower crafts that afternoon. I’ve got a few more ideas up my sleeve including some nice thank you cards and other papercrafts.

The Instant Flower Press from Interplay is a cracking piece of kit and if you enjoy crafting and have kids that enjoy crafting, then I can’t recommend it enough. The small boy went to school today with a bag full of dried flower pictures for show and tell and he’s loving showing off his dried flower craft to anyone who will listen. It’s nice to do something a bit different with him and importantly he’s really enjoyed it and got something out of it too!

Dried Flower Craft Ideas

The Instant Flower Press from Interplay costs £9.99, is suitable for ages 8+ (though my 5 year old used it happily with supervision) and is available from a wide range of retailers.

Note: We were sent the Instant Flower Press from Interplay for review purposes. All images an opinions are our own.

Review: Serenata Flowers Summer Bouquet

This summer hasn’t been much to write home about. I think we’ve had a handful of nice sunny days and the rest in Manchester at least has been cloudy, windy drizzly. We all need a bit of summery sunshine in our lives, even if we have to magic that up ourselves. Today was one of those miserable, grey June days. I trudged home from work in the rain, opened the door and waiting for me was a huge box emblazoned with the words “Serenata Flowers”. I knew I’d had a little bit of summer sent to me.

Opening up the box I was blown away by the flowers I’d been sent. The Deluxe Sunshine Splendour bouquet (current price £39.98) was a huge bouquet of 4 glorious sunflowers; with 6 delicate white roses, 5 lovely chrysanthemums and a mixture of white alstromeria and stunning blue limonium. This really was sunshine in a vase.

Serenata Flowers

The bouquet from Serenata Flowers arrived in tip-top condition. It was well packaged and came with the stems in a little pot which kept them fresh and watered. My Sunshine Splendour bouquet came with a sachet of liquid plant food, it was prettily wrapped in cellophane and tissue paper, and came with a little gift card from the sender. It is something which would delight any lucky recipient.

Serenata Flowers offer free standard delivery and have a huge and seasonal range of bouquets and gifts such as balloons, cakes and chocolate. The bouquets start at just £19.99, with free standard delivery, which I think is really good value. The flowers I received were excellent quality, as fresh as a daisy and just stunning.

It really was a cheery bunch of summer in a vase. Flowers always make my heart glad, and these did not disappoint.

Serenata Flowers

Disclosure: We were sent this bouquet by Serenata Flowers for review purposes. All images and opinions are our own.

Beautiful Festive Flowers from Floric

There’s only one thing I love more than buying fresh flowers for my home, that’s being sent fresh flowers as a nice surprise, just because someone wants to see the smile on my face when I receive them. Pre-child we always had a bouquet of lovely flowers on our mantelpiece, a little floral pick-me-up every time I walked past them. Sadly these days floral gifts seem to be reserved for special occasions, but I hope that this might change in the near future.

In December, before the decorations go up (absolutely no earlier than the 16th in our house), I do always get a lovely bouquet of festive flowers for the table, just to ease us in gently to the season. This year was no exception, on 5th December a beautiful bouquet of 24 beautiful red tulips from online florists Floric were delivered to my door.

floric

The flowers arrived carefully packaged and protected in a box. They were beautifully arranged with some matching red festive sizal wrap and came with two sachets of flower food and a gift card. The tulips weren’t open on arrival, but once in a vase and after 24 hours in my house they started to open up. In another day or so these tulips are going to be stunning.

floric

I think it’s always wonderful to receive flowers, but I think they’re especially nice to receive in the run up to Christmas. These Christmas tulips from Floric are just £24.99 and delivery is free. They also have other styles of bouquet in their Christmas range, so there’s something to suit all tastes and budgets.

With my vase of 24 beautiful red Christmas tulips adorning my table, I can’t help but start feeling a little bit more Christmassy each day. They’re a lovely, cheery thing to receive, either as a gift, or a token of appreciation to the Mum, Auntie, Sister or Grandma who helps make Christmas extra special each year.

Note: I was sent these beautiful flowers from Floric free of charge for review purposes. All images and opinions are my own.

Didsbury in Bloom 2014

Didsbury is a fine old part of the world. It’s often referred to in somewhat sneering tones as “leafy Didsbury” because, well, it’s a particularly leafy suburb of Manchester. Today the RHS Britain in Bloom judges came and inspected the little village where I’ve spent my entire life.

Last year the judges were very pleased with the efforts of our local team of dedicated green-fingered volunteers, so much so Didsbury won gold. As far as I’m aware the judges look around the village at the planters and displays, taking in the Jubilee Gardens on the corner near Cafe Nero and then make their way down the road where we live, because (and I say this without a hint of smugness, honest) it’s a very pretty road, it has a small green at the top, it overlooks fields and leads down to the river. It’s very nearly countryside, nearly.

Today the sun shone. The road had been swept. Plants watered and deadheaded, it looked beautiful, so out came my camera to capture the moment. So for your floral pleasure may I present Didsbury in Bloom 2014: Ford lane.

Didsbury in Bloom

This year celebrates 50 years of the RHS Britain in Bloom competition, hence the rather stunning display on the green.

Didsbury in Bloom

Didsbury in Bloom

Didsbury in Bloom

As a resident, I’d like to thank all the volunteers who work so hard to make Didsbury beautiful year round, but especially for occasions like this. Fingers crossed we do well again this year!