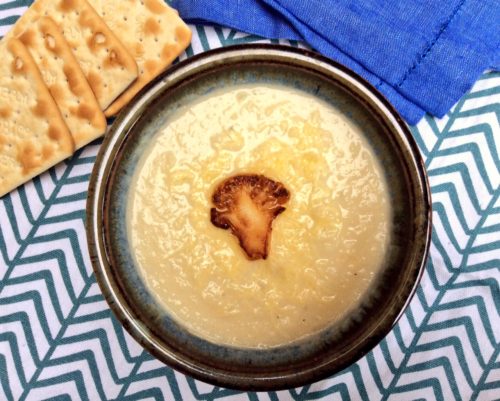
Recipe: Norwegian Inspired Cauliflower Cheese Soup

The first time I ever tried Cauliflower Cheese Soup was in 2003. We had a long weekend in Kristiansand in Norway. It was December and the Christmas lights made the city twinkle at night, the snow was piled high in the streets and it was cold, bitterly, bitterly cold.

We’d venture out and dash in and out of shops, sit drinking steaming cups of coffee in cafes and we’d eat at night in the bistro downstairs from the hotel. Hubs was determined to sample as many Norwegian delicacies as he could, reindeer was a favourite. I am veggie and there wasn’t much choice for me, so I lived on Blomkålsuppe, a Norwegian cauliflower soup. I loved it and I’ve lusted after it ever since.

Now autumn is here my soup making pot is starting to see some serious action. Cauliflowers are cheap and plentiful in the shops, so I decided to try and recreate my favourite soup in the world, but with a cheesy twist that my son would approve of. This morning I made some very delicious Norwegian inspired Cauliflower Cheese Soup.

I decided to use the Extra Mature Cheddar in my soup – it had a lovely subtle tang which I knew would compliment my soup nicely. Cheddar is a perfectly versatile cheese, it melts beautifully and we use it almost as a seasoning.

This Cauliflower Cheese Soup really is very simple, incredibly hearty and exactly like a lovely comforting hug in a bowl. Serve with warm crusty bread, or if you’re feeling especially Scandinavian try it with rye bread.
Cauliflower Cheese Soup

Cauliflower Cheese Soup

Ingredients:
1 large onion, chopped
1 teaspoon butter
A tbsp olive oil
900g cauliflower florets – fresh or frozen
300mls hot vegetable stock
400mls milk
100g Extra Mature Cheddar Cheese
Salt, pepper, ground chilli flakes

Method:
Gently fry your onion in the butter and olive oil until it’s soft.

Add your cauliflower florets to the pan and stir. Pour in the hot vegetable stock and 300mls of the milk. Add a little salt, pepper and ground chilli flakes, then put the lid on the pan and simmer until the cauliflower is tender.

Remove from the heat and leave to cool for ten minutes. Using a blender (I used a stick blender), blend the soup until smooth. I added the remaining 100mls of milk at this stage as my soup was too thick. If your soup needs loosening up add some extra milk.

Stir in most of your grated cheese and stir until it has melted through. Taste the soup, you can always add more cheese if you think it needs it. Add any extra salt, pepper and ground chilli flakes if you think it needs additional seasoning.

To serve, spoon into bowls and sprinkle a little extra cheese on top. Serve with warm crusty bread.

If you’d like to garnish your soup with caramelised cauliflower like I have, remove a cooked floret from the pan before you blend the soup and pat dry.

Thinly cut it into slices and gently fry with some butter until golden brown. Gently lay it on top of the soup and serve. Delicious!

You could even use frozen cauliflower for your soup. Just defrost it thoroughly first and you’d never know once it was blended up. It’s frugal too.

Cauliflower cheese soup is the ultimate comfort food. What comfort food dishes will be warming your cockles this autumn?

Try my recipe for Luxurious Cauliflower and Chestnut Soup

Recipe: Norwegian Inspired Cauliflower Cheese Soup

Recipe: Goats Cheese & Caramelised Onion Galette

Hello Autumn. This wonderful season of mellow fruitfulness and crispy crunchy leaves has arrived, and my lovely quince tree is heaving with fruit. Normally I make a big batch of quince jelly with its fruit, but this year we have so many that I thought I’d cook with them too. I made a delicious Goats Cheese & Caramelised Onion Galette topped with quince – and it was oh so good!

Quince is an unusual fruit. It looks like a hard pear and is covered in fuzz. They’re not so much an eating fruit, but one you cook with. They’re most commonly found in Mediterranean and Middle Eastern cookery. Quince are perhaps most famously used in membrillo, a delicious thick paste served with cheese from Spain.

galette

I’ve never made a galette before, I had one at a French cafe in Devon and thought that it would be a good thing to try at home. It’s a bit like an informal French tart. It’s very simple and a great thing to throw together on an Autumnal evening for a warming family meal. It looks pretty too doesn’t it?

galette

It’s very simple, it’s a shortcrust pastry filled with whatever you fancy. I went for goats cheese and caramelised onion topped with finely sliced quince in a fresh thyme pastry crust. If you don’t have quince you could slice and apple or pear over the top and it would probably be just as good.

Goats Cheese & Caramelised Onion Galette

Serves 6
Try this delicious informal French tart – the perfect thing for an Autumnal supper.

Ingredients
For the shortcrust pastry –
100g butter
225g plain flour
1 teaspoon of thyme leaves – I used fresh but dry would be fine
tepid water
pinch of salt
For the filling –
150g of goats cheese
1 large onion
knob of butter
1 teaspoon of sugar
1 teaspoon of balsamic vinegar
salt & pepper
1 quince, cored and finely sliced
1 egg

Instructions
1. Make your pastry. Rub the butter and flour together in a bowl until they are like breadcrumbs. Add your thyme and salt and combine. Gradually add the tepid water a couple of spoons at a time into your bowl until you have a ball of dough that isn’t too sticky and wet or too dry. Wrap in clingfilm and put in the fridge to rest for half an hour or so.
2. Finely slice your onion and fry gently until soft and golden in the knob of butter. Once soft, season and add the sugar and balsamic vinegar and cook through. Set aside to cool a little.
3. Roll out your dough until it’s about the thickness of a pound coin and roughly the shape of a circle approximately 30cm in diameter. Place on baking paper on a baking tray.
4. Slice or crumble your goats cheese (whichever works best with the cheese you’ve chosen) and place it in the middle of the pastry, leave an edge around the sides of about 6 or 7cms so you can fold the pastry up to make the classic galette shape later.
5. Top the cheese with your caramelised onions and then fan your finely sliced quince (or apple or pear) in an artistic circle on top of the onion.
6. Take a pastry brush and brush beaten egg around the visible edge of your galette. Now take a look at my picture of the finished galette. You will need to bring the sides of your galette over the sides and covering the top, leaving the middle of the galette open. Fold the sides in sections, working anti-clockwise so they roughly overlap. Gently press the folds together. It is meant to look rustic.
7. Brush with the beaten egg and dot the quince slices on the top with some butter.
8. Bake in a pre-heated oven 200°c for 45-50 minutes until golden brown.
9. Once baked, remove from the oven and leave to rest for 10 minutes, and then serve.

Notes
This serves 6 for lunch, or 4 hungry people. I served my galette with new potatoes and salad.

My goats cheese and caramelised onion galette was delicious and easy to make. I really liked how rustic and hearty it looked, and it’s always good to bring something to the table which makes everyone’s tummy rumble. The French often make sweet galettes with plums and such like, I have a feeling we’ll be eating a lot of these versatile galettes this year.

galette

Recipe: Malty Malteser Butterfly Cakes

In my family, September is birthday month and this week it was my brother’s turn to blow out the candles. We weren’t having a big bash for him, but you can’t successfully have a birthday without cake. My brother loves Maltesers, so I thought I’d make him some quick and easy butterfly cakes, but with a Maltesery twist.

I’ve had a jar of malt extract lurking in my cupboard for a little while now, so I knocked up a standard sponge recipe and added a big dollop of the lovely malty stuff. Baked my buns until they were golden and whipped up a chocolate buttercream icing complete with a big bag of smashed up Maltesers. There was no room for candles, but at his age they’re verging on a fire hazard anyway!

Malteser Butterfly Cakes

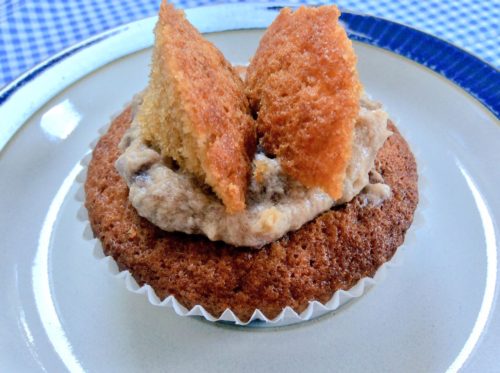
The little Malteser Butterfly Cakes came out a little darker than a plain sponge would. This is because the dark malt extract makes the mixture darker. They’re not overdone, that’s their natural bronzed colour.

This recipe makes around 12 malteser butterfly cakes.

Malteser Butterfly Cakes

4oz Butter or margarine
4oz sugar
1 dessert spoon of malt extract
2 medium eggs
1 teaspoon of baking soda
4oz self raising flour

For the buttercream:
4oz butter
4oz icing sugar
1 tablespoon of drinking chocolate powder
10oz of Maltesers

1. Beat the butter and sugar together until fluffy and the stir in the eggs and malt extract.
2. Carefully fold through the baking soda and self raising flour until combined.
3. Dollop into cake cases, there should be enough to make about 12 buns.
4. Bake in a preheated oven at 190c for around 15 minutes. Once cooked leave to cool.
5. To make the buttercream, beat the butter, icing sugar and hot chocolate powder until soft and fluffy. Bash up the Maltesers and gently fold in.
6. Carefully cut a circle out of the top of each of your cooled cakes, cut the circle in two, dollop a teaspoon of buttercream into the hole and top with the halves to make them look like butterfly wings.

Malteser Butterfly Cakes

If you love butterfly cakes, you might also enjoy my Peanut Butter Butterfly Cake recipe.

Casa Costello

Recipe: Spanish Style Bravas Sausage Casserole

When I go out for tapas I always order patatas bravas. I love the crispy pieces of potato smothered in the garlicky, tomatoey bravas sauce. I’ve had it in my head to make a big Spanish style bravas sausage casserole in my slow cooker for a while. This summer has not been up to much and the rainy days have had me guiltily rustling up comfort food dishes, instead of summery salads and such like.

I confess I made my sausage casserole with Quorn sausages, but you could very easily make them with your favourite meaty sausages if you’d prefer. Making the sauce in the slow cooker and letting it bubble away gently to itself for a few hours makes it extra delicious.

Bravas Sausage Casserole

I browned the sausages separately and popped them into the sauce for the last hour or so. The great thing about Quorn sausages is that they take on some of the flavour of the sauce.

To serve I roasted some new potatoes in some oil and once they were cooked I spooned over some sausages and bravas sauce and added a dollop of incredibly garlicky aioli.

Spanish Style Bravas Sausage Casserole

Serves 4
A super simple, delicious and fairly frugal family meal.

Ingredients
2 tablespoons of olive oil
1 large onion, chopped
3 garlic cloves, crushed
2 500g cartons of passata
2 tablespoons of tomato purée
1 tablespoon of sweet chilli sauce
2 teaspoons of smoked paprika
1 teaspoon of sugar
2 tablespoons of fresh parsley, chopped
1 teaspoon of dried oregano
Salt & Pepper to taste
8 sausages (two per person) I used Quorn sausages

Instructions
In a frying pan gently fry the onion in 1 tablespoon of olive oil until it’s soft but not brown. Add in the garlic towards the end of cooking and cook through.

Tip the fried onion and garlic into your slow cooker, add the passata, tomato purée, smoked paprika, sweet chilli sauce, sugar and oregano and cook on medium for about 3 hours. Taste and adjust seasoning if you feel it needs it.

In the frying pan, fry your sausages until they’re brown, drain and add to the sauce and leave to cook through for an hour. Before serving stir through 1 tablespoon of fresh parsley.

Serve the Bravas Sausage Casserole with crispy roasted potatoes and aioli. Scatter with the remaining chopped fresh parsley.

Notes
I sometimes finely dice some peppers, cook them off and add them to the sauce to bump up the veg content. This sauce is perfect for hiding secret veg from your children!
This does make lots of sauce. If you have lots left over, it’s delicious warmed up the next day with crusty bread.

The Bravas Sausage Casserole was delicious and something I will be making over and over again. What’s more it’s very simple, pretty quick to throw together and fairly frugal. What’s not to love?

Recipe: Spanish Style Bravas Sausage Casserole

Recipe: Super Speedy Cheese and Onion Pinwheels

Back in July I spent a day judging at the International Cheese Awards. During the day I sampled hundreds of cheeses, learned a fair amount about cheese making and met celebrity chef  Joe Hurd for a chat about Parmesan. As you do.

The International Cheese Awards is a great opportunity to try lots of new cheeses and to see what I like and what I probably wouldn’t try again. I spent quite a lot of time visiting the trade stands. I made a bee-line for the Lactalis stand which featured familiar household names such as Galbani, President and Seriously Strong Cheddar.

Joe Hurd was on hand to give cooking demonstrations throughout the day and to talk about his love of Anglo-Italian cookery. We chatted about Galbani Parmesan which is an iconic brand in Italy. It’s matured for 9 months and is sweet and dense and used predominantly as a seasoning in Italy.

I asked Joe how he likes to serve Parmesan and his answer quite surprised me. Joe said that Parmesan barbecues really well with garlic and Italian sausage. Apparently it grills really well and doesn’t melt like a cheddar style cheese might. Sounds delicious! In Cyprus I’ve had Parmesan with honey as a dessert, so it really is a surprisingly versatile cheese.

Recipe: Super Speedy Cheese and Onion Pinwheels

I came home from the International Cheese Awards with bags bursting with cheese from all over the world, but my goodies from Lactalis were especially lovely. After my chat with Joe I was keen to see what I could make with them.

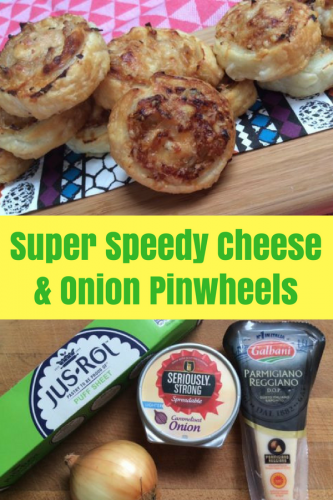
Being a simple soul, and it being summer and the season of picnics I decided to make some Cheese and Onion Pinwheels. I’ve never made pinwheels before, but they seemed the sort of easy thing a busy person could throw together in very little time and have something impressively homemade for a picnic in the park with friends.

Recipe: Super Speedy Cheese and Onion Pinwheels

As it happened, they were delicious. They required very few ingredients and took no time at all to knock together.

Cheese and Onion Pinwheels

Makes 15
Super simple and really speedy cheesy snacks for picnics and parties.

Ingredients
1 large onion, finely chopped
1 teaspoon of butter
A pinch of salt, pepper and sugar
1 teaspoon of balsamic vinegar
A pack of ready made puff pastry
1 tub of Seriously Strong spreadable – Caramelised Onion flavour
1 tablespoon of Galbani Parmesan, finely grated

Instructions
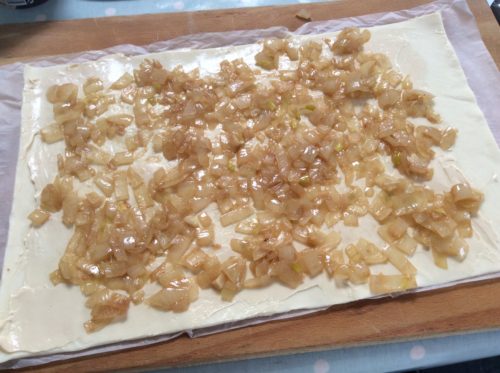
In a frying pan melt the butter and gently fry the onion until soft but not brown. Add the salt, pepper, sugar and balsamic vinegar and stir. Remove from the heat and set aside to cool.

On a large board unroll the sheet of puff pastry, leave it on the paper it comes wrapped in. Spread the Seriously Strong Caramelised onion cheese all over the pastry, be fairly generous but spread it evenly if you can. Cover with the cooled fried onion.

Roll the pastry up along its long side, wrap in the paper and put in the fridge for 10 minutes or so. Pre-heat the oven to 200 degrees.

Remove the pastry from the fridge and carefully cut into rounds approximately 1.5cm thick. You should get around 15 pinwheels from this.

Place each round on a greased baking tray and top with a little of the finely grated Galbani Parmesan. Bake for 15 minutes or until golden brown.

Remove from the oven and leave to cool on a rack for 15 minutes or so.

Serve on their own or with your favourite chutney.

Recipe: Super Speedy Cheese and Onion Pinwheels

It really is a very simple process, my cheese and onion pinwheels hardly took any time at all and now I know what I’m doing I can go wild with the fillings and flavours if I want to.

You can easily put these together in no time at all and once they’re cooked they look like you’ve spent hours slaving away in the kitchen. They’re so easy you could even get the kids involved.

Recipe: Super Speedy Cheese and Onion Pinwheels

The Seriously Strong spreadable cheese is ideal for these cheese and onion pinwheels. It cooks really well and with it being a caramelised onion flavour it packs a lovely punch which works beautifully.

What flavour combinations would you try in your pinwheels?

Recipe: Super Speedy Cheese and Onion Pinwheels

Recipe: Delicious slow cooked Beef in Red Wine

One of the boy’s favourite winter meals is a hearty beef in red wine stew, it’s something I’ve been cooking for years now, and since I got a slow cooker (or crock-pot) last year it’s been a regular in our weekly menus, something I can pretty quickly throw together the night before, or first thing in the morning and leave to gently bubble away in the slow cooker for the day. There is nothing better than coming home from a hard days work to find a hot and hearty meal ready to be served.

My recipe for beef in red wine is really flexible and pretty quick to put together. I usually use shin of beef or braising steak, these are both good for really long, slow cooking and are very tender once cooked, and so delicious my five year old makes short work of it.

beef in red wine

Slow cooked beef in red wine

Serves 6
A delicious and hearty beef stew, cooked slowly until the beef is tender. A perfect winter warmer!

Ingredients
1 bottle of red wine, I used Eisberg alcohol free wine
1400g Braising steak, in chunks
3 large carrots
3 parsnips
2 sticks of celery
8 shallots
1 stock cube
2 bay leaves
1 dessert spoon of tomato puree
1 teaspoon of sugar
2 tablespoons of plain flour
1 tablespoon of rapeseed oil (or similar)
Salt & pepper

Instructions
Add salt and pepper to the flour and toss the beef chunks in the seasoned flour and fry the beef in the oil (in batches) until browned. Set aside.

While the beef is cooking switch on the slow cooker and put it on high, add the bottle of red wine (less one glass) to the pot.

Chop the carrots, celery and parsnips into bitesize pieces and put into the slow cooker. Peel the shallots and add those to the slow cooker.

Once all the beef is browned put it in the slow cooker with the bay leaves, sugar, tomato puree, stock cube and some more seasoning.

Deglaze the pan with the glass of red wine and add that to the slow cooker too.

Leave the slow cooker on high for two hours, or until you need to leave the house; then turn it down to low. The stew can be eaten after 5 or 6 hours, but if you can cook it for a bit longer then that’s always going to be better.

Towards the end of the cooking I spoon out some of the liquid and mix it with any of the remaining seasoned flour and add that paste back into the pot, this helps to thicken the gravy.

When you’re nearly ready to eat, taste and check the seasoning, adding more if you think it needs it. Serve with buttery mash and vegetables.

Notes
You can easily change what vegetables you use, root vegetables are always lovely in this, it’s great with swede if you have some or even new potatoes. You could use large chunks of onion instead of shallot if you’d like. It’s very forgiving and very flexible.

This recipe for beef in red wine would work beautifully with my rich and creamy Fennel & Potato Gratin.

beef in red wine

Made with alcohol free Eisberg, this really helps to cut the calories down in this hearty stew. At just 36 calories a (125ml) glass (compared to an average of 158 calories for standard red wine). This wine is a great option for people counting their calories.

Recipe: Delicious slow cooked Beef in Red Wine

Four fun ways with Mega Marshmallows

I love cooking and baking, but I have genuinely never laughed so much, nor had so much fun making anything as I have done today making and playing around with these Mega Marshmallows.

I was sent a couple of bags of Mega Marshmallows to try and I was dying to start experimenting with them. There’s something a bit silly and frivolous about marshmallows and you can’t help but smile when you eat them.

mega marshmallows

I’ve spent the morning in my kitchen experimenting with these huge marshmallows. They are 5cm tall, and are 84 calories each and contain 0% fat. I made three different things with just a few ingredients, I had SO MUCH FUN and I’m certain my son would (and will) enjoy recreating these recipes with me again.

Chocolate Marshmallow Teacakes

mega marshmallows

I love a Tunnocks Teacake and nothing on earth could ever come close to that level of chocolately perfection, but it’s still a lot of fun to try. To make six teacakes you will need…

6 chocolate digestive biscuits
3 Mega Marshmallows
1 bar of melted Chocolate

In a warm oven put your digestive biscuits on a tray, chocolate side up, watch carefully and remove once the chocolate has melted. Cut your Mega Marshmallow into two pieces and squash the cut side on top of the melted chocolate. Leave them somewhere cool to set and stick together.

Melt your chocolate and then carefully cover each marshmallow and biscuit with the chocolate, put on a rack and leave them to cool.

Chocolate Covered Marshmallows

mega marshmallows

I found I had some melted chocolate left over from making the teacakes, so never one to waste anything I dipped some marshmallows in the chocolate and put some sprinkles on top. They’re really cute and they look great. If I had some cake pop sticks they’d make pretty pops too.

Chocolate & Marshmallow Krispie Bites

mega marshmallows

I am not going to pretend that this is my recipe, I saw Nigella make these once and always wanted to try it. She used plain rice krispies, I used the chocolate covered ones. I think if you were keen to up your calorific intake you could add some chopped up chocolate digestive pieces too. This is a real sticky treat which was really fun to make.

Chocolate Digestive S’mores

mega marshmallows

I’ve never had a S’more but I know people rave about them. I have an understanding of the concept so I decided to put theory into practice, but with chocolate digestive biscuits.

Take two chocolate digestive biscuits and sandwich half of a Mega Marshmallow in between them and put them into a warm oven for a few minutes. Keep an eye on them and remove them from the oven once the chocolate has melted. The marshmallow will by this point be warmed through and gooey. Eat quickly and carefully, the marshmallow oozes out unctuously from between the biscuits.

Mega Marshmallows are probably the most fun ingredient I’ve ever used in my baking and I’ve enjoyed being a bit experimental and a bit silly with them. They cost £3 for a 700g pack (I made all of these things with one bag and still had a few left over to scoff taste test).  They are currently available from Tesco, Sainsbury’s Ocado, Bargain Buys, B&M, Family Bargains, Poundworld and Farm Foods.

Go out and have some fun with them, you won’t regret it!

Four fun ways with Mega Marshmallows

Note: We were sent some Mega Marshmallows to try, all images and opinions are our own.

Recipe: Sneaky Cauliflower Lasagne Sauce

Lasagne is one of those tried and tested family meals. It’s something everyone will happily tuck into and it’s perfect for sneaking a bit of extra veg into if you’ve got kids. I’ve taken things a step further; and for some think may be a step too far, but it’s just as delicious and a little bit healthier. Stick with me on this. I use blended cauliflower instead of béchamel sauce to make cauliflower lasagne sauce.

Don’t get me wrong, I adore béchamel sauce and find it to be incredibly easy to make and versatile. But, and here’s the big but. It’s just flour, butter, milk and seasoning and it doesn’t count as one of your five a day.

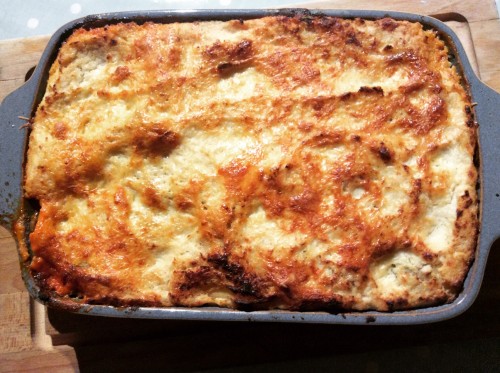
Over the weekend I made our current favourite lasagne. Generous portions of roasted butternut squash and parsnip, with handfuls of fresh baby spinach in a fresh tomato sauce, layered with lasagne sheets and topped with cauliflower sauce. It works, it really works and if you put enough cheese in it, it turns into an amazing lasagne-cauliflower cheese mash up.

Recipe: Sneaky Cauliflower Lasagne Sauce

Sneaky Cauliflower Lasagne Sauce

Sneak extra veg into your cooking with this delicious cauliflower lasagne sauce.

Ingredients
2 cauliflowers
400mls milk (I used semi skimmed)
200g mature cheddar cheese, grated
Salt & Pepper (chilli flakes & grated nutmeg optional)

Instructions
Chop up your heads of cauliflower, they don’t need to be in pretty florets as you’ll be blending them. Add as much stalk as you like, it’s full of flavour and very frugal. Boil or steam until cooked through.

Once cooked, drain and put into a blender (you may need to do this in batches). Season generously and add the milk, blend until smooth. If you want a smoother sauce you can pass it through a sieve at this point and/or add a little bit more milk.

Whilst the sauce is hot, stir through the cheese and taste. Add more seasoning if you feel it needs any. Layer the sauce into your lasagne as you would do with your normal white sauce.

Notes
You can add as much cheese to the sauce as you’d like. I haven’t added much at this point because I know I’ll be sprinkling more cheese on top of the lasagne when I cook it.
I sometimes add a spoon of soft cheese with garlic and herbs which give it a nice background flavour.
Try adding chilli flakes to add a bit of a kick, or a touch of grated nutmeg because it just works.

Recipe: Sneaky Cauliflower Lasagne Sauce

I think my cauliflower lasagne sauce has lots of potential. I can imagine it working really well in something like moussaka. It’s such a great way to sneak extra veg into your life.

This recipe could easily be adapted for vegans too. Just swap the milk for soy milk or similar and leave out the cheese.

Cauliflowers are incredibly cheap in the shops at the moment, so we’re cooking with them a lot. This would also work well with frozen cauliflower. But not broccoli, broccoli is a step too far!

Have you got any tips for sneaking veg into your family meals?


Recipe: Sneaky Cauliflower Lasagne Sauce

Easy Christmas Recipe: Mincemeat Vol au Vents

It’s not often I have a guest post to share with you, but when Bobble Bardsley tweeted a picture of his Mincemeat Vol au Vents I knew it was a stroke of genius that needed to be shared. I dislike pastry so I struggle with mince pies, but the idea of a Mincemeat Vol au Vent is fantastic. They have all the traditional mince pie taste but with considerably less of the claggy pastry. I am definitely going to try these out! Over to you Bob….

These delicious morsels were an accident – we ran out of fillings for our vol au vents one Christmas (in the 2010s, not the 1980s!) so the mincemeat came out of the cupboard and we filled the last few pastry cases with that.

It was a revelation. If you find homemade mince pies a bit too chewy, or your pastry always goes ‘caramelised’ (AKA burnt) these are a great alternative, and can be made from scratch within about 15 minutes.

Mincemeat Vol au Vents

If you find homemade mince pies a bit too chewy, or your pastry always gets burnt these are a great alternative, and can be made from scratch within about 15 minutes.

Ingredients
Frozen vol au vent cases
Milk/egg wash
Mincemeat
Icing sugar (for decoration)

Instructions
Remove the vol au vent cases from their packaging, wash with milk or egg so they go golden brown when baked, and arrange on a baking tray with a small gap between them.

Bake according to the packaging instructions – I used Jus-Rol vol au vents, and the instructions were 220C for about 13-15 minutes.

With a few minutes spare, remove the vol au vents from the oven. They should already be golden, and very nearly cooked.

Push down their ‘hats’ to create a hollow, and add a teaspoon of mincemeat to each one. A dozen vol au vents will take anywhere around 150-200g depending on how much you fill them.

Return to the hot oven for a few minutes until the suet has melted and the mincemeat has ‘relaxed’ into the bottom of its pastry nest.

Remove and allow to cool. At this stage I used a flour sifter to dust them with icing sugar. If you don’t have a sweet tooth, the mincemeat and pastry alone are delicious together.

Notes –

  • I prefer to glaze with milk rather than egg. Be generous, so your pastry is quite ‘wet’ when it goes into the oven.
  • Have a palette knife or sharp-edged silicone spatula ready to prise the pastry cases off of the baking tray once they’re done. Alternatively use non-stick baking parchment if you have any.
  • Be quite frugal with the mincemeat. They might not look very full, but you’ll be glad of that when you take a bite, and the flaky vol au vent pastry starts to collapse. It’s much easier to just shove the whole thing in at once and then reach for another.

Don’t let ANYONE tell you vol au vents are old-fashioned. They’ll soon change their tune once they taste one of these. Mincemeat vol au vents are the future!

Mincemeat Vol au Vents

If you enjoyed this recipe, you might also like to try these mincemeat flapjacks.

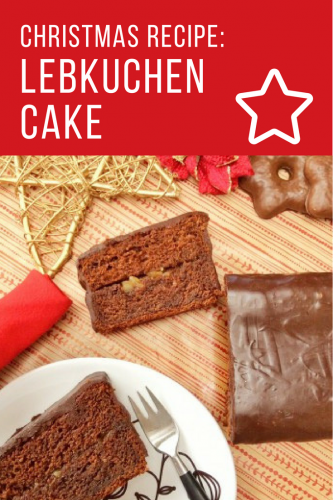
Christmas Recipe: Lebkuchen Cake

When Duerr’s asked me to try their new Chunky Ginger Preserve, my first thought was lebkuchen. I’ve never made them before but I thought it might be nice to try. If you like ginger, you’ll like the Duerr’s Chunky Ginger Preserve, it is sweet and spicy, full of chunks of fiery ginger, and great for cooking with, especially for my Lebkuchen cake.

One of my favourite things to eat around Christmastime is lebkuchen. Lebkuchen are a German cakey-biscuit, usually a soft spiced gingerbread covered in icing or chocolate, sometimes filled with jam, sometimes not. I find them irresistibly moreish and any bags which find their way into our house have to be kept from me and a small ration allocated daily. 

You can find the recipe  for my Lebkuchen Cake below, don’t be put off by the large-ish list of ingredients, it is literally stick them in a bowl and give them a good stir. It is probably the best cake I’ve ever made and a great alternative to the traditional Christmas cake if you don’t like all that fruit!

Lebkuchen Cake

Recipe: Lebkuchen Cake

Serves 10
A delicious cake version of the traditional German Christmas treat – easier than it looks to make and truly scrumptious!

Ingredients
125g of butter, softened
150g sugar
1 egg yolk
3 eggs
200g of runny honey
3 heaped tablespoons of sour cream
300g self-raising flour
1 tablespoon cocoa powder
1 teaspoon baking soda
1 teaspoon of baking powder
5 teaspoons of ground ginger
A pinch of salt
2 tablespoons of Duerr’s Chunky Ginger Preserve
For the chocolate glaze
150 g dark chocolate
180 ml double cream

Instructions
In a large bowl beat the butter and sugar until well combined. One at a time add the following ingredients and mix – one egg yolk, honey and sour cream.

In a separate bowl mix the dry ingredients – self-raising flour, cocoa, baking soda, baking powder, pinch of salt and ginger together. Add the dry ingredients to the wet ingredients and gently mix.
Mix the eggs and add to the cake mixture and stir.

Pour the cake mix into a lined cake tin. I used a large loaf tin. Bake in a preheated oven at 180ºc. for about 50 minutes until it is cooked through. Remove from the oven and leave to cool, preferably overnight.

When cool cut the cake in two lengthways and spread the Duerr’s Chunky Ginger Preserve on the bottom layer, then sandwich back together.

To make the chocolate glaze, put the double cream in a saucepan and bring it to the boil and remove from the heat. Add the crushed chocolate and stir until dissolved, keep stirring until it has cooled a little, but is still liquid.

Pour the hot chocolate glaze on the top and sides of the Lebkuchen cake and leave it for a few hours to cool and set.

Notes
Five teaspoons of ground ginger does sound like a lot, but once it is cooked the fiery ginger tones down a little.
This does make a large cake, so you could split it into two cake tins and make two smaller cakes if you’d like.
If you don’t like dark chocolate you could use milk chocolate instead.

To taste test the lebkuchen cake properly we bought some proper lebkuchen from the Christmas Markets and I’m pleased that the two were comparable. Despite the long list of ingredients it was so easy to make and I will be making it again, probably several times before Christmas for various occasions.

lebkuchen cake

With my Christmas recipe repertoire now including Finnish Joulutorttu and German Lebkuchen cake, we are in for a truly continental Christmas – and it’s all the better for it!

Christmas Recipe: Lebkuchen Cake