Recipe: Beautiful Blueberry and Buttermilk Scones

Over the weekend we experimented with making our own butter at home. One of the by-products of the butter making process is that you’re left with a jug of buttermilk. Buttermilk is supposed to be brilliant for making soda bread and scones with, though I’d not tried it in scones before. Waste not, want not, so I whipped up a batch of blueberry scones to use up the buttermilk. The result was the most incredible, light as air scones I’ve ever made – even my Nan would’ve been impressed with these blueberry and buttermilk scones!

blueberry and buttermilk scones

Blueberry and Buttermilk Scones

Ingredients
14 oz self raising flour
3 oz caster sugar
1 tsp bicarb of soda
1/4 tsp salt
6 oz butter or margarine
8 fl oz buttermilk
100g of fresh blueberries
1 egg (for egg wash)

Instructions

Preheat oven to 220 degrees or Gas Mark 7.
Mix the dry ingredients together in a bowl. Add your softened butter or margarine and rub until the mixture resembles breadcrumbs.

Add your buttermilk and mix, the dough will be a bit wetter than a standard scone recipe – this is normal, don’t be tempted to add more flour. Once combined, add your blueberries and gently mix in until fairly evenly distributed.

Roll the mixture out so it’s approx 2cm thick, I did this on a piece of greaseproof paper because the texture of the dough was quite wet.. Cut into 12 rounds and put on a lightly oiled baking sheet and bake for 15 minutes. I brushed the tops of my scones with a beaten egg before baking.

Notes
Serve plain, or with butter, or blueberry jam, or cream, or everything you can fit onto your scone. They’re delicious slightly warm with a little dollop of jam.

To date the picture I look of my luscious blueberry and buttermilk scones has been my most popular images on Instagram. I can’t look at it without feeling hungry and wanting to make a fresh batch.

These airy-fairly light blueberry and buttermilk scones were the best ones I’ve ever made, and I’ve made hundred of scones in my lifetime. They are delicious eaten plain, or lovely buttered or warmed and served with blueberry jam, cream and a pot of tea.

Once you’ve tried these delicious light as a feather buttermilk scones, you’ll never go back. I promise you’ve never had scones THIS good!

Recipe: Beautiful Blueberry and Buttermilk Scones

Cooking with Kids: Homemade Butter

At the end of September I was lucky enough to spend a day at River Cottage with a gorgeous group of food bloggers and Foodies100. It was a marvellous day and you can read about it all here. But for me one of the highlights was making homemade butter from scratch. It was something I did at school about 25 years ago, but this was quicker and much more fun. So it was one of the first things I wanted to try with the boy when I got home.

It was very easy, fun to do and with an educational element we can all get behind. By chance I’d spied some yellow stickered cream in my local supermarket and at 25p for a big carton, it had “make me into butter” written all over it.

making butter

The recipe is from the River Cottage team, it’s not mine so I won’t even try and claim it as my own. On the day we all picked a variety of herbs, chopped them up and incorporated them into the butter, or you could just salt it like we did at home (it’s hard to get green bits in butter past the rigorous quality control standards of a small child). It’s the kind of recipe you can adapt however you want. Tarragon butter? Garlic butter? Thyme butter? You choose!

Homemade Butter

Make your own creamy homemade butter. It’s so easy and a lovely fun thing to do with the kids.

Ingredients
200ml double cream
Pinch salt, optional

Instructions
Using an electric whisk, whip the cream until it looks like very stiff scrambled eggs. Keep mixing using a spatula until the mixture separates into butter and buttermilk. Set aside the buttermilk.

Using your cold hands, squeeze the excess buttermilk from the butter. Rinse the butter in iced water, squeeze any further moisture out and pat dry.

Put your homemade butter on a piece of baking parchment and flatten into a rectangle and sprinkle with salt, adding any herbs if you are making a herb butter.

Roll up like a swiss roll and put it in the fridge to chill. It is ready to use however you wish.

Notes

You can save the buttermilk and use it in another recipe, maybe in scones or soda bread.

It’s pretty quick to make if you use an electric whisk, you could beat it by hand if you wanted, but it might take forever. The small boy loved helping to whisk the cream, insisted on trying it when it looked (but did not taste) like scrambled eggs and he enjoyed helping to pat it flat, like play-dough but all slippy. 

making butter

It’s a lovely thing to do with kids, I think it’s good to teach them where food comes from and how it is made. Cookery, maths and science go hand in hand. It’s edible education and I think we can all agree that’s a very good thing indeed!

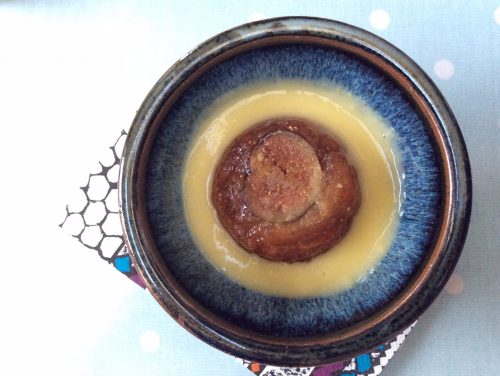
Recipe: Fig, Honey & Cinnamon Sponge Pudding

I love figs, they still seem like a decadent kind of fruit, a rare globe of loveliness, rich, versatile and hard to come by. I like to have a tin of figs in syrup in my cupboard to bake a form of Birnenpfannkuchen with, but fresh figs are a rare and wonderful treat. I was shopping in Aldi this week when I noticed they had 4 figs for 59p in their super 6 offer, and at that price it’s rude not to, so I slipped a couple of boxes into my basket and started plotting a pudding.

Fig, Honey & Cinnamon Sponge

I couldn’t find a recipe for what I wanted to make, so I experimented a bit instead. What I wanted was a honey baked fig in some light sponge spiced with cinnamon, and ideally some sultanas soaked in tea, but we didn’t have any, we’ll add those next time. That’s how I came up with this recipe for Fig, Honey & Cinnamon Sponge.

Fig, Honey & Cinnamon Sponge

Fig, honey and cinnamon sponge puddings

Serves 6
A lovely, quick little pudding, gently spiced with cinnamon and making the most of fresh seasonal figs.

Ingredients
3 fresh figs
6 teaspoons of runny honey
4 oz butter or margarine
4oz of caster sugar
1 teaspoon baking powder
1 tablespoon of ground cinnamon
2 eggs
4oz self raising flour

Instructions
Pre-heat your oven to 190. Grease six ramekins. Halve the figs and place one half in a ramekin and drizzle round a teaspoon of honey.

Beat the butter or margarine and the sugar together until light and fluffy. Add the baking powder, cinnamon and eggs and mix together. Once combined gently stir in the flour and equally divide between the six ramekins.

Bake in a pre-heated oven at 190 for 20 minutes, or until the sponge is cooked through.
Once cooked, run a knife around the edge of the ramekin and tip out.

Notes
Serve with custard, ice cream or cream. Best eaten when warm.

It’s a really, really simple little pudding to make and takes less than half an hour. If I can get my hands on more figs these Fig, Honey & Cinnamon Sponge puddings will be a regular treat for us until the fresh fig season is over.

Fig, Honey & Cinnamon Sponge

I love the way the honey and fig juices soak into the sponge and make it sticky and unctuous, without making it too sweet. Next time I make these Fig, Honey & Cinnamon Sponge puddings I would throw in some soaked dried sultanas, but it works really well without them. This is a glorious pud and I had to fend off request for seconds (because I wanted them). Give it a try and let me know what you think.

Recipe: Fig, Honey & Cinnamon Sponge Pudding

Recipe: Easy Chocolate Malt Cake

Since joining “the motherhood” I’ve had to get acquainted with my mixing bowl. I’ve never been a great baker of cakes, but seemingly the minute you become a mother, someone thrusts a whisk into your hands and asks you to bake two dozen fairy-cakes for some occasion or other.

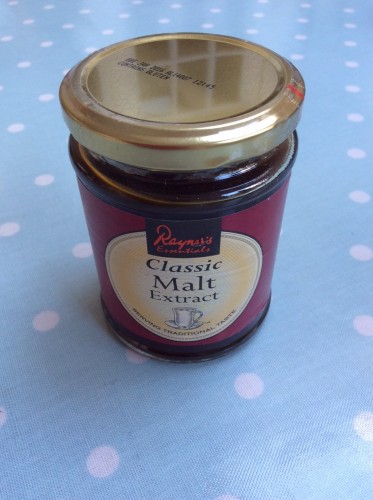
My go-to cake has been a Victoria Sponge and my Vicky-Sponge is generally pretty well received, but I have failed in my attempts to make a good chocolate version, until now that is. There was always something missing, a lack of depth of rich chocolateyness and I couldn’t figure out why. I was sent a jar of Rayner’s Classic Malt Extract to try, my first port of call was to tentatively add it to a chocolate sponge cake, and by Jove I’d cracked it!

Easy Chocolate Malt Cake Recipe

My easy chocolate malt cake recipe is by definition easy, quick to throw together in a cake emergency and tasty enough to offer the Vicar for tea. It probably won’t win any prizes for innovation or decoration, but it’s a delicious stand alone cake, or it works well with a dollop of ice cream and some fruit.

Easy Chocolate Malt Cake

Serves 8
A real simple, really tasty chocolate sponge cake with an undercurrent of malty richness.

Ingredients
4oz sugar
4oz butter or margarine
2 medium eggs
1/2 teaspoon baking powder
2 tablespoons Bourbon cocoa powder
2 teaspoons Rayner’s Malt Extract
4oz self raising flour
Splash of milk

Instructions
Beat the butter and sugar together until fluffy. Stir in the eggs, baking powder, cocoa powder and malt extract, mix until well combined. Gently fold in the self raising flour, add a small splash of milk if the mixture is too stiff.

Pour the cake batter into a lined loaf tin.

Bake in a pre-heated oven at 190 for 30 minutes, check if it is cooked through and if it is remove from the oven and leave to cool.

Easy Chocolate Malt Cake

Note: I was sent a jar of Rayner’s Classic Malt Extract free of charge to use in a recipe. All images and opinions are our own.

Recipe: Posh Cheese on Toast

Back in July I got to be a Judge at the International Cheese Awards and I came home with enough cheese to make a colony of mice very happy indeed. Between us we’ve been slowly working our way through the South Manchester Cheese Mountain, with me commandeering the lovely Brie type cheeses I generally adore.

We seem to have a surfeit of cheddar style cheeses, which is fine, they’re a good multi-purpose cheese and a nice mature cheddar always has a place in our fridge. It’s tempting to cook up a big extra cheesy macaroni cheese or something similar, but when it comes to it, I don’t think you can beat a plate of cheese on toast. Not just any cheese on toast though, but posh cheese on toast.

Posh Cheese on Toast

This is one of my favourite quick meals. Take the comforting loveliness of cheese on toast, add a bit of frippery and it suddenly becomes more of a meal. It’s easy too and doesn’t take much longer than your bog standard cheese on toast.

Posh Cheese on Toast

Posh Cheese on Toast (feeds one hungry person)
One individual ciabatta, split in two lengthways
A handful of rocket 
A dollop of your favourite relish, I’ve gone with Ballymaloe original relish
Some Seriously Strong Extra Mature Cheddar

Method
1. Toast one side of your ciabatta (the crust side), once toasted remove from grill and spread over your Ballymaloe relish on the untoasted side. Thinly layer your rocket (or baby spinach if you prefer) on top, then evenly cover with Seriously Strong Extra Mature Cheddar. Pop under the grill.
2. Grill until the cheese has melted to your satisfaction.
3. Remove from the grill, leave for a minute to cool slightly, then devour.

Posh Cheese on Toast

Posh Cheese on Toast

Posh Cheese on Toast

It’s simple, but the best things often are. I guess in some ways it’s a bit like a pizza, but quicker and for my money nicer.

Note: We were given a block of Seriously Strong Extra Mature Cheddar Cheese to try free of charge on the proviso I used it in a recipe and blogged it. All images and opinions are my own.

Recipe: No Churn Peanut Butter Oreo Ice Cream

When it comes to peanut butter, you either love it or hate it. I am firmly on the love side, whilst hubs is staunchly hate, which only means one thing…. more for me! The summer holidays so far have been a bit meh, and I’ve been having to come up with new and exciting indoor things to do. One boring morning we decided to whip up a batch of Peanut Butter Oreo Ice Cream, the small boy loves helping out in the kitchen almost as much as he likes eating the results.

I found two new and deliciously different flavours or Oreo cookie in my local shop; the Golden Oreo which is a lovely crunchy vanilla flavoured cookie and the limited edition Peanut Butter Oreo. They were both crying out to be whizzed up in a milkshake, but I thought it was time to ring the changes and try some no churn Peanut Butter Oreo Ice Cream.

peanut butter oreo ice cream

Peanut Butter Oreo Ice Cream

Ingredients

1/2 jar smooth peanut butter (I used reduced fat)
2 tablespoons hot water
1 tin of condensed milk
2 teaspoons vanilla extract
1 pint of double cream (whipped)
1 packet of Peanut Butter Oreos

Method

1. Put your peanut butter in a large bowl and add two tablespoons of hot water, stir thoroughly as this will help to loosen the peanut butter making it easier to work with. Once mixed, add your tin of condensed milk and vanilla extract to the peanut butter and combine.
2. In a separate bowl whip your cream until it forms peaks, gently fold your cream into the peanut butter mixture.
3. Chop up, or bash up a packet of Peanut Butter Oreo cookies and gently stir into your mixture, making sure the pieces are well distributed.
4. Pour into a tub and freeze for 6-8 hours. We also made peanut butter oreo ice cream popsicles with some of our mixture which worked very well.

You could also make this with normal Oreos if you can’t get hold of the peanut butter Oreo cookies.

peanut butter oreo ice cream

This is such a great recipe to make with kids, it’s incredibly simple and because there are no eggs, no cooking, no fuss; it’s quick and easy to put together – the hardest part is waiting for it to freeze!

peanut butter oreo ice cream

The recipe made a lot of ice cream – nearly two pints of it, so it was ideal for making into popsicles and also for spooning into a tub. It is very rich, so a little goes a long way. Don’t forget to take your tub out of the freezer about 10 minutes before serving too so it softens a little.

It is so simple and utterly delicious, if you love peanut butter then you’ll love this recipe! If you try it let me know what you think.

If you enjoyed this, you might also like to try these recipes –

Recipe: No Churn Peanut Butter Oreo Ice Cream

Easy Recipe: Speedy Microwave Jam Sponge

In the early 1980s my Grandma (who was a professional cook) got herself a microwave and dedicated her retirement to figuring out how to use it. Her microwave cheffing was never considered a success. You could break your teeth on her sponge cakes and her scrambled eggs bounced. Everything which came out of her microwave was a disaster, which was enormously disappointing for someone who could make patisserie that would make French Chefs weep with jealousy.

I have shied away from microwave cookery, bar reheating leftovers, pinging ready meals and giving jacket potatoes a head start; the thought of baking a cake in the microwave sends me straight back to 1985 and I was resolved never to try it. That was until I was sent a jar of Duerr’s Rhubarb and Custard Homebaking Jam, the jam has been formulated to behave itself when heated, so it doesn’t go chewy like other jams might. Additionally it tastes just like those rhubarb and custard sweets I used to be addicted to as a child.

We decided it would be best to make a jam sponge and custard with this really lovely yummy jam (I had already liberally smeared some on a croissant for quality control purposes). I love steamed puddings, but who has the time? So I decided it was worth me tentatively experimenting with a microwaved version, what’s the worst that can happen?

I made my usual sponge recipe and popped it in the microwave for four minutes, checked it, decided it needed another two minutes and it was perfect. It was by far the lightest, fluffiest sponge pudding we’ve had in a long, long time. It took just ten minutes from weighing the ingredients to pouring custard over the finished pudding and filling our faces. This really is the perfect pudding if you need something quick, warming, universally popular and drowned in custard.

jam sponge

My microwave is 850 watts, yours may be different, so it might be best, at least the first time you make this, to reduce the cooking time, check it, and then check it ever minute until it’s cooked to your satisfaction. I originally guessed at 4 minutes, but my 850 watt microwave took 6 minutes to get to sponge perfection.

Microwaved Jam Sponge Pudding (serves 6)
Ingredients:
4oz Sugar
4oz Butter or Margarine (I always use Stork)
2 medium eggs
4oz self raising flour
1 teaspoon of baking powder
Half a jar of Jam (I used Duerr’s Rhubarb and Custard Homebaking Jam)

Method:
1. Cream the butter and sugar together until light and fluffy. Stir through the eggs.
2. Sift in the flour and baking powder and gently combine.
3. Dollop your jam on the bottom of a large microwavable bowl, gently (very gently so as not to disturb the jam) dollop the sponge mixture on top of the jam and smooth it so it’s fairly evenly distributed.
4. Microwave for six minutes (check this often as it’s really easy to quickly overcook things in the microwave).
5. Once cooked, remove carefully from the microwave and eat while it’s still warm.

Serve with custard, cream or ice cream, or whatever takes your fancy.

This is ridiculously quick and easy, incredibly tasty and really, really popular. I think my Grandma would be really proud that I finally cracked the mystery of microwave baking.

Easy Recipe: Speedy Microwave Jam Sponge

Recipe: Easy Peanut Butter Butterfly Cakes

I’ve been doing a lot of baking recently which can only mean one thing, I’m happy. I’m not sure why I’ve been blessed with the gift of temporary inner peace but I’m going with it and enjoying the cakey results. Yesterday on a whim I whipped up an experimental batch of Peanut Butter Cakes. They turned out to be pretty darn good, so I’m sharing the recipe. It’s really easy, if I can bake it then so can you.

Peanut butter cakes

Easy Peanut Butter Butterfly Cakes (makes approx 20)

Ingredients:
8oz Butter or margarine (I used stork)
8oz sugar
4 large eggs
2oz peanut hottie powder
1 teaspoon of baking soda
6oz self raising flour

For the icing:
2 big scoops of Betty Crocker vanilla buttercream style icing
2 heaped dessert spoons of Chocolate Peanut butter hottie

Method:
1. Beat the butter and sugar together until fluffy and the stir in the eggs.
2. Carefully fold through the peanut hottie powder, baking soda and self raising flour until combined.
3. Dollop into cake cases, there should be enough to make about 20 buns.
4. Bake in a preheated oven at 180c for 15 minutes. Once cooked leave to cool.
5. To make the icing (yes this is cheaty, but you can make your own buttercream if you want), beat the buttercream until soft and thoroughly mix in the chocolate peanut hottie powder, add a drop of hot water if it feels too stiff.
6. Carefully cut a circle out of the top of each of your cooled cakes, cut the circle in two, dollop a teaspoon of buttercream into the hole and top with the halves to make them look like butterfly wings.

Resist the temptation to eat them all in one go.

So there you have it, really, really easy peanut butter cakes, they’re something that would be great to bake with children, or just by yourself if you’re in your happy place like me.

Kitchen Basics: Versatile Tomato Sauce

One of the staple dishes in our kitchen is a really simple tomato sauce. I make a batch almost fortnightly and it’s used in a few different ways, from spaghetti and meatballs, in lasagne, with baked vegetable dishes and topping pizzas, it’s so simple to do and the basis of so many meals it is one of the first things I’ll be teaching the boy to cook. Using some of good quality tinned tomatoes, I knocked up a batch of sauce for a quick and simple meal this week.

Versatile Tomato Sauce

Ingredients:
1 large onion (or two small ones) finely chopped
1 clove of garlic, crushed
1 bottle of passata
1 pod of tomato purée
1 teaspoon of oregano or mixed herbs
1 teaspoon of pesto, tomato pesto if you have it (optional)
Olive oil
Sugar
Salt & pepper

Method:
1. In a frying pan heat up a splosh of olive oil (about a tablespoon) and gently soften your finely chopped onion. Stir frequently until soft and then add your crushed garlic and warm through for a few minutes, don’t let it burn or it’ll go bitter.
2. Once your onion is soft, add the passata and warm through. While it’s bubbling away gently, add the tomato purée, herbs, pesto (optional) and salt and pepper. To balance out any bitterness from the tomato add a good pinch of sugar to taste.
3. Leave to simmer gently for ten minutes or so, stirring frequently.

To serve as I have done, toss through some cooked spaghetti and serve with meatballs and a sprinkle of cheese. Alternatively layer into your lasagne, or cook for longer until it thickens a bit more and use as a pizza topping.

tomato sauce

This tomato sauce is incredibly versatile and I know that even if I serve it just with some plain pasta it will be a meal the small boy will devour in one sitting. As it’s made from tomatoes it is one of his five a day and is probably healthier than what I could buy in a jar.

tomato sauce

I like to use good quality passata and purée where I can, you can tell by the colour, texture and flavour of the raw ingredient that anything you make with them will be tasty.

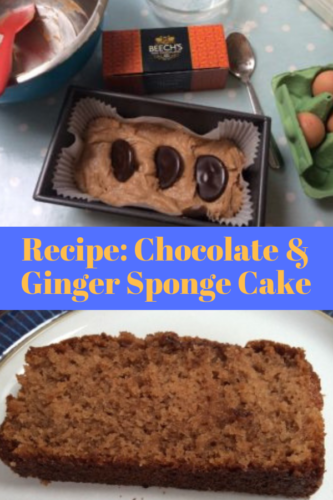
Recipe: Chocolate and Ginger Sponge Cake

On Friday afternoons the small boy and I like to bake something, usually a cake to offer any visitors over the weekend. We decided to make a chocolate sponge cake and as an experiment we added some Beech’s Chocolates Ginger Thins to the cake. It was delicious, so I’ve decided to share the recipe.

Recipe: Chocolate and Ginger Sponge Cake

A simple sponge cake is often our bake of choice. It’s easy to throw together, with minimal mess and ticks all the right “cooking with mummy” boxes for my son.

Chocolate & Ginger Sponge Cake

Ingredients:

4oz sugar
4oz butter or margarine (I used stork)
2 eggs
4oz self raising flour
2 dessert spoons of cocoa powder
2 teaspoons of ground ginger
3 Beech’s Chocolate Ginger Thins
splash of milk if needed

Recipe: Chocolate and Ginger Sponge Cake

Method:

1. Cream the butter and sugar together until fluffy. Stir in the eggs.
2. Add the cocoa powder and the ground ginger and combine. Then sift in the flour and stir through. If the cake batter is too thick (which it might be a little) add a drop of milk until it is the right consistency.
3. Put mixture into a lined loaf tin and put the thins half way into the cake at regular intervals (see picture).
4. Bake in pre-heated oven at 190 degrees for 30 minutes.
5. Leave to cool and then try not to eat it all in one go.

It’s utterly delicious on its own, but would be lovely slightly warm with a scoop of ice cream. The chocolate thins impart a deliciously subtle flavour of ginger into the cake. Definitely something we’ll be baking again.

Beech’s Fine Chocolates get the thumbs up from us, I’ll be looking out for them in the future. They’re seriously delicious British made chocolates, perfect for after dinner and equally great to bake with, and what’s more, my hard to please husband loves them.

If you enjoyed this recipe, you might also like to try my award winning Victoria Sponge recipe.

Recipe: Chocolate and Ginger Sponge Cake

Note: We were sent a selection of chocolate thins and bunnies from Beech’s Chocolates for review purposes. All images and opinions are our own.