Crafts: Easy Chinese Drum Craft for kids

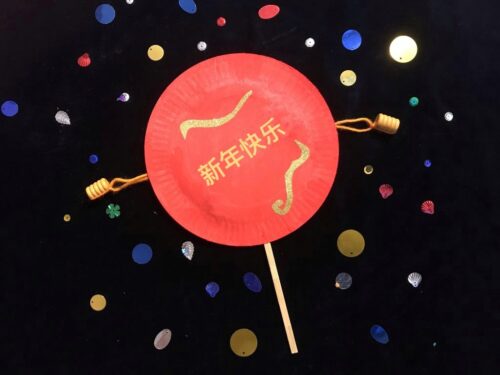
This month I have decided to try my hand at making a ‘Bolang Gu’ which is also known as a Chinese drum or pellet drum.

Chinese drums are small drums with two pellets or beads on the sides. You twist the long stick and the beads swing forward and back, rhythmically tapping the drum. They’re quite easy to play once you’ve got the hang of it and they’re really run instruments for kids to play too.
Crafts: Easy Chinese Drum Craft for kids

Easy Chinese Drum Craft for kids

You will need –
Two paper plates (I used small side plate sided ones)
Red paint
Two beads
Some wool or thick thread
One stick, I used two chopsticks taped together
Decorations – I used gold paper, but you could add sequins, stickers, words, whatever you fancy
Sticky tape
Bostik White Glu
Bostik Foam Pads or Glu Dots

Crafts: Easy Chinese Drum Craft for kids

Method –
Paint the outside of your paper plates with red paint and leave to dry (overnight if possible).

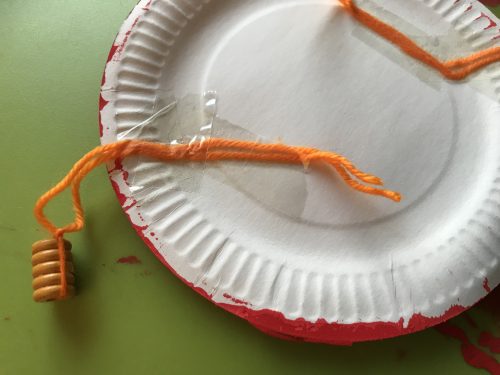
Take your beads and your wool or thread and knot the beads so they are secure and won’t fly off when you’re playing your drum. Make sure the threads are long enough for the beads to be able to swing freely, but not too long that they could take someone’s eye out. Once you’ve done this, securely tape the threads to the inside of one of the plates at three and nine o’clock positions.
Crafts: Easy Chinese Drum Craft for kids

Tape your stick to the inside of the plate at the six o’clock position.

Using Glu Dots or sticky Foam Pads, stick the plates together and press so they don’t fall apart.

Decorate your drum however you want. I found some lovely gold paper and cut out “Happy New Year” in Chinese writing and stuck that on the front which I though looked quite nice.

Your Chinese drum is now complete and ready to play!

Chinese New Year is a real time for celebration. Here in Manchester there is always a big parade and there are lots of wonderful, colourful celebrations. It’s a welcome splash of warmth and colour at a very drab time of the year. Will you be celebrating Chinese New Year?

Check out my other craft tutorials here!

Crafts: Easy Chinese Drum Craft for kids

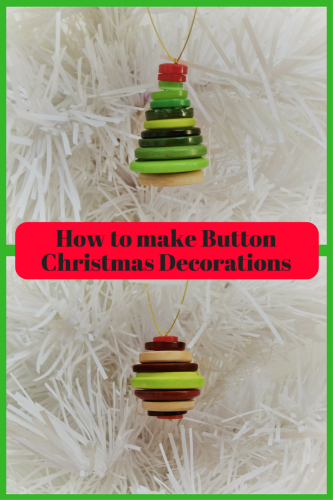
Crafts: How to make Button Christmas Decorations

If you’re looking for a simple but quite beautiful Christmas craft, then by Jove I think I’ve got it! These lovely button Christmas decorations are really simple to do and look great hanging on a tree.

I belong to a craft group and we are always on the lookout for interesting things to make and do on our craft evenings. We spotted a picture of some button Christmas decorations and thought we would give them a try. All we needed were a huge box of buttons, some craft wire and a bit of patience to experiment.

Crafts: How to make Button Christmas Decorations

How to make a button Christmas Tree

You will need – 
A selection of buttons, mostly green in different shapes and sizes
Fine jewellery or craft wire

Method –
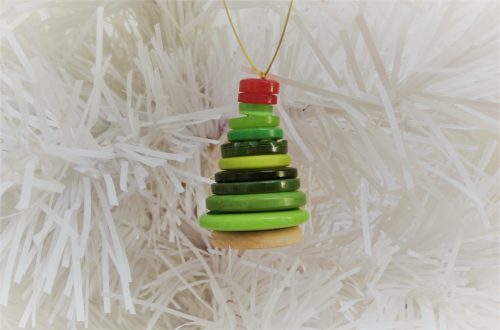
Sort a selection of buttons to make your tree. You’ll need something to be the tree trunk at the bottom, I used two wooden buttons. You will also need green buttons in decreasing sizes and in a variety of shades of green.

I found it best to find the right buttons and lay them out in order before threading them onto the fine wire.

Take a length of fine jewellery or craft wire, approximately 8 inches in length. Double up the wire and thread one end through one hole on your base button and the other end through the opposite hole. Do the same with all the buttons in your Christmas tree stack until your Christmas tree is complete.

Top your tree with a brightly coloured button, or a star-shaped button if you have one. If you’re happy with your tree, tie a knot on the last button and another knot in the ends of the jewellery or craft wire to create a hanging loop.

Crafts: How to make Button Christmas Decorations

How to make a button Bauble

You will need – 
A selection of buttons, in various colours, shapes and sizes
Fine jewellery or craft wire

Method –
Sort a selection of buttons to make your bauble. You’ll need to play about with your buttons a little to find a selection of matching buttons. You’ll need one fairly big central button, then some matching ones in various sizes and colours.

I found it best to find the right buttons and lay them out in order before threading them onto the fine wire.

Take a length of fine jewellery or craft wire, approximately 8 inches in length. Double up the wire and thread one end through one hole on your base button and the other end through the opposite hole. Do the same with all the buttons in your Christmas bauble stack until your bauble is complete.

If you’re happy with your bauble, tie a knot on the last button and another knot in the ends of the jewellery or craft wire to create a hanging loop. Easy.

These are a lovely, easy craft to make. One of my craft group friends also make a button Santa and a button snowman, but I’m all out of buttons ad I need to go and buy some more so I can make some more button Christmas decorations.

Check out my other craft tutorials here!
Crafts: How to make Button Christmas Decorations

Crafts: How to make lolly stick Christmas decorations

Now it’s mid-November, I’m really starting to get stuck into some Christmas crafts. I made some beautiful button decorations at my craft club last week and over the weekend I had a root through my craft stash to see what we could make. I discovered a large and colourful lolly stick collection which were crying out to be turned into Christmas decorations.

Crafts: How to make lolly stick Christmas decorations

Crafts: How to make lolly stick Christmas decorations

You will need:
A selection of coloured lolly sticks
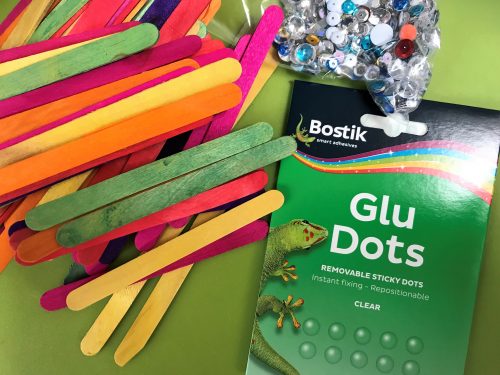
Bostik Glu Dots
Assorted embellishments – glitter, stars, sequins etc
Bostik White Glue
Scissors
Sticky tape
Ribbon

Crafts: How to make lolly stick Christmas decorations

How to make your lolly stick Christmas decorations

To make a Christmas tree, select some green lolly sticks and another stick for the trunk of the tree. With a pair of scissors carefully cut your lolly sticks to different lengths (see the photo). Using Glu Dots, stick a star to the top of your trunk and then stick the green branches across the trunk. Using white glue decorate your tree with sequins, stars and other embellishments. Leave to dry.

Crafts: How to make lolly stick Christmas decorations

Once dry, carefully attach a loop of ribbon to the back of the tree using sticky tape. Your lolly stick Christmas tree is now complete.

To make a Christmas star, select some colourful lolly sticks, I chose pink. Using Glu Dots, stick the lolly sticks across each other to make a start shape (see photo). Using white glue decorate your star with sequins, stars and other embellishments. Leave to dry.

Crafts: How to make lolly stick Christmas decorations

Once dry, carefully attach a loop of ribbon to the back of the star using sticky tape. Your lolly stick Christmas star is now complete.

My son and I really enjoyed making and decorating our Christmas tree and star. It’s a lovely craft to do with kids and they can really use their imagination when it comes to decorating them. These lolly stick crafts are a simple but effective craft to do in the run up to Christmas.

I am a Bostik craft blogger and I was sent the materials to create this lolly stick craft from Craft Merrily. 
Check out my other craft tutorials here!

Crafts: How to make lolly stick Christmas decorations

Crafts: Spooky Halloween Pom Pom Spiders

Pom poms are a pretty easy thing to make and with a little imagination you can turn them into all kinds of different creatures and characters. This month I was tasked by Craft Merrily to create a Halloween craft. I’d been wanting to master my new pom pom maker, so I decided to make some pom pom spiders. They’re easier than you think and an easy craft to do with children.

Crafts: Spooky Halloween Pom Pom Spiders

We’ve all made pom poms before using two rings of cardboard you laboriously wind wool around, then cut, tie and you’re done. I’ve bought a set of pom pom makers on the recommendation of my friend Lucy – an expert pom pom maker. She is right, they really are a pom pom game changer!

Lucy showed me how to use the pom pom maker. You wind your wool around two semi-circles of the maker, then wind it around the other two semi-circles, clip them together, cut them and the tie them around the middle and you’re done. Easy. Not just easy, but quick and easy.

Crafts: Spooky Halloween Pom Pom Spiders

You can make your pom pom spiders as big or as small as you want (if you’re not sure how to make pom poms, there’s a video you can watch here). Use whatever colours you think would work best.

How to make Pom Pom Spiders

You will need –
Pom pom makers (or make your own cardboard rings)
A ball of wool
Scissors
Pipecleaner
Googly eyes
Bostik Glu Dots

How to make your Pom Pom Spiders –
Wind your wool around your pom pom maker, make sure you are generous with the winding. The more wool you use, the fuller your pom pom will be.

Before you cut and tie your pom pom, cut your spider legs out of the pipecleaners. I used four identical lengths of pipecleaner (which make 8 spiders legs). Twist the pipecleaners together in the middle and put them through the centre of your pom pom.

Cut the wool around your ring and tie you pom pom together tightly with a long length of wool. You should have a pom pom now, it may need trimming up slightly so it is even all over.

Using the Bostik Glu Dots and the googly eyes, stick eyes onto your pom pom spider. Bend its legs to make spiders legs. You pom pom spider is now complete. You can leave the long piece of wool on him or cut it off if you prefer.

Your pom pom spiders are ready for Halloween. Hang them around the house, make a pom pom spider garland out of them or decorate your Halloween party table with them. How would you use your pom pom spiders?

Crafts: Spooky Halloween Pom Pom Spiders

I am a Bostik craft blogger and I was sent the materials to create this craft from Craft Merrily. 

Check out my other craft tutorials here!
Toy Review: Fuzzy Felt Paw Patrol Set

With my small boy being a massive Paw Patrol fan (have you noticed?) our house is slowly filling with Paw Patrol toys and merchandise. The latest addition is a brand a new Fuzzy Felt Paw Patrol set from John Adams Toys which was launched this month.

Toy Review: Fuzzy Felt Paw Patrol Set

Paw Patrol fans will love the new Fuzzy Felt Paw Patrol set. It’s a reboot of the classic fuzzy craft toy which you might remember from your own childhood. I think every adult I know gets misty-eyed about the happy hours they spent playing with Fuzzy Felt and I’m no exception. I had previously dismissed Fuzzy Felt as a bit too basic and a bit too old fashioned for my son. But I was wrong, completely wrong. 

Toy Review: Fuzzy Felt Paw Patrol Set

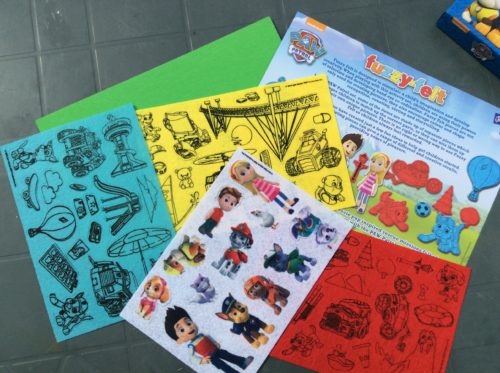
The new Fuzzy Felt Paw Patrol set costs £10.99 and is widely available in toy shops and online. The Fuzzy Felt Paw Patrol set contains four felt sheets with over 70 assorted felt shapes and a felt playboard. All you need is your imagination and you’re all set for hours of fuzzy fun. 

The felt shapes come in sheets and you can easily pop the pre-cut felt shapes out and arrange them however you want on the playboard. Come on, you know how fuzzy felt works, why am I explaining it? 

Toy Review: Fuzzy Felt Paw Patrol Set

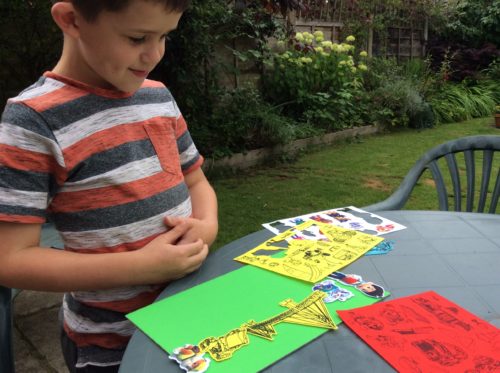
The Fuzzy Felt Paw Patrol Set is suitable for children aged 3+ and I did think it would be far too basic and old fashioned for my six year old, but I was very, very wrong. He absolutely loved it, we sat in the garden for well over an hour playing with it. I went inside and left him to it for another half hour while I cooked our dinner and he happily played with it. He only stopped to eat and then was straight back on it again. It just goes to show, the classics are classics for a reason.

Toy Review: Fuzzy Felt Paw Patrol Set

If I had any criticism at all, it would be that the playboard is just A4 sized and I know my son would have loved something a bit bigger, perhaps an A3 board which folds down to an A4 size would suit him better. 

I am really pleased my son likes this Fuzzy Felt Paw Patrol Set. It’s perfect for packing to take on holiday, especially knowing how long he will happily play with it. I know he will get great play value from this. If you’re wavering over buying fuzzy felt, don;t waver, just do it. I am astonished by how much he likes it.

You can watch my son playing with his Fuzzy Felt Paw Patrol set here on YouTube.

Disclaimer: We were sent this Fuzzy Felt Paw Patrol Set for review purposes. All images and opinions are our own. This blog post contains an affiliate link.

Toy Review: eZee Beads PAW Patrol

One of my son’s favourite things in the world is Paw Patrol. He’s been fairly obsessed with the TV series for about three years now. His love for Chase, Marshall, Ryder and the team is as long standing as it gets for a six year old. It also shows no signs of waning. He’s got quite a lot of Paw Patrol merchandise, but he’s always keen to add more to his collection. Over the Bank Holiday weekend we gave him a eZee Beads PAW Patrol set to try, but what did he think?

Toy Review: eZee Beads PAW Patrol

The eZee Beads PAW Patrol set was launched this year and costs around £16.99 for the set. eZee Beads PAW Patrol is suitable for ages 5+ and comes with three Paw Patrol designs to make – Chase, Marshall and The Look Out.

The set comes with –

  • 900 eZee beads
  • Bead tray
  • Plastic tool
  • Water sprayer
  • 3 design cards
  • Bead storage tray
  • Instructions

Toy Review: eZee Beads PAW Patrol

This new kit from John Adams allows you to recreate your favourite Paw Patrol characters with colourful beads. Just select a design card, push the beads onto the pegs of the tray and then spray with water. Then leave your beads to dry (and stick together). Once it’s dry, carefully remove your bead design from the tray. 

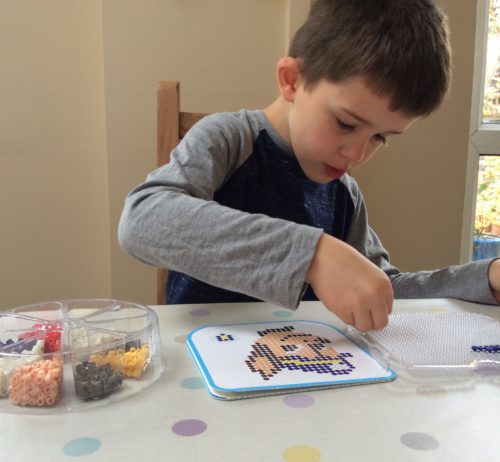
To begin with I helped him to get it all set up, putting the beads into the bead storage tray and showing him how to put the beads on the pegged tray. You’re supposed to slot the design into the bead tray and put the coloured beads on top of the design. But the cardboard design kept falling out and the plastic tray obscured it. We found it easier to have it next to the board and count the different coloured beads in each row.

Toy Review: eZee Beads PAW Patrol

As with all bead crafts, this was a little fiddly for his small boy fingers. But that’s the point, bead crafts like this are excellent for helping to boost his hand-eye co-ordination as well as strengthen the muscles in his hands which will help to improve his pen holding and writing.

It was not too fiddly though. Once he got into the rhythm of it he methodically placed the beads into position. He really enjoyed bringing Chase’s face to life in bead form. 

Toy Review: eZee Beads PAW Patrol

Once he’d finished the design (which kept him very well occupied for over an hour) we sprayed the beads with water and left them to dry and stick together. When we’ve done bead crafts in the past they have always been the kind you have to iron, I’ve never been that keen on that if I’m honest. Whilst the results are pretty instant, a hot iron and an excited child are a combination which makes me a bit nervous.

The instructions say to leave the beads to dry for half an hour, but when I checked it was still a bit wet so I put it to one side for a few more hours. Once it was dry I used the tool supplied to try to ease the design off the bead tray. This was a bit tricky, I didn’t want to break his design. I very carefully teased the edges off with the spatula end and with the sharper end ran it underneath the beads to release them. After a couple of minutes of gentle persuasion the design came off the board and was admired by everyone in the room.

Toy Review: eZee Beads PAW Patrol

He was really pleased with the results of his hard work, and rightly so. I was really impressed that he sat for so long to compete his design. The eZee Beads PAW Patrol set was really easy to use and contained everything you need. We liked it a  lot. It’s ideal for a bit of quiet, focused craft time and the eZee Beads are, well, very easy to use.

The eZee Beads Paw Patrol set from John Adams is available from a wide range of retailers including Amazon.

Disclaimer: We were sent the eZee Beads Paw Patrol set for review purposes. All images and opinions are our own. This blog post contains an affiliate link.

Craft Round Up: Five Easy Autumn Leaf Crafts

At this time of year the trees are shedding their beautiful leaves. The pavements and paths are filled with crispy and colourful leaves and they are crying out to be used in crafts. Easy autumn leaf crafts are amongst my favourite kinds of craft, partly because it’s good fun to actually collect the leaves, then sitting down with the boys and having fun crafting something beautiful makes me happy. Here are some of my five favourite ideas for easy autumn leaf crafts.

Autumn Leaf Sand Art

Easy Autumn Leaf Crafts

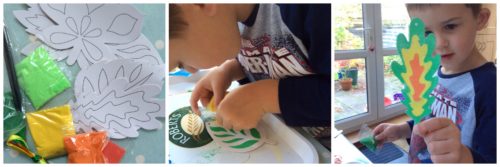
We are firm fans of sand art and we loved doing this fab kit from Baker Ross. My top tip for sand art is to do it on a tray or a piece of paper so you can collect any stray sand to use again later. Sand art kits are fab, just peel the stickers off the leaf and sprinkle sand onto the sticky paper underneath. It requires some concentration and a steady hand, but my five year old loved it and I think he made some very beautiful autumn leaves.

Make your own Autumn Wreath

Easy Autumn Leaf Crafts

This is a great rainy day activity. Using some foam stickers from Baker Ross and a paper plate we made our own autumn wreath which I think looks pretty cool, and he enjoyed making it which is the most important thing.

Making Autumnal Alphabet Wreaths

autumnal alphabet wreaths

This is a craft I did myself (a grown up craft if you will), but you could easily do this with children too. I think this looks fab and it was really good fun to do too, it’s probably one of my favourite easy autumn leaf crafts. You can read my tutorial here.

Create an autumnal woodland wonderland

easy autumn leaf crafts

This is one of those easy autumn leaf crafts which is good to have up your sleeve for a rainy day. It was incredibly easy, but he had the best time making his woodland wonderland, who doesn’t love stickers? These woodland foam stickers from Baker Ross are great. We used them with some of the leftover leaf stickers from our autumn wreath and made our lovely woodland scenes. All I had to do was print out a silhouette of a tree and he did the rest.

Paint your own tree

easy autumn leaf crafts

I’m very fond of this one. We had so much fun going to the park and collecting a big bag of leaves. When we got home we had a hot chocolate and warmed up. We painted a big tree and then stuck leaves on it. This wonderful artwork is still hung up in our kitchen and it makes me smile at the memory every time I see it.

These are my ideas for easy autumn leaf crafts – what do you like to make at this time of year?

Five Easy Autumn Leaf Crafts

I am a Baker Ross Ambassador.

Easy Ideas for Halloween Crafts

One of my favourite things about Halloween, apart from being given an excuse to dress up, is Halloween crafts. It’s one of those occasions when you and the kids can go all out on the spooky stuff.

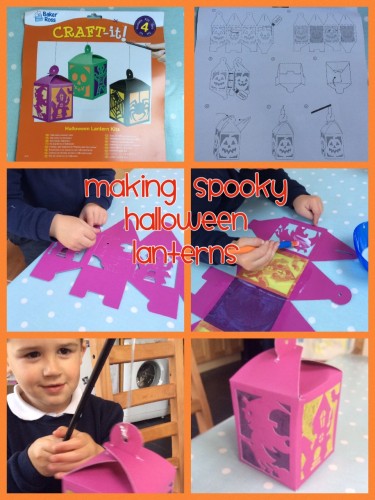
Last year me made a few different Halloween crafts, but our favourites were the Spooky Lanterns from Baker Ross which you can find out how to make here. They are still available this year on the Baker Ross website and they do look really effective.

halloween crafts

This month we’ve been starting to look at some more easy Halloween Crafts. We were sent a selection of Halloween and autumnal themed crafts to try (we will do the autumnal crafts in a separate blog post).

The Halloween crafts we were sent were –
  • Day of the Dead colour in mini gift bags
  • Halloween Dotty Art
  • Halloween Pom Pom Decoration Kits

halloween crafts

Day of the Dead has been very much in fashion for the last few years and is gaining in popularity. Indeed, last year I dressed as a Day of the Dead style zombie bride for Halloween. The little colour in gift bags (there are 6 in a pack) would be a great craft activity for a kid’s Halloween party, then they could fill their bags with sweets and take them home afterwards.

halloween crafts

The Halloween Dotty Art kits would also be great for a Halloween Party (we are going to take ours on holiday with us over half term). The pack contains eight different Halloween designs (Monster, Spider, Cat, Ghost, Pumpkin, Owl, Bat & Skull) and packs of coloured stickers. You then stick the stickers on the spooky design and bring your Halloween picture to life. This kind of thing is great for strengthening little fingers and increasing dexterity, as well as being a fun activity you can do together without creating any mess.

halloween crafts

I love pom pom crafts, so I was pleased to find these Halloween Pom Pom Decoration Kits in my box of seasonal crafts from Baker Ross. The pom pom kit contains everything you need to make a spider, a bat and a pumpkin.

Like most pom pom crafts they are a little fiddly to make and probably need a grown up to get it started and help tie it off at the end. Making pom poms is lots of fun and once you’ve snipped your threads you can start to see your spooky pom pom creature come to life.

The Baker Ross website has hundreds of easy to do craft kids for children and adults alike. Their kits are almost universally well designed and thought out, and there’s something for all ages, abilities and craft interests, often with minimal mess and fuss. For easy Halloween crafts, have a look at Baker Ross for inspiration.

We are Baker Ross Ambassadors.

How to Scrapbook – Project Craft at Paperchase

I was an invited guest of Paperchase and I was not asked to pay for my workshop place or materials. All images and opinions are my own.

Paperchase (purveyors of beautiful stationery and arts and crafts materials) have recently launched “Project Craft”, a series of special crafting workshops for adults and children. The Project Craft sessions are currently only available in three flagship stores – Manchester, Glasgow and London, but they should be rolled out to a high street near you soon.

Being an occasionally crafty type, I was invited along to their Manchester store for an evening of crafting and cupcakes. The Project Craft workshops cost from £10 and include all the craft materials you will need for the session. Current Project Craft workshops include –

  • How to scrapbook
  • How to make a tissue paper pom pom
  • Card making with dye-cutting, lino print or foil
  • How to make kids crafts
  • How to make paper flowers
  • DIY stationery

A small group of happy crafters sat in a quiet corner of the store, next to the little cafe upstairs in an area set aside for Project Craft. We were there for the “How to Scrapbook” workshop, which costs £20 and includes a scrapbook and some materials. You are also advised to take along some photographs, old tickets, paper keepsakes and souvenirs that you might want to incorporate into your scrapbook.

project craft

If you’re a bit of a hoarder of tickets and little bits of paper, a scrapbook can be a lovely way to keep it all together and make something of your memories. At the workshop you create at least one double page layout and learn lots of useful tips including how to arrange your photos, layer pages and embellish your scrapbook with different products.

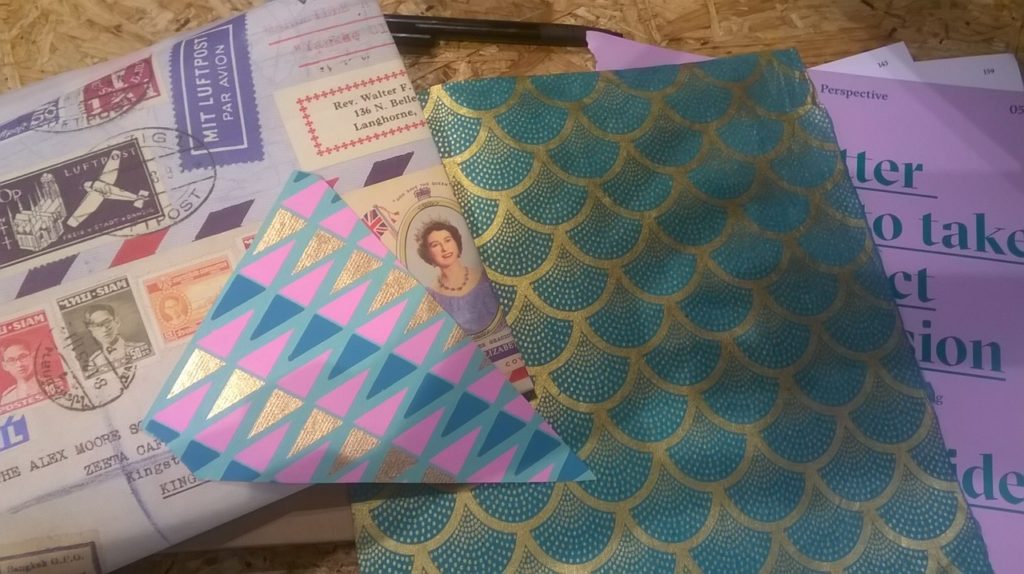
Sadly I’d forgotten to bring some things to scrapbook, but undeterred I rifled through some magazines and had a good rummage through the papers and embellishments they had. Thankfully I managed to forage enough nice things to make a few pages for my scrapbook.

project craft

There was expert tutelage from the Project Craft team at Paperchase. They gave an overview of the scrapbooking process, showed us some examples and sample templates and set us to work creating our masterpieces. There was always someone on hand to give advice and encouragement when required. I was the only scrapbooking virgin in the room, but I didn’t feel too far behind the others and whilst what I created was probably a bit basic, I was happy with the results.

project craft

Whilst my crafting heart probably doesn’t lie in scrapbooking, I did enjoy the process and I think this would be a nice thing to do with my son. Something we can use to document our days out together and something we can use to look back on in later life. I really like the idea of scrapbooking holidays and visits to museums and such like with him.

My scrapbooking might not be perfect, but it was very enjoyable and I learned a few things that I will take forward with me. I enjoyed my little taster of Project Craft at Paperchase and I will be booking in to try the lino print craft workshop soon.

Project Craft Workshops are available at Paperchase in Manchester, Glasgow and London, with more stores to follow soon.

Note: I was an invited guest of Paperchase and I was not asked to pay for my workshop place or materials. All images and opinions are my own.

Easter Crafts for Kids (and grown-ups too!)

Easter has “crafts” written all over it. There are so many Easter crafts to make, from Easter cards to Easter bonnets and beyond. Easter has the benefit of having a long Bank Holiday weekend as well as a couple of weeks off school for the holidays. That means there are an awful lot of hours to keep the kids occupied, crafting is a great way to fill an hour or two, especially if they just need a bit of quiet time, concentrating on a task and creating something lovely.

We got cracking with some Easter Crafts over the weekend. We all sat down and decorated these Egg Mosaic Baubles from Baker Ross. The pack contains everything you need to decorate four of the polystyrene eggs, including the eggs, a selection of sticky squares, ribbon and plastic pins.

Easter crafts

It’s quite fiddly to peel the backing off each individual square, so I peeled them off in rows or blocks, stuck them on the back of my hand and peeled them off as I needed them. The small boy didn’t like the idea of doing neat rows, so he stuck his on randomly, which I really like, and for some reason it made me think of Tetris the computer game.

Once the eggs were covered in the mosaic stickers I pinned the ribbons in place and hung them on a plant. I think they’re quite lovely and the certainly brighten the place up. The small boy is always so proud of his crafts and can’t wait to show them off to anyone who will look.

Later that day I was flicking through a craft magazine when I saw something I recognised. The Spring Blossom Tree kit from Baker Ross. Inspired, I got the kit out of our crafts box and made my first (and rather lovely) blossom tree.

easter crafts

The instructions are really clear and easy to understand. The tree, blossom and stand are all made from foam pieces, you stick the glittery blossom onto the plain coloured blossom and stick that onto the tree, and the stand just slots together. It’s very simple and very effective. I’m a sucker of cherry blossom, whether it’s made of foam or not.

We’ve got lots more Easter crafts and things to do over the next few weeks, so do keep an eye on our Instagram feed for new ideas and inspiration!