Review: Christopher Robin Movie Winnie the Pooh Plush Range

Winnie the Pooh has been a children’s favourite for almost a century. The first collection of stories about this wonderful bear and his friends was first published in 1926. Since then Christopher Robin, Winnie the Pooh and friends have been a part of so many childhoods. This summer sees the release of the Christopher Robin movie starring Ewan McGregor.

To celebrate the release of the Christopher Robin movie on 17th August, Posh Paws have just launched their Winnie the Pooh plush range; and what a range it is. The characters are all based on the original drawings of Winnie the Pooh and friends, so they have a wonderful original, vintage feel to them. I was never 100% happy with the modern cartoon version of Winnie, I’ve always much preferred the original.
Review: Christopher Robin Movie Winnie the Pooh Plush Range

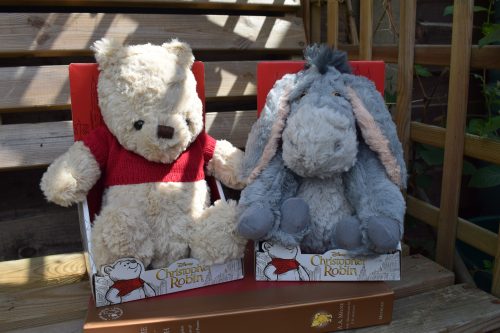
I was sent the 10 inch tall Winnie the Pooh plush and the 10 inch Eeyore Plush; both of which retail for £14.99. The Christopher Robin movie Winnie the Pooh range also includes Piglet and Tigger. All the characters are available in 7”, 10” and 20”.

Review: Christopher Robin Movie Winnie the Pooh Plush Range

These Christopher Robin movie Winnie the Pooh Plush toys are really sweet and special. They are officially licenced from Disney, so they’re the real deal. The super soft plush makes them so fluffy and cuddly. Winnie the Pooh is wearing his knitted red jumper which makes him instantly recognisable. Both Winnie and Eeyore are wonderfully snuggly and great to cuddle.

Review: Christopher Robin Movie Winnie the Pooh Plush Range

The Posh Paws Christopher Robin movie plush toys are suitable from birth and these vintage, heritage style toys are so soft and cuddly, I am a little bit in love with them. They would make a really wonderful gift for a newborn, or for any Winnie the Pooh fan. They’re a real keepsake, true to the original illustrations by Ernest Howard Shepard in the A.A. Milne books and just the thing for little ones to cuddle as they snuggle down at night.

Review: Christopher Robin Movie Winnie the Pooh Plush Range

These Christopher Robin movie Winnie the Pooh Plush soft toys are available to buy from Debenhams and a range of other retailers.

Disclaimer: We were sent these Christopher Robin Movie Winnie the Pooh soft toys for review purposes. All images and opinions are our own.

Review: Pride and Prejudice, Ordsall Hall Salford

Having lived in Manchester all my life, I felt I probably knew most of the hidden gems and worst kept secrets of my city. This week I discovered a Tudor secret, hidden in plain sight, surrounded by modern houses, apartment blocks and industrial buildings – Ordsall Hall is the most stunning Tudor building I’ve ever seen and it’s tucked away near Salford Quays. On Wednesday I took a good friend (an Austen fanatic) to see Pride and Prejudice at Ordsall Hall.

Review: Pride and Prejudice, Ordsall Hall Salford

This summer, Ordsall Hall is hosting a number of outdoor theatre productions and thankfully the weather seems to be behaving itself, so all you need is a folding chair and a cardigan for when the sun goes down. Ordsall Hall provides a wonderful backdrop to productions like Pride and Prejudice. It is incredibly beautiful and it’s worth turning up a little bit early so you can have a look around before the performance begins.

Review: Pride and Prejudice, Ordsall Hall Salford

We arrived a little late due to a confused satnav and a full car park, but we eventually settled down in our camping chairs a few minutes before the performance began. The five actors were mingling and chatting with the audience, which was a nice touch as somehow outdoor theatre seems a little bit more intimate and this made it more so. Heartbreak Productions are experts in outdoor theatre, spending their summer touring up and down the country.

Pride and Prejudice is the incredibly well known tale of the Bennet sisters, a host of charming young bachelors and of course the dashing Mr Darcy. All of the many roles were performed by a troop of just five actors who seamlessly managed to portray this large cast of characters with a simple change in posture or a different hat. It was marvellous, it really was.

Review: Pride and Prejudice, Ordsall Hall Salford

We were gripped by this story, told on a simple stage by very talented actors with the exceptionally lovely backdrop of Ordsall Hall. They had the audience stood up, learning to curtsy and bow, and we learned a simple dance. It was all great fun and I now feel well prepared to enter Georgian polite society.

Experiencing Pride and Prejudice at Ordsall Hall was a wonderful experience. It was a delightful evening of comedy, romance, and some will-they-won’t-they. But we all know they will, eventually.

Review: Pride and Prejudice, Ordsall Hall Salford

Although I’ve seen outdoor plays before, never in such delightful surroundings. There are a number of other plays being performed at Ordsall Hall this summer and they’re well worth taking a look at. There’s something for everyone at Ordsall Hall this summer!

Disclaimer: We were invited guests of Ordsall Hall and we were gifted tickets to see Pride and Prejudice in exchange for this review. All images and opinions are our own.

Recipe: Rhubarb and Ginger Upside-Down Cake

We’ve got a fruit patch in our garden, some years we have more fruit than we can cope with, but other years are a bit of a let down. Last autumn we planted some rhubarb. Rhubarb was always growing in my childhood garden and we used to frequently eat this sour fruit in crumbles or stewed with ice cream. I had different plans for our first crop, I wanted to make a Rhubarb and Ginger Upside-Down Cake.

Upside-Down cake is so wonderfully retro. It’s usually made with pineapple, but I thought some lightly poached rhubarb stalks would look lovely, flavoured up with stem ginger and orange it was a real tea time treat. I suspect this will be our new go-to recipe for our homegrown rhubarb, it somehow feels like a waste to just turn it into a crumble.

Recipe: Rhubarb and Ginger Upside-Down Cake

Rhubarb and Ginger Upside-Down Cake

Ingredients:

For the poached rhubarb layer –
Rhubarb, 5 or 6 stems cut into lengths
50g sugar
200mls of orange juice
1 piece of stem ginger, finely diced
1 dessert spoon of stem ginger syrup

50g unsalted butter
50g caster sugar

For the cake batter –
150g butter or baking margarine
150g caster sugar
3 eggs
1 teaspoon of vanilla extract
1 teaspoon of baking powder
150g self raising flour
2 tablespoons of the poaching syrup from the poached rhubarb, cooled

Method:
I baked my upside-down cake in a 20cm square tin, I thought the rhubarb would look better laid out in the square tin, but use what you have.

To begin with I cut my rhubarb into lengths which would fit the tin, I knew I would use any smaller lengths to fill in any gaps and I had almost exactly the right amount for my tin.

In a saute pan, put in the orange juice, rhubarb, stem ginger and syrup and 50g of sugar. Lightly poach the rhubarb over a gentle heat. You want the stems to be softening but not floppy or collapsed. Once cooked, remove them from the pan and leave them to cool a little. Turn the heat up in the pan and reduce the liquid by around half so it turns into a rhubarb, orange and ginger syrup.

Recipe: Rhubarb and Ginger Upside-Down Cake

While your rhubarb is cooling a little, cut out a piece of baking parchment to fit the bottom of your baking tin. Grease the tin and put the parchment in the bottom.

Beat 50g of unsalted butter and 50g of sugar together and spread that on top of the baking parchment, this will add more delicious flavour to your rhubarb topping.

Carefully arrange your rhubarb in the bottom of your baking tin. I decided to do lengths of colourful rhubarb, but you can arrange yours in whatever pretty pattern you like. Remember that when you turn your cake out, the bottom will be the top, so making it pretty is worth a few minutes of your time.

Pre-heat the oven to 180°.

Once your rhubarb is in position, make your cake batter. Beat your butter or baking margarine together until fluffy, add the eggs, baking powder and vanilla extract and combine. Finally, carefully mix in the flour and add two tablespoons of the rhubarb syrup leftover from the poaching earlier and mix well.

Pour your cake batter over the rhubarb and smooth it off. Bake in your pre-heated oven for 35 minutes. Once baked I like to leave the cake in the cooling oven for 10 minutes or so with the door slightly open.

Once baked, leave the cake to cool in the tin for 5 minutes or so and then carefully turn it out. My cake came out after a couple of seconds upside down on the board. The baking parchment I’d put it on made sure all the fruit came out in one layer.

It’s best served warm with ice cream or custard, but it’s still delicious cold.

Recipe: Rhubarb and Ginger Upside-Down Cake

Given how love/hate rhubarb can be; both my 8 year old nephew and my 7 year old son loved it and both asked for seconds. It’s such a simple cake and it looked so pretty with its pink and green stripes. It’s a subtly beautiful cake and one which I’m going to bake over and over again. I just need my rhubarb plant to up its game a bit.

If you enjoyed this recipe, you might also like my lemon and ginger drizzle cake.

Recipe: Rhubarb and Ginger Upside-Down Cake

Crafts: Make Your Own Cupcake Case Prize Rosette

I’ve just got home from watching my son take part in school sports day. At our school sports day they try to have a range of activities so everyone has a chance to shine. Inevitably there are always children who win lots of the events and a few who don’t do quite so well. You don’t win a prize or rosette at our school sports day, but each team wins points which go towards the house total for the year.

Crafts: Make Your Own Cupcake Case Prize Rosette

My son is very prize focussed, so I thought it would be nice to make him a rosette to wear when he gets home from school later. The rosette is really easy to make and used a few craft items I had in my craft box, mostly cupcake cases and Bostik Glu Dots. You can make rosettes for all kinds of different occasions; from sports days, parties, birthdays or you could even do your own dog show and give them out to the prize winning pooches!

Make Your Own Cupcake Case Prize Rosette

You will need:
3 coloured cupcake cases
A safety pin
Some sticky tape
Two foam circles
Bostik Glu Dots
Some craft foam
Coloured sticky paper

Crafts: Make Your Own Cupcake Case Prize Rosette

To Make Your Own Cupcake Case Prize Rosettes:
Begin by sticking your cupcake cases together. I flattened mine out and glued them together with glu dots, so that the coloured side was facing up.

Take one of your foam circles and stick this to the back of the rosette, my foam circles were self adhesive, but use glue if yours aren’t. Using some sticky tape, tape the safety pin to the foam circle.

Crafts: Make Your Own Cupcake Case Prize Rosette

Take your craft foam and carefully cut two lengths of the foam to act as the rosette “ribbon”. Cut a V in the bottom of each one. Use sticky tape to fix this on the back of the rosette.

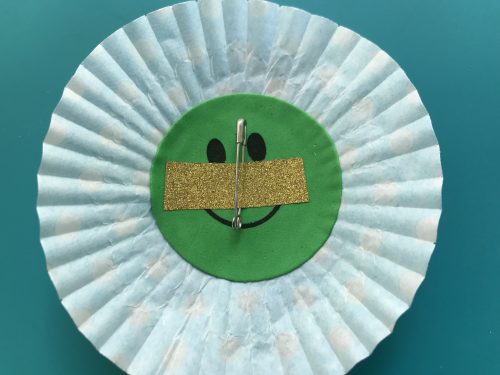
Turn your rosette over, you can start to decorate the front of it now. Take your last foam circle and stick this in the middle of the cupcake case. I then cut a number 1 out of sticky backed paper and stuck this to the foam circle. My rosette was now complete. All I needed was a sports day superstar to pin it to.

Crafts: Make Your Own Cupcake Case Prize Rosette

This is a very sweet little craft. It’s quick and easy with minimal mess and great for kids to make too. You can mix it up and use any colours or patterns you like!

If you enjoyed this craft, you might also enjoy making a bicycle card or making a clay thumbprint keepsake (which looks a bit like a medal).

Make Your Own Cupcake Case Prize Rosette

Ten books to read before Secondary School

This morning I was stood in the playground looking at the Year 6’s and thinking they’re just a few short months away from Secondary School. These children look like giants compared to my 7 year old, but they’ll soon be making the leap to big school. The summer holidays are stretching ahead, and if you’ve got a Year 6 to entertain, I’ve picked out ten books to read before Secondary School which should entertain, enthrall and interest 11 year olds this summer.

Ten books to read before Secondary School

The Boy in the Striped Pyjamas by John Boyne. Nine year old Bruno knows nothing of the Final Solution and the Holocaust until he meets Shmuel, a boy who lives on the other side of the adjoining wire fence and who, like the other people there, wears a uniform of striped pyjamas. Read the story of these two young boys who form an incredible friendship despite their different backgrounds, a box of tissues is essential!

The Graveyard Book by Neil Gaiman. When baby Bod escapes a murderer intent on killing the entire family, who would have thought it would find safety and security in the local graveyard? Brought up by the resident ghosts, ghouls and spectres, Bod has an eccentric childhood learning about life from the dead. But for Bod there is also the danger of the murderer still looking for him – after all, he is the last remaining member of the family. Everyone needs to read at least one Neil Gaiman book, and The Graveyard Book is an excellent place to start!

Ten books to read before Secondary School

Northern Lights by Philip Pullman. Northern Lights is the first volume in Philip Pullman’s award winning His Dark Materials trilogy. Lyra Belacqua and her animal daemon live half-wild and carefree among the scholars of Jordan College, Oxford. The destiny that awaits her will take her to the frozen lands of the Arctic, where witch-clans reign and ice-bears fight. Her extraordinary journey will have immeasurable consequences far beyond her own world.

Fly by Night by Frances Hardinge follows the story of a twelve-year-old orphan called Mosca Mye and her loyal companion, a cantankerous goose. Together they become the unlikely heroes of a radical revolution. Mosca is on the run, heading for the city of Mandelion. There she finds herself living by her wits among cut-throat highwaymen, spies and smugglers. With peril at every turn, Mosca uncovers a dark plot to terrorize the people of Mandelion, and soon merry mayhem leads to murder.

The Secret Garden by Frances Hodgeson Burnett, this is a true children’s classic and an absolute must-read for anyone. After losing her parents, young Mary Lennox is sent from India to live in her uncle’s gloomy mansion on the wild English moors. She is lonely and has no one to play with, but one day she learns of a secret garden somewhere in the grounds that no one is allowed to enter. Then Mary uncovers an old key in a flowerbed – and a gust of magic leads her to the hidden door. Slowly she turns the key and enters a world she could never have imagined.

Lockwood & Co: The Screaming Staircase by Jonathon Stroud. When Lucy Carlyle, a talented young agent, arrives in London hoping for a notable career,  she finds herself joining the smallest most ramshackle agency in the city, run by the charismatic Anthony Lockwood. When one of their cases goes horribly wrong, Lockwood & Co. have one last chance of redemption. Unfortunately this involves spending the night in one of the most haunted houses in England, and trying to escape alive.

What Not To Do If You Turn Invisible by Ross Welford. Turning invisible at will is one way to cure your acne, but a far more drastic act than 13 year-old Ethel Leatherhead had initially intended when she tries a combination of untested medicines and a sunbed. When one day her invisibility fails to wear off, Ethel is thrown into a nightmare of lies and deception as she struggles to keep herself safe, to find the remedy that will make her seen again – and solve the mystery of her own birth. A gripping and very funny read!

Stormbreaker by Anthony Horowitz. Stormbreaker is the first book in the number one bestselling Alex Rider series by Anthony Horowitz. Fourteen year old Alex is forcibly recruited into MI6. Armed with secret gadgets, he is sent to investigate Herod Sayle, a man who is offering state-of-the-art Stormbreaker computers to every school in the country. But the secondary school aged spy soon finds himself in mortal danger.

Railhead by Philip Reeve. Railhead is the story of a petty thief, Zen Starling who is destined to ride the rails  of the space train to nowhere special. That is until Raven, a strange and mysterious figure, persuades Zen to commit an elaborate robbery to steal the pyxis, is a mysterious box containing a shining black orb. Could this bring everything in this galaxy, and the next, to the end of the line?

I am Malala (Young Readers Edition) by Malala Yousafzai. Raised in a once-peaceful area of Pakistan transformed by terrorism, Malala was taught to stand up for what she believes. So she fought for her right to be educated. And on October 9, 2012, she nearly lost her life for the cause: She was shot point-blank while riding the bus on her way home from school. No one expected her to survive. This book documents her journey from village girl to Nobel Peace Prize winner, we hear firsthand the remarkable story of a girl who knew from a young age that she wanted to change the world – and did.

Ten books to read before Secondary School

Review: EasyRead Time Teacher Watch

Learning to tell the time is a vital life skill and one we are working on with the boy. We’ve changed some of our clocks to ones with big numbers and we’re always asking him what time it is. But really the most effective way is to wear a watch and check the time yourself throughout the day. We’ve just got him an EasyRead Time Teacher Watch so he can really crack telling the time over the summer.

Review: EasyRead Time Teacher Watch

The EasyRead Time Teacher Watch is aimed at children aged 5-12 years. It has a fabric strap for breathability, it’s water-resistant, is non allergenic and had a stainless steel back. Not only that, but it has a Seiko movement, so you know the watch is a good quality make.

The EasyRead Time Teacher Watch has a really clear face. It’s divided into two, so children can quickly learn TO and PAST. There’s a simple instruction leaflet featuring their three-step teaching system which can be found on the outside of the watch box and in the leaflet inside. It’s really simple and should be easy enough for most children to pick up and follow.

The three-step teaching system:
  1. Read the number at the end of the long hand.
  2. Say which side the long hand is pointing to (TO or PAST).
  3. Read the number at the end of the short hand.

It’s as simple as that. EasyRead recommend that parents get their children involved in timing their daily activities, such as “you have five minutes to finish your breakfast”.

Review: EasyRead Time Teacher Watch

The EasyRead Time Teacher Watch comes in a range of standard colours and it costs £19.95. Additional watch straps, which are available in several bright colours are £4.95. I think, given how messy my boy can be, it might be useful to buy a spare strap. The straps are washable, but a spare is always useful.

EasyRead have a few other products to help your child learn to tell the time including wall clocks, school clocks and teaching aids; 24 hour wall clocks for home and school, 24 hour wrist watches and children’s alarm clocks which come with a night light and snooze button.

My son is delighted with his new watch. Not only does it look pretty cool, I think it will really help him learn to tell the time. He has grasped the three step concept really quickly and so far he’s been happily telling us the time. I’d really recommend the EasyRead Time Teacher Watch for helping children learn to tell the time quickly and easily.

For more information about the EasyRead Time Teacher Watch, visit their website.

Review: EasyRead Time Teacher Watch

Disclaimer: We were sent a EasyRead Time Teacher Watch for review purposes. All images and opinions are our own.

Review: Petit Ferdinand Customised Labels

Since my son started school four years ago, I’ve lost count of the number of hours I’ve lost rummaging through the school lost property box. One week he managed to lose three jumpers! The school are generally pretty good; as long as things are clearly labelled, they usually end up finding their way back home.

Four years ago I invested in some sew on labels. This was a big mistake, having to sit and sew on labels on all his polo shirts, jumpers, trousers, PE kit and coats took far longer than I anticipated; but I soon discovered iron on labels and better still, stick on labels. These are complete game changers and save hours and hours of my time every year.

Review: Petit Ferdinand Customised Labels

My latest batch of name labels have come from Petit Ferdinand and I opted for the £30 value pack which includes; 20 stick-on clothing name labels, 20 iron-on clothing name labels, 40 stick-on item name labels, 10 stick-on shoe labels, 30 stick-on item name labels and 20 stick-on item name labels. That’s 140 name labels in total.

You can customise your labels with different colours, fonts and images; which all help them to stand out in a pile of lost property. The value pack comes in a booklet which keeps them all together. There are simple instructions on how to apply them and make them stick to clothes, shoes or bits of kit like water bottles.

Review: Petit Ferdinand Customised Labels

They’re easy to use and really help my son spot his jumper in a pile of identical school jumpers. This pack from Petit Ferdinand will last us at least two years and I think they’re excellent value.

I’ve moved on from the dark days of those dreadful sew on labels. I absolutely refuse to go back to laboriously sewing them into clothes; stick-on name labels are the future and for £30 for 140 name labels you can’t really go wrong.

Review: Petit Ferdinand Customised Labels

For more information about Petit Ferdinand, or to order some name labels, visit their website.

Disclaimer: I was sent a value pack of Petit Ferdinand name labels for review purposes. All images and opinions are my own.

Recipe: Greek Inspired Olive, Spinach and Feta Pinwheels

In a few weeks time I’ll be hosting a celebratory picnic with some close friends. My mind is busy planning what I can serve up to my guests which is delicious, no fuss on the day and they will enjoy. I’ve sidestepped soggy quiche and I’m thinking a selection of different flavoured pinwheels might hit the spot. I was brainstorming some filling ideas when I found a jar of Olive Branch Sweet Olive, Fig and Almond Relish in my cupboard, and I wondered if this sweet and tangy relish would work in a pinwheel, thankfully it did and I’ll be making these Olive, Spinach and Feta Pinwheels again!

Recipe: Greek Inspired Olive, Spinach and Feta Pinwheels

Pinwheels are sheets of puff pastry, rolled up with a tasty filling and baked in the oven. They’re really simple to make; especially if you decide life is too short to make your own puff pastry and you buy the ready rolled stuff. It usually costs about £1 for a sheet so it’s quite economical.

Alongside the olive, fig and almond relish, I added chopped spinach, feta and a little bit of Cheddar cheese to the mix. The result was really different, a delicious sweet, tangy pinwheel with enough cheese and spinach to balance out the sweet with the savory.

Recipe: Greek Inspired Olive, Spinach and Feta Pinwheels

Greek Inspired Olive, Spinach & Feta Pinwheels

Makes 15

Ingredients
1 pack of ready-made puff pastry
A jar of Olive Branch olive, fig and almond relish
2 large handfuls of baby spinach, chopped
100g feta cheese, crumbled
Fresh black pepper
75g finely grated Cheddar cheese

Instructions
On a large board unroll the sheet of puff pastry, leave it on the paper it comes wrapped in. Spread the jar of relish all over the pastry leaving a bare edge along one of the long sides of the pastry. Spread it out as evenly as you can.

Scatter the chopped spinach and crumbled feta fairly evenly over the top of the relish and season with black pepper. I don’t think it needs salt as the cheeses make it quite salty. Scatter about 25g of the finely grated Cheddar cheese over the top, this will melt and stick it all together.

Recipe: Greek Inspired Olive, Spinach and Feta Pinwheels

Roll the pastry up along its long side, roll it us as tight as you can, as if you were making a Swiss roll. Wrap it in the paper in came in and put it in the fridge for 10 minutes or so. Meanwhile, pre-heat the oven to 200 degrees.

Remove the pastry from the fridge and carefully cut into rounds approximately 1.5cm thick. You should get around 15 pinwheels from this.

Place each round on a greased baking tray and top each one with a little of the finely grated Cheddar cheese. Bake for 18-20 minutes or until golden brown.

Remove from the oven and leave to cool on a rack for 15 minutes or so. Because the relish has sugar in it, these feta pinwheels will be extra hot, so don’t be tempted to gobble them up straight from the oven.

If you don’t have a jar of the olive, fig and almond relish to hand, you could choose your own favourite relish. Alternatively a nice olive tapenade would be great in these Greek inspired pinwheels.

I am certain these Olive, Spinach and Feta Pinwheels will go down well at our celebratory picnic. They’ll be great with a nice chilled glass of prosecco on a sunny summers day!

If you enjoyed this pinwheel recipe, you might also like these simple cheese and onion pinwheels.

Recipe: Greek Inspired Olive, Spinach and Feta Pinwheels

Crafts: Make Your Own Ladybird Flower Pot

This summer has been an absolute belter. We have loved having some actual summer for a change, but it hasn’t been that great for the garden. My lawn is brown and my plants are looking a bit sorry for themselves. We’ve been trying to keep them watered as well as we can using waste water from the bath and shower, but they could do with a really good drink. We’ve been doing a few garden crafts, such as these pretty cupcake case flowers and we’ve been painting some pots for inside the house, like this Ladybird Flower Pot.

Crafts: Make Your Own Ladybird Flower Pot

The ladybird flower pot does take a couple of craft sessions to do, mainly so paint can dry properly in between coats, but it’s worth it, it’s a very pretty pot and would make a nice gift with a little plant in it.

How to make a Ladybird Flower Pot

You will need – 
A small terracotta pot
Red paint
Black paint
A paintbrush
A pencil with a rubber on the top
Bostik White Glu
Bostik Glu Dots
A black foam circle
Googly eyes
A black pipecleaner
Sticky tape

How to make your ladybird flower pot:
Firstly, paint the outside of your plant pot all over with red paint, leave it to dry. It might need a few coats of red paint, so make sure you leave time for the coats to dry.

Crafts: Make Your Own Ladybird Flower Pot

Once the red paint is dry, take a fine paintbrush and paint a black line from the top to the bottom as neat as you can. Taking the pencil with the rubber top, dip the rubber into the black paint and carefully dab spots around the pot. Do as many or as few as you want. Leave the pot to dry, the black spots may take a little while to dry off.

Once all the paint is dry, paint the whole pot with PVA glue, this will stop the paint from running off if the pot gets wet. It won’t make it 100% waterproof, but it will be splash-proof at least.

Crafts: Make Your Own Ladybird Flower Pot

Once the glue has dried, make a pair of ladybird antennae out of your pipecleaner. Fix your googly eyes onto the circle of black foam with a glu dot, this will be your ladybird’s face. Stick the antennae to the back of the foam face with sticky tape and then stick the face onto the plant pot with some of the white glu. Leave it to dry.

Crafts: Make Your Own Ladybird Flower Pot

Once it’s all dry you can put a little plant in your pot. What a lovely, cheery little gift to give someone, or to keep for yourself.

If you enjoyed this, you might also like these bee and butterfly crafts.

Crafts: Make Your Own Ladybird Flower Pot

Disclosure: We are Tots100 Bostik Bloggers and we were sent a box of craft items to use to create this post.

Three of the Best Stage 5 Biff, Chip and Kipper Books

If you’ve got or had a child in Primary School in the last few years, you’ll know that Biff, Chip and Kipper books play a huge part in teaching them to read. My son has been faithfully bringing home the Oxford Reading Tree, Read with Oxford Biff, Chip and Kipper books for several years now. They’re honestly my favourite books to hear him read to me.

The Biff, Chip and Kipper books by Roderick Hunt are full of adventure; the stories are interesting and exciting, and the action happens all over the world, so you get to explore lots of things when you’re reading. The illustrations by Alex Brychta are brilliant. He has woven a cast of characters into the background of his stories and you’ll see the same ones pop up in all kinds of different guises.

My son is able to read independently now, more or less. We’re at that stage where we are trying to build his confidence in his reading. We also want him to really love reading. We’ve recently got our hands on some of the newer Biff, Chip and Kipper books. They have four stories in each one as well as points for discussion. I’ve squirreled a few them away for our holiday, I know he will love these compact editions, both to read with us and by himself.

Three of the Best Stage 5 Biff, Chip and Kipper Books

I’ve picked three of the latest Stage 5 Biff, Chip and Kipper Books from Read with Oxford. Stage 5 is the “Becoming Independent” stage and is generally aimed at children aged 5-7 years. Stage 5 is ideal for children who are beginning to read independently.

three of the Best Stage 5 Biff, Chip and Kipper Books

The Beehive Fence and Other Stories
In The Beehive Fence, read how Biff overcomes her fear of bees during an African adventure. Join Chip, Wilf and Nadim in A Good Turn on the very first Scout camp where they mean a troop of cub scouts. In What a Journey! Mum and Dad take the family on holiday by train, but the journey isn’t quite what they expect. The last story, The Fair-Haired Samurai find out if Kipper’s Aikido classes come in useful when the magic key takes him on an adventure to Ancient Japan.

Fireball in the Sky and Other Stories
This bumper book contains four fabulous Biff, Chip and Kipper stories. Starting with The Ogres Dinner where the children meet the King of the Ogres and wonder who or what will be for dinner that night! In The Secret Pop Star the children meet a boy band hero and unexpected things happen. In the Fireball in the Sky the children encounter aliens in an unexpected encounter. Lastly, in A Knight in Town the magic key brings an extra person home from an adventure, with hilarious consequences!

The Strange Old House and Other Stories
Join Biff, Chip, Kipper and Floppy the dog in these four exciting stories. Go on a spooky night-time adventure to The Strange Old House; find out what happens when there’s a Flood! and the family all have to move out – what will the come home to? Discover how Biff and Wilma rescue two imprisoned Princes in the Tower and find out what happens when the magic key goes wrong in Key Trouble!

These bumper books each contain four Biff, Chip and Kipper stories and each costs £10.99. Between each story are discussion points and tips for how to read the stories. They are exactly the kind of books they’re used to reading at school; so it will feel very comfortable and natural for them to read these Biff, Chip and Kipper books. If you’re planning on doing some reading with your stage 5 child over the summer, then these books are a great investment.

To learn more about you can help support your child’s reading, visit the Oxford Owl website.

Three of the Best Stage 5 Biff, Chip and Kipper Books

Click here for more of our book reviews and round-ups.

Disclosure: We were send a selection of these books for review purposes.