Recipe: Birnenpfannkuchen – German Pear & Ginger Pancake

We’ve been making Apfelpfannkuchen at home for a number of years, it’s a lovely baked apple pancake pudding, a bit like a sweet toad in the hole with fruit. It’s a handy store-cupboard pudding which takes no time at all to prepare and it’s pretty easy on the pocket as well as being delicious.

It occurred to me that it would be good to try making one using pears and ginger instead of the traditional apple and cinnamon. It was only afterwards I discovered that the Germans had beaten me to it and had got there first with the Birnenpfannkuchen, though all of the recipes I could find online were in German, so what you’re looking at here is probably the worlds first Birnenpfannkuchen recipe in English (I take my victories where I can find them).

Any pud that I can prepare with any degree of success must be easy, I’m not a natural when it comes to desserts, so I urge you to give this easy recipe a try. I promise you will not be sorry!

Birnenpfannkuchen

Birnenpfannkuchen – German Pear & Ginger Pancake Recipe

Ingredients:
50g butter
2 teaspoons of oil, I used groundnut
1 tin of pear halves in juice
2 teaspoons ground ginger
75g plain flour
65g sugar, I used golden granulated, but use what you have
3 eggs
150ml semi-skimmed milk
Pinch of salt

Method:

  • Preheat the oven to 220C. I used my tarte tatin pan, but if you don’t have one of these a lined cake tin will be fine.
  • Put the butter and oil in the pan and put in the oven to melt for a couple of minutes, once the butter has melted arrange your pear halves in the pan and sprinkle over a teaspoon of ground ginger. Put in the oven to warm through while you do the next bit (tinned pears are already soft, but if using fresh pears cook until they are soft but not collapsing).
  • Meanwhile, tip the flour into a bowl with a pinch of salt, add the sugar and a teaspoon of ground ginger and combine. Add the eggs and milk and whisk thoroughly so it forms a thick batter.
  • Remove the tatin pan with the pears from the oven and quickly pour over the batter. Put the pan back in the oven and bake for 15-20 minutes, make sure you keep an eye on it towards the end. When it’s cooked your Birnenpfannkuchen should be all puffed up and golden brown like a giant Yorkshire pudding.
  • Once cooked flip it out of the pan, upside down on a plate and serve either hot or cold with cream, ice cream or custard, whatever floats your boat.

Birnenpfannkuchen

If you liked this easy recipe you might like my incredibly easy Joulutorttu recipe (Finnish jam tarts).
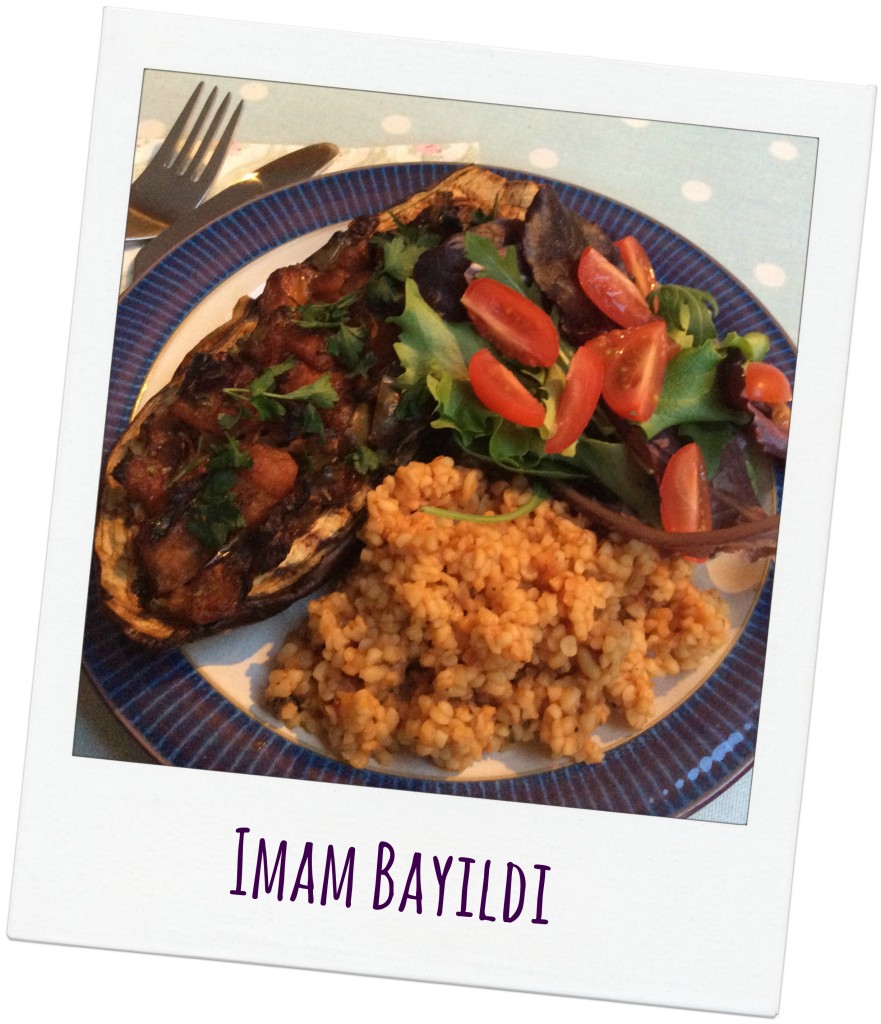
Recipe: Authentic Imam Bayildi Armenian style

My beautiful son is part Armenian. I have no hint of interesting ancestry on my side of the family, so I have wholeheartedly embraced some parts of Armenian culture to help him keep in touch with some of his roots. If I’m honest it’s mostly the bits which involve food.

Armenian food is very Mediterranean, you can find very similar food in Greece, Cyprus and Turkey. They do beautiful things with vegetables, so I’m sharing my favourite vegetarian Armenian recipe Imam Bayildi, I hope you like it.

Imam Bayildi is basically stuffed, baked aubergines. It is simple to make, you can prepare them ahead of time and then cook them when you need them and they are melt in the mouth gorgeous. I like to use good quality ingredients in this recipe as every single mouthful zings flavour. Fresh vegetables are essential and good quality tinned tomatoes are ideal, full of flavour and a little does go a long way.

This recipe serves four.

Imam Bayildi Imam Bayildi

Ingredients:
2 aubergines
2 tablespoons of olive oil
1 medium onion, finely diced (I prefer red, but a white onion works too)
2 cloves of garlic
1 green pepper, finely diced
Half a can of good quality tinned tomatoes
Big handful of chopped parsley
1 teaspoon of sugar
Salt & pepper

Method:
1. Cut the top off each aubergine, slice it in half lengthways and scoop out the flesh, leaving an aubergine boat, leave a little of the aubergine flesh around the skin so it can help retain its structural integrity while in the oven. Griddle the aubergine halves on a high heat until they have a little bit of char, then put in a baking dish so they are snuggled up close to each other, this will help them keep their shape in the oven.
2. Chop up the aubergine flesh and fry gently in the olive oil, while that is cooking (stir frequently) chop and add the onion and peppers to the pan. Cook until they are all soft and then add your crushed garlic cloves and half a tin of good quality chopped tomatoes.
3. Season well and add your sugar, cook and stir regularly until most of the liquid has evaporated and all of the vegetables are cooked and soft. Stir through the chopped parsley (reserving a small amount to garnish with later).
3. Carefully spoon the tomato and vegetable mixture into the aubergine skins. Add two tablespoons of water to the baking dish to help the aubergines to cook. Bake for 30 minutes at 200c.
4. Once cooked serve with salad, rice or bulgar wheat, maybe some pitta bread.

Imam Bayildi

We love Imam Bayildi, it’s a regular meal for us; really flavoursome and healthy as well as being a traditional Armenian meal. If you enjoy aubergines, you might also really like this Armenian Ikra recipe.

Healthy Lunch: Spinach & Goats Cheese Pesto Pasta

As the only veggie in the house, I am rubbish at feeding myself, the boys eat healthy, nutritious meaty meals and I might have some cereal, or toast. I’ve tried to avoid pasta because I thought that it wasn’t that great for you, that was until I read this article which contains actual science and shows that if you re-heat your pasta, it digests as a fibre rather than a carbohydrate. Which is brilliant because that means it releases energy differently and it is healthy, or pretty healthy. Whichever, it means it’s back on my menu at last.

Because pasta is now healthy when it’s cold, or better still, re-heated, it makes a pretty perfect lunch box staple. So for my lunches this week I made a big batch of spinach and goats cheese pesto pasta. I can take it out and about with me, it can be eaten cold, or if I’m near a microwave I can quickly reheat it. It’s incredibly simple to make, healthy-ish to eat and just delicious.

Healthy Lunch: Spinach & Goats Cheese Pesto Pasta

Spinach & Goats Cheese Pesto Pasta

Ingredients:
One bag of fresh baby spinach, ready washed
One garlic clove, crushed
100g of toasted pine nuts
Olive oil
Salt & Pepper
Zest of one lemon
Juice of half a lemon
1 and a half teaspoons of honey
200g goats cheese (grated if you can be bothered, cut into pieces if you can’t
Roasted tomatoes
Pasta – I used twirls

Method:
Set up your blender and tip in your fresh spinach, blend for a minute or so until it’s all starting to turn into a paste. Add the garlic, toasted pine nuts, lemon zest, lemon juice, honey and generous amounts of salt & pepper. Blend until it’s all combined and it’s looking like a paste.
Add your goats cheese and then add olive oil until it is the pesto type consistency you need, you’re probably looking at maybe around 100ml of olive oil. Blend until smooth. Taste and adjust the seasoning if need be.
Bring a large pot of water to the boil and tip in your pasta, when it’s cooked (instructions should be on the packet), drain and stir the pesto through. You probably won’t need to use all the pesto which can be stored in the fridge for another day.

I topped mine with some thyme roasted tomatoes which are one of my favourite things in the world. It’s a delicious lunch (or evening meal) for all the family, contains at least one of your five a day, it’s easy to make and a great healthy lunch box for when you’re on the go.

What do you pack in your lunch box?

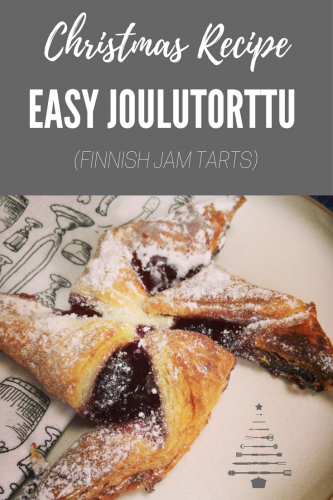
Christmas Recipe: Easy Joulutorttu (Finnish Jam Tarts)

For about 11 months of the year I don’t really do much baking; then December starts and I’m elbow deep in flour. I actually love it, I make the usual mince pies and shortbread, hubs makes the cakes and because we’re a bit rubbish we always buy a Christmas pudding. I’m always on the look out for really, really easy, but fairly impressive looking and tasting things to add to my festive baking repertoire. This year I’m firmly sold on Joulutorttu, a sort of festive Finnish jam tart.

Traditionally the Joulutorttu is made with puff pastry and a special Finnish prune jam. We don’t tend to have prune jam in the cupboard; but I had a jar of Mackays Christmas Preserve. I thought this would make a good substitute. Of course if you have prune jam at hand you could use that, but this delicious Christmas preserve is packed with berries, made with mulled wine and lends a particularly merry feel to the Christmassy tarts.

Joulutorttu

Easy Joulutorttu (Finnish Jam Tarts)

You will need:
One packet of ready made puff pastry (or make your own if you’re clever)
One jar of Mackays Christmas Preserve with Mulled Wine
A splash of milk for brushing
Butter for buttering your baking tray

To make:
Butter your baking tray.
Pre-heat your oven to 200 degrees.
Unroll your sheet of puff pastry, cut it into squares approx 3 inches square (my sheet cut into 15 squares).
Take a square and put a teaspoon of jam in the middle. Cut each corner to the middle and fold one corner of each triangle into the middle to make a windmill shape (trust me, this is much easier than it sounds, the picture probably explains it better).
With a pastry brush, brush the windmills with milk and pop into a pre-heated oven for 15-20 minutes until the Joulutorttu are golden and puffy.
Once cooked, leave to cool, this is very important as the jam will be super heated. To serve, dust with icing sugar, they would be especially excellent with a good cup of coffee and best enjoyed whilst wearing a Scandinavian style jumper.

Joulutorttu

These Joulutorttu are pretty much as easy as baking gets. They’re a great store cupboard treat to whip up with no notice when festive visitors just happen to pop in. They’re crunchy, sweet and full of star-shaped Christmas joy.

Recipe: Easy Joulutorttu (Finnish Jam Tarts)

You can find more of my recipes here.

How to make a really easy Train Birthday Cake

Children’s birthday parties can be fairly hard work, with lots to remember, from party food, party bags, games, music, costumes and cake. I’m all for making life easy (and on a budget), so this year instead of buying an expensive cake we opted to make our own. The small boy wanted a train birthday cake to go with his train birthday party and who am I to argue?

Train birthday cake

To make this easy train birthday cake you will need:
Three rounds of sponge cake (as described below)
Half a jar of raspberry jam (approx), or strawberry if you prefer
Two tubs of Betty Crocker Vanilla Buttercream icing
Three tubes of smarties
Bigjigs trains (see below)
One cake board (or big enough plate)

Hubs is the baker of the household, so I asked him to make three layers of sponge cake. Use your favourite and foolproof sponge cake recipe (his used 8 eggs to give you an idea of the amount of sponge we made) you want to make three round sponge cakes baked in a 25cm tin. Once baked they need to be around an inch tall.

Once the cakes are cool, put a blob of the buttercream on the cake board and place the first layer of sponge on top of that, this helps to anchor the cake to the board and stops it sliding about. Spread a layer of jam on top of the first layer. Carefully turn the second layer upside down and gently spread the flat bottom with the buttercream and sandwich in top of the jam layer.

On the top of the second layer, spread evenly with more jam and then spread buttercream on the upturned bottom of the top layer of sponge, put that on top. You should have a three layered cake in front of you which from the bottom goes…
Blob of buttercream
Cake
Jam
Buttercream
Cake
Jam
Buttercream
Cake

With me so far? Good. Now you’ve got all your layers stacked carefully, spread the remaining buttercream over the top and sides of the cake. Don’t worry about it being prefect, if you aim for the rustic look it’ll be fine. I created a wavy effect with a palette knife and the sides were rough but fully covered. If you want you can make the buttercream smooth.

Bigjigs make a sort of pick and mix name train set, I bought mine from my local toy shop Giddy Goat Toys. I bought the carriage and the letters of his name for £2.25 each, which cost me just £9 in total. This was much cheaper than buying a proper train and carriages and much more personal.

I gave them a little wash, though they’d been in a sealed box, then using a little blob of the buttercream “glued” the removable letters onto the carriages and pressed the train into the thick buttercream in the top of the cake.

Tipping the smarties into a bowl I then wrote his age in smarties on the top of the cake, then I used the remaining smarties to edge around the bottom of the cake. I was pretty pleased with my efforts.

If you do this the night before the party and leave it out uncovered overnight, the buttercream should firm up slightly and make it easier to transport. On the morning of the party I wrapped it loosely in foil and it sat in my knee in the car on the way to the party. On arrival we unwrapped it and there were no buttercream smears on the foil and it still looked good. Phew.

The cake tasted really good, but hubs does make beautiful cakes. We had lots of lovely compliments about it. It sliced into approx 24 slices, which was more than enough for a kids party.

Our lovely and quite huge train birthday cake was a really big hit, a few people thought we’d bought it (ha, always a compliment) and the small boy was really, really pleased with it and proudly showed it off to his friends. It’s a really easy way to make a simple sponge birthday cake a little bit special.

Train birthday cake

How to make a really easy train birthday cake

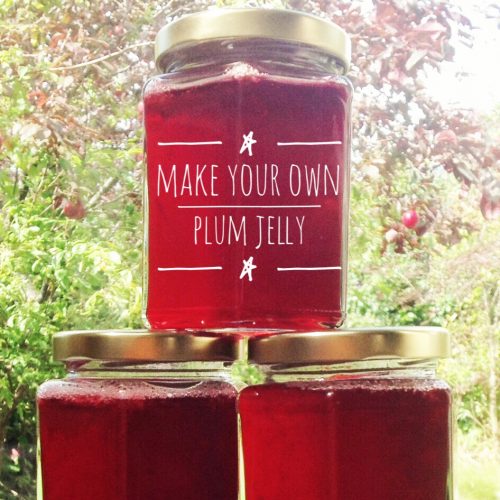
Easy Recipe: Plum Jelly – preserving summer

With three established plum trees in our garden we suddenly get quite popular at this time of year; people popping round on the off chance they can take a bag home to turn into a duff or a crumble or a sponge. This year has been an exceptionally good year for our plum trees and we couldn’t give the fruit away fast enough so I made a batch of plum jelly.

We used to be keen picklers and preservers (before we became parents), so I decided to make a batch of plum jelly. It’s very simple, you don’t need mad skills to make it, all you need is time and patience.

Recipe: Plum Jelly - preserving summer

Ingredients:
4.5 lbs of ripe plums (any variety)
1 pint of water
1.5 lbs of preserving sugar

Method:

  1. Halve the plums (you don’t need to remove the stones, I left most of them in, but if it popped out easily then I discarded it), and place into a very large pan. Pour in your water, put the lid on the pan and cook until the fruit has fallen apart, this should take about 10-15 minutes.
  2. Set up your jelly bag, if you haven’t got one of these don’t worry, you can put a sieve over a large bowl, line the sieve with a clean piece of muslin, this will work just as well.
  3. Once your plums are cooked, gradually ladle into the jelly bag or lined sieve and leave (preferably overnight) to drip. Don’t be tempted to squeeze the juice out as this may result in a cloudy jelly. You should get around 2 pints of juice from the plums.
  4. Put your plum juice into your very large pan with the preserving sugar and stir until the sugar melts into the juice. Turn the heat up and bring it to a low rolling boil. It’s better to take this slow and steady, than rush it and push it too far. At this stage put your clean jars in the oven to sterilise them.
  5. You should carefully taste the jelly at this stage to see if it needs any more sugar. This will vary depending on the ripeness of the fruit; remember you can always add but you can’t take away, so keep tasting. Personally I like a slightly tart jelly.
  6. Keep an eye on your plum jelly, keep stirring and you should feel it start to thicken. Scoop any foamy scum off the top (this is just impurities from the fruit and the sugar, it’s not harmful at all) and discard.
  7. Take a cold plate (if you put it in the fridge to chill, that’ll help) and put a dribble of the plum jelly on. Leave it to cool and if it sets to the consistency you want then your jelly is ready to be put in the jars; if not keep stirring and testing the jelly regularly.
  8. When it’s ready, carefully remove your jars from the oven; (they will be incredibly hot) and pour in your plum jelly. We use a wide necked funnel for this; but filling a jug and pouring it into the jar works just as well. Work quickly and carefully and get the lids on your jars while everything is still hot.

Leave to cool and and then it’s ready for slathering on crumpets.

plum jelly

Personally I like to put my jars of jewel coloured jams and jellies away until the winter months. It’s lovely to open a jar of something homemade, special and evocative of summer; just when you need the sunshine memory the most. But then I’m sentimental like that.

If you enjoyed this recipe, you might also like to try my No Churn Plum Ice Cream.

Easy Recipe: Plum Jelly - preserving summer

Recipe: Haggis, potato cake & poached egg stack

The most famous foodstuff in Scotland is haggis, (followed by much more appealing sounding things like shortbread and whisky). It’s traditional to serve haggis with neeps and tatties, but I wanted to try something a little different and perhaps make haggis a bit more appealing, a little bit sexy even. That’s a tough gig. Even tougher given that I’m vegetarian and I’ve never tried haggis.

I tried to think of it like black pudding. Being a Lancashire lass this put me firmly in my comfort zone. It’s sort of like black pudding in that’s it’s made from fairly unappealing bits of animal in a sausage shape; although haggis holds together less well than black pudding.

I decided to try to turn it into a brunch or lunch meal, served with homemade potato cakes and a poached egg it’s a fairly well-balanced, interesting meal that’ll satisfy anyone with a hearty appetite. I’ve made my own potato cakes as they’re much nicer than shop bought, but if you want to buy them I recommend you get them from a good bakery.

Recipe: Haggis, potato cake & poached egg stack

Haggis, potato cake & poached egg stack

Ingredients:
One haggis
One egg per person
Chives
Oil for frying

For potato cakes (makes 6 large cakes) –
2 mugs of mashed potato
Half a mug of plain flour
Salt & pepper
Chives
Oil for frying

Method:

Start by putting your cold (leftover) mashed potato in a bowl with the plain flour, season and snip in some chives. Mix thoroughly by hand and shape into 6 equal sized potato cakes. Fry them off gently until they’re golden brown on both sides. Set aside somewhere warm until you’re ready to serve them. They can be kept warm in a low oven for a little while.

Take your haggis (unsteamed) and cut into 1.5cm thick slices. Fry gently in oil until brown and crispy on both sides, make sure it’s cooked all the way through. Set aside and keep warm with the potato cakes.

Poach an egg per person.

To plate up, stack your haggis on top of your potato cake and place your poached egg on top. I snipped chives all over mine because I like chives, but you don’t have to do that if you don’t want.

Recipe: Haggis, potato cake & poached egg stack

It’s really simple, it took me hardly any time at all and it was quite delicious. The boys once again returned clean plates to the kitchen. Winner winner haggis dinner?

If you enjoyed this recipe you might also like this recipe for Crumbly Cranachan Shortbread with Whisky. or these delicious haggis pasties.

Recipe: Haggis, potato cake & poached egg stack

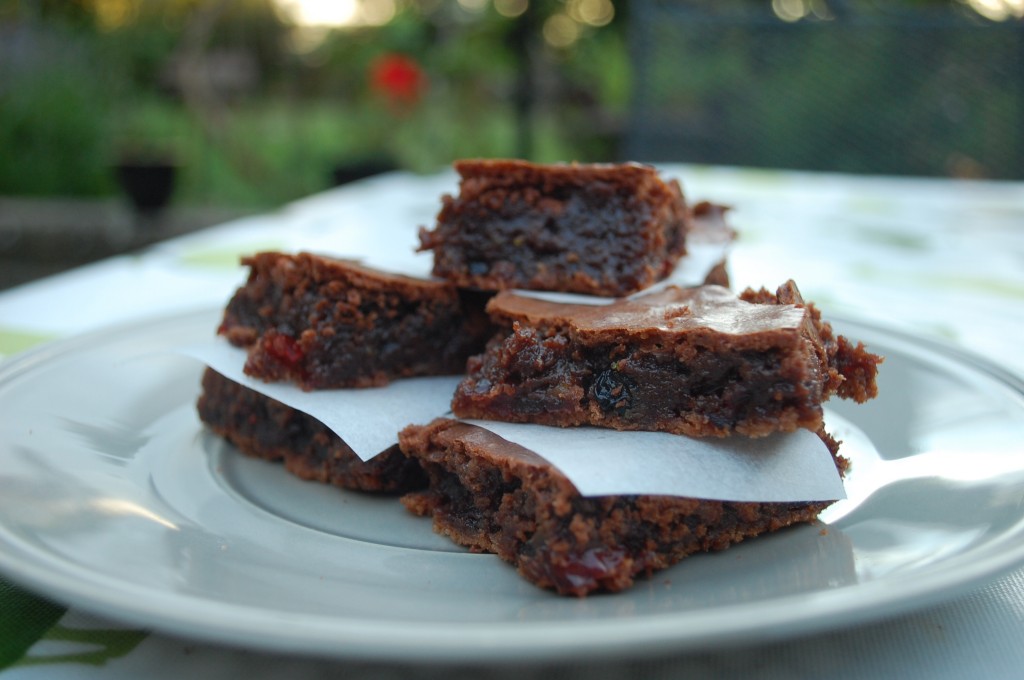
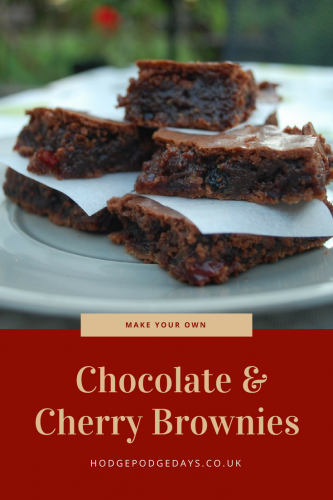
Gorgeously Gooey Chocolate and Cherry Brownies

Who doesn’t love brownies? These gorgeous Chocolate and Cherry Brownies have a crisp crust and a delicious gooey centre. They are best served warm with a good dollop of vanilla ice cream. Brownies are always a favourite. Whatever the season, brownies never seem to go out of fashion.

Chocolate and Cherry Brownies

Gorgeously Gooey Chocolate and Cherry Brownies

Preparation time 15 minutes
Cooking time 35-40 minutes
Makes about 18

Ingredients
200g butter, cubed
100g good quality dark chocolate, roughly chopped
4 eggs, beaten
425g granulated sugar
100g plain flour
1 tsp baking powder, sifted
½ tsp sea salt
1 tbsp vanilla extract
100g dried or glace cherries

Method
Preheat the oven to 180c, gas mark 4. Line a small roasting tin with baking parchment.

Place the butter and chocolate in a heatproof bowl and allow the ingredients to melt either over a pan of barely simmering water or in a microwave on a low heat. Allow to cool slightly.

Place the remaining ingredients in a mixing bowl and pour in the melted chocolate and butter mixture. Fold together lightly until thoroughly combined. Pour into the prepared tin and place in the preheated oven for 25-30 minutes until a crust forms. Remove from the oven and allow to stand for 15-20 minutes. Cut into squares when cooled.

Cooks Tips:
You can add other ingredients in with the cherries if you’d like. Pecans and brazil nuts work well instead of cherries.

Brownies are great to make with kids and a real family treat. Brownies are a good base for all kinds of wacky ideas you or your kids may have. Swap out the cherries and add chunks of Oreos, wedges of Snickers bars or drizzle with caramel and sea salt when they’re fresh from the oven. Make them into Christmas Brownies by adding chunks of chocolate orange and a couple of handfuls of cranberries.

Whatever you choose, they will almost certainly be delicious! How do you like yours?

Chocolate & Cherry Brownies

This recipe was developed in conjunction with an Appliance House Chef.

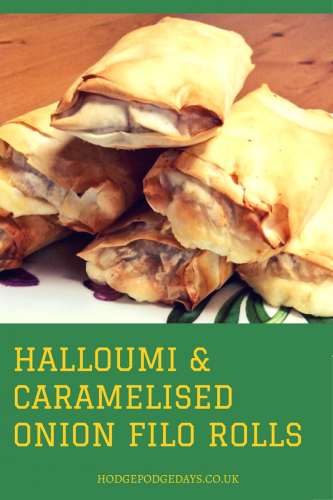
Recipe: Halloumi & Caramelised Onion filo rolls

I like filo pastry. I like using it because it’s so easy and it makes pies so much lighter than if you use a standard shortcrust. We use it a lot. This weekend I made a few spinach and feta pies but I had a few sheets of filo left over. Not wanting to let them go to waste I knocked up a plate of halloumi and caramelised onion & filo rolls. They’re so quick and easy to make and great for picnics and lunch-boxes too.

Halloumi, caramelised onion & filo rolls

Recipe: Halloumi & Caramelised Onion filo rolls

Ingredients:
1 pack of halloumi, sliced into 6 thick slices
3 sheets of filo pastry
1 onion, sliced
1 teaspoon of balsamic vinegar
3 teaspoons of olive oil
1 teaspoon of sugar
Salt & pepper
Small bowl of water

Method:
Put 2 teaspoons of olive oil into a frying pan, fry the sliced onion until soft but not brown. Add your teaspoon of balsamic vinegar and teaspoon of sugar, season with salt and pepper and stir. Set aside to cool.

Oil a baking tray and pre-heat your oven to 220. Take your filo and cut it in half (landscape, not portrait). You will need to work quickly with the filo to stop it drying out.

Take one half sheet of the filo, about an inch from the bottom of the filo place your slice of halloumi, top with some caramelised onion, dab the filo with water so when you fold, roll and press it the sheet will stick together. take the bottom inch and lay it over the halloumi, pat down, fold the sides in and then roll the halloumi down the length of the pastry making a roll. Place on your oiled baking sheet. Do the same with the rest of the halloumi.

Once all the rolls have been made (don’t worry if they look a bit rustic, it adds to their charm), brush with olive oil and put in the oven for ten minutes, check on them, they may need another few minutes, but don’t worry if they ooze a little, that’s normal and adds to their unctuousness.

Once they’re brown enough, remove from the oven and put on a wire rack to cool for a few minutes.

They’re lovely eaten still warm from the oven, or cold the next day. We liked them best with a tomato and chilli dipping sauce.

You can play about with this and maybe use sautéed peppers instead of the onion. I’m going to try making them with a thick chilli jam which I think would work really well. I’d not change the cheese though. The halloumi is great for this, it relaxes but doesn’t melt and has that amazing salty tang.

Recipe: Halloumi & Caramelised Onion filo rolls

If you enjoyed this recipe, you can find more of my recipes here.

Recipe: Arroz al Horno – food from the Costa Blanca

I really love cooking and trying new things, but being a busy mum these days the things I cook need to be quick, easy and nutritious, not to mention kind to my purse. When I was asked by Villa Plus to recreate a recipe from the Costa Blanca, I quickly accepted the challenge.

I struggled to come up with a suitable dish which went with my “bung it all in a pan and enjoy your holiday while it cooks” mentality. I wanted something that I could quickly prepare and just leave to cook while I could get on with the business of relaxing. Eventually I came across a recipe for Arroz al Horno. A traditional dish from Valencia which literally means oven baked rice. It’s a popular dish and each town and each family seem to have their own variation of it.

I managed to find all of the ingredients in shops in Didsbury in Manchester; going to the butcher and the greengrocer and then a deli for the last few bits. All of the ingredients could be found much more easily on a sunny Spanish market, but my meal feeding 6 comes in at just £1.66 per head.

photo 1 (7)

Ingredients: (to feed 6, or 4 very generously)

1 lb of diced lean pork
3 small morcilla sausages (if you can’t find then use chorizo)
1 whole garlic bulb
500g of paella or risotto rice
2 pints of stock (I used vegetable but you could use chicken or beef)
4 medium tomatoes
1 pepper (I used yellow, but red or orange would work)
1 tin of cooked chickpeas
1 teaspoon of smoked paprika
Olive oil (Spanish if you have it)
Pinch of saffron
Salt and pepper

Method: (Don’t panic, it’s easy)

  1. Cut the morcilla into thick slices and pour two tablespoons (approx) of olive oil into a large frying pan. Fry the diced pork and morcilla until brown.
  2. Slice up two tomatoes and cut the pepper into four or five thick slices and add to the pan. Throw in the whole garlic bulb.
  3. Add the rice to the pan, the morcilla should be giving off some delicious oils by now, stir and let the rice soak up the oil. Tip in the tin of chickpeas. Add half the stock, a pinch of saffron and a teaspoon of smoked paprika. Season generously with salt and pepper and transfer to a casserole dish. Add the remainder of the stock and stir.
  4. Bake in the oven with the lid on for 20 minutes at 220 degrees. After 20 minutes give it a good stir and add more stock if required.
  5. Artistically decorate your Arroz al Horno by pushing the garlic bulb in the middle, draping the pepper slices around it and topping with halves or the remaining two tomatoes. Put the lid back on and bake for a further 10 minutes.
  6. Then remove the lid and drizzle with some more olive oil, bake for a further 10 minutes, remove from the oven and serve.

The garlic bulb? The cloves should be perfectly cooked after their time in the oven. If you like you can squeeze the garlic out and mash a clove or two through your Arroz al Horno, or they’d be delicious spread on crusty bread.

Arroz al Horno

It was incredibly quick and easy to make and it went down an absolute storm. I made the Arroz al Horno with pork, but recipes from the Costa Blanca region also use chicken or rabbit, some top with sliced potatoes or use different vegetables, which is how it should be, true Spanish cuisine is about using the best ingredients you have available to you at the time.

Arroz al Horno