Review: TioTina Oven Gloves

I am a keen cook, and like most keen cooks I have the scars to prove it. My usual method for removing hot stuff from the oven and grill is a bunched up tea towel, which is fine until you burn yourself, which I manage to do at least once a week. I was given the chance to try out some TioTina oven gloves to see for myself how effective they are.

TioTina oven gloves, or rather gauntlets are heat resistant to 350 degrees C 662 Fahrenheit with Aramid/Paramid. Bullet proof vests and racing driver fire protection suits are made from similar material, so they’re pretty tough. They’re super-thick and have long cuffs which help protect your arms, which for me is great because my arms and wrists are the bits of me most often burnt.

TioTina Oven Gloves

The gloves have silicone on the palm and fingers which stops hot trays and pans from slipping out of your grip. The gloves are flexible, so if you need to fiddle about with something hot, you can easily do that.

TioTina Oven Gloves

You get two gloves and each glove can go on either hand. I tend to casually whip things out of the oven with one hand, so for me a pair of these TioTina oven gloves will probably last me forever (I’m a bit more cautious with roasting tins full of hot fat though).

We put the TioTina oven gloves to the test. Although we were sent a large pair of gloves and I have the dainty hands of an elegant lady, they still fit me loosely, but I felt confident using them thanks to the silicone grips. Hubs who has hands like shovels tried them out too, and the gloves fit him perfectly . Because I have a cruel streak I made him hold a blisteringly hot oven tray for a good five minutes and he was fine. The gloves passed the test!

TioTina oven gloves

I think it’s important to use proper oven gloves when you’re taking things out of the oven. I’ve lost count of the burns I’ve had over the years and I don’t think it sets a very good example to my son to be so laissez faire about this aspect of kitchen safety, especially when I can’t give him his lunch without issuing at least three warnings about blowing on hot food etc.

The TioTina Oven gloves are robust and make getting things out of the oven very safe. They work fantastically well and will be a key part of my kitchen for some time to come.
Recipe: Easy Chocolate Malt Cake

Since joining “the motherhood” I’ve had to get acquainted with my mixing bowl. I’ve never been a great baker of cakes, but seemingly the minute you become a mother, someone thrusts a whisk into your hands and asks you to bake two dozen fairy-cakes for some occasion or other.

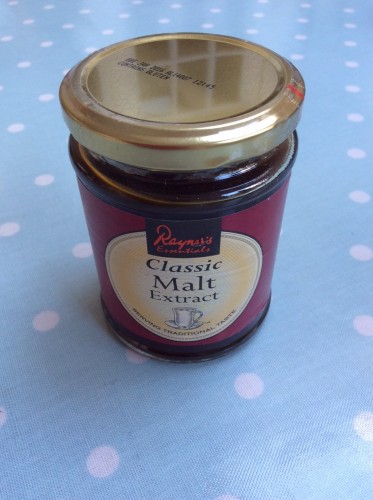
My go-to cake has been a Victoria Sponge and my Vicky-Sponge is generally pretty well received, but I have failed in my attempts to make a good chocolate version, until now that is. There was always something missing, a lack of depth of rich chocolateyness and I couldn’t figure out why. I was sent a jar of Rayner’s Classic Malt Extract to try, my first port of call was to tentatively add it to a chocolate sponge cake, and by Jove I’d cracked it!

Easy Chocolate Malt Cake Recipe

My easy chocolate malt cake recipe is by definition easy, quick to throw together in a cake emergency and tasty enough to offer the Vicar for tea. It probably won’t win any prizes for innovation or decoration, but it’s a delicious stand alone cake, or it works well with a dollop of ice cream and some fruit.

Easy Chocolate Malt Cake

Serves 8
A real simple, really tasty chocolate sponge cake with an undercurrent of malty richness.

Ingredients
4oz sugar
4oz butter or margarine
2 medium eggs
1/2 teaspoon baking powder
2 tablespoons Bourbon cocoa powder
2 teaspoons Rayner’s Malt Extract
4oz self raising flour
Splash of milk

Instructions
Beat the butter and sugar together until fluffy. Stir in the eggs, baking powder, cocoa powder and malt extract, mix until well combined. Gently fold in the self raising flour, add a small splash of milk if the mixture is too stiff.

Pour the cake batter into a lined loaf tin.

Bake in a pre-heated oven at 190 for 30 minutes, check if it is cooked through and if it is remove from the oven and leave to cool.

Easy Chocolate Malt Cake

Note: I was sent a jar of Rayner’s Classic Malt Extract free of charge to use in a recipe. All images and opinions are our own.

Introduction to Baking Class at Wilmslow Kitchen Cookery School

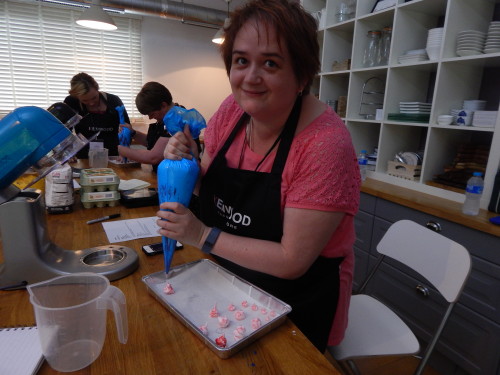
It’s August, which can only mean one thing – the nation goes Great British Bake Off crazy! I love baking and I class myself as an enthusiastic amateur rather than a master baker, my main problem is confidence, I look at the glorious show-stoppers on GBBO and I know my creations would be laughed out of the show tent. Thankfully (and excitingly) I was invited along to an Introductory Baking Class at the Wilmslow Kitchen Cookery School, an foodie blogger event hosted by kitchen legends – Kenwood and Currys PC World.

Wilmslow Kitchen Cookery School

We were introduced to the rather beautiful Kenwood kMix mixers, they come in a variety of lovely colours and I was drawn to the teal one, which perfectly matches my blog. I did point this fact out rather loudly and hopefully, but alas my request to take it home where it so clearly belonged fell on deaf ears.

Wilmslow Kitchen Cookery School

The Kenwood kMix is a contemporary version of the classic Kenwood mixer, it comes with the K beater, power whisk, flexi beater as well as a metal or glass bowl.

Sarah, David and Brian from Wilmslow Kitchen Cookery School gave us a run through of our busy afternoon of baking. In pairs (I was with Emma from Farmer’s Wife & Mummy) we were each going to make meringues, a Swiss roll and a rich chocolate tart. I was particularly excited (and terrified) as the thought of making and rolling a Swiss roll is an idea fraught with peril, the demonstration drew gasps of amazement from the watching crowd of bloggers.

Wilmslow Kitchen Cookery School

We were to tackle what I thought were some fairly difficult tasks, thankfully we were expertly walked through it all and what’s more it was all very enjoyable. I have long feared the meringue, but after trying my hand at the Intro to Baking session at Wilmslow Kitchen Cookery School I went home and made my own delicious batch.

The Swiss roll was, and still is frankly terrifying, but doable, and I’ve had a request to try and recreate the recipe at home. I am increasingly diary intolerant, so decided not to use cream in my Swiss roll and was given the option of a vegan buttercream, which was half a cup of vegan soy based spread whipped with half a cup of icing sugar and a lot (their words) of vanilla extract. It was pretty yummy and I didn’t miss the cream.

Wilmslow Kitchen Cookery School

Here’s what we made, the meringues were by far my favourite, the small boy liked them too. If you like a rich hit of chocolate then the chocolate tart is for you. But the Swiss roll was the winner – really light and if you’re brave, really easy to roll – honestly, if I can do it, you can too!

Easy Recipe: Speedy Microwave Jam Sponge

In the early 1980s my Grandma (who was a professional cook) got herself a microwave and dedicated her retirement to figuring out how to use it. Her microwave cheffing was never considered a success. You could break your teeth on her sponge cakes and her scrambled eggs bounced. Everything which came out of her microwave was a disaster, which was enormously disappointing for someone who could make patisserie that would make French Chefs weep with jealousy.

I have shied away from microwave cookery, bar reheating leftovers, pinging ready meals and giving jacket potatoes a head start; the thought of baking a cake in the microwave sends me straight back to 1985 and I was resolved never to try it. That was until I was sent a jar of Duerr’s Rhubarb and Custard Homebaking Jam, the jam has been formulated to behave itself when heated, so it doesn’t go chewy like other jams might. Additionally it tastes just like those rhubarb and custard sweets I used to be addicted to as a child.

We decided it would be best to make a jam sponge and custard with this really lovely yummy jam (I had already liberally smeared some on a croissant for quality control purposes). I love steamed puddings, but who has the time? So I decided it was worth me tentatively experimenting with a microwaved version, what’s the worst that can happen?

I made my usual sponge recipe and popped it in the microwave for four minutes, checked it, decided it needed another two minutes and it was perfect. It was by far the lightest, fluffiest sponge pudding we’ve had in a long, long time. It took just ten minutes from weighing the ingredients to pouring custard over the finished pudding and filling our faces. This really is the perfect pudding if you need something quick, warming, universally popular and drowned in custard.

jam sponge

My microwave is 850 watts, yours may be different, so it might be best, at least the first time you make this, to reduce the cooking time, check it, and then check it ever minute until it’s cooked to your satisfaction. I originally guessed at 4 minutes, but my 850 watt microwave took 6 minutes to get to sponge perfection.

Microwaved Jam Sponge Pudding (serves 6)
Ingredients:
4oz Sugar
4oz Butter or Margarine (I always use Stork)
2 medium eggs
4oz self raising flour
1 teaspoon of baking powder
Half a jar of Jam (I used Duerr’s Rhubarb and Custard Homebaking Jam)

Method:
1. Cream the butter and sugar together until light and fluffy. Stir through the eggs.
2. Sift in the flour and baking powder and gently combine.
3. Dollop your jam on the bottom of a large microwavable bowl, gently (very gently so as not to disturb the jam) dollop the sponge mixture on top of the jam and smooth it so it’s fairly evenly distributed.
4. Microwave for six minutes (check this often as it’s really easy to quickly overcook things in the microwave).
5. Once cooked, remove carefully from the microwave and eat while it’s still warm.

Serve with custard, cream or ice cream, or whatever takes your fancy.

This is ridiculously quick and easy, incredibly tasty and really, really popular. I think my Grandma would be really proud that I finally cracked the mystery of microwave baking.

Easy Recipe: Speedy Microwave Jam Sponge

Recipe: Easy Peanut Butter Butterfly Cakes

I’ve been doing a lot of baking recently which can only mean one thing, I’m happy. I’m not sure why I’ve been blessed with the gift of temporary inner peace but I’m going with it and enjoying the cakey results. Yesterday on a whim I whipped up an experimental batch of Peanut Butter Cakes. They turned out to be pretty darn good, so I’m sharing the recipe. It’s really easy, if I can bake it then so can you.

Peanut butter cakes

Easy Peanut Butter Butterfly Cakes (makes approx 20)

Ingredients:
8oz Butter or margarine (I used stork)
8oz sugar
4 large eggs
2oz peanut hottie powder
1 teaspoon of baking soda
6oz self raising flour

For the icing:
2 big scoops of Betty Crocker vanilla buttercream style icing
2 heaped dessert spoons of Chocolate Peanut butter hottie

Method:
1. Beat the butter and sugar together until fluffy and the stir in the eggs.
2. Carefully fold through the peanut hottie powder, baking soda and self raising flour until combined.
3. Dollop into cake cases, there should be enough to make about 20 buns.
4. Bake in a preheated oven at 180c for 15 minutes. Once cooked leave to cool.
5. To make the icing (yes this is cheaty, but you can make your own buttercream if you want), beat the buttercream until soft and thoroughly mix in the chocolate peanut hottie powder, add a drop of hot water if it feels too stiff.
6. Carefully cut a circle out of the top of each of your cooled cakes, cut the circle in two, dollop a teaspoon of buttercream into the hole and top with the halves to make them look like butterfly wings.

Resist the temptation to eat them all in one go.

So there you have it, really, really easy peanut butter cakes, they’re something that would be great to bake with children, or just by yourself if you’re in your happy place like me.

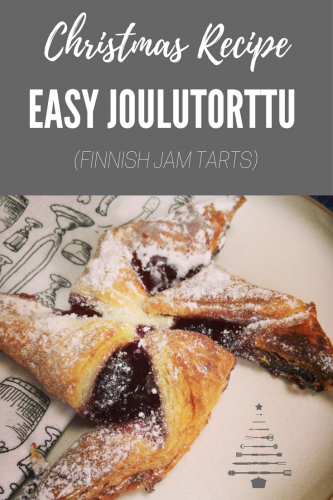
Christmas Recipe: Easy Joulutorttu (Finnish Jam Tarts)

For about 11 months of the year I don’t really do much baking; then December starts and I’m elbow deep in flour. I actually love it, I make the usual mince pies and shortbread, hubs makes the cakes and because we’re a bit rubbish we always buy a Christmas pudding. I’m always on the look out for really, really easy, but fairly impressive looking and tasting things to add to my festive baking repertoire. This year I’m firmly sold on Joulutorttu, a sort of festive Finnish jam tart.

Traditionally the Joulutorttu is made with puff pastry and a special Finnish prune jam. We don’t tend to have prune jam in the cupboard; but I had a jar of Mackays Christmas Preserve. I thought this would make a good substitute. Of course if you have prune jam at hand you could use that, but this delicious Christmas preserve is packed with berries, made with mulled wine and lends a particularly merry feel to the Christmassy tarts.

Joulutorttu

Easy Joulutorttu (Finnish Jam Tarts)

You will need:
One packet of ready made puff pastry (or make your own if you’re clever)
One jar of Mackays Christmas Preserve with Mulled Wine
A splash of milk for brushing
Butter for buttering your baking tray

To make:
Butter your baking tray.
Pre-heat your oven to 200 degrees.
Unroll your sheet of puff pastry, cut it into squares approx 3 inches square (my sheet cut into 15 squares).
Take a square and put a teaspoon of jam in the middle. Cut each corner to the middle and fold one corner of each triangle into the middle to make a windmill shape (trust me, this is much easier than it sounds, the picture probably explains it better).
With a pastry brush, brush the windmills with milk and pop into a pre-heated oven for 15-20 minutes until the Joulutorttu are golden and puffy.
Once cooked, leave to cool, this is very important as the jam will be super heated. To serve, dust with icing sugar, they would be especially excellent with a good cup of coffee and best enjoyed whilst wearing a Scandinavian style jumper.

Joulutorttu

These Joulutorttu are pretty much as easy as baking gets. They’re a great store cupboard treat to whip up with no notice when festive visitors just happen to pop in. They’re crunchy, sweet and full of star-shaped Christmas joy.

Recipe: Easy Joulutorttu (Finnish Jam Tarts)

You can find more of my recipes here.

Gorgeously Gooey Chocolate and Cherry Brownies

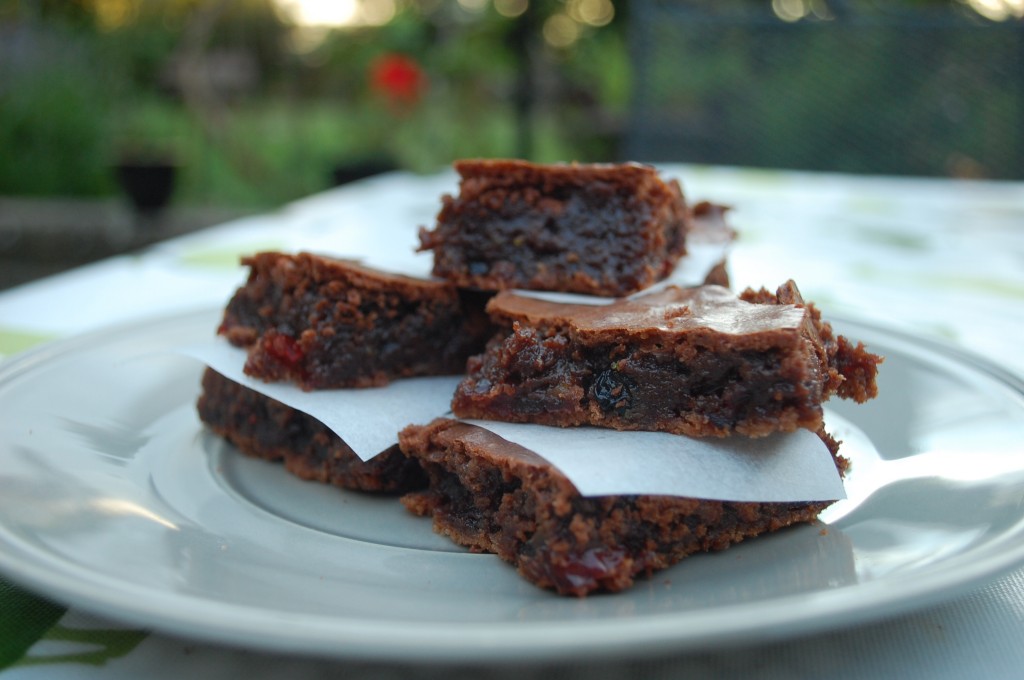
Who doesn’t love brownies? These gorgeous Chocolate and Cherry Brownies have a crisp crust and a delicious gooey centre. They are best served warm with a good dollop of vanilla ice cream. Brownies are always a favourite. Whatever the season, brownies never seem to go out of fashion.

Chocolate and Cherry Brownies

Gorgeously Gooey Chocolate and Cherry Brownies

Preparation time 15 minutes
Cooking time 35-40 minutes
Makes about 18

Ingredients
200g butter, cubed
100g good quality dark chocolate, roughly chopped
4 eggs, beaten
425g granulated sugar
100g plain flour
1 tsp baking powder, sifted
½ tsp sea salt
1 tbsp vanilla extract
100g dried or glace cherries

Method
Preheat the oven to 180c, gas mark 4. Line a small roasting tin with baking parchment.

Place the butter and chocolate in a heatproof bowl and allow the ingredients to melt either over a pan of barely simmering water or in a microwave on a low heat. Allow to cool slightly.

Place the remaining ingredients in a mixing bowl and pour in the melted chocolate and butter mixture. Fold together lightly until thoroughly combined. Pour into the prepared tin and place in the preheated oven for 25-30 minutes until a crust forms. Remove from the oven and allow to stand for 15-20 minutes. Cut into squares when cooled.

Cooks Tips:
You can add other ingredients in with the cherries if you’d like. Pecans and brazil nuts work well instead of cherries.

Brownies are great to make with kids and a real family treat. Brownies are a good base for all kinds of wacky ideas you or your kids may have. Swap out the cherries and add chunks of Oreos, wedges of Snickers bars or drizzle with caramel and sea salt when they’re fresh from the oven. Make them into Christmas Brownies by adding chunks of chocolate orange and a couple of handfuls of cranberries.

Whatever you choose, they will almost certainly be delicious! How do you like yours?

Chocolate & Cherry Brownies

This recipe was developed in conjunction with an Appliance House Chef.

Bahlsen Bake Off – Small boy becomes a Big star!

Biscuits. They’re the parents friend. Providing much needed energy to get through traumatic children’s bedtimes, afternoon energy lulls and for scoffing greedily with friends over a cup of tea. They’re also excellent for staving off the pre-dinner starvation which the small boy seems to get around 4.30pm.

It was not with undue levels of excitement that we opened a box of biscuit awesomeness sent by Bahlsen. They make a much admired and rather too moorish biscuit; you know the sort, plain biscuit one side, and a thick slab of chocolate on the other. It’s impossible to take just one of these out of the packet and leave it at that. Impossible.

We were given our mission (which we chose to accept) which was to take part in the Bahlsen Bake Off. The small boy loves helping in the kitchen, especially making cakes. Alas I am not gifted in the arena of baking, so my specialty pud is usually an Eton Mess, it’s basically an assembly job of all my favourite things, cream, broken meringue and strawberries.

For ease we prepped the component parts beforehand; whipping the cream into stiff peaks, smushing up the meringue and cutting the strawberries. At this was the Bahlsen Bake Off we added nearly a whole packet of the Bahlsen Leibniz Zoo biscuits which we broke up and mixed with the meringue.

We then set to work, you can see what we did in this short, pretty cute video. What do you think of our budding chef?

Bahlsen Bake off

Didsbury Bake Off

It’s been a funny old day. One minute I’m perusing stalls at the Didsbury Craft Fair, the next I’m being roped into helping to judge the Didsbury Bake Off competition. Nice work if you can get it I’m sure.

I ambled into the judging tent to say hello and lend moral support to local cake-eating expert and foodie blogger Liz. I then ended up joining her and fellow judges – local chef and food hero Robert Owen Brown; Emma Caine from Heatons Cakes; actress Tina O’Brien and local businesswoman, telly star and local gad-about Sian Astley.

There were over 40 entries in total across the various categories and we tried everything from jam and chutney, brownies, biscuits and buns to epic and beautiful show-stoppers. Here are some pictures to give you a flavour of the day.

cupcakes
General cakery. The rose cupcakes (pink) and the parma violet cupcakes were something else!
three tier cake
This was the show-stopping winner of the 12-17 year old category.
cake
This was my favourite entry – a 7 year old made the most amazing chocolate cake and decorated it really, really beautifully.

If you fancy having a go and entering a local bake-off yourself then follow Heatons Cakes on Facebook and keep your eyes peeled, they’re organising one as part of The Heatons Summer Festival on Sunday 22nd June 2014.

Well done Didsbury Bakers!

Mummy makes Cakes with Cake Angels

I’m not known for my baking skills. If a cake needs whipping up in our house, it’s usually my much more talented better half who takes up the whisk. My skills lie equally in cake decorating and cake eating.

A few years ago I went to a cupcake decorating class and learned how to pipe the icing onto cakes large and small. It is remarkably easy and can look quite effective.

I was excited when a huge goodie bag from Cake Angels was sent to me. The bag contained a large tub of chocolate fudge icing, some mini marshmallows, two packs of sugar decorations, a big variety tub of chocolate swirls and sprinkles and a couple of sets of candles.

The boys set to work exercising their baking skills. I stood well back for fear my intervention would render the cakes inedible. Once cooled I set to work with my piping bag and the decorations. I think the results are quite acceptable and the products really easy to use, even for a very amateur baker like me. What do you think?

cake angels

Disclaimer: I was sent the goodie bag free of charge by Cake Angels for testing purposes, the products were easy and enjoyable to use, my reviews are always honest and unbiased.