How to store logs and keep them dry for winter

When we moved into our house in 2011, one of the things I loved the most about it was our open fire. It’s such a cosy feature and we love to sit round it in the winter; we sometimes even toast marshmallows on it. Most of our friends have had log burners or open fires put into their homes, so talking about how to store logs and season them is a surprisingly regular topic of conversation.

Our open fire is a relatively cheap source of heat. We get most of our logs from a gardener friend and all we need to do is season them before they’re put on the fire. Seasoning wood just means you need to dry it out. You don’t need to do anything more exciting to it than chop it up into the size you need, stack it up somewhere to dry out and then leave it for around two years. The amount of time you need to leave it depends on the kind of wood it is, but two years is a decent length of time.

How to store logs and keep them dry for winter

For the last seven years our wood has been stacked up in a small shed which came with the house. About a year ago the roof collapsed and the sides rotted and so it was time for a new place to store logs while they dried. We were keen to get something specifically designed to store logs, something which would allow the air to circulate around the wood and dry it out, whilst looking neat and tidy too.

When you’re buying a log store of your own, it’s important to make sure it has slatted sides and a raised slatted floor to allow the air to flow freely through the log pile. Good dry wood will give you a higher heat output and the wood will leave less tar and residue in your stove or chimney. We get our chimney swept every year and our sweep always compliments us on the lack of tar build up. If you burn wood which isn’t dry enough, the build up of tar could be a fire hazard. The tar could also make your chimney or log burner smoke inside the house, which isn’t great either.
How to store logs and keep them dry for winter

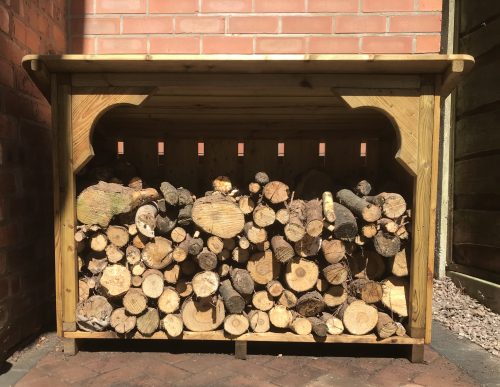
We’ve replaced our rotten old shed with a lovely solidly built log store. It’s from Gardensite and is made in Dorset from Swedish Redwood. The log store is guaranteed against rot for 15 years. We opted for the Melbury log store, it’s a nice classic design which would look unobtrusive in the garden. You can choose to have it delivered ready made, or flat-packed. We chose the flat-pack option and it took less than half an hour to put together.

We’ve put ours in our side yard and it takes up less space than the old shed, but somehow manages to hold more wood. We have given the log store a couple of treatments with creosote; we will make sure to treat it regularly to keep the wood in good condition. I am so pleased with the quality of the log store, we’ve already filled it with logs to dry out for this winter.

How to store logs and keep them dry for winter

Once our wood has been seasoned for at least two years, it is ready to burn. What we do is we have two baskets for wood in the house; one by the fire ready for burning and one in the pantry, so it gets to dry out inside the house a little more before burning. We know this two basket arrangement isn’t really necessary, but it does mean that if it’s raining there is extra wood in the house and no-one needs to get rained on to fill a basket.

How to store logs and keep them dry for winter

  • Stack logs neatly making sure they are raised off the ground a little.
  • Make sure air can flow in and out of your log pile, a log store with slatted sides is ideal for this.
  • Locate your log store in a sheltered spot, somewhere out of the wind and sheltered from the elements a little.
  • Think ahead. You can either buy seasoned or unseasoned wood. If you’re buying unseasoned wood, you will need to store it and season it yourself for a couple of years. Seasoned wood will still need to be stored appropriately to stop it getting too wet again.

If you’ve got a log burner or an open fire, it’s important to put some thought into where and how you will store and season your logs ready for winter. Where do you store your logs and kindling?

How to store logs and keep them dry for winter

Disclosure: We were sent the Melbury log store from Gardensite for inclusion in this blog post. All images and opinions are our own.

Review: Marvel Avengers: Infinity War Nerf Iron Man Assembler Gear

With the recent release of the Marvel Avengers Infinity War film, everyone including my son is once again talking about the Avengers. Like previous Marvel films, they have released lots of products to tie in with the film. My son already has two Marvel Avengers Nerf blasters – the Marvel Avengers Iron Man Slide Armour and the Captain America Civil War Blaster Reveal Shield and we’ve just added the Infinity War Nerf Iron Man Assembler Gear to his collection. But what do we think of this new style Nerf blaster?

Review: Marvel Avengers: Infinity War Nerf Iron Man Assembler Gear

The  Infinity War Nerf Iron Man Assembler Gear is part of a collection of sets which you can collect and combine, then build customisable blasters. There are over 100 combinations of blasters with multiple sets. Nerf blasters to collect in the series are – Star-Lord, Hulk, Captain America, Iron-Man and Spiderman (Iron-Spider) blaster.

Each Assembler Gear set features different blaster combinations and can be combined with other Assembler Gear sets. The Infinity War Nerf Iron Man Assembler Gear set is unmistakably an Iron Man design and includes a gauntlet, two connectors, three darts and a set of instructions.

Because there are three pieces of blaster in the set, you can slot them together in several different combinations. If you want to mix and match your Nerf blaster with another one in the Infinity War range, this is easily done, but you will have to buy more blasters to do this.

Review: Marvel Avengers: Infinity War Nerf Iron Man Assembler Gear

The Nerf blaster comes with 3 darts, which is never really enough. Plus, there’s a slightly different mechanism for loading the dart. The blaster is both single shot and front-loading and you can only prime the blaster after the dart has been inserted. This is really different to the other Nerf blasters we’ve had, and for a little while my son thought he had broken it. You do need to make sure you insert the dart before you prime it and pull the trigger.

It’s solidly built and easy to slot together. I don’t think it’s quite as fun on its own as the other Marvel Nerf blasters we already have. Though I think it might come into its own if you have a few different blasters from the Infinity War range.

The Marvel Avengers: Infinity War Nerf Iron Man Assembler Gear is sutable for ages 5+, costs around £23.99 and is available from good toy shops and online.

Review: Marvel Avengers: Infinity War Nerf Iron Man Assembler Gear

Disclosure: We were sent the Marvel Avengers: Infinity War Nerf Iron Man Assembler Gear for review purposes. All images and opinions are our own.

Recipe: Lemon and Elderflower Gin Meringue Pie

With the wedding of Prince Harry and Meghan Markle just over a week away, I’ve been reading all about their plans for their wedding cake. The cake will be made by pastry chef Claire Ptak, owner of the Violet Bakery in London. Claire has been asked to create a lemon elderflower cake that will incorporate the bright flavours of spring. I love lemon and elderflower, so inspired by those flavours, I’ve made a delicious Lemon and Elderflower Gin Meringue Pie. 

Lemon Meringue Pie is a family favourite. It’s my brother’s favourite pudding, so we ate it quite a lot growing up. I had a lovely bottle of The Lakes Distillery Elderflower Gin Liqueur which I thought might be just the thing to take a very good lemon meringue pie up to the next level, it turns out I was right.

Lemon and Elderflower Gin Meringue Pie

The Lakes Distillery Elderflower Gin Liqueur is made with 14 carefully selected botanicals, all combined with Elderflower extract to make this vibrant and floral Elderflower Gin Liqueur. It’s a lovely summery drink and it the perfect tipple to use in my Lemon and Elderflower Gin Meringue Pie.

For me, the best Lemon Meringue Pies are mostly meringue. My brother fundamentally disagrees with me, he likes the lemony pie base. But the pastry has to be light and crisp. What’s your favourite part of a Lemon Meringue Pie?

Lemon and Elderflower Gin Meringue Pie

Ingredients:

For the pastry –
114g plain flour
56g butter, cubed
A pinch of salt
2-3 tablespoons of cold water
-or- a packet of ready rolled shortcrust pastry
-or- a bought shortcrust pastry case

For the filling –
200g caster sugar
2 level tablespoons of plain flour
3 level tablespoons of cornflour
Pinch of salt
50mls The Lakes Distillery Elderflower Gin Liqueur
350ml water
2 lemons, zested and juiced
30g unsalted butter
4 egg yolks

For the meringue –
4 egg whites
75g caster sugar

Lemon and Elderflower Gin Meringue Pie

Method:
Put the flour and butter in the mixing bowl and rub the flour and butter together with your finger tips until they look like breadcrumbs. Add the water but do not make it wet or sticky. Knead gently together and wrap the dough in clingfilm and chill in fridge for about 20 minutes.

Roll out your pastry and line a greased tart tray with the pastry and trim the edges. Prick the pastry all over and bake blind (with baking beans if you have them) for around 20 minutes at Gas Mark 6/400’F/200’C/180 Fan.

Whilst your pastry case is baking, make the lemon filling. In a saucepan, over a medium-high heat, whisk together 200g caster sugar, flour, cornflour and salt. Stir in the water, Elderflower Gin Liqueur, lemon juice and the lemon zest. Keep whisking until the mixture comes to the boil and starts to thicken.

Once the lemony mixture is pretty thick, whisk in the unsalted butter. Do not be tempted to use margarine instead, it will be horrible.

Put the egg yolks in a small bowl and whisk. Add a spoon of the hot lemony mixture and beat it in, gradually add about 8 more spoons, whisking each time. Tip the egg yolk mixture into the pan with the lemon filling and bring to the boil, whisking all the time. If you just tip the yolks straight into the hot pan they will scramble and it will be grim.

Cook for a few more minutes until the mixture is thick and glossy, remove the lemon filling from the heat and carefully pour it into the pastry case. I like to leave it to cool in the case for a ten minutes or so before I top with the meringue.

Now for the fun part. In a large and squeaky clean glass bowl, whip the egg whites. Gradually add the caster sugar and whip the egg into stiff peaks. If you’re doing this by hand it could take some time, I use an electric whisk and it only takes a few minutes to get to stiff peak perfection.

Lemon and Elderflower Gin Meringue Pie

Dollop the meringue over the pie making sure it covers the pie and seals the edges so no lemon is showing. I like to use a spoon to try to make some peaks on the pie before baking it in the oven for 15 minutes, or until meringue is golden brown.

You can either eat it hot from the oven, or chilled from the fridge; either is good. No, either is bloody lovely.

Tip: If you’ve got any of the lemon filling left over, it’s excellent spooned over vanilla ice cream.

If you enjoyed this recipe, you might also like to try this Cornflake Pie or these love heart jam tarts.

Recipe: Lemon and Elderflower Gin Meringue Pie

Disclosure: I was sent a bottle of The Lakes Distillery Elderflower Gin Liqueur to use in a recipe. 

Crafts: How to make an Egg Box Dragon

Egg boxes have long been used for all kinds of kids crafts. They lend themselves to so many things, so this month we’ve turned one into an egg box dragon.

Dragons are our favourite mythical creatures. In our world they’re mostly friendly and none of them need slaying. Of course dragons have been figures in fiction for hundreds of years but only recently they’ve developed a friendlier reputation. We’re very fond of our bright green dragon, we’ve called him Dave and he’s a bit sparkly.

Crafts: How to make an Egg box Dragon

Our egg box dragon took a couple of craft sessions to make. We painted him first and left him to dry overnight. The next day we decorated him and made him look all fierce and fancy.

How to make an egg box dragon

You will need:
One egg box
Green, red or orange paint
String or wool
Googly eyes
Sequins
Pipecleaners
Blu Tack Glitter Pens or glitter
Bostik Glu Dots
Red and yellow card
Black felt tip

Crafts: How to make an Egg box Dragon

How to make your egg box dragon:
Using whichever coloured paint you choose, paint your egg box, making sure it’s well covered with paint. Put the box to one side to dry, preferably overnight.

Once dry, cut the egg box up. we cut our six egg box into thirds, so each section had two egg spaces. You can do them individually if you prefer. Using a skewer carefully poke through holes where you want to thread your sting through and tie your dragon parts together. We also poked some holes through to thread pipecleaner horns and a ridge on it’s back. A grown up will probably need to help with the tricky cutting, poking and threading.

Crafts: How to make an Egg box Dragon

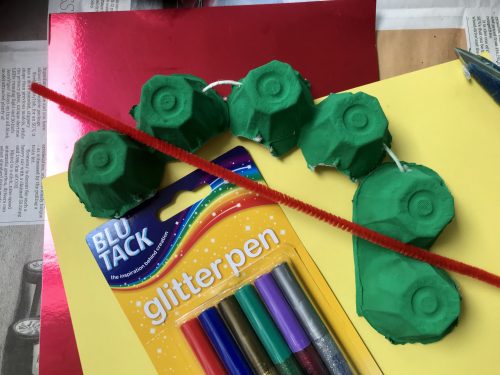
Thread the string though the holes and tie the ends together. Thread through your pipecleaner horns and using the glu dots, stick on the dragon’s eyes. Then you can go crazy decorating it. We added sparkles and sequins along its body and dabs of glitter from the glitter pens. I can’t sing the praises of glitter pens enough, all the sparkle of glitter but without the mess!

Crafts: How to make an Egg box Dragon

Draw on some details with your black felt tip, I added a snout detail on his face and leave the glitter to dry. While your glitter is drying, cut out some red and yellow flames and stick them to your egg box so it looks like your dragon is breathing fire. Your dragon is now ready for some dragon action.

If you enjoyed this blog post, you might also like to try some jelly bean architecture.

Review: Totally Amazing, Fact-Packed, Fold-Out Atlas of the World

My son loves maps, he can study them for hours. He has maps on his bedroom wall and he loves an atlas. His love of geography and geology come from his Dad’s side of the family and it’s something I am very happy to encourage. He has a couple of atlases already; but I knew he would love The Totally Amazing, Fact-Packed, Fold-Out Atlas of the World by Jen Green.

The Totally Amazing, Fact-Packed, Fold-Out Atlas of the World is for children aged 7+. It includes three big gatefold maps showing the major continents in detail, with facts about people, places, cultures, cities, landmarks and wildlife. It’s fact-packed and features lots of landmarks. We think it’s a really good atlas for provoking interesting conversations about the world, its people and the environment.

Review: Totally Amazing, Fact-Packed, Fold-Out Atlas of the World

The atlas is illustrated by Christiane Engel and the illustrations are colourful and informative. There is lots of detail on the maps, with enough to pique the interest of a child, but not too much that they get bogged down in it. There is even a flags of the world section at the back.

Since giving my son The Totally Amazing, Fact-Packed, Fold-Out Atlas of the World he has been engrossed in it. One of his favourite things to do is to spend 20 minutes or so each night looking at the atlas while he winds down for sleep. Sometimes we will look at it together and he is brimming with questions. I love this part of our day; exploring a map together and talking about all the things to see and do in that country or continent. It’s also very handy for planning our holiday later this year.

Review: Totally Amazing, Fact-Packed, Fold-Out Atlas of the World

The atlas is divided by continent. There are maps that show biomes and terrains as well as wildlife; and other maps that show people, places and political boundaries. Discover more about our diverse and wonderful planet and find out how every part of our planet is important and connected.

If you’ve got a child who like mine loves maps, or if you want to explore more about geography and geology at home, then The Totally Amazing, Fact-Packed, Fold-Out Atlas of the World would be a brilliant resource to start exploring with. Up to date and perfectly pitched at 7+ year olds; I know we will be enjoying this book for a long time to come.

The Totally Amazing, Fact-Packed, Fold-Out Atlas of the World is available in paperback from all good bookshops and online for £9.99.

Disclosure: We were sent The Totally Amazing, Fact-Packed, Fold-Out Atlas of the World for review purposes. All images and opinions are our own.

Blogger Board Game Club: My First Bananagrams

I am part of the Asmodee UK Blogger Board Game Club run by Playtime PR. Each month 50 bloggers are sent a board game to play and put to the test. This month we were sent the My First Bananagrams game to play.

My First Bananagrams is suitable for children aged 4+ and for 1-4 players. The banana shaped bag contains 80 single tiles, 13 combo-letter tiles and a set of instructions. The game is really simple to play. You tip the tiles out and turn them face down, each player picks 15 tiles at random and when someone shouts “split!” everyone turns their tiles over.

Blogger Board Game Club: My First Bananagrams

Each player individually races to arrange their letters in their own word grid. At any time during the game you can say “Swap” and put one tile back face down and take a new one. You can rearrange your grid at any time and as many times as you like, there are no limits to the number of times you can swap tiles. The first person to use all of their tiles, or failing that, the most tiles wins.

Each game is quite short, probably between 10 – 15 minutes and it’s probably about the right level for my son. He can find words without too much of a struggle, so it’s still lots of fun and does stretch him a little bit. I think it’s a nice fun game to help build confidence around finding words from a collection of letters.

It’s a lot of fun to play and really great for helping him to think more creatively about words. He started off with three letter words, but was soon confidently finding five letter words. It’s a bit like Scrabble, but with fewer rules and therefore easier to play.

Blogger Board Game Club: My First Bananagrams

My First Bananagrams is a real winner for us. It’s nice and compact, so you can throw it in your bag and play it anywhere with a flat surface. This will be hugely popular on holiday, I know it!

My First Bananagrams costs around £15.99 and is widely available in toy shops and online.

We were sent the My First Bananagrams game for review for the Asmodee UK Blogger Board Game Club. All images and opinions are our own.
Find other board game and toy reviews here.

Preview: Timber Festival – a brand new family festival!

This July sees the first ever Timber Festival which is located in the stunning surroundings of the National Forest. Timber is a family festival which is taking place on the 6th – 8th July in Feanedock, in the heart of the National Forest. Brought to you by Just So Festival organisers, Wild Rumpus, the Timber Festival is set to be a thought-provoking three days in the forest.

Preview: Timber Festival - a brand new family festival!

Timber will be three days of music, arts, creativity and philosophy in the woods. With lots of different areas in the woods where festival-goers will be able to learn, relax, experience or just be. There will be live music, workshops, discussions, a chance to really chill out, great food, light and fire installations as well as storytelling and a lantern procession. Timber has seven themes to explore, with lots of different things happening in each one. The themes are; Gather, Provocation, Sound, Light, Breath, Feast and Time.

The Breath theme includes family yoga, Tai Chi, Indian head massage and forest bathing. I am in dire need of some serious chill out time, so I think I know where I’ll be spending the weekend!

Preview: Timber Festival - a brand new family festival!

You can camp in the forest, learn more about the woods, reconnect with nature and have a really special weekend with the family. We are Just So Festival veterans and our favourite part of Just So is spending time in the Spellbound Forest; so I have high hopes that Timber Festival will have all of the wonder of the Spellbound Forest and more!

With den building, crafts, woodland workshops, campfire songs, tree climbing; as well as famous faces such as Stuart Maconie, Geoff Bird and Robert Macfarlane; Timber looks set to be a fabulously thought-provoking and fun weekend for the whole family.

Come along to the Timber Festival this July where the peaceful tonic of the wildness rules supreme!

Preview: Timber Festival - a brand new family festival!

Timber Festival is on the 6th – 8th of July 2018. Tickets for Timber Festival are now available at £130 /£45 for a weekend ticket; £40 /£15 for day visitors, under 3’s free. People who live within the National Forest get an additional 10% off their ticket price.
For more information about Timber Festival, visit their website.

Recipe: Butterfinger Mini Cups Rocky Road

I am and always have been very pro-peanut butter, my husband on the other hand is fiercely against it. This is great news for me, it means if I buy anything peanut buttery it won’t mysteriously vanish overnight. On a recent visit to my local Co-op I spotted something peanut butter fans will probably have been dreaming about for a while, Butterfinger Mini Cups. They were on offer for £1 a bag, so I bought two bags – one to scoff and one to bake with.

Firstly, each bag contains 85g of Butterfinger Mini Cups. Apparently they are “sharing bags”, no one is going to share a bag of these and they’re so addictive the bags don’t even have that resealable thing most sharing bags have. No one is saving some for later. They’re gone before you know it. This is a warning, especially if you’re a bit on the greedy side like me.

Recipe: Butterfinger Mini Cups Rocky Road

If you’ve never tried Butterfinger Mini Cups before, they’re a bit like Reece’s peanut butter cups, but smaller and with tiny crunchy pieces inside. I first had a Butterfinger bar a couple of years ago from a shop which sold American sweets and it wasn’t love at first bite. For some reason the Butterfinger Mini Cups really hit the spot for me, they really are mini, so I thought they would be great in rocky road, and they were.

Rocky road is one of those quick and easy things you can quickly throw together, you don’t need much skill and it’s a good thing to “bake” with children, although there’s no actual baking involved. Rocky road is what we used to call chocolate fridge cake when I was a child, except chocolate fridge cake doesn’t have marshmallows in it, you can leave them out if you’re vegetarian and just add some extra dried fruit or biscuits.

Recipe: Butterfinger Mini Cups Rocky Road

I’ve used digestive biscuits, but you could equally use rich tea biscuits, sometimes I use malted milk biscuits because I love them. Rocky road is a pretty forgiving recipe, you can add whatever extras you want. What would you add?

Butterfinger Mini Cups Rocky Road

Ingredients:
200g Milk Chocolate, broken into small pieces
2 Tablespoons of golden syrup
135g Unsalted butter
200g digestive biscuits
100g Mini marshmallows
50g Raisins
100g Butterfinger Mini Cups
50g white chocolate to decorate (optional)

Recipe: Butterfinger Mini Cups Rocky Road

Method:
Line a high sided baking tray with baking parchment. I used a small roasting tin because it seemed up to the job.

Put the milk chocolate, golden syrup and butter in a glass bowl. Using a bain marie (put an inch or two of hot water in the pan and place the glass bowl over the top making sure the water doesn’t touch the bowl) over a gentle heat. Stir the chocolate until everything has melted together.

While the chocolate mixture is slowly melting, put the biscuits into a plastic bag and bash them with a rolling pin until they’re broken up, but not crumbs. Ideally you want a mixture of chunky pieces and smaller, crumbly bits. Once bashed, tip them into a mixing bowl. Add the marshmallows and raisins.

Take the butterfingers and put a few to one side for decoration. Take the rest and chop them in half, add them to the biscuit mix.

Once the chocolate has melted, take it off the heat and carefully tip the biscuity mix into the chocolate. Stir it well and make sure everything is coated. Then tip it onto your baking tray spread the mixture out. It needs to be about 2cm deep as a minimum for maximum rocky road excellentness.

Take the Butterfinger Mini Cups you’d put to one side and poke them into the mixture so they’re visible, but the melted chocolate will anchor them in place. If you’re feeling fancy, you can melt the white chocolate (again over a bain marie) and drizzle over. Leave to set before slicing.

Recipe: Butterfinger Mini Cups Rocky Road

You can either put the tray in the fridge or somewhere to cool for a few hours. Once set, slice it into generous wedges and devour. If you can restrain yourself, it will keep in an airtight tin for a few days or so.

If you enjoyed this recipe, you might also like this recipe for sparkly chocolate cups.

Recipe: Butterfinger Mini Cups Rocky Road

Crafts: How to make a Clay Scrabble Tile Nameplate

I’ve been curious about clay crafts for a little while. A few months ago I bought myself a cheap packet to play about with and it’s sat in my craft cupboard ever since. I didn’t really know what to do with it, but with a poorly child to entertain, I thought we’d have a play and see what we came up with. We ended up making a rather lovely clay Scrabble tile nameplate.

I figured that the boy loves playdough, so I thought the clay might have similar appeal, thankfully I was right.

Crafts: How to make a Clay Scrabble Tile Nameplate

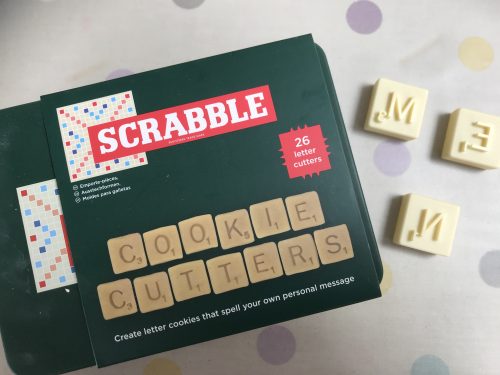
I got out my box of cookie cutter shapes and a rolling pin and we set to work. In my cookie cutter collection I found a box of scrabble tile cookie cutters, we thought they’d make really cool name plates and we think they do. Here’s how we did it.

How to make a Clay Scrabble Tile Nameplate

You will need:
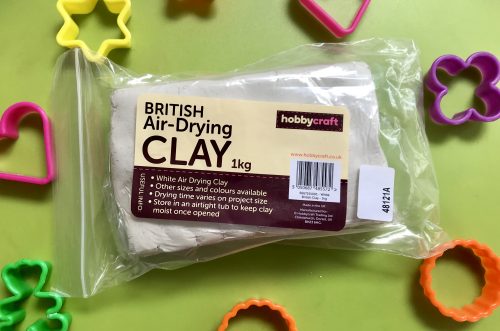
A packet of air dry clay
A rolling pin
Some Scrabble Tile Cookie Cutters
A wooden toothpick
A length of jewellery wire
Some coloured paint, we used black
A fine paintbrush

Crafts: How to make a Clay Scrabble Tile Nameplate

How to make a Clay Scrabble Tile Nameplate:
Take a piece of clay and work it in your hands for a few minutes until it is pliable. Roll it out on a surface you don’t mind getting clay on, we used a plastic chopping board that could be put in the dishwasher afterwards.

Crafts: How to make a Clay Scrabble Tile Nameplate

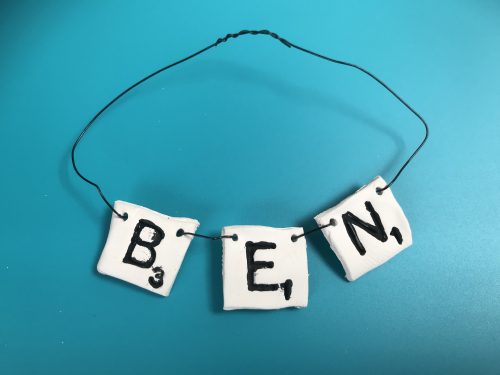
Taking your Scrabble tile cookie cutters, cut out the tile pieces you need. We were making a nameplate with the name BEN, so we cut out those letters with a few spares too. I made some holes with a toothpick so I could thread my wire through later. We left them to dry for 24 hours, though longer might be needed, depending on your clay.

Once the pieces were dry, I carefully threaded some jewellery wire through the holes and twisted the ends together. Then we took a fine paintbrush and a little bit of black paint and painted in the letters and left the paint to dry.

Crafts: How to make a Clay Scrabble Tile Nameplate

We were pretty pleased with our first clay craft, it’s a little bit rustic, but we think that adds to its charm. We feel quite inspired to try to make a few other things out of clay, so watch this space!

Crafts: How to make a Clay Scrabble Tile Nameplate

This post contains an affiliate link.

Children’s Books: Five Wonderful Books about Weddings

Weddings are a time for celebration and an excuse for family and friends to get together and have a party. Weddings are the joining of two families and two hearts forever. This month we are celebrating the marriage of Prince Harry to Meghan Markle and as ever, we let current affairs guide us in our reading. We’ve picked out five wonderful books about weddings to help us find out more about this important event.

Five Wonderful Books about Weddings

The Scarecrows’ Wedding by Julia Donaldson and Axel Scheffler is a fabulous love story, full of drama, humour and originality. It tells the story of two scarecrows as they plan the best wedding ever, the best wedding yet, the wedding that no one will ever forget. But things don’t quite go to plan and the scarecrows’ special day is almost ruined by a wicked scarecrow!

Children's Books: Five Wonderful Books about Weddings

Celebrating Weddings Around the World by Anita Ganeri. Learn all about wedding celebrations from around the world. With weddings from the world’s main religions as well as some little-known ceremonies and festivals, this book takes an intriguing and colourful look at how getting married and weddings are celebrated in many different places. It’s a wonderful book for learning more about cultures and customs outside of your own.

Katie Morag and the Wedding by Mairi Hedderwick. Another one of the popular Katie Morag series of stories set on the Scottish Island of Struay. Romance has been brewing on the island between Neilly Beag and Granma Mainland. Everyone is thrilled when they announce that they are to be married. Everyone, that is, except Grannie Island. Will there be a happy ever after?

My Uncle’s Wedding by Eric Ross is the story of a same-sex wedding between Andy’s Uncle Mike and his partner, Steve. Follow Andy on this enjoyable journey as he talks about his uncle’s wedding, how it affects him, and the things he gets to do in preparation for the ceremony.

No wedding books round-up would be complete about the classic story of Cinderella by Max Eilenberg. There are so many Cinderella stories and this classic has been told and retold a thousand times. Enjoy this wonderful tale of Cinderella; thrown into drudgery by her stepmother and two nasty sisters, she makes her way to the ball and a dreamy prince captures Cinderella’s heart on the dance floor. Re-told with a humour, this Cinderella gets her happy ending and her handsome prince.

What are your favourite books about weddings to read to your children? Is there always a happy ending?

If you enjoyed this, you might also enjoy our pick of five lovely books about love.

Children's Books: Five Wonderful Books about Weddings

This post contains Amazon affiliate links.