Christmas Crafts: Make your own Glitter Tape Baubles

Christmas crafts are my favourite kinds of crafts. There’s something really lovely about sitting down with my son and making decorations for the tree, or little gifts for people. I’m always on the look out for new products to craft with and when I saw the Sellotape Glitter Tape I knew straight away they would be perfect to make some Glitter Tape baubles with.

Sellotape are currently celebrating their 80th anniversary and they very kindly sent me some craft goodies to have a little play with. I love this vintage style Limited Edition Sellotape tin too. Perfect for holding some little crafty bits and bobs once I’ve used all the tape!

Sellotape began life in 1937 and has been used in a wide variety of applications since then. It became a regular at the crafting table in the 1970s when it was used fairly extensively on Blue Peter. This iconic sticky tape is a year round essential, not only for wrapping presents, but for all manner of crafting and DIY jobs around the home.

Christmas Crafts: Make your own Glitter Tape Baubles

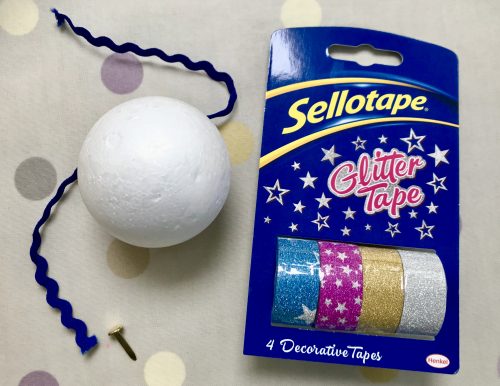
In my hamper of Sellotape goodies was an assorted pack of glitter tape. I really liked the different designs and it seemed a waste of something so glamorous to use the tape for just wrapping presents.

The glitter tape tears really easily, so you don’t need scissors or a dispenser to use it. It was beautiful and shimmery, so I thought I’d see how it worked on a bauble.

The tape sticks really well to the styrofoam ball, but slightly raises at the edges, which creates an effect I actually really quite like. But if the cracked ice on a frozen lake look isn’t your thing, then you could paint it all over with PVA glue to seal it all down.
Christmas Crafts: Make your own Glitter Tape Baubles

What I especially liked about this glitter tape was that the glitter stays on the tape. Not a speck of the sparkly stuff came off on my fingers, clothes or ended up shimmering on my face for three days. This sellotape glitter tape is really good stuff!

Make your own Glitter Tape Baubles

You will need:
A roll of sparkly glitter tape
One styrofoam ball
Ribbon
Brass paper fastener

How to make your Glitter Tape Baubles
The Sellotape glitter tape is easy to tear by hand. Tear small pieces of tape and stick in random places all over the styrofoam ball. Make sure the ball is completely covered in the tape; cup the ball in your hand and squeeze it to make sure the tape is in place.

Using the brass paper fastener; pierce the ribbon and create a hanging loop with your ribbon and press the fastener into the top of our bauble. Hang on your Christmas tree and enjoy.

Remember the tape does curl a little on the edges, but it doesn’t come off. I’ve had my bauble hung up for a couple of days and it looks the same.

Christmas Crafts: Make your own Glitter Tape Baubles

I really like my Glitter Tape Baubles, they’re a bit different and look quite stunning when the light catches them. I enjoyed working with the glitter tape, which does not shed and tears really easily. Watch this space for more Christmas craft ideas!

Christmas Crafts: Make your own Glitter Tape Baubles

We were sent a small hamper from Sellotape in return for this blog post. All images and opinions are our own.

Craft Kit Review: Out Of The Box Pebble Painting Kit

We were sent the Out Of The Box Pebble Painting Kit for review purposes. All images and opinions are our own.

It’s weird how some craft trends seem to come out of nowhere. Over the summer you couldn’t move for people painting pebbles, so I knew I needed to give it a try for myself. Despite pebble painting being a pretty simple craft, having a craft kit to get you started is always a good idea.

We tried the Out Of The Box Pebble Painting Kit (rrp £8). The kit is suitable for ages 3+ and contains everything you need to transform ordinary pebbles into beautiful characters or creatures.

Craft Kit Review: Out Of The Box Pebble Painting Kit

The Out Of The Box Pebble Painting Kit contains –

  • 5 x pebbles
  • Paint
  • Googly eyes
  • Felt
  • Glue
  • Gems
  • Pipe cleaners

The kit is well thought out with lots of decorations for your pebbles. It’s worth noting that once you’ve painted your pebbles you need to let them dry properly before you can decorate them. We painted them one day, left them to dry and then decorated them the next day.

You can paint and decorate them however you want. I wanted to copy a couple of the examples on the box; specifically the whale and the ladybird. My son wanted to do his own thing and make up his own magical creatures.

Craft Kit Review: Out Of The Box Pebble Painting Kit

These days I’m a complete glu dot convert because they are so quick and easy to use and you don’t have to wait for the glue to dry. So I put aside the glue which came with the kit in favour of some glu dots. This meant we could instantly stick on eyes, gems, pipe cleaners and felt pieces.

Pebble painting is a lovely, easy craft for people of all ages. It’s great for encouraging creativity, developing their imagination and developing hand – eye co-ordination. My son really liked painting and decorating the pebbles and was really enthusiastic about the whole process. I really enjoyed it too. Pebble painting is really good fun. We just need some more pebbles now!

The Out Of The Box Pebble Painting Kit is a great starter kit for this craft. My six year old approved of it and as it’s currently available for just £5 I think that’s excellent value for money and would make a great Christmas present for a crafty kid (or adult like me).

Craft Kit Review: Out Of The Box Pebble Painting Kit

Crafts: Spooky Halloween Pom Pom Spiders

Pom poms are a pretty easy thing to make and with a little imagination you can turn them into all kinds of different creatures and characters. This month I was tasked by Craft Merrily to create a Halloween craft. I’d been wanting to master my new pom pom maker, so I decided to make some pom pom spiders. They’re easier than you think and an easy craft to do with children.

Crafts: Spooky Halloween Pom Pom Spiders

We’ve all made pom poms before using two rings of cardboard you laboriously wind wool around, then cut, tie and you’re done. I’ve bought a set of pom pom makers on the recommendation of my friend Lucy – an expert pom pom maker. She is right, they really are a pom pom game changer!

Lucy showed me how to use the pom pom maker. You wind your wool around two semi-circles of the maker, then wind it around the other two semi-circles, clip them together, cut them and the tie them around the middle and you’re done. Easy. Not just easy, but quick and easy.

Crafts: Spooky Halloween Pom Pom Spiders

You can make your pom pom spiders as big or as small as you want (if you’re not sure how to make pom poms, there’s a video you can watch here). Use whatever colours you think would work best.

How to make Pom Pom Spiders

You will need –
Pom pom makers (or make your own cardboard rings)
A ball of wool
Scissors
Pipecleaner
Googly eyes
Bostik Glu Dots

How to make your Pom Pom Spiders –
Wind your wool around your pom pom maker, make sure you are generous with the winding. The more wool you use, the fuller your pom pom will be.

Before you cut and tie your pom pom, cut your spider legs out of the pipecleaners. I used four identical lengths of pipecleaner (which make 8 spiders legs). Twist the pipecleaners together in the middle and put them through the centre of your pom pom.

Cut the wool around your ring and tie you pom pom together tightly with a long length of wool. You should have a pom pom now, it may need trimming up slightly so it is even all over.

Using the Bostik Glu Dots and the googly eyes, stick eyes onto your pom pom spider. Bend its legs to make spiders legs. You pom pom spider is now complete. You can leave the long piece of wool on him or cut it off if you prefer.

Your pom pom spiders are ready for Halloween. Hang them around the house, make a pom pom spider garland out of them or decorate your Halloween party table with them. How would you use your pom pom spiders?

Crafts: Spooky Halloween Pom Pom Spiders

I am a Bostik craft blogger and I was sent the materials to create this craft from Craft Merrily. 

Check out my other craft tutorials here!

Crafts: Easy Halloween Monster crafts for kids

It may only be the start of September, but I’m sure Halloween preparations get earlier every year! My boy is already making noises about going trick or treating, it’s too soon for me, but it’s never too soon to get crafting. This month I was tasked by Craft Merrily to create some Monster Crafts. We’ve done two monster crafts this month, one ideal for a playdate or party and the other is just a simple craft you can do with as many children as you want.

Monster Crafts – Shower Puff Creatures

You will need:
One shower puff per person
Bostik Glu Dots
Pipe cleaners
Googly eyes
Cardboard
Scissors
Felt (you can use card if you don’t have any felt)

Crafts: Easy Halloween Monster crafts for kids

How to make your shower puff monster:
This is pretty simple. Using your pipe cleaners, twist them into a shape you like and wrap them tightly around the monster’s head. I had them as weird ears, but you could use lots and do crazy hair. 

Cut out some circles (or other shapes if you prefer) and stick your googly eyes on to them. I drew lines around the eyes to make my monster look more monstrous. Using the glu dots, stick your monster eyes wherever you think your monster might have eyes. 

Cut a mouth shape out of the felt (or cardboard), make a tongue or creepy teeth if you prefer and stick them in the mouth. I used a pen to draw some detail on the mouth and tongue. Once you’re happy with you mouth stick it in place using the glu dots. You are done! Find a nice place to hang your monstrous creation.

Crafts: Easy Halloween Monster crafts for kids

Monster Crafts – Create your own monster!

You will need:
Cardboard
Bostik Glu Dots
Felt tips or crayons
Assorted craft things to stick on – feathers, glitter, stickers, eyes etc

Crafts: Easy Halloween Monster crafts for kids

I have drawn up some of my own monster templates which you are more than welcome to download here. I printed them out on card. If you don’t want to use my drawings (I’m no artist) then you can draw your own on paper or cardboard.

Colour, stick, create, go wild, let you imagination know no limits and conjure up the monster of your dreams, or nightmares! As you can see the boys had lots of fun creating and decorating their monstrous creatures.

Crafts: Easy Halloween Monster crafts for kids

The boys really liked this little crafting session, perfection was not required and they loved using their imaginations. They gave their monsters very cute names too, like Ghosty and Mr Colourful. I really like this one, this is Ghosty and he is multicoloured with green accessories, oh and you can walk him with your fingers too.

This is the kind of craft activity that they can do with fairly minimal supervision and you can use their creations to decorate the house come Halloween too.

Crafts: Easy Halloween Monster crafts for kids

Note: I am a Bostik craft blogger and I was sent the materials to create this craft from Craft Merrily. 

Crafts: Easy Halloween Monster crafts for kids

Check out my other craft tutorials here!
Crafts: Make your own Button Craft Bag

Button craft is really popular at the moment. My craft group did some button art earlier in the year, although I missed the session I was keen to try it for myself. The world is your oyster when it comes to buttons, glue them, stick them, sew them, the only limit is your imagination. This month Craft Merrily have challenged the Bostik Bloggers to create a back to school themed craft, a tricky topic I think, but a decent challenge.

When I opened by box of craft goodies I found a bag, big enough to use as a book bag (or pop my iPad in). I also noticed a handful of buttons in the bottom of the box, not enough to do anything with but enough to give me ideas. I was a little bit inspired by a wedding dress we were sewing bright buttons onto at The Lost Carnival at Dunham Massey over the weekend. So off I went, hunting for my old button box. I think most households have one of these, an old sweetie tin filled with an assortment of buttons of all shapes, sizes and colours.

Crafts: Make your own Button Craft Bag

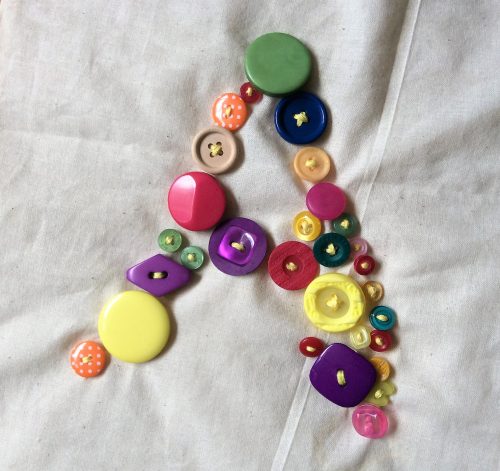
I had enough buttons to monogram the bag with the letter A. Choosing the brightest and the best, I set to work with my rudimentary sewing skills and an hour later I had something which I was fairly pleased with. It’s a simple enough craft and one I’d happily do with a child who was past the beginners sewing stage. 

HOW TO MAKE YOUR Button Craft bag

You will need:
1 fabric bag
A selection on buttons in different shapes, sizes & colours
A needle
Thread (I used cotton embroidery thread)
Scissors

Crafts: Make your own Button Craft Bag

How to make your Button Craft bag:

Have a look at your bag and visualise the letter or image you want to sew on it in buttons. You might want to softly sketch your design onto the bag with a pencil. This will help you to follow it when you’re sewing.

When you’re happy with our design, thread your needle with the thread and start sewing the buttons onto your design. Think carefully about where to sew your buttons. Make sure you’ve got a good spread of colours and sizes across your design. 

Keep sewing until you’ve finished your design. Make sure your buttons are secure. My design took me around an hour and I’m pretty average at sewing. 

Crafts: Make your own Button Craft Bag

I’m quite pleased with how my first foray into button craft has turned out. It has inspired me to raid the button box again and see what else I could rustle up.

Have you tried button craft? What would you make?

Crafts: Make your own Button Craft Bag

Note: I am a Bostik craft blogger and I was sent the materials to create this craft from Craft Merrily. 

Check out my other craft tutorials here!


Easy Crafts: Make your own Manchester Bee

This month we’ve been busy getting ready for Didsbury in Bloom. We’ve been sprucing up our front garden and helping to build a bug hotel on our road. This year Didsbury in Bloom celebrates our connection to the Royal Society for the Protection of Birds (RSPB) which was founded in the village and we’ve been learning about how we can help encourage birds and bugs into our gardens. 

We have plans to build our own bug hotel and we are collecting the materials we will need to put it together. We’ve also been searching in our garden to see what bugs we could find, with all the rain lately we’ve seen a lot of slugs and snails!

Rather fittingly, this month Craft Merrily have challenged the Bostik Bloggers to create a creepy crawlies craft. I wanted to do something simple, and knowing I had some kids to entertain on a play date, I sketched up these templates, one of a Manchester Bee and the other, a butterfly. I then printed them out and set the boys to work.Easy Crafts: Decorating Butterflies & Bees

To make and decorate your butterfly and Manchester Bee  you will need –

Templates printed out – they’re sturdier if printed on card
Colouring pens
Glitter or other embellishments
Bostik fine & wide glu pen
String or ribbon
A hole punch
Scissors

Download these templates for FREE here.

Easy Crafts: Make your own Manchester Bee decorations

Method –

This is a ridiculously easy craft. Just set the kids to work decorating the butterflies and bees however they like given the colouring in materials you have, then get the kids to embellish them however they like.

Easy Crafts: Make your own Manchester Bee decorations

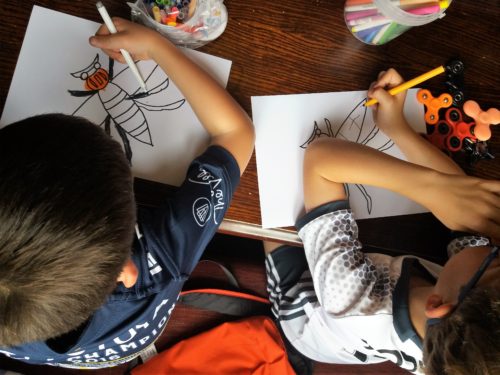
I encouraged the boys to colour them in first, then to scatter glitter and stick on the paper flowers however they liked best. They came up with some lovely creative ideas, but my favourite was the yellow and black Manchester Bee.

Once they’re decorated how you want them to be, I’d leave them to dry for a few hours before cutting them out, or getting a grown up to cut them out for you.

Easy Crafts: Make your own Manchester Bee decorations

To turn them into tree decorations; using the hole punch, make a hole in one of the wings and thread through some string, tying a knot in the string to form a  loop. I think these would make really great bunting too, just punch two holes in and thread the string though each hole to hang it on the bunting.

Easy Crafts: Make your own Manchester Bee decorations

As you can see, they look really effective and several of the neighbours have commented how lovely they are. They’re not rain-proof, but they are quite fun to hang out on sunny days, especially when the Didsbury in Bloom judges are walking past.

Easy Crafts: Make your own Manchester Bee decorations

What other crafts can you think of to make with these Manchester Bee and butterfly templates?

Easy Crafts: Make your own Manchester Bee decorations

Note: I am a Bostik craft blogger and I was sent the materials to create this craft from Craft Merrily. 

Check out my other craft tutorials here!

Craft Tutorial: Make your own Uranus (other planets are available)

It’s rare a craft tutorial comes with a soundtrack, but I’ve had this earworm the whole time I’ve been making this planet, so it’s only fair to pass it on. My son has a space themed bedroom and I fancied that I could add to its charm by making Uranus and hanging it from his ceiling, ready to be admired by his fellow 6 year olds. 

We decided to create a planet and I wanted to make one with rings because they’re prettier right? I didn’t want to do Saturn as that was too obvious, so my space savvy friend suggested Uranus as it does have rings.

Craft Tutorial: Recreating Uranus (other planets are available)
For more information about Uranus, visit https://www.nasa.gov/uranus

How to make your own Uranus

You will need:
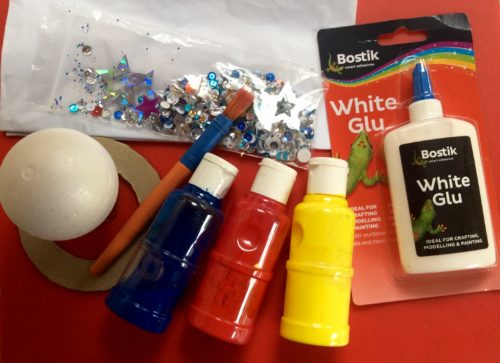
1 polystyrene ball
Half a sheet of tissue paper
A “ring” of cardboard cut to fit the ball
Glue
Blue and silver paint
PVA glue
A length of fishing line

Craft Tutorial: Recreating Uranus (other planets are available)

How to make Uranus:

Using an egg cup to balance your polystyrene ball on, carefully tear up the tissue paper into pieces a few centimetres square and stick onto the ball using the glue. Once covered, leave it to dry for an hour or so.

Once dry, carefully put the cardboard ring around your planet. The ring should be cut to fit the ball snuggly.

When the ring is in place, paint over your planet and its ring in blue (or whichever colour you choose, your planet, your rules). You might need to give it a few coats, but remember to leave it to try in between. If you’re in a hurry, a hairdryer can be used to gently speed up the drying process.

Craft Tutorial: Recreating Uranus (other planets are available)

Once the blue base coat is dry and you are happy it doesn’t need more coats, paint over with silver paint. I wanted the silver paint to seem a bit like gases, so I dabbed it all over the planet and the rings so you could still see the blue underneath. Leave this to dry (again, carefully use a hairdryer if you’re in a rush).

Craft Tutorial: Recreating Uranus (other planets are available)

When Uranus is dry, take a length of clear fishing line and cut it to the required length. Tie a knot in the middle and thread the pin through the knot and tie it tight. Stick the pin in Uranus, thinking about how you want the planet to hang. I thought it would look pretty at a slightly jaunty angle, so I went with that.

I was going to embellish my planet with sequins and shiny stars, but it was so pretty as it was that I thought I would leave it as it is. If you decide to make your own Uranus, or another planet of your choosing; then you can paint it or embellish it however you’d like.

I’m really pleased with how my Uranus has turned out. I know my son will enjoy adding it to his bedroom planetarium.

Craft Tutorial: Make your own Uranus

Check out my other craft tutorials here!

Craft Tutorial: Kusudama origami flowers

I’ve been part of a local craft club for a little over a year now. We meet once a month for an evening of crafts and each month we try something different. At the first craft club meeting I went to we learned how to make kusudama origami flowers. They are pretty simple to make and once you get into the rhythm, making them becomes addictive. 

Craft Tutorial: Make your own kusudama origami flowers

All you need are some squares of paper and some Bostik glue dots. I added a button and a pipe-cleaner stem, but a lot of kusudama origami flowers don’t have these. It’s easier to make them with thinner paper rather than card. They’d work well with nice wrapping paper cut into squares for example.

Craft Tutorial: Make your own kusudama origami flowers

You can use squares of paper of any size depending on the size of flower you want to make. You will need to make the petal segments in odd numbers. You’ll need to make a minimum of 5 segments, but 7 is a good number to make. I’ve seen them with 15 petal segments and more. Once you’ve got the knack you can really get creative with your kusudama origami flowers.

There are lots of design ideas on Pinterest if you want to take a look. My friend made 20 kusudama origami flowers and attached them to a string of fairy lights with the light shining through the centre of the flower. I have a bouquet of them in a small vase on my dining table. 

It’s much easier to show you how to fold the petal segments and put the flower together than it is to try and explain. I’ve made a video tutorial to walk you through it. 

Making kusudama origami flowers is a lovely little craft to know how to make. It’s a good entry level origami craft and one which you can do with the kids too. A bouquet of colourful kusudama origami flowers would make a lovely gift for flower loving friends, relatives or teachers. Say it with paper flowers?

Craft Tutorial: Make your own kusudama origami flowers

Note: I am a Bostik craft blogger and I was sent the materials to create this craft from Craft Merrily. 

Check out my other craft tutorials here!

Craft Tutorial: Pom Pom Bird in a brown paper nest

This month I’ve been tinkering about with Easter crafts. I loved making my Easter Bunny Bunting, but after consulting with my son, he suggested making a birds nest with some birds in it. He loves topping up the bird feeders and watching the birds in the garden, so making a little next for him to enjoy indoors seemed a nice idea.

I explored a few different options for making the nest, but eventually decided on making one out of brown paper. Like all of my crafts, this is really easy and I think it looks pretty cute. My son is pretty happy with the result too.

Craft Tutorial: Pom Pom Bird in a brown paper nest

Making a brown paper nest

You will need:
An empty takeaway soup container or similar
Brown paper
A stapler
Bostik Glu Dots
ScissorsCraft Tutorial: Pom Pom Bird in a brown paper nest

Method:
Take your takeaway soup container and cut it down to a height you like, mine was about 4cm deep.

Take the brown paper (my brown paper was leftover packing from a parcel I’d received) and fold it roughly over the container and staple into place. It doesn’t matter if it’s not neat as you want it to look a bit rough, like a birds nest.

With another piece of brown paper, cut it into a circle which is approx 10cm wider than your container. Using the Bostik Glu Dots, stick the paper inside the container, pressing it into the inside edges and over the side. Cut a fringe into the overlapping paper so it looks like twigs sticking out from the nest.

Shred with some scissors some more brown paper to make a comfy nest base for your birds.

Craft Tutorial: Pom Pom Bird in a brown paper nest

Making a Pom Pom Bird

You will need:
Wool
A pom pom maker, or your own homemade cardboard pom pom maker
Googly eyes
Orange paper for the beak
Scissors
Some felt for the wings
Bostik Glu Dots

Craft Tutorial: Pom Pom Bird in a brown paper nest

Method:
Make your pom pom bird as big or as small as you want (if you’re not sure how to make pom poms, there’s a video you can watch here). 

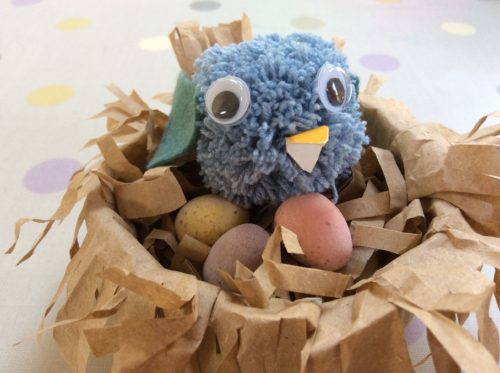
Using the Bostik Glu Dots, glue a pair of googly eyes on your bird. Cut out a small beak shape of your orange or yellow card and glue the beak on too.

Cut out two wing shapes out of your felt material. I cut two curvy triangular shapes and stuck those to the side of the pom pom bird to give it its wings.

Once you’re happy with your pom pom bird, pop it in the nest and you’ve finished. I added a few mini eggs to keep it company, but I doubt they’ll last for long.

Craft Tutorial: Pom Pom Bird in a brown paper nest

Note: I am a Bostik craft blogger and I was sent the materials to create this craft from Craft Merrily. 

Review: Sambro Paw Patrol Craft Egg

When you think of Easter, one of your first thoughts is probably about chocolate eggs. In recent years there have been a few changes to the eggs kids might find left by the Easter bunny, and not all of them are now made of chocolate. 

It’s also nice to be able to give something that won’t be gobbled up in five minutes, especially as my son usually gets given a lot of chocolate eggs. We’ve been gifting a combination of chocolate eggs and play eggs for the last few years, much to the delight of my son. This week we received the Paw Patrol Craft Egg from Sambro to put to the test.

Review: Paw Patrol Craft Egg

The Paw Patrol Craft Egg is ideal for little artists who enjoy being creative and who like to have fun creating, painting and drawing. The Craft Egg is a great way to encourage and develop their creativity and imagination. Plus it will also keep your little ones busily entertained for a while.

Review: Paw Patrol Craft Egg

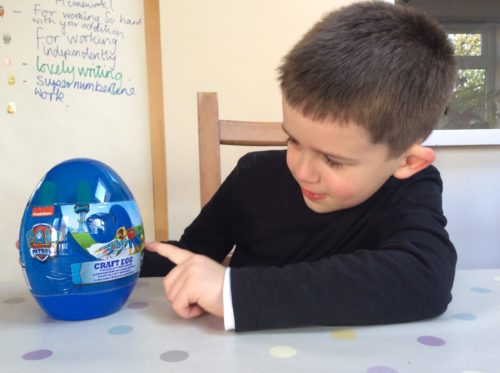
He was incredibly excited when he saw the Paw Patrol Craft Egg sat waiting for him on the table.  I helped him peel the wrapper off (which is tricky and will probably need a grown-up and a pair of sharp scissors) and then he opened up the egg.

The Paw Patrol Craft Egg contains:

  • 4 Marker Pens
  • 4 Crayons
  • 2 Ink Pads
  • 2 Stampers
  • 2 Finger Paint Pots
  • 10 Paw Patrol Colouring Sheets

Review: Paw Patrol Craft Egg

He was absolutely delighted with his Paw Patrol Craft Egg. Once we’d unpacked it and looked at everything inside, he diligently sat colouring the pictures in and stamping them with his new Paw Patrol ink stamps. He happily crafted and coloured away for over an hour. 

I think he will come back to his craft egg several times over the next few days. He has already coloured in the ten pictures which were included, but with the paint, felt tips, crayons and ink pads included, I am sure he will create a number of artworks over the Easter break. 

The Paw Patrol Craft Egg from Sambro costs £5.99 and is a good alternative to the traditional chocolate egg. There are a number of different craft eggs to choose from which include Minions, My Little Pony, Shimmer & Shine and Disney Princesses. The Paw Patrol egg is available in pink or blue. They are available from a range of retailers, but I’ve seen them online in both Amazon and Ocado.


Check out our giveaways over on our competitions page.

Review: Paw Patrol Craft Egg PLUS Win a Minions Craft Egg