7 things to do with Wild Garlic

I love cooking with wild garlic, and it’s a nice thing to do with my son, both collecting it and making delicious things with. Over the years we’ve made many tasty things, so I thought I’d share some of our favourite things to make with wild garlic. They’re in no particular order, some are quick and simple to make, some take a few hours, but all of them are very tasty indeed.

When you go foraging it’s important not to pick too much of anything. Take just what you need and save the rest for the wildlife or other foragers. If you’re foraging for wild garlic, you don’t need much anyway. It’s pretty pungent and a few leaves go quite a long way. I tend to try to pick the younger leaves in spots where I think (hope) dogs haven’t been. I always wash my wild garlic leaves before I use them anyway. You can find out more about wild garlic here.

Recipe: Wild Garlic and Parmesan Scones

7 things to do with Wild Garlic

Wild garlic and parmesan scones

These wild garlic and parmesan scones are so delicious. They’re everything you want from a savoury scone. I sprinkle a pinch of sea salt on the top which makes them extra delicious. This is such a great recipe, we can’t get enough of these simple scones, which are great for a quick lunch, or warmed with soup.

Wild garlic hummus

This simple hummus recipe is a real treat. Gently garlicky and full of good stuff. My son really loves this and gets me to make it a couple of times a week during wild garlic season.

Easy Recipe: Quick Wild Garlic Hummus

Wild garlic macaroni cheese

This is a really simple recipe. It’s my standard go to macaroni cheese recipe, but with shredded wild garlic leaves scattered through it. It’s a really simple way of making something fairly basic into something fantastic.

Cheesy wild garlic quiche

This is a lovely quiche. Cheese and onion quiche is my favourite, but the addition of wild garlic really makes it something special. It’s a fine thing to serve to guests over for lunch, or just to keep to yourself if you’re a massive quiche fan, which I am!

Cheesy wild garlic quiche

Easy wild garlic pesto

Pesto is such a versatile thing to have in the fridge. This gentle wild garlic pesto is great stirred through pasta, or drizzled on pizza. Or in any way you’d normally use pesto.

Wild garlic pesto twists

If you’ve got a couple of tablespoons of wild garlic pesto going spare, then these cheese and wild garlic pesto twists are a simple but excellent way to use this lovely pesto.

Recipe: Wild Garlic and Parmesan Focaccia

Wild garlic and parmesan focaccia

This is the most delicious bread I’ve made. If you can get your hands on some lovely fresh wild garlic, it’s well worth making yourself. It’s like the best garlic bread you’ve ever had. I love this recipe!

Wild garlic is such a fantastic ingredient. It’s getting easier to come by now, many shops and deli’s are now stocking it in springtime. I hope this had given you some ideas about how to use any wild garlic you come across. Happy cooking!

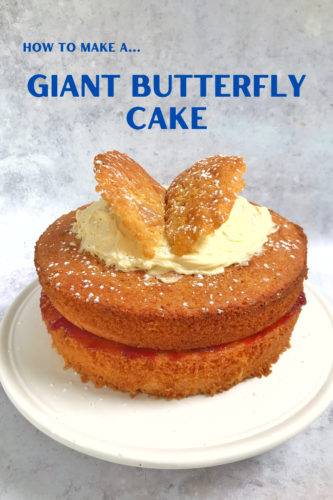
How to make a Giant Butterfly Cake

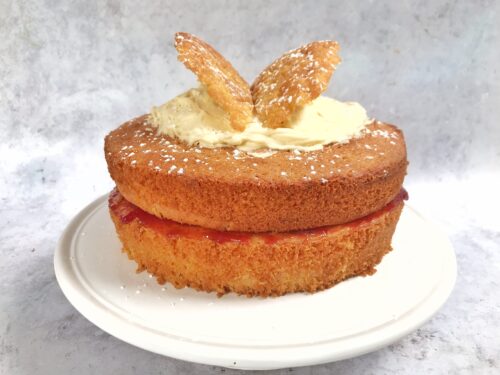
I’m a keen baker, but lack confidence in my decorating ability, so I tend to go for simple styles. Occasionally I’ll bake something incredibly pretty, like my lemon curd cake. It was so pretty, it was featured in BBC Good Food Magazine, which was nice. For my birthday this year, I was low on time and energy, but needed something tasty but pretty to share with my family. I’m quite big on whimsy, so I decided to bake a giant butterfly cake.

Here in the UK, butterfly cakes are a bit of a birthday tea staple. Little sponge buns, with their lids cut off, filled with buttercream, and the top put back on in the shape of butterfly wings. They’re incredibly simple, but they are quite a joyful little bun. Whilst I was wondering what to bake for my birthday, I thought an upgrade to my standard Victoria sponge, but with a butterfly cake top would be simple but really quite fun. I was not wrong.

How to make a Giant Butterfly Cake

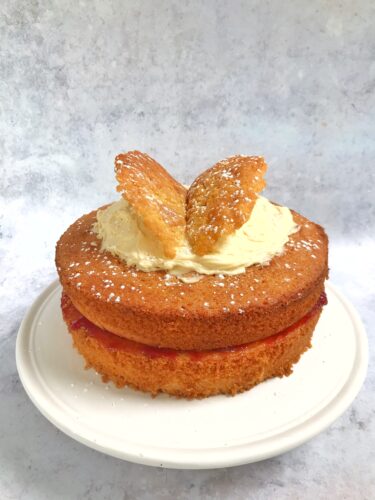
I know my Victoria sponge cake recipe is a good one, but this re-working of it really made it extra brilliant. It was as light and airy as a butterfly wing, but the vanilla buttercream and butterfly wings really made it extra special.

Giant Butterfly Cake

Ingredients:
200 g caster sugar
200 g softened butter or margarine (I use Stork)
4 eggs, beaten
1 tsp vanilla extract
1.5 tbsp milk
200 g self-raising flour
1 tsp baking powder

Buttercream
200g butter, softened
200g icing sugar
A large slug of vanilla extract, approx. 10mls

To finish
1/3 of a jar of good quality raspberry jam
Icing sugar for dusting

How to make a Giant Butterfly Cake

Method:
Heat your fan oven to 190c. Grease two 20cm sandwich tins, I also lined the bottom of each tin with a circle of baking parchment. In a large bowl, beat your butter and sugar together until fluffy (I used a hand mixer). Add the eggs, milk and vanilla and combine, then add the flour and baking powder and mix together until you have a smooth batter.

Divide the mixture equally between the two tins. You can weigh them to make sure they’re fairly equal if you’d like. Bake in your pre-heated oven for around 20 mins until golden and they’re cooked through. Remove from the tins and leave to cool on a cooling rack.

Once your sponge layers are as cool as they can be, thickly spreading good quality raspberry jam between them and sandwich them together on a cake plate or stand.

To make the buttercream, sift your icing sugar to make sure there are no lumps. Then beat the softened butter and icing sugar together with the vanilla extract until it is fully combined and fluffy.

Take a sharp knife and carefully cut a circle out of the top cake layer. Don’t cut all the way through, you’re looking to create a small crater for the buttercream to sit in. Carefully remove your circle from the cake and set it aside.

You can either pipe or spoon your buttercream into your cake crater, it’s up to you. I used a spoon. Fill the crater and smooth the buttercream, I sort of made a small ravine in the middle so there was a dip where I’d be putting the butterfly wings.

With a sharp knife, cut the circle of cake in half and place them onto the buttercream ravine. As this is much bigger than your average butterfly cake, I used my spoon to build up the buttercream underneath the wings to support them, which worked really well. Once you’re happy with how the wings look, you just need to sprinkle a tiny bit of icing sugar over the top, and it’s ready to be shared.

The cake did look awesome, everyone was oohing and ahhing over it, which is exactly the response I was going for. It’s a great, simple, fun bake and one I suspect I’ll be asked to make over and over.

How to make a Giant Butterfly Cake

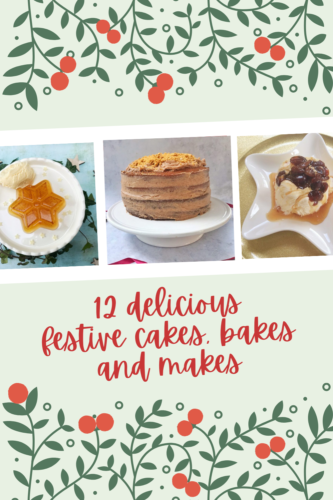
Christmas: 12 favourite festive cakes and bakes

I was chatting about baking to a mum in the playground yesterday, we discovered a shared love of fairly unusual continental recipes, the kind Paul and Pru would give to Bake Off contestants to try and baffle them into submission. It got me thinking about some of my favourite things I’ve baked and blogged, so I thought I’d choose 12 of our favourite festive cakes, bakes and makes and give them another airing.

I promise you they’re all easy, I lack the patience, time and skill to do anything too fancy and time consuming; but they’re all delicious.

Mincemeat Flapjack

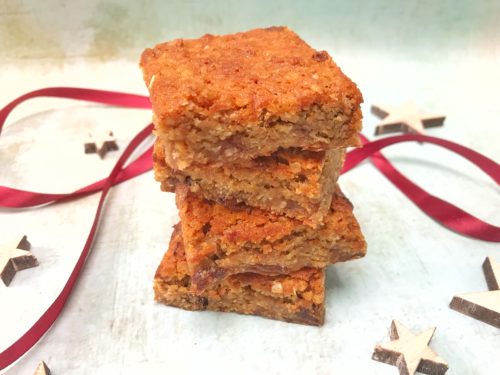
One of the most enduring and classic flavours of Christmas is mincemeat. Mince pies are an undeniable Christmas classic, but I’ve been throwing mincemeat into cakes and vol au vents for a few years now. It’s too good an ingredient just to use in little pies. So I baked a hearty batch of mincemeat flapjack and they all but disappeared in an afternoon. They’re simple, they’re filling and most of all, they’re delicious.

12 of our favourite festive cakes, bakes and makes

Lebkuchen Cake 

Traditionally a moreish soft biscuit, I decided to attempt a German Lebkuchen Cake with considerable success. The recipe is easier than it looks to make and the results are truly scrumptious. It’s one of our favourite festive cakes!
12 of our favourite festive cakes, bakes and makes

Danish Butter Cookies

Because to me, and other children of the 80’s, Danish Butter Cookies are forever linked to Christmas, it’s at this time of year I tend to make them the most. A batch of cookies neatly wrapped in brown paper, or in a decorative bag or box make a lovely little edible gift for someone.

Christmas Recipe: Danish Butter Biscuits

Joulutorttu

Traditionally Joulutorttu are made with puff pastry and a special Finnish prune jam. However I made mine with a Christmas preserve, but it does need a good firm set jam. Try plum or prune conserve for authenticity. They look a bit tricky to make, but it’s ready-roll puff pastry and jam and  a bit of arty twisting of the pastry.

Joulutorttu

Chocolate Dipped Candied Orange Slices

I like to make a big batch of these chocolate dipped candied orange slices at Christmas and give little bags of them as presents for people. They’re also a really nice treat to take away on holiday to nibble with a nice glass of good red wine in the evening.

Recipe: Chocolate Dipped Candied Orange Slices

Mincemeat Filo Rolls

I do love mince pies, but sadly the pastry doesn’t love me. Instead of the usual shortcrust pastry pies, I make these alternative mince pies, with filo pastry and in the style of a spring roll. These Mincemeat Filo Rolls were really, really lovely.

Easy Christmas Recipe: Mincemeat Filo Rolls

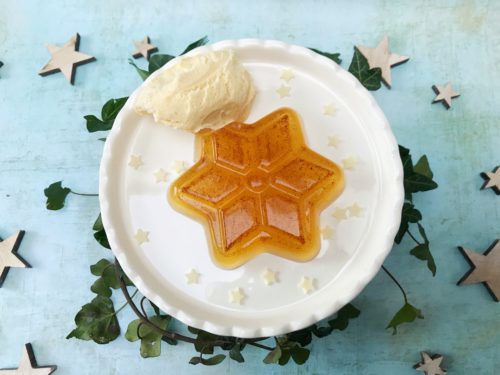
Mulled Cider Jellies

Sometimes, and this is not very often, I mull too much cider and I’ll have some left. Sure, I could heat it up again later, but I fancied making something different with it. I thought I’d make some Mulled Cider Jellies. It turns out they make a really interesting, different and delicious festive dessert. You could make them just as well with apple juice if you’re serving them to children or people who don’t drink alcohol. It’s a very pretty dessert and just a bit different.

Christmas Recipe: Mulled Cider Jellies

Christmas Pudding Ice Cream

This is an incredibly easy dessert, imagine a rich vanilla ice cream topped with Courvoisier soaked festive fruits. It’s utterly delicious, you can whip it up the night before, or make it up to a month ahead of the big day. It is delicious, incredibly simple and uses only four ingredients. I think we’ve found a winner!

12 of our favourite festive cakes, bakes and makes

Sticky Ginger Sponge Cake with Cinnamon Frosting

I love a bit of ginger cake and at this time of year it’s a lovely warming bake to make for the family. It’s sticky and spicy and you can dress it up for Christmas, or dress it down for every day cake eating if you prefer. This sticky ginger sponge cake with cinnamon frosting is special enough to serve for an occasion, or you could glitz it up a bit more and serve it as an alternative Christmas cake. It’s about as easy as can be.

Easy Recipe: Sticky Ginger Sponge Cake with Cinnamon Frosting

Cranberry and Pomegranate Jelly

Puddings at Christmas time can be a bit on the heavy side. All that booze soaked fruit and extra thick cream can get a bit much; plus if you’re feeding the whole family, Christmas pudding is not a universally popular choice. What is always, always popular is jelly. This is a jelly that everyone in the family can enjoy – cranberry and pomegranate jelly!

Recipe: Cranberry and Pomegranate Jelly

Peppermint Bark Buttons

Homemade treats make for really lovely gifts at Christmas. These Peppermint Bark Buttons are really fun to make and they’re delicious too.

Homemade Gifts: Peppermint Bark Buttons

Cinnamon & Raisin Shortbread

I originally created this shortbread recipe in 2013 in celebration of the Great British Bake Off; it’s been a favourite ever since. Cinnamon and raisin are a great combination and this lovely crumbly shortbread is a great bake all year round.

Recipe: Cinnamon & Raisin Shortbread

So that’s my little round up of my 12 of our favourite festive cakes, bakes and makes. What are your favourite favourite festive cakes, bakes or makes?

12 of our favourite festive cakes, bakes and makes

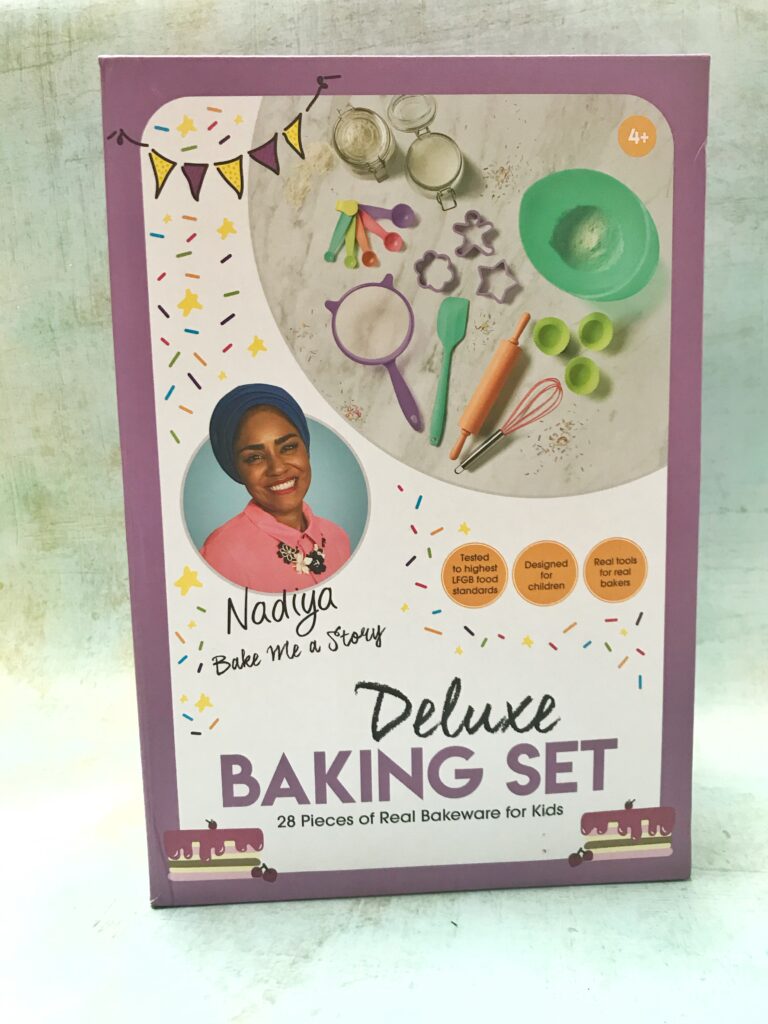
Review: Nadiya’s Deluxe Baking Set for Kids

We were sent the Nadiya Hussain Deluxe Baking Set for Kids for review purposes. All images and opinions are our own.

The boy and I have been baking together for years, he’s keen to make and eat the fruits of our kitchen labours, but he sometimes finds some of my grown-up equipment a bit big or heavy to use. This is clearly a bit of a universal problem, as Great British Bake Off winner, Nadiya Hussain has launched a range of kids baking kits, making it easier for kids to get involved in the kitchen with their own utensils.

Nadiya's Deluxe Baking Set for Kids worth £25

The new range of Nadiya Hussain’s Bake Me a Story baking sets come in three different styles – Deluxe, Savoury and Simple. Each set includes a set of special recipe cards from Nadiya’s new book and is designed to give children the confidence to bake from scratch.

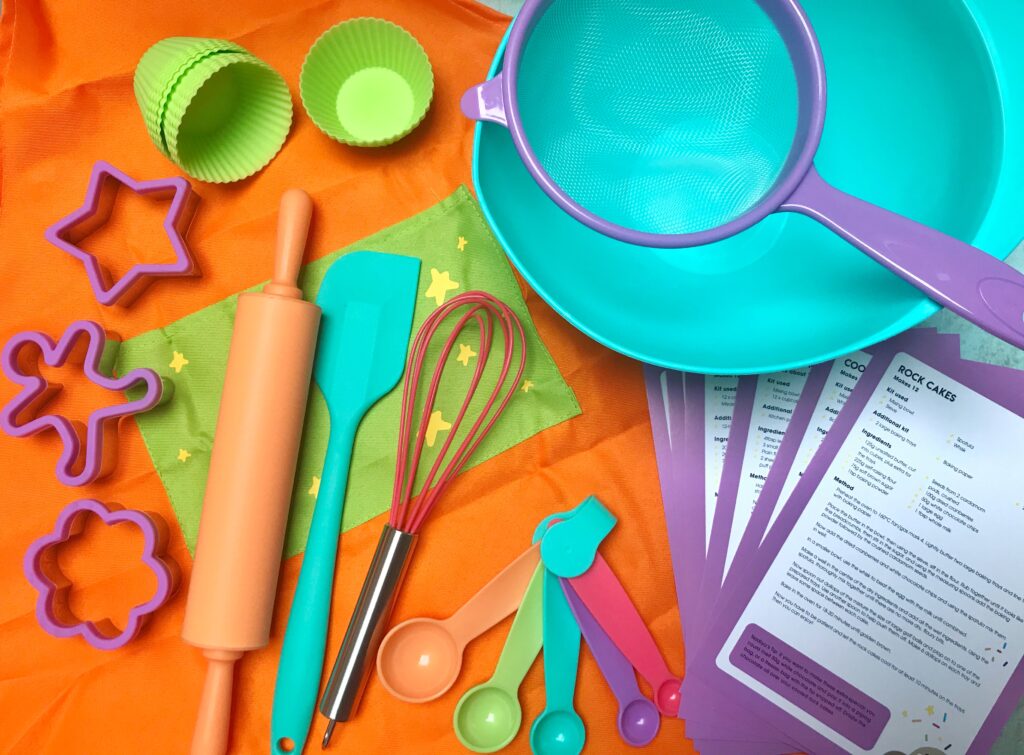
The Deluxe Set we were sent costs around £25 and provides all the tools needed to bake the recipes that are included in the box. The set includes a whisk, spatula, rolling pin, 12 silicone cupcake cases, a sieve, 3 cookie cutters, a mixing bowl, measuring spoons, the all important apron and six easy to make recipes written by Nadiya.

Nadiya's Deluxe Baking Set for Kids worth £25

I was really impressed when I unpacked the box. The set is so good that most of it had made its way into general baking use in my kitchen. Even if I’m baking by myself, I will likely reach for some of the kit included, it’s so good. I was especially impressed with the cookie cutters, which have a silicone edge on one side, so when you are pressing out the cookies you’re not in danger of cutting your fingers too.

I also like the silicone cupcake cases, which are great for saving on waste. The rolling pin was as lightweight as it could get away with and was really easy for my son to use. Together we baked a batch of gingerbread biscuits and we both enjoyed using all of the colourful equipment provided.

Nadiya's Deluxe Baking Set for Kids worth £25

There are other sets in the range and they are all great for encouraging kids to get in the kitchen.

The Savoury set (costing around £19.99) again includes all the tools needed to make the recipes on the five included recipes and includes a spoon, measuring spoons, a chopping board, mixing bowl, apron and a safety knife and a fish slice.

For those taking their first bite at baking opt for the Simple Set (£14.99). This contains a rolling pin; whisk, spatula, three cookie cutters and six silicone cup case cases. Everything needed to make the three recipes included.

Nadiya's Deluxe Baking Set for Kids worth £25

Everything is designed to be safe for kids to use and fun too. Everything is easy to clean and dishwasher safe too. The Deluxe Baking Set has so much in it; and would make a great gift for an aspiring baker or keen cook. It’s made for children aged 4+ and it was just right for my 9 year old son. It wasn’t too babyish, it is just good quality baking equipment for kids.

Party Recipe: Jam and Cream Sponge Cake

This week sees the 75th anniversary of VE Day and many people across the UK and beyond will be marking the date. We will be taking part in a community zoom celebration, so I’ve been busy baking a lovely Jam and Cream Sponge Cake to have with a nice pot of tea.

I baked this deliciously light sponge cake filled with lovely purple (the royal colour) mulled wine jam. I’d like to think the Queen would approve of my simple but very yummy jam and cream sponge cake.

Patriotic Jam and Cream Sponge Cake

To find out how to make my Jam and Cream Sponge Cake, read my recipe below…

Patriotic Jam and Cream Sponge Cake

Serves 16
A classic Victoria Sponge layered with Mulled Wine Jam and Chantilly Cream.

Ingredients
300g caster sugar
300g softened butter
6 eggs, beaten
2 tsp vanilla extract
3 tbsp milk
300g self-raising flour
1.5 tsp baking powder

For the filling
1/2 Jar Mackays Christmas Preserve (mulled wine jam)
200ml double cream
1 level tablespoon of icing sugar
1 teaspoon of vanilla extract

Instructions
Heat your fan oven to 190c. Butter three 20cm sandwich tins. In a large bowl, beat your butter and sugar together until fluffy (I used a hand mixer). Add the eggs, milk and vanilla and combine, then add the flour and baking powder and mix together until you have a smooth batter.

Divide the mixture equally between the three tins, you can weigh them to make sure they’re fairly equal if you’d like. Bake in your pre-heated oven for around 20 mins until golden and they’re cooked through. Remove from the tins and leave to cool on a cooling rack.

To make the Chantilly cream, beat the cream, sugar and vanilla until smooth and creamy. I used my hand mixer for this and it took just a few minutes.

To assemble the cake, choose the most attractive of the three sponge cakes and save that one to go on the top. You may need to cut the top of some of your layers to make them flatter so they sit more comfortably on each other. Put the bottom layer on your serving plate or cake board. Put a teaspoon of jam on the plate and put your bottom layer on that. It will help it stick to the board. Cover that first layer with your jam and put the second layer on top. Gently press the layers together. Top your second layer with the cream and put your top layer on top, sprinkle with icing sugar or decorate as you wish.

Notes

The cream is fresh so the cake will need to be eaten fairly quickly or refrigerated. If you want to keep it for a few days it might be best to not have the cream in between layers, maybe kept in the fridge to indulgently dollop on the side.

My Patriotic Jam and Cream Sponge Cake would make the prefect addition to a celebratory street party or a refined afternoon tea round at Buckingham Palace. It’s so quick and easy to make, it’ll leave you plenty of time to make a few plates of cucumber sandwiches and mix up a jug or two of Pimms for the party!

Patriotic Jam and Cream Sponge Cake

What’s your favourite celebratory bake?

Patriotic Jam and Cream Sponge Cake

I have to say, this sponge recipe is absolutely magic, I use it as the base for all my sponge cake bakes now; from butterfly cakes, cupcakes, sponge puddings and good old Victoria sponges, it’s light every single time. I can’t fault it.

Jam and Cream Sponge Cake

Recipe: Wild Garlic and Parmesan Focaccia

Being in lockdown isn’t easy. Some days I find myself going a little stir crazy, some days I’m listless in bed, other days I’m bursting with energy. I’m trying, where I can to just go with my mood rather than force myself to do things. Over the weekend the sun shone a little and I managed to leave the house and take the dog for a short walk on the field by my house. Along one shady side of the field is a path which in the spring in fringed with wild garlic. I can never resist pulling a few leaves and taking them home to make wild garlic scones or something equally lovely with them. Whilst it was quiet, I grabbed a handful of wild garlic, then headed home to bake some wild garlic and Parmesan focaccia, because everyone else is baking bread during lockdown, so why shouldn’t I?

Recipe: Wild Garlic and Parmesan Focaccia

Focaccia is a pretty simple bread to make, it just takes quite a lot of time. From picking my wild garlic, to pulling my bread out of the oven took the best part of five hours, but it was five hours very well spent. Before I began I checked in with my lovely Italian friend, Sherwin. He is a keen baker and gave me some top tips for tip top focaccia. His advice was as follows…

Focaccia is a high hydration dough so it is sticky and wet. Use oil instead of flour when hand kneading the dough on a work surface and preferably a slow first rise of 12 hours in the fridge, but an hour at room temperature will do. Use well oiled hands  when transferring and shaping the dough into a baking tray making sure not to knock out too much of the air. You can put rosemary, olives, cherry tomatoes, courgette or cheese. Enjoy!

I followed his excellent advice. I chose to prove my dough for an hour in the warmth of my bedroom and then topped it with wild garlic and Parmesan. The result was like the best garlic bread you’ve ever had.

Wild Garlic and Parmesan Focaccia

Ingredients
500g strong white bread flour
1 and a half teaspoons of salt
2 sachets dried easy blend yeast
Olive oil, lots
400ml cold water
More olive oil for drizzling
20g wild garlic leaves, washed and finely chopped
30g finely grated Parmesan
A sprinkle of sea salt
Freshly ground black pepper

Recipe: Wild Garlic and Parmesan Focaccia

Method
Place the flour, salt, yeast, olive oil and the water into a large bowl. Gently mix together with your hand to form a dough, then knead the dough in the bowl for five minutes.

Next you need to stretch and knead the dough by hand in the bowl for about five minutes.

Tip the dough onto a very well oiled work surface and then knead some more for about five more minutes. Put the dough back into the bowl, cover and leave somewhere warm to rise until doubled in size, this takes about an hour. I put mine on my bed as my bedroom is the warmest room in the house, but whatever works for you.

Line a large baking tray with baking paper. Tip the dough out of the bowl and flatten the dough onto the tray, push the dough into the corners, cover with a large plastic bag or cling film, making sure it does not touch the top of the dough, then leave to prove for one hour.

Preheat your oven to 220C or Gas mark 7.

Using the tips of your fingers, dimple the focaccia all over, so it is covered in little dents. Sprinkle over the wild garlic and Parmesan, adding a generous twist of freshly ground black pepper and some sea salt. Drizzle over some more olive oil and then put in your pre-heated oven for 20 minutes.

Once it’s baked and out of the oven; drizzle with a little more olive oil and it’s ready to eat, hot or cold.

It is the most delicious bread I’ve made and if you can get your hands on some wild garlic, it’s well worth making yourself.

If you enjoyed this, you might also like to try these wild garlic pesto twistswild garlic pesto or these wild garlic and cheese scones.

Recipe: Wild Garlic and Parmesan Focaccia

Recipe: Easy Easter Chocolate Tart

One of my favourite (and incredibly easy) things to make is an indulgent chocolate tart. Made with dark chocolate it is a delicious and pretty adult dessert. If dark chocolate isn’t your thing, you can swap it out for milk chocolate and enjoy a more family friendly pudding. I’ve jazzed up my usual chocolate tart for Easter and, well it was so popular that is disappeared within the hour!

Easter is undoubtedly a time for chocolate. If you can’t indulge your sweet tooth now, then when can you? This chocolate tart is really very simple to make, especially if you cheat and buy ready made pastry, and would be fun for kids to join in with too.

Recipe: Easy Easter Chocolate Tart

Easy Easter Chocolate Tart

Ingredients:
For the pastry –
4oz plain flour
2oz butter, cubed
A pinch of salt
2-3 tablespoons of cold water
-or- a packet of ready rolled shortcrust pastry

For the filling –
150g single cream
2 tablespoons of sugar
150g good quality dark chocolate, or milk chocolate if you prefer

2 bags of mini eggs to decorate, 3 if you’re a nibbler!

Recipe: Easy Easter Chocolate Tart

Method:
Tip the flour, salt and butter in a large mixing bowl. Using your fingers, rub the butter into the flour until it looks like breadcrumbs. Use a knife and stir in just enough cold water to bind the dough together. Do this gradually as you don’t want your pastry to be too wet. Once you’ve made the dough, cover the bowl and chill it in the fridge for 15 minutes or so before rolling out.

Or if you’re using shop bought, ready rolled pastry, take it out of the fridge about half an hour before you want to use it.

Pre-heat your oven to gas mark 5 or 190°

Take your pastry and roll it out to the thickness of a pound coin. You can either roll it out on a floured surface, or between two pieces of baking parchment. I find the baking parchment method quicker and a lot less messy.

Grease a 20cm tart tin and carefully put the pastry in the tin, pressing it against the sides. Let the pastry hang over the sides of the tin, you can trim it later. Prick the base all over with a fork. Top the pastry with a sheet of baking parchment and cover with baking beans, bake in your pre-heated oven for 10 minutes.

Remove the baking beans and parchment and pop back in the oven for another 8 minutes. Remove from the oven and leave to cool. Once cool, carefully with a sharp knife trim the pastry so it is flush with the top of the tin.

While your pastry is cooling, warm up your cream and sugar in a saucepan. Finely chop the chocolate and once the cream is simmering, turn off the heat and add the chocolate to the pan. Leave for a minute and stir until the mixture is smooth, like really thick hot chocolate.

Carefully fill the tart case with the melted chocolate mix, level it off and make an artistic swirl or ripple on the top if you want. Decorate with your mini eggs however you want. Put your tart in the fridge for a minimum of two hours, or overnight if you wish.

This chocolate tart is very, very rich, so a little goes a long way. It also makes an excellent pudding for Easter!

If you enjoyed this recipe, you might like these mini egg cookies or these peppermint crunch slices!

Recipe: Easy Easter Chocolate Tart

Recipe: Wild Garlic and Parmesan Scones

Every year in March and April, the hedgerows and lanes hereabouts are abundant with wild garlic. When the wind blows in the right direction, we get a gentle whiff of garlic and off I go with a paper bag to collect a few leaves to cook with. One of my favourite ways to use it is in wild garlic and parmesan scones, which go really well with soup, or as a savoury snack with some good butter.

Of course when you’re foraging it pays to know a little of what you’re doing. Wild garlic can look pretty similar to other plants, some of which may be poisonous, but you can generally tell what is and isn’t wild garlic by the smell, which is, well, garlicky.

When you go foraging it’s important not to pick too much of anything. Take just what you need and save the rest for the wildlife or other foragers. If you’re foraging for wild garlic, you don’t need much anyway. It’s pretty pungent and a few leaves go quite a long way. I tend to try to pick the younger leaves in spots where I think (hope) dogs haven’t been. I always wash my wild garlic leaves before I use them anyway. You can find out more about wild garlic here.

Recipe: Wild Garlic and Parmesan Scones

These wild garlic and parmesan scones are very delicious. They’re everything you want from a savory scone. I sprinkle a pinch of sea salt on the top which makes them extra delicious. This recipe makes about 8 big scones, though you could cut them smaller if you prefer.

Wild Garlic and Parmesan Scones

Ingredients:

125g butter
450g self-raising flour
50g finely grated parmesan cheese
5 wild garlic leaves, finely chopped
1/2 teaspoon bicarbonate of soda
Big pinch of salt
Milk to mix, I used about 1/3 pint
Rock salt

How to make Wild Garlic and Parmesan Scones:

Pre-heat your oven to 190° and put a sheet of baking parchment on a large baking tray.

In a large bowl rub the butter into the flour with your fingertips, until the mixture looks like breadcrumbs. Add the parmesan, wild garlic, bicarbonate of soda and pinch of salt and toss together. Little by little add the milk, mixing with your hands until it makes a soft dough.

Tip the dough onto a floured surface and pat or roll it until it’s 1.5-2cm thick. I usually shape the dough and pat it down with my hands because it gives a slightly more rustic finish which I like. Cut the dough into rounds, don’t twist the cutter because this can prevent the scone from rising.

Recipe: Wild Garlic and Parmesan Scones

Put the cut scones on the baking tray, brush them with milk and if you like sprinkle a pinch of rock salt on the top of each one. Bake for 15-20 minutes until they’re nice a brown and hollow when you tap them underneath.

Serve hot from the oven with lashings of butter, or with soup or a ploughman’s lunch.

If you enjoyed this, you might also like to try these wild garlic pesto twistswild garlic focaccia or this wild garlic pesto.

Recipe: Wild Garlic and Parmesan Scones

Easy recipe: Homemade Chocolate Jazzies

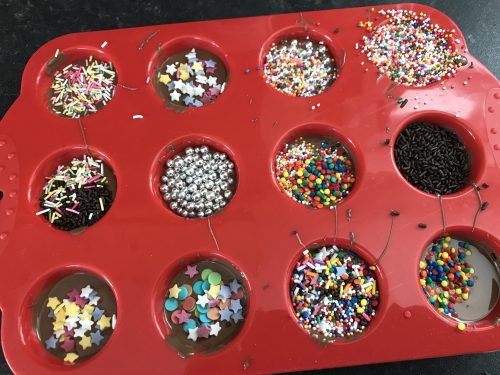
A few weeks ago I was mooching around one of my local charity shops when I spotted a silicone baking mold for a pound. They can be quite expensive, so I snapped it up and took it home. I think it was originally designed for small cupcakes or muffins, but this had homemade chocolate jazzies written all over it.

As a working from home mum I am often called upon to help entertain a child or two for the odd day during the school holidays. I don’t mind this as for me it’s probably easier to entertain two seven years olds, than one seven year old who is just so “boorrEDDD” of my company. I like to have a few crafts, activities and bakes up my sleeve to entertain any young visitors we may have; so I thoroughly cleaned my silicone mold and tucked it away for a rainy day.

Easy recipe: Homemade Chocolate Jazzies

As a keen baker I always have a good variety of sprinkles in my cupboard. For some reason kids love sprinking almost as much as eating the sprinkles. I had quite a few little jars which probably needed using up. Making homemade chocolate jazzies is a really good way of using them up. You could give each child a different kind of sprinkle so they know which jazzies are theirs, or they can mix and match.

I made some sparkly chocolate cups for Mother’s Day back in the spring, they are very similar to those, but slightly smaller and with billions more sprinkles.

Homemade Chocolate Jazzies

Ingredients:
250g of milk chocolate
Cake decorating sprinkles, stars, silver balls, whatever you fancy

You will need:
A saucepan, a glass bowl which will sit in the pan, but so it doesn’t touch the bottom; a metal spoon, silicone baking molds.

How to make your chocolate jazzies:
Boil some water and pour the water into your pan so it’s about 3cm deep. Carefully place the glass bowl in the pan making sure the bottom of the bowl doesn’t touch the water. This is called a bain marie.

Break your chocolate up into small pieces and put it in the glass bowl. The water in the pan needs to be at a gentle simmer, not bubbling and boiling. Stir the chocolate until it is melted.

Easy recipe: Homemade Chocolate Jazzies

Once the chocolate is melted, with a spoon scoop out some melted chocolate into each of the molds. Try and put an equal amount in each. If you’re good at this there might be just enough left over for some spoon licking afterwards. Gently shake the silicone tray so the chocolate settles.

Once you’ve used all of your chocolate, take your chosen sprinkles and sprinkle as much or as little as you like over the top of each chocolate. Leave them to cool for at least two hours. If you need them to set a bit faster for impatient boys, pop them in the fridge.

Easy recipe: Homemade Chocolate Jazzies

To serve, make sure they are properly set and carefully pop them out of the molds. You might want to be careful and tip them out onto a tray or over a dish to catch any excess sprinkles. We had many excess sprinkles because the boys were very enthusiastic about the sprinkling.

Easy recipe: Homemade Chocolate Jazzies

The homemade chocolate jazzies went down an absolute storm. The boys really enjoyed making them. They’re incredibly simple to do and they also really enjoyed eating them and sharing them too. My chocolate jazzie experiment was a success!

PS. If you’re wondering they they’ve got blue hands, we played with blue slime while the jazzies set and the slime coloured their hands for the day. They do have clean hands, I promise!

Easy recipe: Homemade Chocolate Jazzies

Easy Recipe: Quick Coffee Cupcakes

There’s nothing quite as good as a cup of coffee in the garden with a little sweet treat to go with it. This week I knocked up a batch of my quick coffee cupcakes and sat in the garden in the last of the sunshine before Storm Hector swept in and spoiled all our summer fun.

Cupcakes are something I make quite a lot of at home. They’re so quick and easy to do and I often have a fresh batch of buttercream in the fridge for emergencies. I know this is potentially an unpopular opinion, but cupcakes are just buns with fancy icing. If you can master a basic swirl people think you’ve got mad baking skills. I’m not going to win any prizes for my decorating, but I can do some basic piping, enough to turn a humble bun into a cupcake. If I can do it, you can too!

Easy Recipe: Quick Coffee Cupcakes

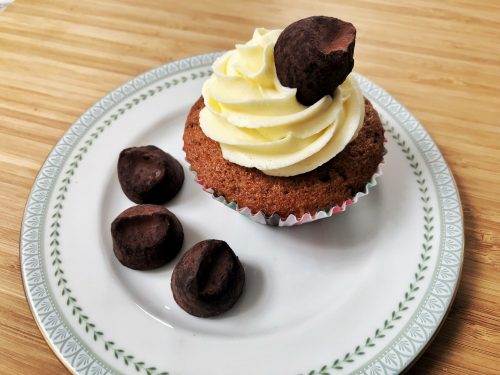
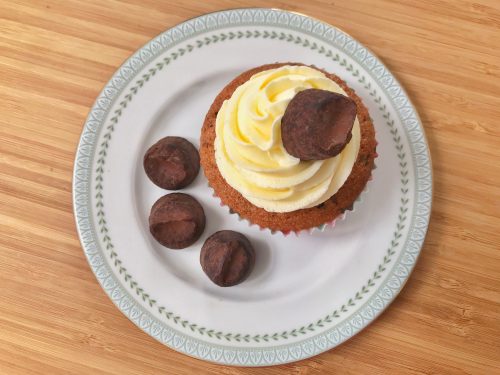
These quick coffee cupcakes are great to make in a hurry. I piped plain vanilla buttercream on these, but if you’re baking for a real coffee fan, then you can easily make coffee buttercream. You can ramp the coffee flavours up further by adding a Roasted Coffee Cacao Truffle from Beech’s Fine Chocolates to the top, this turns a simple cupcake into a lovely grown up after dinner treat!

Win a selection of Beech's Fine Chocolates Gourmet Packs

Quick Coffee Cupcakes

Ingredients:
150g butter or margarine
150g caster sugar
3 eggs (large)
150g self raising flour
1 teaspoon baking powder
1/2 teaspoon vanilla extract
1 heaped teaspoon of instant coffee dissolved in 1/2 tablespoon of milk

For the buttercream:
250g icing sugar
250g butter (softened)
1/2 teaspoon vanilla extract
Beech’s Fine Chocolates Roasted Coffee Cacao Truffles

Method:
Pre-heat your oven to 180° and put paper cases in a bun or a muffin tray.

Cream your butter and sugar in a large mixing bowl. Add the rest of the ingredients and using a hand mixer combine until the batter is smooth and airy.

Dollop a large dessert spoon of the cake batter in each case and bake in the oven for 20 minutes. Once cooked remove from the oven and leave cool on a rack.

While your cupcakes are cooling, sift your icing sugar and beat together with the softened butter. Add your vanilla extract and beat it in thoroughly.

Once your cupcakes are cool, put your vanilla buttercream in a piping bag with a star piping nozzle – I use a Wilton 2D nozzle. I did a standard buttercream swirl, if you’re not sure how to do it, watch this short video.

I then decorated the buttercream swirl with a Roasted Coffee Cacao Truffle from Beech’s Fine Chocolates. Serve with a cup of very good coffee.

If you wanted to up the coffee content of your coffee cupcake, you could add some coffee to your vanilla buttercream. Dissolve some coffee in a splash of milk and beat it through thoroughly.

Easy Recipe: Quick Coffee Cupcakes

If you enjoyed this recipe, you might also like these popcorn cupcakestangy marmalade cupcakes or romantic rose cupcakes.

Easy Recipe: Quick Coffee Cupcakes