The Ultimate Review Round up of Merlin Attractions in the UK

If you’ve got a Merlin Annual Pass, you might have some favourite places to visit with it. A lot of passholders tend to visit the same two or three attractions, but it’s good to branch out a bit if you get the chance. This year we have been Merlin Annual Pass Ambassadors and we’ve made a conscious effort to get out and about a bit more, using our passes on holidays and weekends away to get the most out of them.

The Ultimate Review Round up of Merlin Attractions in the UK

There are (I think) 32 UK attractions you can gain entry to with a Merlin Annual Pass. Whilst we’ve not managed to visit them all, we’ve had a lot of fun trying. Below is a list of all the (current) Merlin Attractions in the UK along with links to a write up of a visit there, either by myself or another blogger. It’s a cracking to do list if you’ve got a Merlin Annual Pass. How many have you visited?

The Ultimate Review Round up of Merlin Attractions in the UK

Alton Towers Resort
Bear Grylls Adventure – the newest and most adventurous attraction!
Blackpool Tower – Our review back in 2016.
Blackpool Tower Circus – We loved this, definitely worth seeing if you’re visiting.
Blackpool Tower Dungeon
Chessington World of Adventures Resort
Edinburgh Dungeon
JURASSIC Skyline – We visited on a cloudy day, but loved it all the same.
LEGOLAND Discovery Centre Birmingham – The newest LEGOLAND is a treat!
LEGOLAND Discovery Centre Manchester – Our own favourite LEGOLAND!
LEGOLAND Windsor 
London Dungeon
London Eye
Madame Tussauds Blackpool – See all your favourite famous faces!
Madame Tussauds London
National SEA LIFE Centre Birmingham – Worth a visit to the National Centre.
SEA LIFE Blackpool – Plus Behind the Scenes Tour!
SEA LIFE Bray
SEA LIFE Brighton
SEA LIFE Great Yarmouth
SEA LIFE Loch Lomond
SEA LIFE London
SEA LIFE Manchester – Lots to see and do under the sea!
SEA LIFE Sanctuary Hunstanton
SEA LIFE Scarborough
Seal Sanctuary Gweek – This is a real treat for Seal fans!
Shrek’s Adventure!
Thorpe Park Resort
Warwick Castle – Seriously good fun for castle enthusiasts!
Warwick Castle Dungeon
Weymouth SEA LIFE Adventure Park – A very different SEA LIFE experience.
York Dungeon

What’s your favourite Merlin Attraction?

The Ultimate Review Round up of Merlin Attractions in the UK

Homemade Gifts: Fruit and Nutty Buttons

Homemade treats make for really lovely gifts at Christmas. These Fruit and Nutty Buttons are really fun to make and delicious too.

Homemade Gifts: Fruit and Nutty Buttons

I’ve been making variations of these chocolate buttons since I found a silicone mold in a charity shop for £1 earlier in the year. I’ve made these a bunch of times with my son, they couldn’t be more simple. Melt some chocolate, pour it in the mold and decorate however you want.

As it’s Christmas I wanted to use some nuts in these buttons, so I made a batch of candied walnuts. They’re super easy and so delicious, we nearly ate the whole batch before we got chance to add them to the buttons.

Homemade Gifts: Fruit and Nutty Buttons

Candied Walnuts

Ingredients:

200g walnuts
6 tablespoons of sugar
1 tablespoon of ground cinnamon
1 egg white
splash of water

Homemade Gifts: Fruit and Nutty Buttons

How to make your candied walnuts:

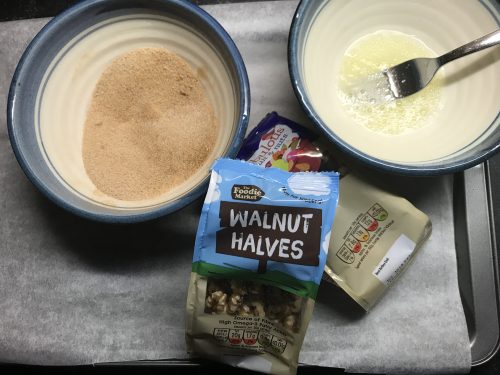
Pre-heat your oven to 120° and put some baking parchment on a baking tray. In a bowl, whisk your egg white with a splash of water. In a different bowl, mix the sugar and cinnamon until it’s well combined.

Using a fork, dip each walnut in the egg white and then toss is in the sugar until it’s covered. Place the walnuts on the baking tray. Once all the walnuts are covered, put the tray in the oven and bake for 45 minutes or so. Make sure you turn the walnuts every 15 minutes so they cook evenly. Remove from the oven and leave to cool.

Fruit and Nutty Buttons

Ingredients:
250g of milk chocolate
A bag of mixed fruit and nuts
Candied walnuts
Small bag of white chocolate buttons

Homemade Gifts: Fruit and Nutty Buttons

You will need:
A saucepan, a glass bowl which will sit in the pan, but so it doesn’t touch the bottom; a metal spoon, silicone baking molds.

How to make your fruit and nutty buttons:
Boil some water and pour the water into your pan so it’s about 3cm deep. Carefully place the glass bowl in the pan making sure the bottom of the bowl doesn’t touch the water. This is called a bain marie.

Break your chocolate up into small pieces and put it in the glass bowl. The water in the pan needs to be at a gentle simmer, not bubbling and boiling. Stir the chocolate until it is melted.

Once the chocolate is melted, with a spoon scoop out some melted chocolate into each of the molds. Try and put an equal amount in each. Gently shake the silicone tray so the chocolate settles.

Homemade Gifts: Fruit and Nutty Buttons

Melt about half of your white chocolate buttons for drizzling. Take your fruit and nuts and decorate the buttons however you want. I did four different kinds –

  • Candied walnuts drizzled with white chocolate
  • Pecan nuts, dried cranberries and sultanas
  • Just candied walnuts
  • Plain white chocolate buttons

Leave them to cool for at least two hours. If you need them to set a bit faster you can pop them in the fridge. Once they’re set you can put them in little cellophane bags and decorate with ribbons.

They’re really delicious and the addition of fruit and nuts turns them from a fun chocolate treat into something a little more grown up. They’re such a lovely gift to give and receive, and really great to make with kids too.

Homemade Gifts: Fruit and Nutty Buttons

Christmas Crafts: How to make Pretty Paper Baubles

It’s the week before Christmas and I’ve got a million things to do. One of them is to plan some things for me and the boy to do on Friday. We have a whole day to ourselves before the madness begins, and he’s already requested crafts and baking. Those I can do. I’ve been wanting to try to make some paper baubles for a few weeks, I finally had the chance this morning.

These paper baubles are so simple to do, but they look pretty smart and I’m sure they cutting and sticking will appeal to my son. Paper bauble making will definitely be on our agenda for Friday.

Christmas Crafts: How to make Pretty Paper Baubles

How to make Pretty Paper Baubles

You will need:

Coloured or patterned paper
A glass
A pencil
Scissors
A glue stick
A length of ribbon

How to make Pretty Paper Baubles:

You’ll need coloured paper, I used plain red paper and a patterned red paper which I thought would work well together. On your coloured paper, draw around the rim of the glass to make a circle. You’ll need at least 8 circles to make your bauble.

Cut your circles out and fold them in half. If you’re using patterned paper, the pattern needs to be in the inside of the fold.

Christmas Crafts: How to make Pretty Paper Baubles

Using the glue stick, glue the folded halves together; if you’re using plain and patterned paper, alternate them. Make sure your circles are well stuck together, you might want to press them under a heavy book for half an hour to make sure they’re firmly glued together. I found it best to make two halves of the bauble before putting the ribbon on.

To fix the ribbon in place, give the inside half of one side of your bauble a really good rub with the glue stick. Lay your ribbon in place and having given the other half of the bauble a good rub with the glue stick, press the two sides together. Your bauble is complete and ready for hanging up on the tree.

It’s as simple as that!

If you enjoyed this, you might also like to try –

How to make Pretty Paper Baubles

Children’s Book Review: The Element in the Room

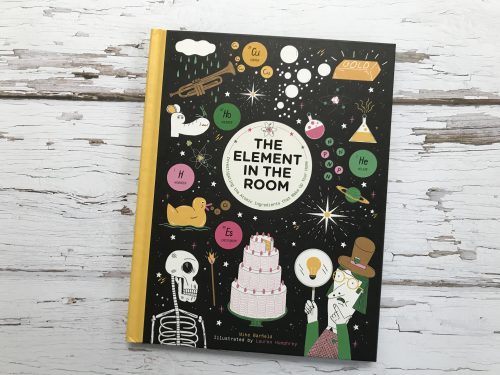
The Element in the Room by Mike Barfield is a fully illustrated and fun guide to the chemical elements and is jam-packed with mind-blowing facts!

Children's Book Review: The Element in the Room

For reasons I still don’t quite fully understand, I never really did much chemistry at school. I was able to swap my GCSE options so I did drama instead of science. I don’t feel that choice has hindered me, but when it comes to helping with homework, I find myself sneaking off to the loo to google things a bit more than is proper. The Element in the Room is just the kind of book we need. It is as advertised – packed full of facts.

The Element in the Room is aimed at 7-11 year olds and is written in such a way that even scientifically dense me can understand. It even has a helpful glossary at the back, just in case I get extra stuck. For my science mad 8 year old, this is a great book all about the Periodic Table of Elements.

Children's Book Review: The Element in the Room

It’s got colourful illustrations by Lauren Humphrey, slightly larger than bite-size facts and even a few experiments to try. There are even some comic style pages featuring scientific sleuth Sherlock Ohms as he investigates the elements.

This funny and fascinating book is written by Mike Barfield, a comic writer; so it’s as funny as it is factual. It’s a real treat to find a book on the Periodic Table which is so accessible and fun to read. If you’ve got an aspiring scientist, The Element in the Room is a great book to buy them. It might even help me learn something about science!

The Element in the Room by Mike Barfield costs £14.99. It’s published by Laurence King and it is available from a wide range of bookshops including Amazon.

For details of more children’s books published by Laurence King, visit their website.

Disclosure: We were sent a copy of The Element in the Room for review purposes. All images and opinions are our own.

Days Out: The Lakeside & Haverthwaite Railway

Getting out of the city and out into the countryside for the weekend is an all too rare thing. But this year we’ve managed two jaunts to the Lake District; the first to Keswick for a spot of glamping and the second to Coniston. During our visit to Coniston, we took some time to explore the southern lakes a little more. My son is a steam train enthusiast, so we visited the The Lakeside & Haverthwaite Railway and we loved it so much, we went back again the next day!

As a child I spent an awful lot of time in the southern Lake District. My Nan had a caravan there and my Uncle liked to fish; so we would spend lots of our school holidays going on day trips and long walks. I remember my time there very fondly, especially our annual visits to The Lakeside & Haverthwaite Railway, so it was great to share that with my son.

Days Out: The Lakeside & Haverthwaite Railway

On arrival at Haverthwaite Station, it felt like nothing at all had changed in 30 years. Of course it had, whilst original features abound, there are the kind of modern conveniences that people expect; like clean modern toilets, a nice cafe and a gift shop.

Most visitors arrive and park at Haverthwaite Station which is near Ulverston and really easy to find. The steam trains run regularly, but if you find you’ve just missed one and you’ve got to wait for the next one, the cafe is very decent and you can always have a mooch around the gift shop. The station itself is really pretty to explore and there’s a play area for little ones too.

Days Out: The Lakeside & Haverthwaite Railway

On the day we visited, Haverthwaite Station was playing host to The Owl Sanctuary. There were a selection of owls and a few handlers talking to the visitors about them. My son was lucky enough to hold a tiny one. He adores owls, so he was in his element.

Days Out: The Lakeside & Haverthwaite Railway

Soon our steam train rolled into the station and it was all aboard for our journey to Lakeside at Windermere. We clambered aboard ‘Repulse’ and got comfortable in the original carriages. The journey itself isn’t an especially long one and takes around 20 minutes; but it takes you through beautiful countryside, pauses in Newby Bridge, then through some woodland and eventually to the edge of Lake Windermere.

Most people get off here and either go on to explore the aquarium, or go on to get the steam boat across Windermere. We stayed on the train and returned to Haverthwaite Station.

Days Out: The Lakeside & Haverthwaite Railway

Periodically, The Lakeside & Haverthwaite Railway have special events and special days. The day after our first visit was one of these special days. As it was sort of on our way home, we returned to do the whole thing all over again, but with a few child friendly activities, dressing up and sing songs. This was the icing on the cake for my son and our two visits to the railway have really cemented his love for it. I know that come spring, we’ll be back.

I have very fond memories of going on The Lakeside & Haverthwaite Railway when I was a child, and now my son does too. It really is a brilliant attraction, made better by having things to see and do at either end. It really was the highlight of a very brilliant weekend in the lakes.

For more information about The Lakeside & Haverthwaite Railway, visit their website.

Note: we paid for our tickets in full, I’ve just written about it because we loved it!

Christmas Recipe: Mulled Cider Jellies

At Christmas time I can’t get enough of mulled drinks. Mulled wine is a favourite but a few years ago I tried Mulled Cider and my head was turned. I’m more likely to drink Mulled Cider at home and it’s such a delicious and warming drink, it really sings Christmas to me.

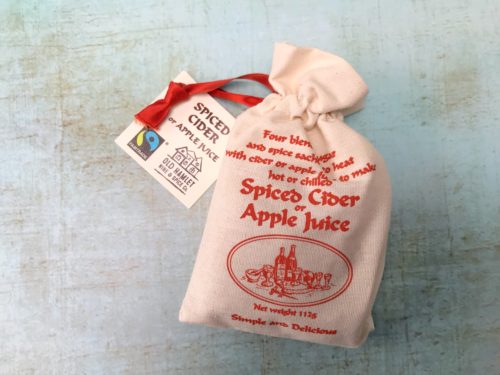
When I mull at home, I usually use a ready-made spice sachet, usually one from Steenbergs because I can’t fault them. This Christmas I’ve been using the Spices for Spiced Cider and Apple Juice and they’ve really hit the spot. All you do is warm through a litre of cider or apple juice, tip one of the sachets in and after a few minutes it’s ready.

Christmas Recipe: Mulled Cider Jellies

Sometimes, and this is not very often, I mull too much cider and I’ll have some left. Sure, I could heat it up again later, but I fancied making something different with it. I thought I’d make some Mulled Cider Jellies. It turns out they make a really interesting, different and delicious festive dessert. You could make them just as well with apple juice if you’re serving them to children or people who don’t drink alcohol. This recipe makes 4 good-sized jellies.

Christmas Recipe: Mulled Cider Jellies

Mulled Cider Jellies

Ingredients:

1 pint of mulled cider or mulled apple juice
2 tablespoons of sugar
A sachet of Dr Oetker Vege Gel

How to make Mulled Cider Jellies:

Take about 200mls of your cooled mulled cider and stir the Vege Gel into it, make sure all the powder dissolves.

Add the sugar and bring the remainder of the cider to the boil, once it’s boiling, add your 200mls of cider and Vege Gel into the pan and stir, stir, stir.

Christmas Recipe: Mulled Cider Jellies

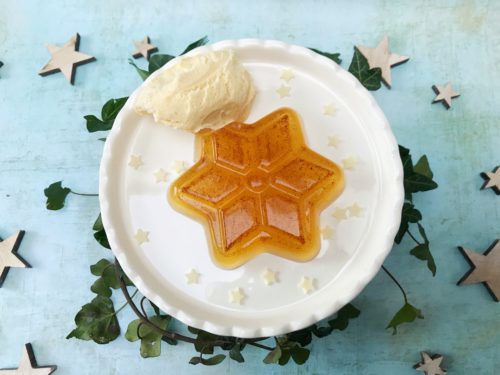
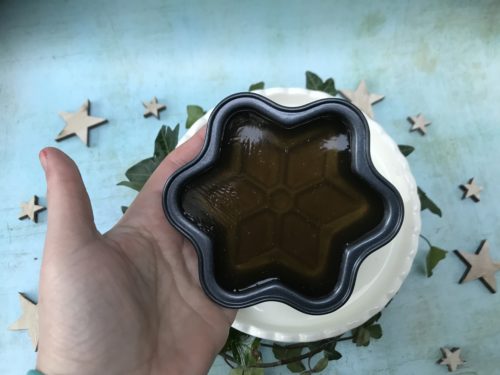
Make sure you have your moulds ready for your jelly as it will start to set really quite quickly. I used some small glass pyrex dishes and also a metal cake mould in the shape of a star. You could make one big jelly if you prefer.

Pour your jelly carefully into your serving dishes and put them in the fridge until it’s set properly. This took about two hours, but if you can it is probably worth leaving the jelly overnight in the fridge.

I turned my jelly mould out onto a serving plate, be careful when you do this so not to break the jelly.

Serve with good vanilla ice cream.

Be careful if you’re turning your jelly out of the moulds, I tried to move my jelly and ended up breaking a little piece off the corner which I then covered with ice cream, so it was all fine in the end.

It’s such a pretty little pudding, easy to do and something a bit different at Christmas.

If you enjoyed this, you might also like to try –

Christmas Recipe: Mulled Cider Jellies

I was sent some mulled cider spice by Steenbergs and decided to use in in this recipe. I have not been compensated for this post.

Book Review: Hedgehogs Don’t Live in the City

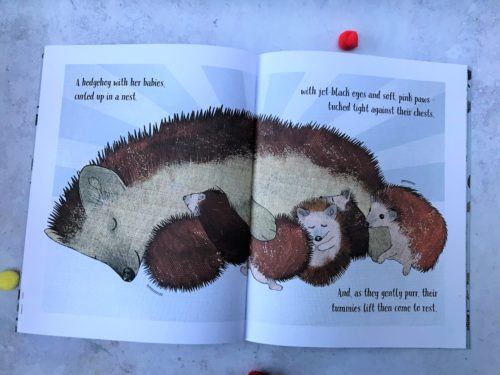
Hedgehogs Don’t Live in the City is a lovely book by Lucy Reynolds and illustrated by Jenna Herman. It’s about a brother and sister, Archie and Grace,  who go on an autumnal walk and discover a little family of hedgehogs.

Hedgehogs Don’t Live in the City is a gorgeous nature trail of a book, with lots of wildlife tucked away on each page to spot. The pages are alive with autumnal colours, with brightly coloured leaves littering the book. The children and the buildings are somewhat grayer, and all the natural things are as colourful as nature allows.

Book Review: Hedgehogs Don't Live in the City

The words are the understated star of this book. They’re gloriously descriptive; whipping winds, pounding footsteps and dancing leaves. Hedgehogs Don’t Live in the City really draws you in and you can almost smell the mellow fruitfulness of autumn.

Towards the back of the book there are pages of hedgehog facts and pages about how you can help hedgehogs in your own garden. I find hedgehogs are well-loved little creatures and children really enjoy reading and learning all about them. This is a lovely book to give to a little one who loves hedgehogs and nature.

Book Review: Hedgehogs Don't Live in the City

Hedgehogs Don’t Live in the City is suitable for ages 4-8. It is a lovely autumnal read and probably a great accompaniment to a nature trail too. The illustrations are beautiful, but for me, it’s a real joy of a book to read out loud, both for me and my son.

A Hedgehogs Don’t Live in the City by Lucy Reynolds costs £7.99 in paperback. It is published by Doodles & Scribbles and it is available from a wide range of bookshops and to order directly from Doodles & Scribbles.

If you enjoyed this review of Hedgehogs Don’t Live in the City, you might also be interested in The Hedgehog and her Hoglet.

Disclosure: We were sent a copy of Hedgehogs Don’t Live in the City for review purposes. All images and opinions are our own.

Review: Doctor Dolittle The Musical at The Lowry

Every year The Lowry in Salford Quays puts on a big family show. It’s not always Christmassy, but it’s always a good alternative to the traditional Panto. This year The Lowry are playing host to Doctor Dolittle The Musical and we went along to see if he really could talk to the animals.

Based on the popular 1967 film with Rex Harrison; this spectacular new stage show stars Mark Williams as the eccentric Doctor. In Doctor Dolittle, join him and his human companions and his exotic menagerie of animal friends on an extraordinary adventure to find the Giant Pink Sea Snail. With help from the Pushmi-Pullyu and his trusty sidekick Polynesia the Parrot, the good Doctor teaches us not only to talk to the animals but to listen to them as well!

Review: Doctor Dolittle The Musical at The Lowry

Fans of the original film, or the Eddie Murphy re-make will spot a few changes to the original story, but the main characters and the most favourite songs survive. In this production there is more of a focus on Doctor Dolittle’s relationship with the animals rather than him falling in love. Matthew Muggs played by Patrick Sullivan instead falls in love with Emma Fairfax (Mollie Melia-Redgrave).

The production is lush and visually striking, with a versatile paper set designed by Tom Piper. Each scene is brought to life by the animal puppets. There are 39 animal puppets and each one moves authentically and you really start to see some of them as actual animals rather than puppets, especially Jip the dog who is just wonderful. There are two giant puppets – the Giant Pink Sea Snail and the Giant Lunar Moth who are especially well done. At the end the moth flutters over the front few rows holding Doctor Dolittle in its legs, it’s very well done.

Mark Williams as Doctor Dolittle is warm and just crotchety enough. He doesn’t dominate the stage, but gives the animals the space to shine. Matthew Muggs (Patrick Sullivan) is a charming, engaging everyman, whilst Mollie Melia-Redgrave as Emma Fairfax is by far the strongest vocalist in the show and leads us through a procession of songs.

Little Tommy Stubbins; the boy who escapes from the orphanage to go on a grand adventure with Doctor Dolittle; is ably and enthusiastically played by six young boys. I think Thomas Ryan played Tommy on the night we attended and he is someone to watch out for in the future.

Vicky Entwistle voices and is the co-puppeteer for Polynesia the parrot. It’s a large part but I found myself drawn to watching Vicky instead of Polynesia, which was quite distracting. Doctor Dolittle also stars Brian Capron as both Albert Blossom and Straight Arrow. As Albert Blossom (the circus owner) he was brilliantly bawdy and it took a moment for me to recognise him. I really did enjoy the colourful circus scenes which were a real highlight.

Review: Doctor Dolittle The Musical at The Lowry

I feel I must mention the Ensemble cast, who were superb. They really helped to move the story along and were all lively, engaging and great singers and puppeteers.

The production contains 24 songs, some of which you might remember from the films (Talk to the Animals; I’ve Never Seen Anything Like It; and My Friend The Doctor). Doctor Dolittle is two and a half hours long, including a 20 minute interval; there are a couple of parts where the action really slows, which is a shame in an otherwise colourful show.

Doctor Dolittle The Musical is a joyful, colourful, all singing and dancing family show. Fans of the film would really enjoy the musical; and as Albert Blossom would say, you’ve never seen anything like it in your life!

For more information about Doctor Dolittle The Musical, and to buy tickets, visit the website.

Check out our run down of family theatre shows in the region this Christmas.

We were invited guests of The Lowry, all thoughts and opinions are our own.

Recipe: Chocolate Brownies with Boozy Cherries

Chocolate brownies are universally popular. I know my family absolutely adore them and whenever I make a batch, they usually disappear far too quickly. Brownies are the kind of thing you can easily adapt for different occasions or tastes.

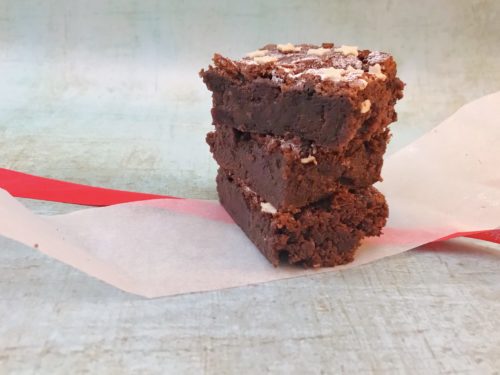
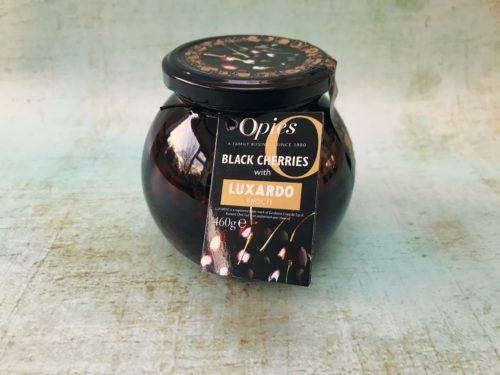
This week I’ve decided to bake the classic – chocolate and cherry brownies, but I gave them a festive twist and baked them with Opies Black Cherries with Luxardo Kirsch. They were so gooey and good – the perfect brownie!

Recipe: Chocolate Brownies with Boozy Cherries

Chocolate Brownies with Boozy Cherries

Ingredients:

250g milk chocolate
250g unsalted butter
4 medium eggs
250g sugar
60ml of vegetable oil
2 heaped tablespoons self raising flour
2 heaped tablespoons cocoa powder
150g drained Opies Black Cherries with Luxardo Kirsch
2 shots of the Luxardo Kirsch which the cherries had been in

How to make your Chocolate Brownies with Boozy Cherries:

Pre-heat your oven to 185° and line a deep sided baking dish with baking parchment.

In a bowl, over a pan of simmering water, melt the chocolate and the butter together until smooth. In a separate bowl, mix the sugar and the eggs, whisk them until they’re light and fluffy.

Pass the flour, cocoa powder through a fine sieve and add to the eggs and sugar. Gently whisk the ingredients together until combined. Then mix in the melted chocolate and the vegetable oil to combine. Stir through the cherries and kirsch and pour the batter into the tin.

Recipe: Chocolate Brownies with Boozy Cherries

Bake for 35-45 minutes until the brownies have lost their wobble but are still a bit gooey inside. Take out and leave to cool. You want to almost under bake them so it’s still soft in the centre.

Once they are cool, cut them into squares. I sprinkled my brownies with white chocolate stars and icing sugar to make them look a bit more festive.

Recipe: Chocolate Brownies with Boozy Cherries

I did have plans to make cherry chocolate brownie sundaes with them; layering them up with ice cream, whipped cream and drizzling more kirsch and cherries over the top. But I went out to work and when I came home they’d all gone, so you’ll have to use your imagination instead. The sundae sounded pretty tasty in my imagination!

Recipe: Chocolate Brownies with Boozy Cherries

Note: We were sent a jar of Opies Black Cherries with Luxardo Kirsch and I decided to use them in this recipe. I’ve not been compensated for this post.

Kids Crafts: Bubble Wrap Printed Christmas Cards

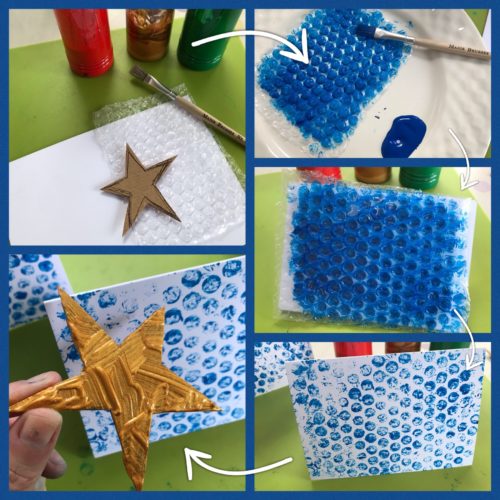
I’ve been playing around with some printing techniques I learned recently and together with my son we’ve made some fun Christmas cards with bubble wrap which are just a bit different to the usual. These Bubble Wrap Printed Christmas Cards are simple to do, but really look the part.

A little while ago I went to a gelatine monotype printing workshop with my friend Sarah at Crafts and Makes in Didsbury. The workshop was run by John Pinder and he taught us some basic printing techniques. I really enjoyed the workshop, but I’ve not yet had the time to make a gelatine plate to print on.

At the workshop we played about printing with different textures. One thing I especially liked was bubble wrap, it makes such a pretty pattern that I knew I could create something similar at home with some poster paint and blank card. The results are pretty good and would be good fun for kids to do in the run up to Christmas. Imagine Uncle David’s face when he opens his Christmas card to see this masterpiece?

Kids Crafts: Bubble Wrap Printed Christmas Cards

These Bubble Wrap Printed Christmas Cards are really simple to do, you might need to help/supervise/stop smaller children painting their faces/walls/the cat, but you probably do that anyway when you do crafts.

Bubble Wrap Printed Christmas Cards

You will need:

Some blank greetings cards
Bubble wrap
Thick cardboard
Selection of post paints
A paintbrush

How to make your Bubble Wrap Printed Christmas Cards:

Firstly, put newspaper down on the table you’re using, this could get messy. Cut a piece of bubble wrap to the size of the front of your greetings card. Squirt a blob of whatever paint colour you want for your background onto a plate and using the paintbrush apply an even layer of paint all over the bubbly side of the bubble wrap.

Kids Crafts: Bubble Wrap Printed Christmas Cards

Carefully lay the painted side of the bubble wrap onto the card and press it down all over. Peel it back, there will be enough paint on it to print another one or two cards. Ideally, leave the cards to dry before printing the next stage. Mine took about 20 minutes.

While you’re waiting for your cards to dry, take your thick cardboard and draw some simple festive shapes. I did a wonky star and a Christmas Tree. Cut out your cardboard templates. Once your bubble wrap background is dry, liberally cover one side of your Christmas shapes with paint. Press the painted side of your shape on the front of the card, carefully removing it so the edge don’t smudge too much.

To print the next card you’ll need to add more paint to the shape. Leave your cards to dry. If you feel it needs it, you could touch up the shape with some extra paint. Leave them to dry properly, maybe overnight, and then write them and send them to your favourite person.

If you enjoyed this, you might also like to try making –

Kids Crafts: Bubble Wrap Printed Christmas Cards