Crafts: How to make an Egg Box Dragon

Egg boxes have long been used for all kinds of kids crafts. They lend themselves to so many things, so this month we’ve turned one into an egg box dragon.

Dragons are our favourite mythical creatures. In our world they’re mostly friendly and none of them need slaying. Of course dragons have been figures in fiction for hundreds of years but only recently they’ve developed a friendlier reputation. We’re very fond of our bright green dragon, we’ve called him Dave and he’s a bit sparkly.

Crafts: How to make an Egg box Dragon

Our egg box dragon took a couple of craft sessions to make. We painted him first and left him to dry overnight. The next day we decorated him and made him look all fierce and fancy.

How to make an egg box dragon

You will need:
One egg box
Green, red or orange paint
String or wool
Googly eyes
Sequins
Pipecleaners
Blu Tack Glitter Pens or glitter
Bostik Glu Dots
Red and yellow card
Black felt tip
Crafts: How to make an Egg box Dragon

How to make your egg box dragon:
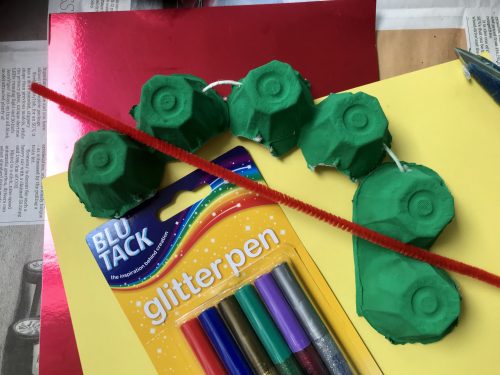
Using whichever coloured paint you choose, paint your egg box, making sure it’s well covered with paint. Put the box to one side to dry, preferably overnight.

Once dry, cut the egg box up. we cut our six egg box into thirds, so each section had two egg spaces. You can do them individually if you prefer. Using a skewer carefully poke through holes where you want to thread your sting through and tie your dragon parts together. We also poked some holes through to thread pipecleaner horns and a ridge on it’s back. A grown up will probably need to help with the tricky cutting, poking and threading.

Crafts: How to make an Egg box Dragon

Thread the string though the holes and tie the ends together. Thread through your pipecleaner horns and using the glu dots, stick on the dragon’s eyes. Then you can go crazy decorating it. We added sparkles and sequins along its body and dabs of glitter from the glitter pens. I can’t sing the praises of glitter pens enough, all the sparkle of glitter but without the mess!

Crafts: How to make an Egg box Dragon

Draw on some details with your black felt tip, I added a snout detail on his face and leave the glitter to dry. While your glitter is drying, cut out some red and yellow flames and stick them to your egg box so it looks like your dragon is breathing fire. Your dragon is now ready for some dragon action.

If you enjoyed this blog post, you might also like to try some jelly bean architecture.

Crafts: How to make a Clay Scrabble Tile Nameplate

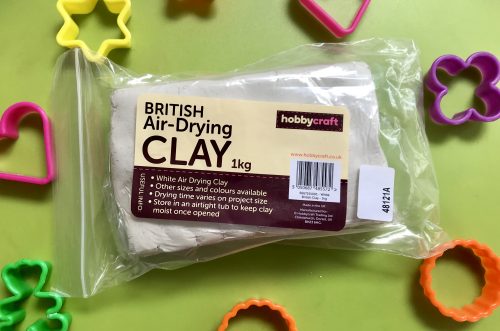
I’ve been curious about clay crafts for a little while. A few months ago I bought myself a cheap packet to play about with and it’s sat in my craft cupboard ever since. I didn’t really know what to do with it, but with a poorly child to entertain, I thought we’d have a play and see what we came up with. We ended up making a rather lovely clay Scrabble tile nameplate.

I figured that the boy loves playdough, so I thought the clay might have similar appeal, thankfully I was right.

Crafts: How to make a Clay Scrabble Tile Nameplate

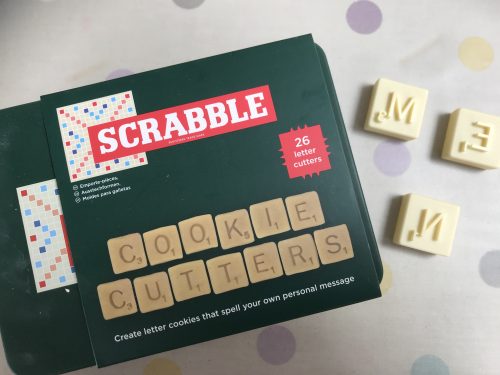
I got out my box of cookie cutter shapes and a rolling pin and we set to work. In my cookie cutter collection I found a box of scrabble tile cookie cutters, we thought they’d make really cool name plates and we think they do. Here’s how we did it.

How to make a Clay Scrabble Tile Nameplate

You will need:
A packet of air dry clay
A rolling pin
Some Scrabble Tile Cookie Cutters
A wooden toothpick
A length of jewellery wire
Some coloured paint, we used black
A fine paintbrush

Crafts: How to make a Clay Scrabble Tile Nameplate

How to make a Clay Scrabble Tile Nameplate:
Take a piece of clay and work it in your hands for a few minutes until it is pliable. Roll it out on a surface you don’t mind getting clay on, we used a plastic chopping board that could be put in the dishwasher afterwards.

Crafts: How to make a Clay Scrabble Tile Nameplate

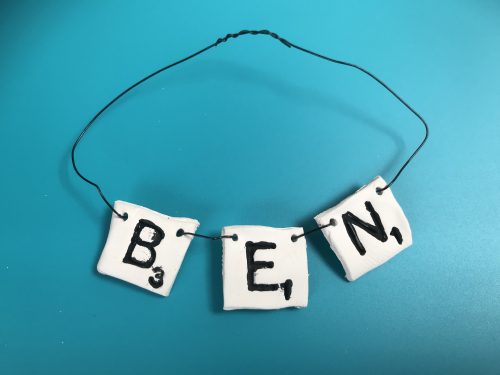
Taking your Scrabble tile cookie cutters, cut out the tile pieces you need. We were making a nameplate with the name BEN, so we cut out those letters with a few spares too. I made some holes with a toothpick so I could thread my wire through later. We left them to dry for 24 hours, though longer might be needed, depending on your clay.

Once the pieces were dry, I carefully threaded some jewellery wire through the holes and twisted the ends together. Then we took a fine paintbrush and a little bit of black paint and painted in the letters and left the paint to dry.

Crafts: How to make a Clay Scrabble Tile Nameplate

We were pretty pleased with our first clay craft, it’s a little bit rustic, but we think that adds to its charm. We feel quite inspired to try to make a few other things out of clay, so watch this space!

Crafts: How to make a Clay Scrabble Tile Nameplate

This post contains an affiliate link.

Kids Craft: Super Easy Woolly Sheep Pencil Topper

One of my favourite sights in spring is new-born lambs, we often pay our local community farm a visit, just so we can take a turn feeding the orphan lambs. Recently we’ve been doing quite a lot of spring themed crafts, so it felt natural to make something a bit sheepish, so we made this really simple Woolly Sheep Pencil Topper. It’s so cute we might make a herd of them to top all the pencils in our pencil pot.

Kids Craft: Super Simple Woolly Sheep Pencil Topper

Like I said, they really are incredibly simple to make. All you need are a few bits and pieces and no more than ten minutes of your time. If you don’t have a circular cotton wool pad (the type usually used to remove make up) then you could use a circle of plain white card instead. I think the cotton wool makes the woolly sheep pencil topper extra woolly though.

How to make a Woolly Sheep Pencil Topper

You will need:
One circular cotton wool pad
A small piece of black card for the face
Two googly eyes
A pair of scissors
PVA glue
A pencil

Kids Craft: Super Simple Woolly Sheep Pencil Topper

To make your Woolly Sheep Pencil Topper:
Take your cotton wool pad and fold it in half. Cut a slit about a centimetre from the top and another one about a centimetre from the bottom. This is to thread your pencil through.

Take your black card and draw the shape of a sheep’s head on it. Carefully cut it out. Using glue, stick the googly eyes into place, leave to dry if need be.

Using more glue, stick the sheep’s head onto the cotton wool pad body. Again, leave this to dry before threading the pencil through. Your Woolly Sheep Pencil Topper is now complete. Ewe can now use your pencil topper with pride!

If you enjoyed this, you might also like these other spring Crafts:

Kids Craft: Super Simple Woolly Sheep Pencil Topper

Crafternoon Tea at Elizabeth Gaskell’s House

Here in Manchester we are lucky enough to have a large number of historic buildings and houses. Hidden in plain sight on one of the busiest roads leading to the city centre is Elizabeth Gaskell’s House. The house is the former home of the famous author and her family. Her novels include Mary Barton, Cranford, North and South, Ruth and Wives and Daughters. I went along to enjoy a “crafternoon tea” session in the Servant’s Hall. Craft, tea, cake and a beautiful historic house – what’s not to like?

Crafternoon Tea at Elizabeth Gaskell's House, Manchester

Elizabeth Gaskell’s House have been running Crafternoon Tea sessions for the last few months. I’ve really wanted to go to them but I was a bit worried that my sewing skills were not good enough; but I need not have worried. I went along to try my hand at some Victorian Crazy Patchwork; a craft I’ve never heard of  before but one which is ideal for people like me who have fairly basic sewing skills.

The Crafternoon Tea sessions are run by talented volunteers. The Victorian Crazy Patchwork class was run by Margot, a very experienced and helpful teacher who provided everything we needed to create our own crazy patchwork. Margot began by talking us through, step by step through the process. One of the best things about Victorian Crazy Patchwork is if your sewing isn’t especially neat, it doesn’t matter because the stitching is covered by the fabric, making it ideal for beginners.

Crafternoon Tea at Elizabeth Gaskell's House, Manchester

Victorian Crazy Patchwork, Margot explained, was a style of patchwork which fine Victorian ladies would do to occupy themselves. They usually used scraps of silk from old dresses or from dressmaking to create colourful patchworks. I remember my husband’s Grandma having what I now know to be a Victorian Crazy Patchwork cushion.

Margot gave us all a pack including a template, a piece of calico and a notebook we could cover with our patchwork. There was a large bag of silk pieces on the table and we all selected a few pieces for our patchwork. We cut out our hexagon shaped centre pieces and stitched them onto our calico; then we cut pieces of contrasting silk and stitched them on. Sewing them so the stitches are underneath (this is hard to explain but hopefully you can get the idea from the photo below).

Crafternoon Tea at Elizabeth Gaskell's House, Manchester

Around half way through the session we stopped and made our way into the tea room for a pot of tea and a slice of really good cake. The tea room is a lovely airy space with the original stone floors from Elizabeth Gaskell’s days at the house. It was the hottest day of the year so far and it was the perfect place for some cool respite from the temperature outside.

Crafternoon Tea at Elizabeth Gaskell's House, Manchester

After we’d been fueled by tea and cake, we returned to the Servants Hall to carry on with our crazy patchwork. It soon became clear that despite my best efforts, I wouldn’t be able to finish it in the two and a half hour craft session. Thankfully Margot let me take everything I needed to finish it at home. In fairness, it was ambitious of me to try to finish within the time. But I left armed with the skills and knowledge to finish off my work at home.

The Crafternoon Tea at Elizabeth Gaskell’s House costs £19 and includes everything you need to create your craft as well as a hot drink and cake. Keep an eye on their website for more craft and literary events. I do know they have a few limited places left on their Crochet Afghan Squares Crafternoon Tea on 17th May and Paisley Woodblock Printing Crafternoon Tea on 21st June 2018.

Crafternoon Tea at Elizabeth Gaskell's House, Manchester
My not quite finished Victorian Crazy Patchwork.

I had the most lovely relaxing afternoon. Even though I went by myself, the rest of the crafters around the table were all very nice and chatty. It was lovely to switch off and concentrate on sewing the patchwork and enjoy the peaceful and historic surroundings of Elizabeth Gaskell’s House.

Elizabeth Gaskell’s House is located at 84 Plymouth Grove, Manchester, M13 9LW

Kids Crafts: How to make Tulip Handprint Cards

This month Craft Merrily have set the Bostik Bloggers the task of creating a flower craft. We decided we would make tulip handprint cards. They’re really simple to make and would make a lovely card to give for a lot of different occasions such as Easter, Mother’s Day or for a birthday. The handprint adds a lovely personal touch too.

Kids Crafts: How to make Tulip Handprint Cards

We went away with some friends for a week, so I planned a few crafts for us to entertain the kids with while we were away. These tulip handprint cards were one of them. The children were all so pleased with their cards and I like to think the recipients were too.

How to make Tulip Handprint Cards

You will need:
1 piece of A4 card, I used pale blue
2 pieces of different coloured paper, I used yellow and pink
1 green pipecleaner
Bostik White Glu
A pencil
An envelope which will fit your A5 card

Kids Crafts: How to make Tulip Handprint Cards

How to make Tulip Handprint Cards
Fold your A4 piece of card in half. Cut out a large rectangle of coloured paper (we used yellow) and stick it onto one side of your card with Bostik White Glu.

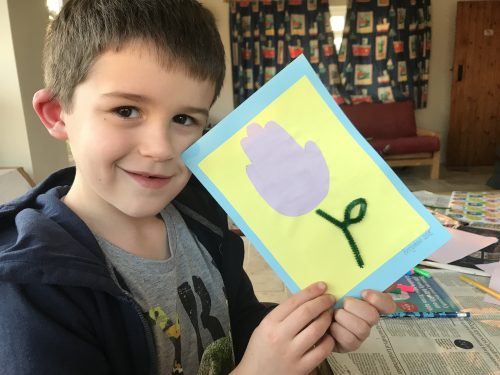
Take a pencil and draw around a child’s hand, carefully cut out the hand shape. A grown up might need to help with any cutting out, especially the trickily shaped handprint. Stick this near the top of the rectangle.

Shape your green pipecleaner into the shape of a flower stem, you could make a loop about half way to make it look like a leaf if you want. Glue it on the card below the flower.

I sandwiched it under a glass dish and left the glue to dry overnight. I’ve no idea why I used a glass dish, it was just close to hand I guess. It worked though.

Kids Crafts: How to make Tulip Handprint Cards

Once the glue is dry, write your card and put it in the envelope ready to delight the lucky recipient!

It’s pretty cute isn’t it?

Check out my other craft tutorials here!

Kids Crafts: How to make Tulip Handprint Cards

I am a Bostik Craft Blogger and I was sent the materials to create this craft from Craft Merrily. 

Kids Crafts: Quick and Easy Earth Day Craft

Every year we celebrate Earth Day on 22nd April. Earth Day is all about loving our planet and doing what we can to protect and care for it. It’s a good excuse for us to talk about things such as recycling, reducing our energy usage and what we can do to lower our personal impact on the planet. We will be doing a few things at home to mark Earth Day, such as reading some books about the environment, learning more about recycling and doing some Earth Day craft.

Kids Crafts: Quick and Easy Earth Day Craft

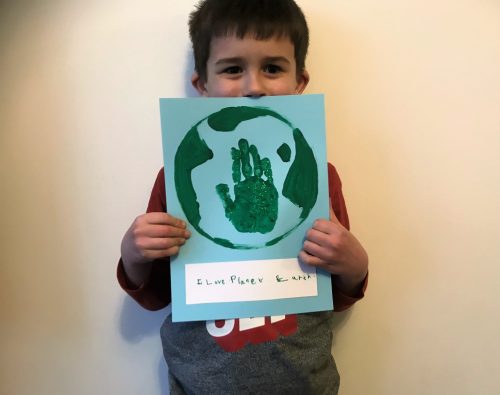
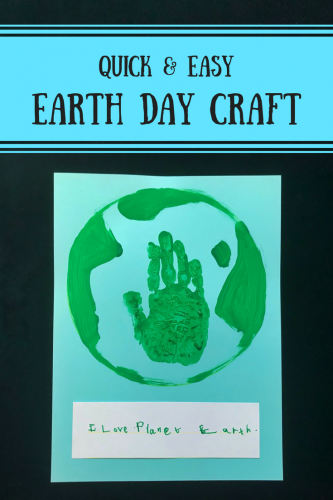
To start us thinking about Earth Day, we began with a really simple but quite effective Earth Day craft. We painted a little globe, glittered it up and wrote a little message underneath. It’s easy to do and would be great to do with your child, or a group of children.

Easy Earth Day Craft

You will need:
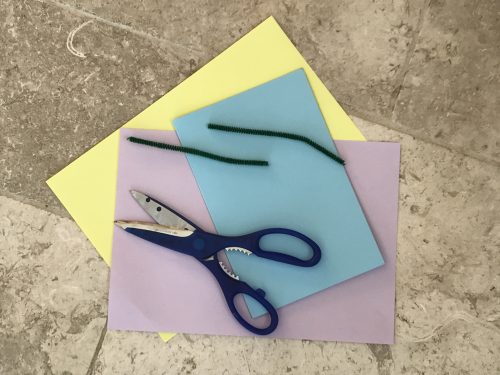
One piece of blue card
Green poster paint
A pencil
A side plate to draw around
The hand of a small child
Some white card
A pair of scissors
Green glitter or a glitter pen
Glue

Kids Crafts: Quick and Easy Earth Day Craft

How to make your Earth Day craft:
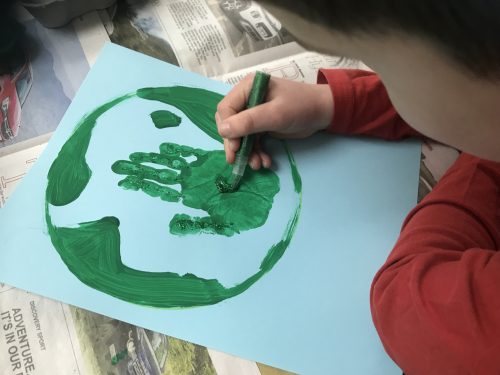
Take your side plate and put it on the blue piece of card, draw around it with your pencil. Liberally paint the palm of the hand of a small child with the green poster paint and press it in the middle of your circle. Wash the hand of the small child before it touches your walls (this part is very important).

Kids Crafts: Quick and Easy Earth Day Craft

Hand the paintbrush over to the newly clean handed small child and get them to paint a few islands and continents on your globe. When this has been done to everyone’s satisfaction, either sprinkle green glitter over the hand-print or leave the paint to dry and then decorate with glitter pens.

Kids Crafts: Quick and Easy Earth Day Craft

While the masterpiece dries, take a piece of white card and cut it down to size. Get the small child to write a suitable statement on the card, we went for “I love Planet Earth”. Which seemed like a suitable catch-all. Stick the writing on the blue card below the planet. I used Bostik glu dots, but use what you have, a glue stick or PVA or whatever. Your Earth Day craft is now complete.

Don’t forget to recycle it when you’ve finished with it!

If you want to learn more about Earth Day or explore the topic of recycling with your child, there are some free to download worksheets here.

If you enjoyed this, you might also like to make some cool egg and cress heads.

Kids Crafts: Quick and Easy Earth Day Craft

Easter Crafts: 3 Ideas for Eggcellent Painted Eggs

When I got an email from school reminding me that entries for the Easter Egg Painting competition needed to be handed in this week, I went into a slight panic. Although we love doing crafts together, he can be a bit easily distracted if something isn’t done and dusted in one session. We chatted about what we could do and between us we came up with three easy ideas for painted eggs.

This was very much a two-day job. We needed to paint our hard-boiled eggs a few days in advance so they could dry properly, then finish them off another day.

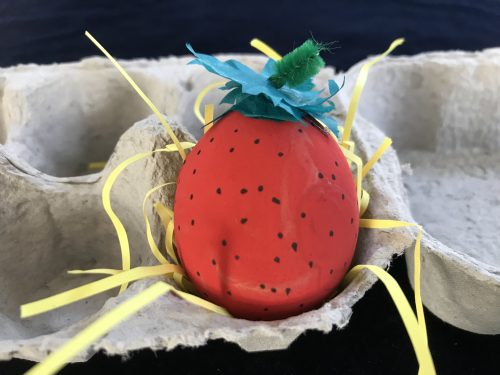
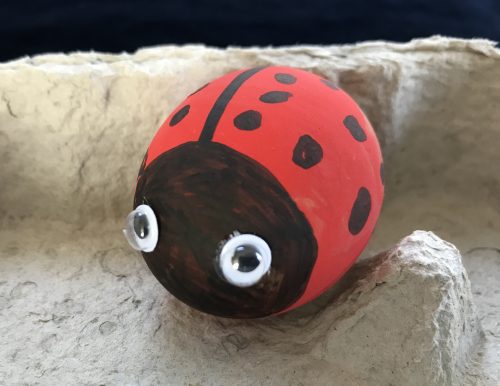
We had decided to make ladybird, a strawberry and a flowering cactus painted eggs. We’ve painted stones and ladybirds and strawberries before, so I knew we could probably do them easily.

I hard-boiled three eggs and left them to cool overnight. The next day the boy painted two of them red and one green; we left them to dry overnight. I’d left them in the little painting bowls we used, so I needed to turn them so they’d dry evenly.

Painted Eggs – A Strawberry

We started off with the strawberry which he had painted red. While he used a black marker pen to draw dots on for seeds, I cut out some green tissue paper for the leaves and made a pipecleaner stem which I bent at the bottom. Using a glue gun I glued the leaves and stem to the top of the strawberry and left it to dry. To present it, we nestled it in an egg try on top of some shredded yellow paper for straw.

Easter Crafts: Three Ideas for Eggcellent Painted Eggs

Painted Eggs – A Flowering Cactus

Next we moved on to our flowering cactus. This was quite simple. While I made a pink flower out of a couple of scraps of pink tissue paper, he drew X’s all over to look like cactus prickles. Once he’d finished, I used the hot glue gun to stick the tissue paper on top. Then we turned an empty cardboard kitchen roll tube into a plant pot for the cactus. We cut it down and taped up the bottom so the egg wouldn’t fall out. We then filled the pot with tissue paper and then nestled the cactus on top.

Easter Crafts: Three Ideas for Eggcellent Painted Eggs

Painted Eggs – A Ladybird

Finally we painted up the ladybird. I drew the line down its back and made a circle for its face, he coloured the face in black and added the spots. Then I used the hot glue gun to fix some googly eyes to its face and it was done.

Easter Crafts: Three Ideas for Eggcellent Painted Eggs

I think these are really simple to do and they look great too. My son and I enjoyed working on them together. I could probably have easily used PVA glue instead of the glue gun; but it was quicker and the glue dries much faster. Plus I wanted to try out my new toy (I have the burnt fingers to show for it too)!

If you enjoyed this, you might also like these other Easter Crafts:

Easter Crafts: 3 Ideas for Eggcellent Painted Eggs

Crafts: How to make a Packing Peanut Flower Garland

These days we’re increasingly mindful of what we throw away. Disposing of plastic and packaging responsibly is something we’re really trying to do, although not always successfully. I often get boxes, packages and deliveries and where I can I recycle or re-use the packaging, but sometimes I need to get creative. When a box arrived filled with packing peanuts my heart sunk. What was I going to do with all these? The answer was simple, crafts. On this occasion I thought I’d make a Packing Peanut Flower Garland to pretty up my freshly painted living room.

Crafts: How to make a Packing Peanut Flower Garland

I hadn’t realised this until now, but most packing peanuts are made from cornstarch, so if you get them wet they just dissolve into a sticky mess. I thought they were made from a plastic foam which wouldn’t biodegrade, but I was wrong. If you can find no other use for them, you can happily throw them in your compost bin and think no more about it, but I had plans for my packing peanuts!

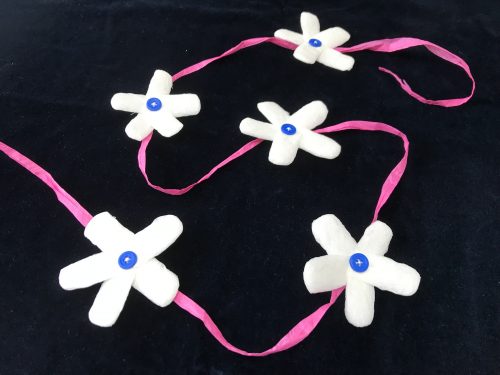
The Packing Peanut Flower Garland is a simple craft which I happily sat and sewed while I was watching my current guilty pleasure – Say Yes to the Dress! It doesn’t require any great skill with sewing – because I have none really, but it’s a lovely little garland which costs pennies to make and would brighten up any space!

make a Packing Peanut Flower Garland

You will need –
Packing peanuts – 5 or 6 per flower
Needle and thread
Buttons
A long piece of ribbon

Method –
Flatten your packing peanuts. I used a rolling pin but you can squash them flat with your hands if you want.

Take 5 or 6 flattened peanuts and arrange them in a flower shape. Using a needle and thread, sew them together in the centre of the flower. Once they’re secure, take your button and sew it on to the centre of the flower. Then place your flower where you want to sew it on the ribbon and stitch it in place through the button.

Crafts: How to make a Packing Peanut Flower Garland

Keep sewing flowers and adding them to the garland until you’re happy with how many flowers you’ve got. Tie a small loop at each end of your ribbon and hang up wherever you think best. It doesn’t matter where, as long as it’s dry!

I’m really quite pleased with my Packing Peanut Flower Garland. It’s so simple and costs very little to make, it’s the prefect frugal craft for those who hate waste!

If you enjoyed this, you might also like some of my other craft posts.

Crafts: How to make a Packing Peanut Flower Garland

Crafts: Simple Paper Plate Hot Air Balloons

This month Craft Merrily have set the Bostik Bloggers the task of creating a flying craft. I asked the boy what he wanted to make with his friends and he said hot air balloons. His wish is my command, and so I set to work gathering what we needed to make hot air balloons.

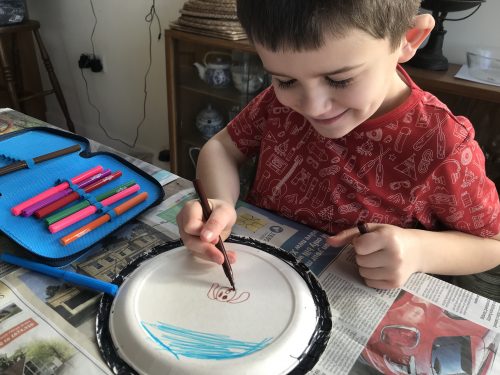
These hot air balloons are a really simple craft and a great excuse for the children to let their imaginations go wild and to decorate their balloons however they want. I did originally imagine that they would want to decorate the hot air balloons with pieces of coloured paper and sparkly embellishments, but on the day they were very keen to just draw pictures of the dog.

Crafts: Simple Paper Plate Hot Air Balloons

How to make Paper Plate Hot Air Balloons

You will need:
A paper plate
Some string or wool
A paper cup
Bostik White Glu
Scraps of colourful paper
Felt tips
Sparkly embellishments

How to make your hot air balloons:

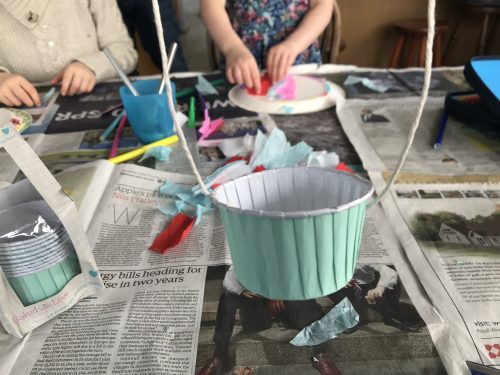
Set up your craft table and set the kids to work decorating the back of the paper plates (this is so the balloon looks domed). I lay our Bostik White Glu, scraps of colourful paper, felt tips and some extra embellishments and let them get on with decorating their balloons how they wanted.

Crafts: Simple Paper Plate Hot Air Balloons

While they were busy decorating, I took the paper cups and made two small holes to thread the string through. I then cut a length of sting, threaded it through each hole and knotted it inside the cup.

Crafts: Simple Paper Plate Hot Air Balloons

Once they’d finished decorating their plates I sellotaped the loop of string to the back of the plate, making a loop at the top of the plate so it could be hung up. We then left them alone for a few hours for the glue to dry.

Crafts: Simple Paper Plate Hot Air Balloons

They were delighted with their hot air balloons and were really happy when we hung them up around the house. They filled the paper cup basket with all kinds of things too. Small teddies and little LEGO figures found themselves floating through the sky!

It’s such a simple craft, perfect for a rainy day and great for making use of any craft bits and pieces you’ve got in your craft box.

Check out my other craft tutorials here!

Crafts: Simple Paper Plate Hot Air Balloons

Kids Crafts: How to make a cheery Daffodil flower

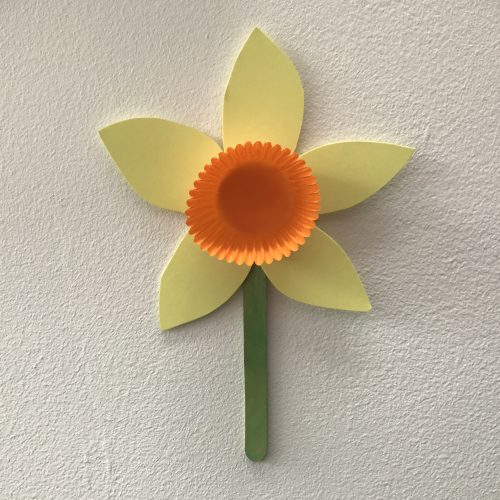
With the first signs of spring slowly making an appearance, and with St David’s Day around the corner, what better craft to make than a cheery daffodil or two. This lovely daffodil craft is perfect for toddlers and small children to make. It’s very simple to make and little ones will be as pleased as punch with their efforts.

St David’s Day is on 1st March and is a day of celebration of both St David’s life and the Welsh people and their culture. St David is the patron saint of Wales and on 1st March it is traditional for Welsh people to wear daffodils or leeks, both of these are the symbols of Wales. The wearing of a daffodil on St David’s Day was made popular by the Victorians, in Wales it is also known as “Peter’s leek” and its Welsh name is “Cenhinen Bedr”.
Kids Crafts: How to make a cheery Daffodil flower

Daffodils are a lovely, bright, cheery spring flower, they’re hard to find at other times of the year. Bring a bit of sunshine in with this cheery daffodil craft!

How to make a cheery Daffodil

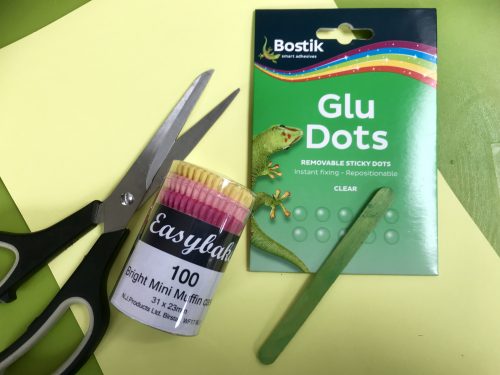
You will need:
Some yellow paper or card, card is better
Green lolly sticks or straws
Some yellow or orange mini muffin cases
Bostik Glu Dots

Kids Crafts: How to make a cheery Daffodil flower

How to make your daffodil:

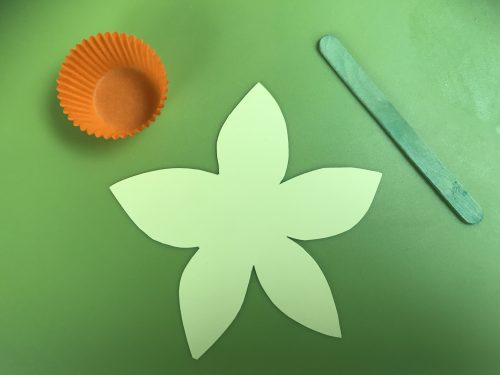
Using a pencil, draw the outline of your flower on your yellow card and carefully cut it out. An adult might want to help with this part.

Using the Glu Dots, stick the green lolly stick or straw to the back of the flower.

Kids Crafts: How to make a cheery Daffodil flower

Using another Glu Dot, stick the mini muffin case in the middle of the flower. Now admire your pretty daffodil!

It’s as simple as that. They look great, we’ve made a few and stuck them around our kitchen. They’re a cheery reminder that spring is nearly sprung and that winter will soon be behind us for another year.

If you enjoyed this, you might also like these other Crafts:

Kids Crafts: How to make a cheery Daffodil flower