How to make your own Quince Gin

A few weeks ago I knocked up a batch of Parma Violet Gin, and very acceptable it was too. Buoyed on by my gin making triumph, and somewhat overwhelmed by a glut of quinces, I decided to try my hand at making some Quince Gin.

Quince Gin, or any fruit flavoured gin is really easy to do, you just need a big jar, some fruit, a bit of sugar, gin and some time.

I’ve never really drunk much quince gin before and now that I have, I find it hard to understand why it’s not more of a thing. It’s not sweet and sickly, but it’s delicately perfumed, just like the fruit and it’s really very special.
How to make your own Quince Gin

We have a quince tree in our garden, so most autumns we are blessed with a fairly decent crop of fruit. Most of this goes towards making quince jelly, which is excellent with cheese, but this year I put aside two nice big quinces for ginning with. It’s simple to do, you just need patience.

How to make your own Quince Gin

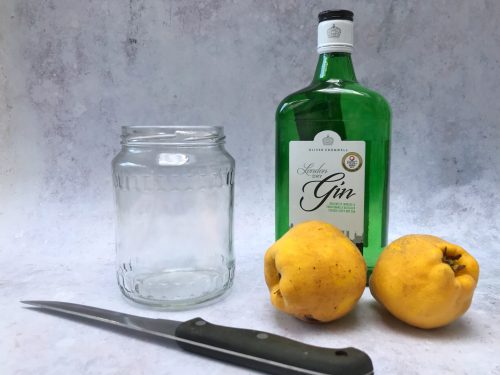
You will need:

380mls Gin, I used the cheap stuff from Aldi
2 large quinces
30g sugar
A large jar
Coffee filters or muslin
A funnel
A nice bottle

How to make Quince Gin:

The first thing I did was measure how much gin my decorative bottle would take. My bottle would hold 350mls of gin, so allowing for a little bit of wastage during the straining process, and me having a little taste, I measured out 380mls of gin and poured it into a large sterilised jar.

To sterilise your jars and bottles, put your clean jars in a low oven for at least half an hour. Carefully remove your jars from the oven (they will be incredibly hot) and allow them to cool down a little.

Chop up your two clean quinces as small as you can be bothered to do. I removed the small core and the pips. Once they’re all chopped up, add them to your large jar and top up with 30g of sugar. Put the lid on your jar and give it a good shake.

How to make your own Quince Gin

Now, the fruit at the top of the jar might be a bit exposed to the air; this bothered me, so I took a piece of baking paper and made a cartouche of sorts. A cartouche is just a bit of paper which you cover the top of food with when you’re cooking to make sure the contents are submerged. This stops the quince at the top of the jar from going brown.

Put the jar to one side, making sure you shake the jar every few days. Leave the quince to sit in the gin for 3-6 weeks.

When the time is up, take your sterilised bottle and using a funnel with some muslin or a coffee filter in it; strain the gin into the bottle. I found that it was best if I strained it twice. Just make sure you replacing the muslin with a new piece after the first straining.

How to make your own Quince Gin

Seal your bottle and decorate it with a nice label if you’re giving it as a gift. I’ve called this gin “Two Quinces” after the 1992 Spin Doctors song, you’re welcome.

If you’ve got some quince to spare, you might also like to try this recipe for Goats Cheese & Caramelised Onion Galette with quince.

How to make your own Quince Gin

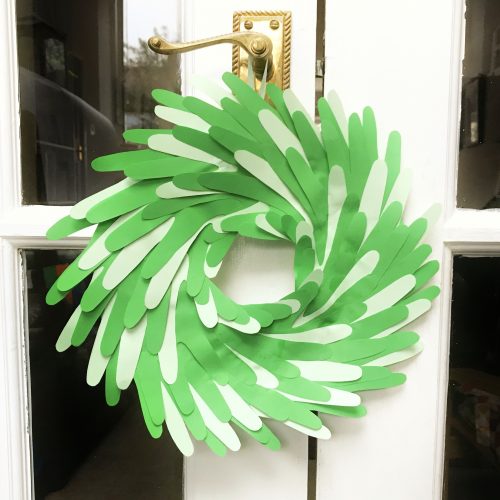
Kids Crafts: Simple Hand Print Christmas Wreath

I’m all about the Christmas wreaths at the moment and wanting to make a Hand Print Christmas Wreath before my son’s hands grow too big, this week we set our minds to making this lovely hand print wreath.

My son has just turned 8 years old and he’s growing so fast. A few days ago we were looking at some clay hand prints he did as a baby and we were marveling at how much he has grown. His hands are shaped like his father’s hands, square, stout and strong. In a year or two his hands will be the same size as mine. It’s going too fast, too fast.

Kids Crafts: Simple Hand Print Christmas Wreath

Wanting to preserve his hand print a little, this easy to make Hand Print Christmas Wreath is a lovely thing to do with children. Here’s what we did…

Make a Simple Hand Print Christmas Wreath

You will need:

A paper plate
A pencil
Scissors
Coloured paper, preferably two colours.
Glue, I used a Bostik Wide & Fine Glu Pen
Some ribbon

Kids Crafts: Simple Hand Print Christmas Wreath

How to make your Hand Print Christmas Wreath:

To begin with, take your paper plate and in the centre of the plate  draw around your child’s hand. Then carefully, making sure not to cut across the plate (because you’ll be making a ring out of it) cut out the hand shape, this will be your template.

Now carefully trim around the inner ring of the plate, so you have a nice ring to glue your hand prints too later. Cut a small slit in the top of the ring and thread a piece of ribbon through, knot the ribbon. This is how you will hang your wreath once it’s finished.

Kids Crafts: Simple Hand Print Christmas Wreath

Take your hand print template and draw around it on your coloured paper. I think I ended up using 8 pale hand prints and 22 darker hand prints, but the more you have, the better the effect I think.

When you’ve got all your hand shapes cut out, it’s time to sit down with the glue. Put a layer of glue all over the plate ring and then place your first hand print on it. Don’t press it down yet as you’ll have to slip another hand shape under it, and then under that.

Put a small dollop of glue on the palm of each hand shape and work around the ring layering the hands under each other. This will make sense when you’re doing it. If you’re using two colours of paper, make sure they are evenly distributed.

Once you’ve worked your way around the ring and the hand shapes are all overlapping each other pretty evenly, then you can press the shapes down onto the ring. Leave the glue to dry for a few hours. Once it’s dry it’s ready to be hung up. If you wanted you could add some embellishments, like little red pom poms or something.

Kids Crafts: Simple Hand Print Christmas Wreath

So there we have it, one very simple Hand Print Christmas Wreath – a great way to remember your children’s little hands. It’s a handmade Christmas decoration which will look great year after year.

If you enjoyed this, you might also like to try –

Kids Crafts: Simple Hand Print Christmas Wreath

Children’s Book Review: Who Owns These Bones?

Who Owns These Bones is written by Henri Cap, Raphael Martin and Renaud Vigourt and is a unique look at animal skeletons and anatomy for 7-11 year olds.

My son is fascinated by animals of all types and on a recent trip to Wild Discovery, he was especially interested in some pictures of bat skeletons. This got us all talking about bones and skeletons (and bat knees which bend the wrong way). Keen to capitalise on this new enthusiasm for skeletons, we’ve been reading Who Owns These Bones.

Children's Book Review: Who Owns These Bones?

Learning about what’s inside our bodies and how it all works is an essential part of science. Learning about animal skeletons and how they work and how they have evolved is both very important and actually quite a lot of fun. In Who Owns These Bones, you will discover a whole host of skeletons and learn about what makes each one unique. You’ll learn how to tell the difference between a human skull and a gorilla’s skull and a whole lot more besides.

The book is informative and facts are presented in slightly more than a bite-size format. Each page has flaps which you can lift up which shows the animal skeleton and the animal itself. The book covers all kinds of skeleton facts; from horns and antlers, teeth; how legs, feet and hands are put together, to the skeletons of creatures which swim, like fish, sharks and squid. Importantly it includes the proper scientific names for things, such as exoskeleton and coelacanth.

Children's Book Review: Who Owns These Bones?

Who Owns These Bones is a big book with a lot of information in it. It’s not a reference book, but a fun way of exploring biology, evolution and zoology. It’s perfectly pitched at the right age group, it’s accessible and interesting enough for my 8 year old to really get it; but with the depth of information and detail which would still enthrall an 11 year old.

It’s a stylish hardback book; printed in mostly blues and oranges, with detailed illustrations of skeletons and creatures alike. There’s some humour and a lot of good solid information. Who Owns These Bones would be a great book for children who are interested in biology and science. It ticks all the right boxes for us; it’s fun, accessible, interesting and educational.

Who Owns These Bones costs £16.99. It’s published by Laurence King and it is available from a wide range of bookshops including Amazon.

For details of more children’s books published by Laurence King, visit their website.
Disclosure: We were sent a copy of Who Owns These Bones for review purposes. All images and opinions are our own.
20 easy ideas for Christmas Day Starters

Christmas dinner is one of the foodie highlights of the year. For me, it’s not necessarily the food which makes it special, it’s sitting down with the family, sharing a meal and enjoying the occasion. Whilst the main course on Christmas Day is more or less fixed, the Christmas Day Starters are a movable feast.

It can be difficult to decide what to make for your Christmas Day starter, but ideally it should be something you can make ahead of time, or something you can quickly cook before serving.

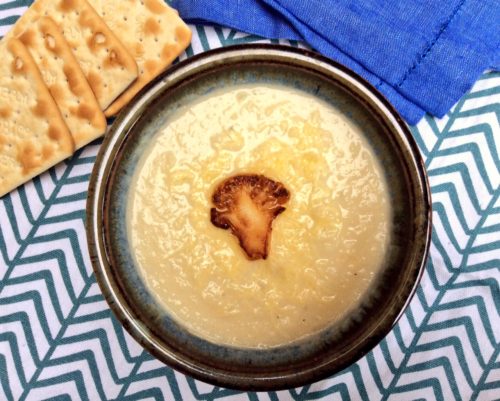
Our family always has soup as a Christmas Day starter. This year I’ll be serving my luxurious cauliflower and chestnut soup which is a grand way to start off the festive feasting. Plus, it’s so easy to make ahead and freeze. All you need to do is warm it through and serve with some crusty bread. Happy families!

20 easy ideas for Christmas Day Starters

Christmas Day Starters

Pâté, meat or veggie – served with melba toast. It’s a Christmas Day classic!

Goats cheese caramelised onion tarts

Mini Yorkshire puddings with creamy smoked trout and horseradish pâté

Crab and avocado tian with lovely thin Melba toast and good butter

Soup – make your own or jazz up a tub of shop bought. It’s a simple starter and a crowd pleaser!

20 easy ideas for Christmas Day Starters

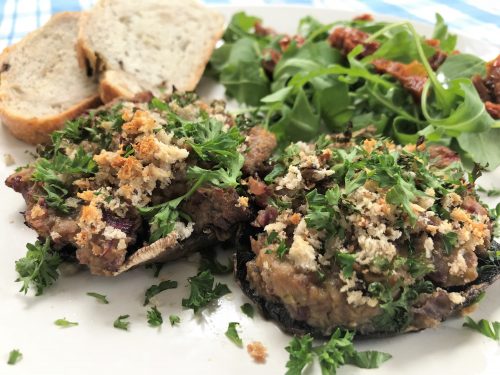
Stuffed mushrooms wrapped in Parma ham

Prawn cocktail – a 70’s classic which will never go out of fashion.

Scallops, pea puree and black pudding

Parma Ham and melon

Smoked salmon blinies with cream cheese

Pâté stuffed Mushrooms

20 easy ideas for Christmas Day Starters

Pan fried mushrooms on ciabatta with a Stilton sauce

Antipasti – Olives, sundried tomatoes, mozzarella balls and cured meats

Oysters –  a simple classic

Pear and mozzarella wrapped in Parma ham

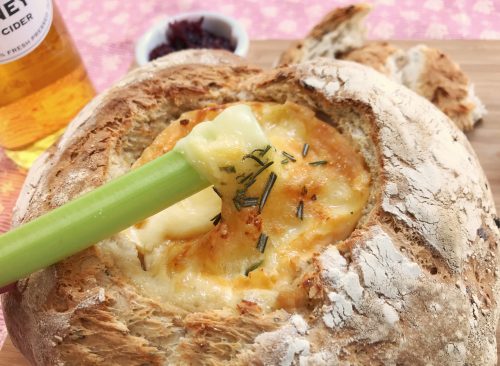
Mini baked Camemberts with bread and celery to dip – super quick and easy

Baked brie or Camembert to share

20 easy ideas for Christmas Day Starters

Figs with mozzarella

Filo baked figs with goats cheese

Potted shrimp and crusty bread

What are your favourite Christmas Day starters? Let me know in the comments below.

20 easy ideas for Christmas Day Starters

Review: The Lanterns at Chester Zoo

With the nights drawing in and Christmas just around the corner, we’ve been filling our diary with lots of festive fun. Top of the list was The Lanterns at Chester Zoo; an evening of magic and sparkle, full of lights and with something special around every corner. I’m not even exaggerating.

Regular readers will know that we are massive fans of the Just So Festival which is organised by Wild Rumpus. Wild Rumpus have sprinkled their magic all over Chester Zoo and The Lanterns and it’s a real multi-sensory experience.

Review: The Lanterns at Chester Zoo

Tickets are timed entry, so there’s an even flow of people throughout; it’s busy but not uncomfortably so. As you make your way to the entrance there are people flying huge neon butterflies and giant snails scooting about the place to entertain the kids and give you a little hint of what is to come.

Review: The Lanterns at Chester Zoo

Once through the gate you step into the Garden of Delight and you’re immediately transported into an illuminated magical world full of giant flowers and colourful lights. Make sure you make your way to the people who are giving out lanterns; the children get a little bucket lantern with an LED tealight and each family gets a larger lantern to carry too. It’s a lovely sight, looking ahead to see the makings of a lantern parade ahead of you.

Review: The Lanterns at Chester Zoo

Marvel at the giant giraffes, lions, elephants and tigers of the Moonlit Meadow. Meet the friendly ostrich and emu in Cloud Cuckoo Land, there’s so much to wonder at. I loved watching my son’s face as we walked around, he was in awe. Go through the Northern Lights where you can say hi to Father Christmas and meet some illuminated reindeer, you’ll soon find the food market where you can have something to eat and drink to set you on your way.

Review: The Lanterns at Chester Zoo

It was at the market we bumped into some friends and we carried on our journey together. The Enchanted Woodland was just that; with people operating flying barn owls, squirrels and deer, the trees were all lit up and it took my breath away. Around the corner you’ll find a snowy wonderland; with snow machines pumping out snow-showers, much to the absolute delight of everyone there. I confess we hung around that area for quite a while because it was just so lovely.

Review: The Lanterns at Chester Zoo

The Wonderland area was a space dedicated to Alice in Wonderland, complete with a giant rabbit and the Cheshire Cat. One of my favourite areas was Rainforest Glow, which just took my breath away. There were giant rainforest flowers hanging from the ceiling, glowing in the lights, plus illuminated rainforest sloths and grubs.

Review: The Lanterns at Chester Zoo

The Ice Kingdom was a great way to finish off the journey. The kids were queuing up to feed the lantern penguins fish and each were given special glasses to look at the lights through which turned all the lights into twinkling rainbows. We were sad to leave. I want to live in The Lanterns.

I really don’t want give too much away about the whole experience, but around each corner you’ll find something really special. It’s festive without being too overtly Christmassy. You will see Father Christmas and some of his elves in passing, but it’s really more about the lights, lanterns and illuminated sights. It’s a real sensory treat from start to finish. We were in awe from start to finish and I’m really ready to fill my own home with sparkle.

In terms of accessibility, the whole trail is on footpaths. There are no steps or stairs and if you’re pushing a wheelchair or a buggy, you should be fine. There aren’t a great many places to sit down, apart from near the food market, so you might want to consider that. It took us around 2 hours to walk around.

There are timed admissions between 4pm-7.45pm and it closes at 9pm. Children’s tickets are from £10-£15 and adult tickets from £12-£17.50.

For more information or to book your tickets visit the Chester Zoo website.

Review: The Lanterns at Chester Zoo

We were invited guests of Wild Rumpus and Chester Zoo. All images and opinions are our own.

Six Family Christmas Shows in Manchester

Christmas is a time for traditions and one of ours is a trip to see a Christmas show or two. In Manchester we have lots of great theatres within easy reach of our home and they always offer an exciting selection of Christmas productions. There’s something for everyone. Love panto? Go and see Sleeping Beauty. Got little ones? Go and see Stick Man at The Lowry. Below are six family Christmas shows you can see in Manchester this Christmas…

Stick Man, The Lowry 1 December – 6 January

This classic tale by Julia Donaldson is on at The Lowry from 1st December to 6th January. The story follows the Stick Man on a series of unfortunate adventures which lead him far from the comforts of home. But will he ever make it back to the family tree?

Stick Man is a modern classic and is suitable for children aged 3+. Fans of the book will enjoy this delightful adaptation where Stick Man finds himself in all kinds of perilous situations.

For more information and to buy tickets, visit the website.

Five Family Christmas Shows in Manchester

Raymond Briggs’ Father Christmas, Waterside Arts 4 – 31 December

Children of all ages will delight in Briggs’ grumpy but loveable Father Christmas as he gets ready for his busiest day of the year: Christmas Eve.  Watch as he prepares his Christmas deliveries, feeds his reindeer and finally takes flight into the snowy night. But things don’t run smoothly and he soon encounters soot-covered chimneys to squeeze through and treacherous weather conditions.

With plenty of live music, songs and playful puppetry, this critically acclaimed adaptation of Raymond Briggs’ much loved book is a delightful festive treat for children to enjoy. Suitable for ages 3-11 years.

For more information and to buy tickets, visit the website.

Doctor Dolittle, The Lowry 11 December – 5 January

This year’s festive extravaganza at The Lowry is the hotly anticipated Doctor Dolittle. It’s based on the popular 1967 film with Rex Harrison and stars Mark Williams, Vicky Entwistle, Brian Capron and Adele Anderson.

Join the eccentric Doctor, his human companions and his exotic menagerie of animal friends on an extraordinary adventure to find the Giant Pink Sea Snail, that holds the secret of life and making the world a happier place. With help from the Pushmi-Pullyu and his trusty sidekick Polynesia the Parrot, the larger-than-life Doctor Dolittle teaches us not only to talk to the animals but to listen to them as well!

For more information and to buy tickets, visit the website.

Five Family Christmas Shows in Manchester

Little Gift, The Lowry 18 – 31 December

Ted is a lonely old soul, living all alone in the big city. One morning his life is changed forever when a mysterious helping hand steps in and disrupts his quiet routine. This playful show presents Ted’s tale with a heart-warming mix of puppetry, live music and song.

Little Gift is a brand-new story from multi award-winners M6 Theatre and Andy Manley. It’s suitable for children aged 3-7 years and it just the thing to bring a bit of light into the darkest season of the year.

For more information and to buy tickets, visit the website.

Sleeping Beauty, Stockport Plaza 30th November – 6th January

What’s Christmas without a panto? Starring Ted Robbins and Claire King, Sleeping Beauty is the story of a Princess who sleeps for a lifetime in her forgotten palace after an evil curse puts her under a spell. Will her true loves kiss awaken our Sleeping Beauty or will evil triumph over good in this magical family adventure that everyone can enjoy.

For more information and to buy tickets, visit the website.

Five Family Christmas Shows in Manchester

The Tin Soldier, Ordsall Hall, Salford 12th January

Toy soldiers, goblins and ballerinas… all the ingredients for a perfect family show filled with puppetry, multimedia and live music, this is a Christmas story not to be missed. Adapted from the Hans Christian Anderson fairy tale and performed by Folksy Theatre.

For more information and to buy tickets, visit the website.

Are you going to see any Christmas Shows? What are you going to see?

Christmas Gifts: Make your own Rosemary Herb Oil

I love fresh herbs, I chop them and throw them into almost everything. I have a few herb plants in my garden which I am forever bothering with a pair of scissors. Rosemary, thyme and bay are standards in my kitchen. During the summer months we can’t grow enough parsley, coriander and basil to meet our needs. We are herb addicts and herb oil is a big part of that.

One of the things I like to do is make my own herb oils. They’re lovely to cook with and drizzle over things and they’re ridiculously easy to make too. Now is exactly the right time of year to be making a few bottles of herb oils to give to foodie friends and family for Christmas and they look really pretty too.

Make your own Rosemary Herb Oil

Because I’ve been busy making rosemary oil, below you’ll find the recipe for that below. But you can use the exact same technique with any woody herb. You can even do it with chillis, which you prick with a pin all over and push into the bottle to steep in the oil.

How to make Rosemary Herb Oil

You will need:

A decorative glass bottle
Some springs of rosemary (or other woody herb)
Olive oil (enough to fill the bottle

Make your own Rosemary Herb Oil

How to make herb oil:

In a small saucepan, pour in the amount of oil you need and warm gently. You don’t want the oil to be hot or bubbling, just warm enough to encourage the oils out of the herbs.

Take your sprigs of rosemary (or whatever woody herb you’re using) and using a rolling pin, roll over the sprigs a couple of times. This will crush the leaves slightly to encourage the herb oils to permeate the oil. Poke your sprigs into your clean and sterilised glass bottle.

If you’re not sure how to sterlise your bottle, I usually put it in the dishwasher on the hottest setting, then put it in a low oven for half an hour. Carefully remove the bottle and leave it to cool a little, so you can handle it, but no so it’s cold.

With the slightly crushed sprigs in the glass bottle, carefully (very carefully) pour the warmed oil into the bottle and seal it shut. Put to somewhere to cool and leave it for a couple of weeks before using the rosemary oil.

Uses for rosemary oil

  • For roasting chicken or lamb
  • For roasting vegetables
  • Adding extra flavour to soups and stews
  • For dipping bread into

You can happily recreate this using thyme or marjoram, or with pricked chillis as I suggested earlier. They really do make a pretty gift for a foodie, especially if you write a pretty label for the bottle.

If you enjoyed this, you might like to try making your own parma violet gin.

Make your own Rosemary Herb Oil

Five Natural Christmas Decorations for your home

Christmas naturally lends itself to crafts. This year I’ve felt like shunning some of the glitter and plastic and decorating the house with more natural Christmas decorations. Not only to they look pretty good, they help make the house smell a bit more festive. Here’s a rundown of five natural Christmas decorations we’ve made this Christmas.

Five Natural Christmas Decorations for your home

A Pomander

Pomanders have been used from the medieval period as a way of perfuming the air. They are oranges, studded with cloves and tossed in aromatic spices, when dried they give off a deliciously festive smell. They are easy to make and if you’re looking for something especially mindful to make, then I can hand on heart say that making a pomander is pretty perfect for that.

Five Natural Christmas Decorations to make at home

They’re very easy to do and a popular thing to make with children. They’re best made ahead of time to give them time to dry out. I used this Pomander kit from Steenburgs which costs £3.50 and there are enough cloves and spices for two pomanders. It’s excellent value and works out cheaper than buying everything you need at a supermarket (I did a few sums on the back of an envelope).

To make them you tie a long length of ribbon around the orange like you would tie up a parcel. Using a skewer or another sharp pointy object, pierce little holes into the orange peel and push the cloves into the holes. The closer the cloves are the better. Once your pomander is covered in cloves, toss it in a mixture of cinnamon and orris root powder and leave it is a warm place for around a month to dry out.

Five Natural Christmas Decorations to make at home

They’re lovely to make and my craft group are getting together next week to drink wine and make Christmas pomanders.

A Dried Orange Garland

Dried citrus slices are a common sight at Christmas time. Whether they’re hanging from a tree, adorning a wreath or part of a garland, they give a natural splash of colour. It’s really easy to dry out orange slices (or other citrus fruit slices).

Five Natural Christmas Decorations to make at home

To make your dried orange slices, all you need to do is slice them as thinly as you can, lay them out on a cake cooling rack and pop them in an oven at 120°. Turn them over every 20 minutes or so and bake until they’ve pretty much dried out. This will take 2-3 hours. They will continue to dry out for a few days after you’ve taken them out of the oven, so don’t worry if they’re not completely dry.

You will need:
Dried oranges, sliced thinly
Red embroidery thread
A needle
Star Anise
A glue gun

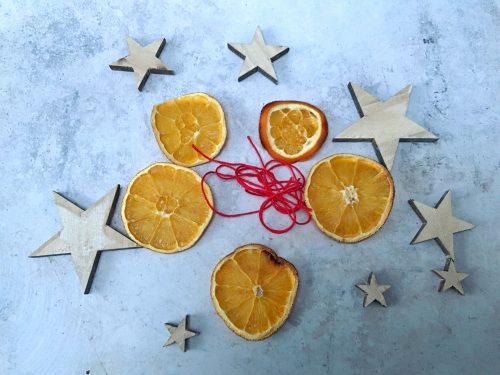
For this craft I took some red embroidery thread and a large needle. I made a hanging loop at one end and then threaded the needle through one side of the dried pith, round the back and out of the front of the other side of the pith. I continued this with each slice so the thread was behind each orange slice. Once I’d threaded them all on the red thread, I made a hanging loop at the other end.

Five Natural Christmas Decorations to make at home

Using my glue gun I glued some star anise onto alternate orange slices and hung the garland where lights could shine through them. Once the tree is up they’ll be hung on the tree in front of fairy lights. You can make your garland as long or as short as you wish, mine was five slices long.

A Dried Orange Decoration

These are lovely, and if you’re drying citrus slices for the garland, then it’s worth saving a few to make these pretty little things to hang on your tree.

Five Natural Christmas Decorations to make at home

You will need: 
Dried orange slices
Ribbon
Star Anise
Glue gun

Take your dried orange slice and carefully make a small slit in the pith with a knife. Thread a piece of ribbon through, make a loop and tie a knot in it.

Using the glue gun, glue a piece of star anise to the centre of the orange slice, leave it to dry for a minute and then it’s ready to be hung up in front of a twinkly tree light and admired.

Tied Cinnamon Sticks

These are a Christmas classic. Three cinnamon sticks tied together with a nice ribbon and hung on the tree. For each one, take three cinnamon sticks and a piece of ribbon, tie the ribbon tightly around the sticks and knot the ribbon, then tie a nice bow. I then took some invisible thread, threaded it through the ribbon and tied the thread so it could be hung from a tree. Simple but effective.

Five Natural Christmas Decorations to make at home

Cinnamon Stick Tealight Holder

If you love a glue gun, then this craft is for you. Using a nice clean jar which you know is big enough to generously hold a tealight, glue cinnamon sticks around the jar using your glue gun. Leave the glue to dry for a few minutes before using. You may want to finish it off nicely with a festive ribbon tied around it, it’s up to you. It’s simple, looks great and could be the start of a lovely natural centrepiece for the Christmas table.

Five Natural Christmas Decorations for your home

There are three lovely ideas for five natural Christmas decorations you could make. With some cinnamon sticks, star anise, cloves and a selection of citrus fruits, you could adorn your home with beautiful and natural Christmas decorations this year. What will you make?

If you enjoyed this, you might also like to try –

Five Natural Christmas Decorations to make at home

Review: I Saw It First! Jungle – A Family Spotting Game

This week we’ve been playing a new game – I Saw It First! Jungle – A Family Spotting Game. It’s a puzzle game for people who love spotting animals, like a ginormous Dobble but a bit harder and just as much fun!

Review: I Saw It First! Jungle - A Family Spotting Game

In I Saw It First! Jungle there are 300 jungle animals all over the double-sided board. Each of the pieces is printed on both sides, so no two games are the same because you can put the board together in many different ways.

The board is covered with all kinds of creatures, some are familiar, like the leopard or the hippopotamus, others less so, like the eyelash viper or the giraffe weevil.

Review: I Saw It First! Jungle - A Family Spotting Game

The game comes with a box to assemble and 300 hexagonal counters each with an animal on one side and the name of the animal on the other. To play you take a counter from the box and show it to the other players. When they say “go” everyone must look for that animal on the board. The first one to spot it shouts “I saw it first” and keeps the counter. You can play for as long as you like. The person with the most counters at the end of the game is the winner. It’s simple but brilliant.

Like I said, the games go on as long as you want. It’s really fun to try to spot the creatures on the board. There’s a good variety of different animals and lots to talk about. Ben knew a lot about some of the animals, birds and insects already and happily chatted about where some of them lived and what they ate as we searched the board for them.

Review: I Saw It First! Jungle - A Family Spotting Game

I Saw It First! Jungle comes in and eye-catching triangular box and features illustrations by Caroline Selmes. It’s easy to understand but addictive to play, and great fun for adults and children alike.

I Saw It First! Jungle costs £19.99 and it is available from high street shops, direct from Laurence King and online retailers such as Amazon.

Note: We were sent I Saw It First! Jungle for review purposes. All images and opinions are our own.

Toy Review: Mr Frosty Choc Ice Maker

When I was a little girl, all I wanted for Christmas was a Mr Frosty. Times haven’t changed much and high on my son’s wish list was a Mr Frosty Choc Ice Maker. Mr Frosty didn’t arrive for Christmas, but as a birthday present. This meant only one thing – making choc ice treats for the weekend!

Review: Mr Frosty Choc Ice Maker

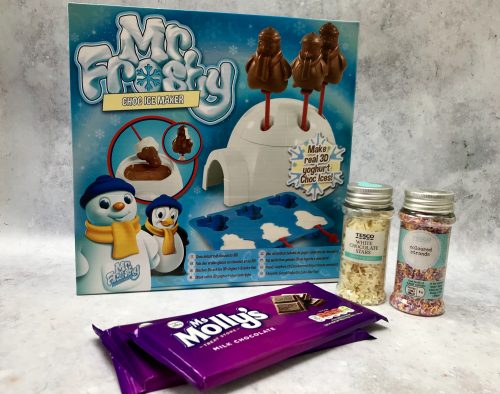
Like all Mr Frosty products the Mr Frosty Choc Ice Maker is a simple idea; easy to follow instructions and solidly made, simple equipment. All you need is some ingredients – your favourite yoghurt, some chocolate for melting and some sprinkles if you’re feeling fancy.

The Mr Frosty Choc Ice Maker comes with all the equipment you need, though you might want to also use some kind of board to keep your table tidy from any drips or dribbles and a spoon for stirring and spooning the melted chocolate. In the box there are some silicon molds to create your own Mr Frosty & Penguin frozen chocolate figures; plastic lolly sticks and an igloo which you melt the chocolate in. The roof of the igloo is also where you stick your lolly sticks while you chocolate sets. There is also a set of very simple, easy to follow instructions.

Review: Mr Frosty Choc Ice Maker

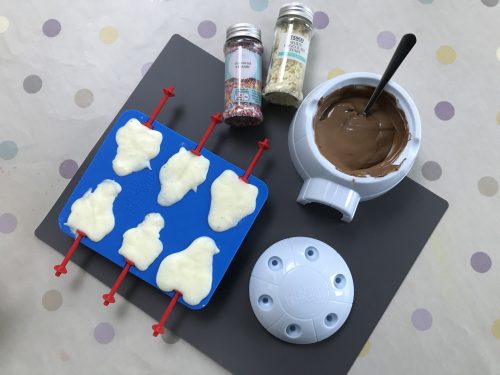
To make your choc ices, slot your lolly sticks in the mold. Spoon in the yoghurt, I tapped the mold a few times so the yoghurt would settle. Then put this in the freezer for a minimum of three hours. We spent our three hours at his birthday party, which was nice.

When we got home I checked that they were frozen, which they were. I left them in the freezer until I was ready for them as they melt quite quickly. Following the instructions, melt the chocolate in the igloo in the microwave and once it’s melted take your lollies out of the freezer, remove them from the mold and quickly spoon the chocolate over.

Review: Mr Frosty Choc Ice Maker

The chocolate does set very quickly, so if you are planning on sprinkling them with anything, do it quickly. Set them in the igloo roof to set and then eat them or put them in a box back in the freezer if you’re saving them for later.

The Mr Frosty Choc Ice Maker is well made, simple and easy to use. Our choc ices were really tasty (we used a good quality vanilla yoghurt) and it was really fun to use. It’s a pretty tidy kit too, other than a smear of yoghurt and a dribble of chocolate, there was no mess.

Now we understand the process, the world is our lobster. We could cover them in nuts, change the yoghurt flavour, swirl through peanut butter, anything. I can see us playing around with this again and again. It’s such a simple kit to use. It’s brilliant.

Review: Mr Frosty Choc Ice Maker

The Mr Frosty Choc Ice Maker kit costs around £12.99 which I think makes it a nicely priced Christmas present idea. Mr Frosty Choc Ice Maker is available in most toy shops and supermarkets such as ASDA and Smyths Toys.

We were sent Mr Frosty Choc Ice Maker for review purposes. All images and opinions are our own.