Days Out: Autumn at Warwick Castle

We’ve had our Merlin Annual Passes for a few years now and we’ve visited a lot of attractions during that time, but for a while, high on our to visit list has been Warwick Castle. It took a bit of planning to get there, but last month we made the journey down the M6 and finally crossed Warwick Castle off our list. We had such a brilliant day that we’re already planning a return visit!

Warwick Castle is about a half hour drive from Birmingham and is really easy to get to, with plenty of parking. We visited on a not too busy day; but the walk from the car park to the castle took a good 20 minutes; so be prepared for a good walk.

Days Out: Autumn at Warwick Castle

We showed our Merlin Annual Passes and we were handed a map and started planning our day. Our first stop was the Horrible Histories Maze which we loved. The maze leads you through a trail through history where you can find out more about different times in history – Horrible Histories style. It was very well done and a nice way for the kids to run off a bit of steam exploring the maze.

Days Out: Autumn at Warwick Castle

Throughout the year Warwick Castle have an array of different shows and activities going on. Depending on when you visit, different things will be available. We visited out of season, so we managed to catch the Bowman Show. This was a highly skilled archer doing his thing and the Birds of Prey Show which was absolutely fantastic.

The Birds of Prey Show showcased a number of beautiful and powerful birds including; Vultures, a Condor, Owls and Eagles which swooped over the watching crowds and onto the Castle ramparts. The show is absolutely not something you should go to if you’re scared of birds as they swoop down low over the crowds, sometimes brushing the spectators with their wings. We thought it was incredible and worth the admission price alone.

Days Out: Autumn at Warwick Castle

The castle itself could take a full day to explore if you were keen. The boy loves castles but is considerably less keen on steep spiral staircases and enclosed places. There are warning signs before you enter the ramparts. It’s a one way system and once you’re in it, you just have to stick with it. The first chance of escape is at the bottom of Guy’s Tower, but to get out you first have to climb to the top of the tower and back down again. I believe we climbed about 500 steps before we made our escape. This meant that we didn’t manage to explore the whole of the castle ramparts, as the boy had had enough.

The view from the top of the tower is absolutely breathtaking. You can see for miles and miles around. It’s 39 metres tall and although I’m pretty good with heights, I did feel a bit giddy when I looked over the edge.  We made our way down the stone steps of the tower and explored the other areas of the castle.

Days Out: Autumn at Warwick Castle

There’s plenty to do. We explored the Great Hall and the inside of the castle. There are lots of exhibits inside including armour and it’s all decorated like the castle would have been a few hundred years ago. The boy loved this, and as it was raining outside we didn’t rush around it. We gave the dungeons a miss, we might go if we’re feeling braver next time.

We spent a lot of time exploring the Kingmaker area. No, it’s not dedicated to the 90’s indie band; it’s all about Richard Neville, the Kingmaker and you walk through his preparations for war and experience the sights, sounds and smells of medieval England. It’s very well done, really interesting and gave us a real insight into castle life.

Days Out: Autumn at Warwick Castle

The gardens are pretty spectacular too. It was raining so we didn’t explore much; but the area around the Conservatory Cafe is especially beautiful, with peacocks roaming around the fountain and lots of manicured lawns and lovely flowerbeds.

We were genuinely sad to leave at the end of the day. I think we all agreed that it’s the kind of place we could and should visit again and spend two days exploring properly. There are lots of themed events and special days on for the rest of the year. We have plans to return in the spring so we can see the trebuchet in action and maybe see some jousting. We’ll definitely watch the Birds of Prey show again and again and try our hand at some archery.

Days Out: Autumn at Warwick Castle

If you love castles, Warwick Castle is an absolute must. It’s packed full of history, presented in an interesting and entertaining format and there’s something for everyone. There is a lot of walking and not a great many places to sit down. The walk to the car park and back really adds an extra 40/45 minutes onto your walking time, so do factor that in if you visit.

We loved the history, we loved the castle, the maze, the birds of prey. It’s the kind of place you need a good day to explore. We’ll be back!

Find out more about Warwick Castle by visiting their website.

Days Out: Autumn at Warwick Castle

Disclosure: We are Merlin Annual Pass Ambassadors this year. All images and opinions are our own.

Recipe: Vegetarian Black Pudding Sausage Rolls

Everyone loves a good sausage roll and vegetarians are no different. It’s pretty much impossible to find them in high street bakers, but they’re so easy to make I usually bake up a batch by myself. This week I wanted to ring the changes, so I baked a batch of these Vegetarian Black Pudding Sausage Rolls and very, very good they are too.

Recipe: Vegetarian Black Pudding Sausage Rolls

I’ve been vegetarian for nearly 30 years now and I’ve never tried black pudding, real or vegetarian. I spotted some in my local butchers (I know right, a vegetarian who goes to the butchers) and bought some veggie black pudding with no real plan for it. After a bit of thought I decided that Vegetarian Black Pudding Sausage Rolls sounded like they’d be a good combination, and I was right.

Vegetarian Black Pudding Sausage Rolls

Ingredients:

1 sheet of ready rolled puff pastry
150g pack of Granose Meat Free Lincoln Sausage Mix
100g The Bury Black Pudding Company Vegetarian Black Pudding
2 tablespoons of parsley, chopped
Salt & Pepper
1 egg, beaten

Recipe: Vegetarian Black Pudding Sausage Rolls

How to make Vegetarian Black Pudding Sausage Rolls:

Take your pastry out of the fridge and pre-heat your oven to 200°. Cover a baking sheet with a piece of greaseproof paper.

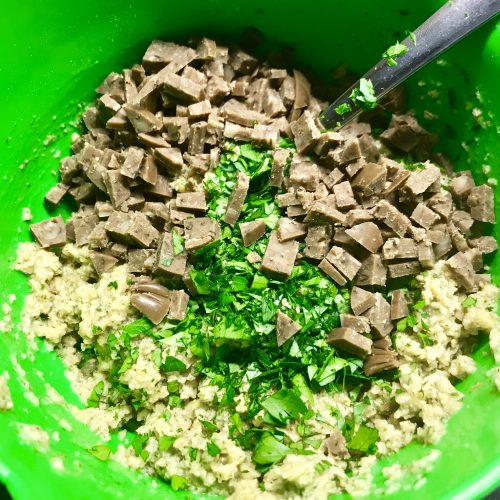
Make up the mix of Granose Meat Free Lincoln Sausage according to the packet instructions. I found this to be a good substitute for sausage meat. Chop up 100g of vegetarian black pudding as finely as you can and add it to the sausage mix. Stir through your chopped parsley and season with salt and pepper. Mix well.

Recipe: Vegetarian Black Pudding Sausage Rolls

Unroll your sheet of puff pastry. Cut your pastry sheet in half length-ways. Spoon a thick line of sausage mixture along the middle of each piece of pastry and paint beaten egg in a line along one edge of the pastry. Roll the sausage up and make sure the pastry edge is sealed well. Cut the long sausage roll down into smaller sausage rolls.

Recipe: Vegetarian Black Pudding Sausage Rolls

I cut each of the two long sausages down to 5, so I had 10 in total. But you can decide how big you want each roll to be. Place them on your baking sheet with the sealed side down. Slash the top of the pastry with a sharp knife and brush with beaten egg. Put them in the oven for 20 minutes, until golden brown and delicious.

Recipe: Vegetarian Black Pudding Sausage Rolls

I have to confess, my meat-eating husband went mad for these. He said they were the best he’d ever had and asked me to make another batch asap. They’re just the thing for Christmas get togethers and really quite different to normal sausage rolls. Maybe stir a couple of spoons of cranberry sauce into the mix if you want to make them more festive. They’re good, really good.

If you enjoyed this recipe, you might also like to try these easy cheaty sausage rolls or these vegan sausage rolls.

Recipe: Vegetarian Black Pudding Sausage Rolls

Christmas Crafts: Paper Plate Holly Wreath

I love a good wreath at Christmas. We always buy a nice foliage one from our local Community Farm and have it on the front door. Inside the house we have a few more delicate wreaths on some of the internal doors, it just makes the place look more festive. I really enjoy making wreaths with my son. Once you’ve got your paper plate base sorted, you just let your imagination run wild. This week we’ve made a Paper Plate Holly Wreath and we’re really quite pleased with it.

Christmas Crafts: Paper Plate Holly Wreath

I had the idea for this Paper Plate Holly Wreath, but I knew that I’d probably be the one who would be spending some time cutting out the individual holly leaves and my son (with direction) would be doing much of the sticking. I sat down with a giant mug of tea and Say Yes to the Dress on TV and got cutting. I’ve no idea how many holly leaves I cut out, but it was about two A4 sheets worth.

Now that I’ve seen the finished Paper Plate Holly Wreath, I am really pleased with it. I think it looks really effective and I’ll be pleased to have it hanging in my kitchen this Christmas.

How to make a Paper Plate Holly Wreath

You will need:

A paper plate
Scissors
Green paint
Paint brush
A pencil
Ribbon
3 or 4 different kinds of green card or foam
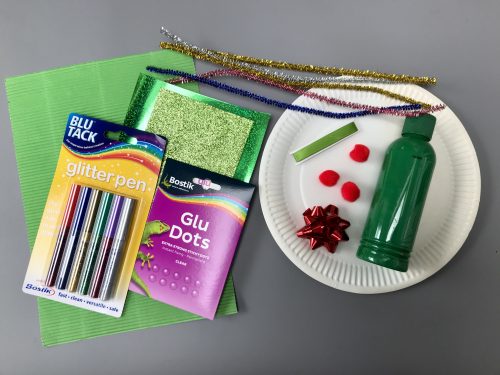
Bostik Glu Dots
Red embellishments – mini pom poms, beads, paper shapes etc

Christmas Crafts: Paper Plate Holly Wreath

How to make your Paper Plate Holly Wreath:

With a pair of scissors, cut the middle out of your paper plate so it looks like a ring. Near the top of your wreath, cut a small slit where you can thread your ribbon through later.

Paint the wreath all over, front and back with green paint and leave it to dry. If you’re impatient like me, you can use a hairdryer to speed up the process. Your ring might need a second coat of paint on the front if you think it’s a bit patchy looking. This process does take a bit of time, so factor that in if you’re crafting with slightly impatient kids.

While your paint is drying, take the piece of cardboard which you cut out of the paper plate and draw a holly leaf on it. It needs to be about 5cm long, but you can make your leaves as big or small as you want really. Cut out your leaf shape, this is now your template.

I found whatever green card I had in my craft cupboard, which was a nice piece of corrugated card, some shiny card and some glittery card. I also found a piece of glittery foam. Using the pencil I then drew around my holly leaf template all over the back of each piece of card. Try and do this so you get minimal waste when you cut them out.

Once you’ve drawn all your holly leaves, you need to cut them out. This takes a little bit of time, so do factor that in.

Christmas Crafts: Paper Plate Holly Wreath

Once you’ve got a big pile of leaves, it’s time to stick them onto your wreath. Before you start sticking, thread your piece of ribbon through the slit you cut earlier and tie a knot in the ends securely.

Take a Bostik Glu Dot and stick it to the back of each leaf, towards one end if you can. Then stick your leaves however you like all over your wreath. We chose to stick the corrugated leaves all around the outside of the wreath. I suggested he try to stick them in pairs, like holly leaves often are and I think he did a good job.

With the other types of holly leaf, we arranged them in an attractive way around the inner circle of the wreath. Ben then stuck them in place. All the holly wreath needed now was berries. Using the red embellishments; mini pom poms, paper shapes and stick on gems, we decorated some of the leaves with red “berries”. I find stick on gems a bit tricky, so I always use a glu dot on them to make sure they stick.

Your wreath is now complete. It looks pretty impressive yes?

Christmas Crafts: Paper Plate Holly Wreath

Check out my other craft tutorials here!

If you enjoyed this wreath craft, you might also like to try these –

I am a Bostik Craft Blogger and I was sent the materials to create this craft from Craft Merrily. I have not been compensated for this post. 

Six Books about Bullying for Anti Bullying Week

I was quite badly bullied at school and that kind of thing stays with you. Attitudes towards bullying seem to have changed in recent years, I think most schools have anti bullying policies and can take things a little more seriously than they did in my day. At my son’s school they’ve been doing a lot of activities around anti bullying week; so we’ve picked out six books about bullying to read this week (and every week, because this stuff is important)!

Six Books about Bullying for Anti Bullying Week

Six Books about Bullying

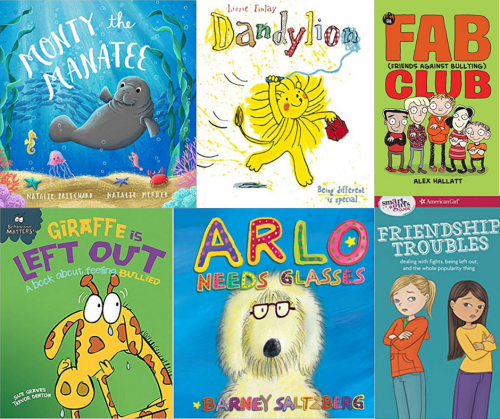
FAB (Friends Against Bullying) Club (FAB Club Book 1) by Alex Hallatt. This is an action-packed chapter book for 8-12 year kids who want to stand up to bullying. This is an inspiring children’s book about standing up to bullies and forming new friendships. FAB is full of humour, and has a gripping plot which teaches kids how to solve problems together.

Arlo Needs Glasses by Barney Saltzberg. One out of every five school children need glasses. This a really fun picture book for children, you can read an eye chart, look through a fold-out phoropter (that big machine optometrists use), and try on different pairs of glasses – movie star glasses, superhero glasses, mad scientist glasses and find the right pair of glasses for you. Once Arlo find some glasses which suit him, he’s back to enjoying all his favourite things again. This is a really positive book and ideal for children who are learning to love their own spectacles!

Giraffe Is Left Out – A book about feeling bullied by Sue Graves and Trevor Dunton. When Leopard arrives at Jungle School, Giraffe doesn’t want to include him and tries to exclude him from joining in. So when Leopard has a birthday party he doesn’t invite Giraffe, even though he has invited all his friends. Slowly Giraffe begins to understand how Leopard must have felt when he started school. Can the two of them learn to become friends after all?

Dandylion by Lizzie Finlay. Dandylion is one of my favourite children’s books ever! It’s all about being different and learning to accept difference in other people. When the ‘delightfully different, bright yellow and rather scruffy’ Dandylion joins Miss Gardener’s neat and tidy class, chaos and fun follow. But after one messy incident too many he’s told to go home – he just doesn’t fit in. It doesn’t take long, however, for everyone to realise that too much neatness and order isn’t always a good thing and everyone’s desperate for Dandylion to return!

A Smart Girl’s Guide: Friendship Troubles: Dealing with Fights, Being Left Out, and the Whole Popularity Thing (Smart Girl’s Guide To…) by Patti Kelley Criswell. This guide will help girls deal with the pitfalls of interpersonal relationships, from backstabbing and triangles, to other tough friendship problems. It features fun quizzes, practical tips, and stories from real girls who’ve been there – and are still friends. It’s just a shame there’s not a version for boys too!

Monty the Manatee by Natalie Pritchard. Monty the manatee is nervous about his first day at Sea School. He tries to make new friends but the other sea creatures think he’s a bit slow and strange. They’re really mean to him and call him names, but when his class is invaded by a dangerous predator can Monty save the day? Monty the Manatee is a simple book about kindness and friendships, suitable for pre-schoolers and children in KS1.

Do you have any favourite books on this subject?

If you enjoyed this, you might also like our round up of books about starting school!

Six Books about Bullying for Anti Bullying Week

How we slay stains and keep our clothes bright

Disclaimer: We were sent a selection of stain removal products for review purposes. All images and opinions are our own.

We’re an average family, but perhaps an above average family when it comes to the amount of stains we find on our clothes. The washing machine is on most days and over the years we’ve developed tried and tested techniques for slaying stains.

There may only be three of us in the house, but we are a bunch of mucky pups. With an 8 year old in the house, his clothes are always covered in various foods he’s eaten that day; mud, grass stains, paint, felt tip, glue, everything and anything. My husband is a printer, and whilst it’s a much cleaner industry than it used to be, he’s often sloshing ink and chemicals over himself. Me, well I’m a grease-monkey. Baking and cooking every day mean my tops often have grease spots and splatters on them. I know I should wear an apron, but I don’t. As a result my clothes bear the brunt of the worse of it.

How we slay stains and keep our clothes bright

With my grease spots I’ve learnt to keep a small bottle of washing up liquid in my bedroom. I’ll squirt a bit of washing up liquid on my grease stains before throwing them in the laundry basket. I only wear cotton clothes and for the most part I’m not that precious about what I wear. What I’m saying is, don’t do this to your best silk blouse.

My husbands chemical soaked clothes are often washed separately at a fairly high temperature. The wash that goes in after that wash is usually something we’re not too precious about; dog bedding or old towels used to dry a soggy dog after a walk in the rain maybe.

How we slay stains and keep our clothes bright

My son’s clothes; a glorious collection of school uniform, cubs uniform, martial arts kit, PE kit, swimming gear and whatever clothes he wears in between. Well that’s a mixture of fabrics which often need a deal more special attention than my collection of grease splattered cotton tops.

His clothes often need more delicate handling, specialist stain removers and a bit more TLC. We’ve tried a lot of different stain removers over the years, some smell too strong, too chemically or too weird. Some just aren’t up to the job. My son is especially gifted at staining his clothes.

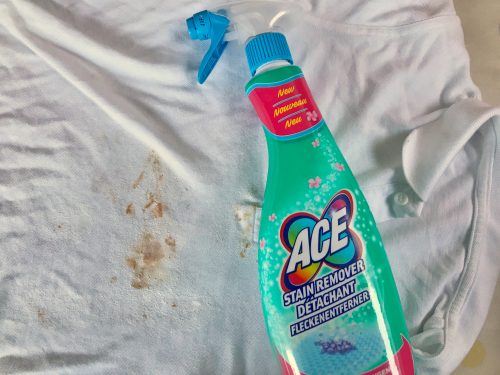
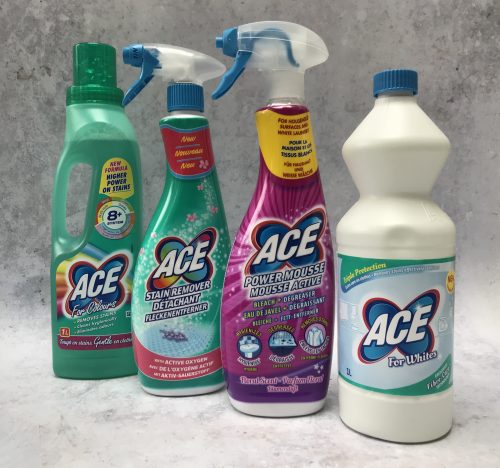
For the last few months we’ve been using some of the ACE Stain Remover range and honestly, they’ve ticked all the right boxes. Gentle on the clothes but tough on the stains. For individual stains, the ACE Multi-Purpose Spray and the ACE Power Mousse are really powerful. Plus they can be used around the house too. Kind of a two in one deal. Personally I like to save them for tackling the terrible state of his school shirts.

How we slay stains and keep our clothes bright

For more general stain removal and brightening whites and colours which are dulled by general grime; ACE for Whites and ACE for Colours are really effective and don’t have that bleachy smell that some laundry brighteners can have.

Whenever you encounter a stain, it’s always best to act as soon as you can so it doesn’t fix in the garment. Dabbing it or scrapping off any dried on food is a good start. Most stains need to be treated in special ways; but for general food, mud, and glass stains, a general stain remover is usually enough to tackle the trail of baked beans down a white school shirt.

What are your top tips for stain removal?

How we slay stains and keep our clothes bright

A letter to my 8 year old on his birthday

I remember holding you in my arms when you were first born. You were all soft and delicate and people said “treasure every minute, they grow up so fast”. And here we are, about three minutes later and you’re 8 years old.

Days Out: Autumn at Warwick Castle

You were never really that delicate and fragile. You were born weighing 8lbs, 15oz and I remember when you were a day old, you lay on my tummy and lifted your head to look me in the eye. Babies are not supposed to do that, but you did. You’ve been amazing me in big and small ways ever since.

Your life seems to be rushing by in the blink of an eye, but when I sit and think of all the things you’ve done, the places you’ve visited and the things you’ve achieved in the last twelve months, it seems like such a lot.

How we've helped our son reach for the stars, and beyond!

What have you done? You’ve been to Beaver camp twice, you’ve got your first mixed martial arts belt, you’ve done SATs even though you didn’t know you were doing them.

You’re reading chapter books, you’ve done really well with your swimming and you’re moving up to another level soon. You’ve been on a million adventures with us, we’ve been glamping in yurts and pods, we’ve had holidays with friends and just our family. You’ve grown tall and strong and you’re healthy, which I thank the universe for every day.

You are funny and cheeky and so full of love and care. You’re more brilliant than you’ll ever know. I just wish I could give you the confidence you need. Believe in yourself more Sunshine, you CAN do things, you can do anything you want as long as you try.

Little Sports Coaching - learn new footballing skills

I always say, all I ever want from you is to try your best. Be the best Ben you can be and you’ll not go far wrong. You still want to be a Ninja Scientist and although that’s probably a pretty tricky dream to achieve, with some hard work and luck, you could get there.

Be brave Ben, be bold. Carry on being kind and funny, with a smile full of half grown teeth and cheeks deep with dimples. Happy 8th birthday to my best boy. You don’t half make your Mama proud.

October Update - What's going on with us?

How to make your own Parma Violet Gin

I don’t do much drinking at home, I like to save myself for a (now rare) night out or trip to a festival. Back in the spring I went to a Gin Festival with some good friends, my first tipple of the day was some quite expensive Parma Violet Gin and it’s been on my mind ever since. Sure, I could buy a bottle, but the Willy Wonka in me fancied making some. It’s so easy, and it’s the perfect homemade gift for a Parma Violet loving gin fan this Christmas!

How to make your own Parma Violet Gin

How to make Parma Violet Gin

You will need:

350mls Gin, I used the cheap stuff from Aldi
6 7g packets of Parma Violets
A large jar
Coffee filters or muslin
A funnel
A nice bottle

How to make Parma Violet Gin:

The first thing I did was measure how much gin my decorative bottle would take. My bottle would hold 350mls of gin, so allowing for a little bit of wastage during the straining process, and me having a little taste, I measured out 380mls of gin and poured it into a large sterilised jar.

How to make your own Parma Violet Gin

To sterilise your jars and bottles, put your clean jars in a low oven for at least half an hour. Carefully remove your jars from the oven (they will be incredibly hot) and allow them to cool down. Pour in your gin, I suggest you use a jug and a funnel for this.

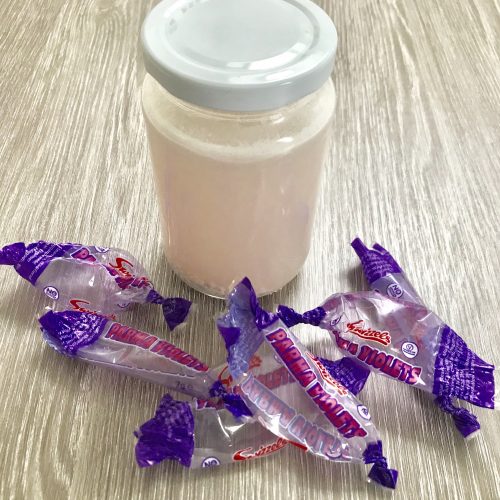
Using whatever method you think best, grind up 6 packets of Parma Violets. I did this using a pestle and mortar, but a food processor or a bag and a rolling pin would work just as well. They don’t have to be super fine, but the more they’re broken up, the quicker they will dissolve.

Tip your crushed Parma Violets into the jar with the gin. Screw the lid on as tight as you can and give it a really good shake. Put it to one side, shaking the jar daily for about two weeks. A little more or a little less time in the jar won’t hurt.

In terms of measurements, if you want to make more or less of the Parma Violet Gin then you should go for a ratio of about 2 of the 7g packets of Parma Violets per 100mls.

When the time is up, take your sterilised bottle and using a funnel with some muslin or a coffee filter in it; strain the gin into the bottle. I found that it was best if I strained it twice, replacing the muslin with a new piece after the first straining. Doing this resulted in a clearer gin but didn’t seem to change the flavour much.

Once the bottle is filled, put the lid on, label it if you want and give it to your favourite gin lover.

Try my recipe for Quince Gin here!

If you liked the look of this recipe, you might also like to try baking these Parma Violet Shortbread Biscuits.

How to make your own Parma Violet Gin

Review: Valley Mill Christmas Candles

We were sent a selection of candles from Valley Mill for review purposes. All images and opinions are our own.

As soon as the clocks go back at the end of October, I start lighting scented candles in the evening. There’s something about having a few flickering candles which make the place feel cosier and warmer. As November moves into December, the candles I burn move from autumnal apples and cinnamon to Christmassy scents. This week I’ve been burning three new scents from Valley Mill in Wales, and very lovely they are too.

Year round, Valley Mill sell their popular range of Tapestry Tin candles in a variety of different scents. Each candle has a 30 hour burn time and they have been handmade in Wales using the finest quality soy wax. This gives them a longer burn time and better scent throw.

Review: Christmas Candles from Valley Mill

Each tin costs £10.95 and they come is a range of different scents. I’ve been burning three of the Christmas scents and although it’s only November, they’ve been really putting me in the mood for Christmas!

Holly Berry – This is a really festive candle. Take the lid off the tin and you can smell Christmas trees and holly wreaths and all things good about Christmas. This would be great to burn in the same room as your tree, especially if you’ve got an artificial one. The holly berry tapestry tin candle is probably my favourite!

Chestnuts – Chestnuts roasting on an open fire is one of the iconic scents of Christmas. This handmade soy wax candle is really evocative of roasted chestnuts. The smell of this lovely candle makes my mouth water. I really must buy some chestnuts this Christmas!

Cranberry Gin – This attractive candle is wrapped in a festive red tapestry print and when lit quickly fills the room with a fruity Cranberry Gin scent. It’s not overpowering and it’s actually quite a refreshing fragrance. It’s got festive hints, but you could happily burn this throughout autumn and into winter.

Review: Christmas Candles from Valley Mill

There are many more delicious sounding Tapestry Tin Candles in the Valley Mill range, including; Amaretto, Welsh Cake, Spiced Apple and Black Orchid.

The Valley Mill candles are well priced and would make a lovely gift for a candle lover. I really like these kinds of candles in tins, they’ve got just the right amount of burn time and I think tins look smart too.

For more information, visit the Valley Mill website.

Crafts: Easy Paper Plate Remembrance Poppies

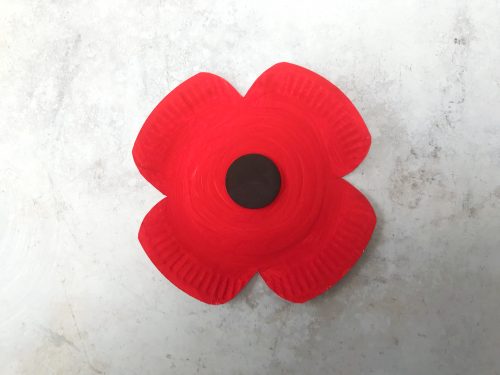
At home we’ve been doing some reading about Remembrance and one afternoon this week we got the paints out and made some Paper Plate Remembrance Poppies.

This year is an especially poignant Remembrance Day as it marks 100 years since the end of the First World War. We’ve been really impressed with some of the crafts which the local schools have been making. One even made their own weeping window which was very well done. There have been individual poppies, poppy wreaths and all kinds of lovely tributes. Here’s how we made our paper plate poppies.

Crafts: Easy Paper Plate Remembrance Poppies

How to make Paper Plate Remembrance Poppies

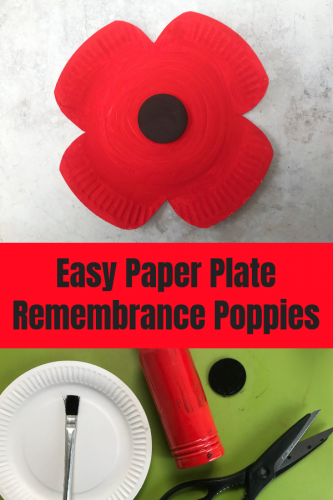
You will need:

A small paper plate
Scissors
Red paint
A black button or a black foam circle
Bostik Glu Dots

Crafts: Easy Paper Plate Remembrance Poppies

How to make your paper plate Remembrance Poppies:

Take your paper plate and cut out four triangle pieces to form petals. You might want to shape the edge of the petals with the scissors a bit. I thought some of my edges were a little angular, so taking a minute to shape them really helped.

Paint your plate with red paint and leave to dry.

Once dry, using the glu dots, glue the button or foam circle to the centre of the poppy. Your poppy is now complete.

If you’d like you could sellotape a green stick or a straw to the back of the poppy and put a few of them in a vase. Or make a few of them into a poppy garland or make a poppy field display of them.

They’re a really sweet thing to do with children, they’re incredibly simple to do and a nice craft to do at this time of the year. I think it’s important for everyone including children to understand why we wear a poppy to remember, you can read more about the poppy on the Imperial War Museum website.

Crafts: Easy Paper Plate Remembrance Poppies

Book Review: Construction Site on Christmas Night

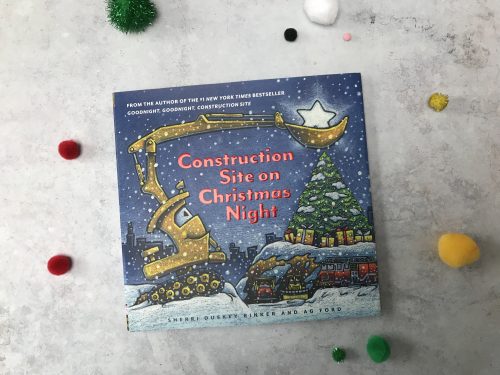
My son will be 8 in just a few short weeks. He has always loved vehicles of all types, especially construction vehicles. He’s had a few books about construction vehicles since he was very young; even now he still likes to look at them sometimes. When I found Construction Site on Christmas Night by Sherri Duskey Rinker, I knew he would enjoy reading it at bedtime.

Construction Site on Christmas Night might be a bit young for him, but the illustrations, rhyming passages and the story made it enjoyable for him.

Book Review: Construction Site on Christmas Night

Construction Site on Christmas Night is the story of a team of construction vehicles who are busy building a surprise in time for Christmas night. In turn, each of the vehicles gets a Christmas gift from the crew.  There are presents for the excavator, bulldozer, crane, dump truck and the cement mixer. Just the things they needed too!

It’s a lovely story, one which my son could very easily read himself, which he did do, over and over. It is probably a bit more for 5-6 year olds, but my son still very much enjoyed the story. It’s an American book, so some of the language is quite obviously American. It wasn’t a major problem for us, but I did have to talk my son through a couple of the phrases.

Book Review: Construction Site on Christmas Night

The rhyming text is fun to read out loud and the illustrations are really vibrant. We have the hardback edition and the cover has some texture and a little bit of glitter to make the snow glisten. It’s the kind of book any little construction vehicle fan would enjoy at Christmas. It’s a lovely story with a lovely heartwarming message.

My son has already asked for Goodnight, Goodnight, Construction Site by the same author, which is always a good sign!

Construction Site on Christmas Night costs £12.99 in hardback. It’s published by Chronicle Books and it is available from a wide range of bookshops including Amazon.

If you enjoyed this review, you might also be interested in The Crocodile and the Dentist.

Disclosure: We were sent a copy of Construction Site on Christmas Night for review purposes. All images and opinions are our own.