Review: A New Stylish Slate House Number

There are many ways for your home to make a great first impression; an attractive front door, pots of flowers, a neatly swept path and an easy to read and stylish house number or nameplate.

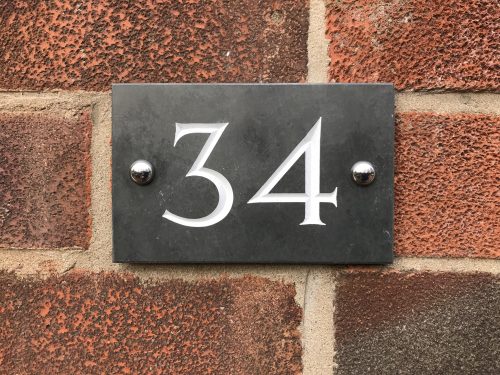
Since moving to our home seven years ago, we’ve been slowly changing things to how we want them to be. The house has just been freshly painted throughout; the avocado downstairs loo is still on the to do list and this week, we finally put up a slate house number. We’ve been numberless since we moved in, visitors have for seven years been counting down the houses to find us. But the days of receiving texts saying “I can’t find your house” are hopefully now over.

Giveaway & Review: A New Stylish Slate House Number

We ordered our slate house number from The House Name Plate Company. They have been handcrafting house signs and numbers for over 30 years from their workshop in North Wales. I love a slate house number, we had one in our old house and we’ve been meaning to get a new one made up for years.

They have a huge range of signs, and numbers; available in many different colours and in materials such as natural slate, cast brass and aluminium, hand fired ceramic, solid granite and contemporary acrylic. It’s so easy to order; just choose your preferred sign or number style and use the online sign builder to preview and order your own house sign or number.

My sign arrived within a couple of days and was well packaged. We’d chosen a smooth slate and needed two digits engraving onto it. It cost just £20.99 plus £3 postage and packing. The slate came with all the fixings too, so all we needed was a drill with a masonry bit and ten minutes to put it up.

It looks so smart now and really finishes off the front of the house. Even the postman has said very complimentary things about it. I have no idea why it took us seven years to order and put up our house number plate!

To see the full range of house number and name plates, visit The House Name Plate Company website.

Giveaway & Review: A New Stylish Slate House Number

Disclosure: I was sent a slate house number in exchange for this review. All images and opinions are my own.

Recipe: Showstopping Turkish Delight Cake

Turkish Delight is one of those things people love or hate. I am firmly in the love camp. For me, it’s always had a hint of the exotic about it, those romantic Laurence of Arabia style adverts from the 80’s mean that this rose (or lemon) scented sweet is wonderfully evocative. What could be a more romantic tea-time treat than this showstopping Turkish Delight Cake?

I love Turkish Delight in all its forms; from the chocolate covered Fry’s version, to the sugar dusted boxes of these jellied fancies you get at Christmas. During my weekly shop I spotted a box of Turkish Delight thins from Morrison’s and I knew exactly what I’d do with them. My Turkish Delight Cake was born!

Recipe: Showstopping Turkish Delight Cake

It’s a stunning looking (and tasting) cake. It looks fancier and harder to bake than it really is. If you can bake a sponge cake and mix up some buttercream, then you’ve got all the skills needed to make this cake.

Showstopping Turkish Delight Cake

Ingredients:
8oz butter or margarine
8oz caster sugar
4 eggs (large)
8oz self raising flour
1.5 teaspoon baking powder
Zest of two lemons

For the buttercream:
250g icing sugar
250g butter (softened)
3 drops of Holy Llama Rose Extract Spice Drops
Red food colouring

To decorate:
Turkish Delight Thins (or similar)
Traditional Turkish Delight pieces

Method:

Pre-heat your oven to 180° and grease three 9 inch cake tins.

Cream your butter and sugar in a large mixing bowl. Add the rest of the ingredients and using a hand mixer combine until the batter is smooth and airy.

Divide your cake batter equally between the three tins (I weigh my filled tins to make sure they’re roughly equal) and bake in the oven for 20-25 minutes until an inserted skewer comes out clean. Leave to stand for 5 minutes before turning on to a wire rack to cool.

While your sponge cakes are cooling, sift your icing sugar and beat together with the softened butter. Add your drops of rose extract, beating thoroughly and tasting as you go. You can always add more, but you can’t take it away!

Once you’re happy with the flavour, add a few drops of the red food colouring and mix well and add more colouring until you’re happy with the shade of pink you’ve got. Make sure your buttercream is well combined and smooth.

On a cake stand or cake board (or wherever your cake is going to sit) put a heaped teaspoon of butter cream in the middle and position your first sponge cake on top of that. This will anchor your cake in place and stop it sliding about.

Cover the top of that sponge layer with a thin spread of buttercream and put your second sponge on top of that. Repeat the process with the third sponge layer.

Now for the slightly time consuming bit; using a palette knife spread the rose buttercream around the sides of the cake. I found it easier to plaster on more buttercream than I needed and then smooth it off. It doesn’t have to be a perfect finish, but cover it as best you can, this is easier if your buttercream is soft. If if’s too hard, give it another beating.

Once the sides of the cake are covered, spread a thick-ish layer of buttercream on the top. I usually ripple the buttercream with the knife, but you can do a smooth finish if you’d prefer. Cut the Turkish Delight Thins in half into triangles and do the same with the Turkish Delight pieces, although they will look more like pyramids.

Arrange the Turkish Delight thins and pieces on top of the cake in whatever way you think looks good. I did haphazard rows of thins with the pieces dotted about.

Recipe: Showstopping Turkish Delight Cake

My Turkish Delight Cake is a real treat. It’s rich and sweet and absolutely packed with the traditional flavours of Turkish Delight; from the light lemon zested sponge, to the sweet rose scented buttercream – it’s a treat and a half for Turkish Delight fans!

If you enjoyed this recipe, you might also like my Romantic Rose Cupcakes.

Recipe: Showstopping Turkish Delight Cake

Valentine’s Day Crafts: 52 Reasons Why I Love You

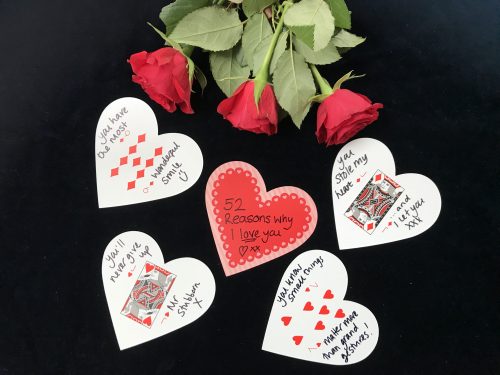
After 23 years of Valentine’s Days with my husband, I’m not saying romance is dead, but the budget has been somewhat slashed. We have for a number of years had a £5 gift and a card policy; which means that Valentine’s Day often requires a bit of creativity. His favourite of the homemade Valentine’s gifts I’ve made for him was the 52 Reasons Why I Love You pack of cards. It’s a favourite of mine too, because it’s so darn cute!

Valentine's Day Crafts: 52 Reasons Why I Love You

It’s remarkably easy to put together. All you need is a pack of cards, a permanent marker and a list of 52 Reasons Why I Love You. That last one is the tricky one. My advice would be to take a few days to list some of the reasons why you love your partner. I found that I could find 30 or so reasons pretty easily, but then I started to write things like “I love you because you take the bins out”; which is a valid reason but lacks a little romance.

You can use a normal pack of cards. I found a nice heart shaped pack of cards and used them, but you can find a similar pack here on Amazon. Using your list of the 52 Reasons Why I Love You; neatly write a reason on every card in the pack. You may want to write the biggest and best reasons on the heart cards, and make sure you write it on the suit side, not the patterned side of the cards.

Here are a few of my reasons to give you an idea of what I wrote –
  • You cook amazing meals
  • You work so hard for our family
  • You’re ace in every single way
  • You’re generous with everyone
  • I love snuggling with you
  • I’ve known and loved you forever
  • I love the way you tuck me in at night

This 52 Reasons Why I love You gift is such a lovely thing to give someone. I know my husband looks at the cards often. The reasons are full of our shared history, our shared interests, our family and all the special things about him which I love and appreciate.

It’s such a small, inexpensive and simple gift. But it’s something that your partner will probably really appreciate and treasure for many years to come.

See what other Valentine’s Day crafts you could make here.

Valentine's Day Crafts: 52 Reasons Why I Love You

Kitchen Hacks: 7 Time Saving Cheats for Busy Cooks

I’m one of those cook-from-scratch types who cheats and feels no shame about it at all. I will happily spend hours watching over a bubbling stew, just don’t ask me to make some mash to go with it. I’ve been thinking about the kind of time saving cheats I use in my kitchen

I have certain rules for cheating which I’ve imposed on myself. For example, I won’t use a jar of pasta sauce, but I will use a jar of pesto. I can knock up a decent tomato pasta sauce in a few minutes; but pesto requires a blender, a garden full of basil and a whole load of ingredients I generally can’t be bothered with.

Kitchen Hacks: 7 Time Saving Cheats for Busy Cooks

I also have my ability (or rather lack of ability) to stand in the kitchen for hours prepping meals. I have a spinal injury, chronic pain and neurological problems which can make hours of prep intolerable for me. Sometimes my hands and arms can go numb too. The idea of peeling spuds with numb hands sets off a number of health and safety alarm bells in my head. Sometimes it’s just better to choose convenience over cut fingers. In short, there are some time saving cheats I’m prepared to forgive myself for, here are some of my favourite ones.

7 Time Saving Cheats for Busy Cooks

One – Frozen mashed potato. I first discovered frozen mash on a trip to Ikea and I’ve been buying it from supermarkets ever since. It costs around £1 a bag and each bag is enough for two meals for our 3 person family. It’s just frozen mashed potato with milk and a bit of seasoning. I usually add more milk and butter, a few minutes in the microwave and you’ve got beautiful, smooth, lump-free mash. There’s no going back to mashing my own from scratch now, and I’m not even sorry.

Two – Ready to roll pastry. I can and do make pastry from scratch when I want to and have the time, but the ready rolled stuff costs about £1 and saves about half an hour of prepping and cleaning up afterwards. If I’m throwing a quick pie or tart together, this is such a time saving ingredient. There’s no shame in using shop bought pastry, no shame at all!

Three – Lazy garlic/chilli/ginger etc. There’s no doubt that fresh is probably better in this case, but unless I’m doing serious batch cooking, then buying a whole bulb of garlic for one or two cloves is a bit wasteful. My garlic tends to start sprouting before I get round to using it all. Tubes or jars of ready crushed garlic, chilli or ginger are a great store-cupboard staple I wouldn’t be without.

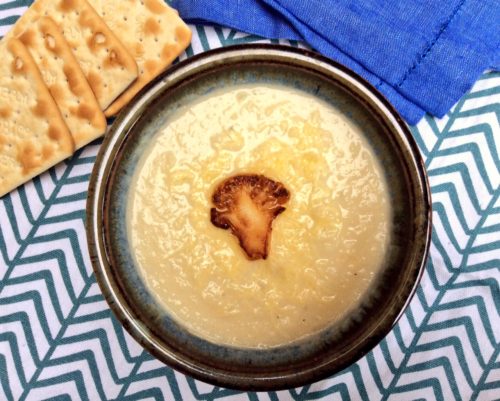
Four – Frozen, ready prepared vegetables. Frozen veg has always lived in my freezer, but in recent years it’s taken a bit of a step forward. You can get ready chopped onion which saves you tears and oniony smelling fingers, I like frozen sliced mushrooms and frozen sliced peppers. They’re so handy if I’m making a quick pasta dish and need to up the veg content. My freezer is also always home to a bag of frozen cauliflower. The cauliflower makes a quick and hearty soup or gets thrown into macaroni cheese to make it more of a balanced meal.

I can also recommend frozen butternut squash pieces. Trying to cut a butternut squash is like trying to finely dice a brick, save yourself time and a trip to A&E by just buying it ready diced and frozen. It tastes no different but it is hard to find, so buy a couple of bags, you won’t regret it.
Cauliflower Cheese Soup

Five – Microwavable rice pouches. My husband makes beautiful rice, I don’t. I have given up trying and usually use boil in the bag rice; although I do flavour the cooking water with stock or turmeric. These days I always have a couple of microwavable pouches in the cupboard. They’re quite expensive and not as healthy as rice you’d cook yourself, but they’re really handy if you’re rubbish at cooking rice or need a speedy supper.

Six – Grated cheese. I use grated cheese a lot at home. You can buy ready grated cheese, but I find that it behaves a little differently to normal blocks of cheese. This is because it’s usually coated in starch to stop it clumping together. I do sometimes still buy it; but often I’ll buy a big block and run it through the grater setting on my food processor, box it up and use it when I need it. Sometimes I just grate by hand until I get bored, and put it in a box in the fridge until I need it.

Seven – Breadcrumbs are part of so many meals I cook. If I know I’ll be getting the food processor out for some batch cooking chopping, then a few days before I’ll buy a crusty loaf to go stale, chunk it up and whizz it in the food processor until it’s crumbs. I put the crumbs in a tub in the freezer, if you give it a shake every so often the crumbs should separate beautifully. You’ll have enough fresh breadcrumbs for a few months for almost no effort.

And if all else fails, order a takeaway! What are your time saving kitchen cheats? Do you worship at the altar of frozen mash too?


Kitchen Hacks: 7 Time Saving Cheats for Busy Cooks

Review: Fairfields Farm Heat & Eat Crisps

I have a monthly get together and craft night with some friends, we each take turns to host it. Craft night means three things, prosecco, crafts and crisps. This week it was my turn to host. I chilled a couple of bottles of fizz, dug out some craft stuff and revealed, with something of a flourish, a large bag of Fairfields Farm Heat & Eat Crisps.

“They’re microwavable!” I announced. “They’re hot crisps!” I said with a bit of a fanfare. My friends were understandably quite curious and keen to try this new style of snack.

Review: Fairfields Farm Heat & Eat Crisps

I opened the bag, took out the dip and microwaved the crisps for 30 seconds. We tried the Fairfields Farm Cheese and Chive flavour Heat & Eat crisps. Inside the bag is a small tub of delicious caramelised onion dip.

The Fairfields Farm Heat & Eat Crisps are good crunchy, thick cut crisps, the kind I would buy anyway as they’re great for dipping. I like that they come with a little pot of dip included. The caramelised onion was so good, I’d quite like them to sell jars of the stuff.

Review: Fairfields Farm Heat & Eat Crisps

There are two flavours – Sea Salted with Tomato Salsa Dip and Cheese & Chive with Caramelised Onion Dip. Each bag contains 125g of hand-cooked crisps and a 50g dip. When the crisps are hot, they are what I imagine freshly cooked crisps taste like, fresh and crunchy. You do have to eat them fairly quickly because they do cool down; but they’re still excellent when they’ve cooled and the hot crisps are a real talking point. The girls were impressed and they all said they would buy them again.

Fairfields Farm which is in East Anglia have been making crisps from their potatoes since 2006. The Heat & Eat Crisps were launched just a few months ago and are hand cooked on the farm using renewable energy.

These new Fairfields Farm Heat & Eat Crisps cost around £1.85 a bag, which I think is a very good price for good quality crunchy crisps which come with a dip.

Review: Fairfields Farm Heat & Eat Crisps

Fairfields Farm Heat & Eat Crisps are currently available in a wide selection of Tesco Stores across the UK to find your nearest stockist visit http://fairfieldsfarmcrisps.co.uk/

Note: we were sent these crisps for review purposes. All images and opinions are our own.

Meal Planning Monday: Shaking off the January Blues

It’s the end of January and I’m shattered. If it were just me, I’d happily exist on a diet of things on toast; but the boys need a proper meal on the table and I need to eat a bit better too. January is about as down in the doldrums as it gets. There’s not a great deal of seasonal veg about and the dark evenings lend themselves to stodgy comfort food dishes. We love a hearty stew as much as the next family, but we’re all starting to crave slightly lighter meals.

I don’t write a meal plan every week, because I don’t do a shop every week. I do a big online shop about every 2-3 weeks and plan 12 meals or so for the next fortnight. The meals are not fixed to specific days, I just cook what I fancy depending on what needs using up and how much time I have to cook. I’ll make quick meals like pasta on days when dinner time needs a speedy turnaround. We almost always eat at the table and I like to cook a nice family dinner a few times a week so we can sit, chat and take our time over it all.

My big shop will arrive on Monday evening and I’m more excited than I should be that my empty fridge will be full again. I’ve spent a smidge over £100 on my shop and it should be enough for 12 meals. I’m blogging a weekly recipe post (each Friday, keep an eye out as some of them are really, really lovely). In my shop this week I’ve also bought baking things for six new and original recipe blog posts. I’d say 12 meals and six bakes for around £100 makes me a slightly smug but very frugal shopper!

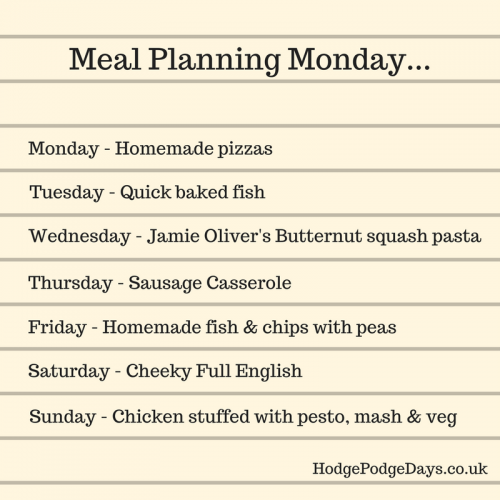
This coming week feels like a bit of a lazy one for me. Most of what I’ve planned are meals which are quick to prep and cook; or things I can throw in a slow cooker and forget about.

Meal Planning Monday: Shaking off the January Blues

Saturday night is Dad cooks night and he’s promised us his signature dish – the Full English (sausages, beans, egg, tomatoes, mushrooms and toast). It might not be the healthiest meal, but he does make an effort to cook things without fat and loads up our plates with the healthier veg.

I think veg is going to be a real focus for me over the next few weeks. Whatever meal I’m serving, I’ll make sure there’s a big pile of fresh veg to go with it. I’m really craving a fresh, zingy salad with lots of herbs too. I’m so done with boiled carrots right now.

If you’re looking for meal planning inspiration, check out my 55 family meals your kids will actually eat!

Recipe: Romantic Rose Cupcakes for Valentine’s Day

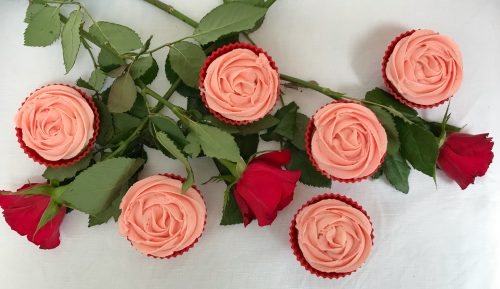
After 17 years of marriage, flamboyant romantic gestures on Valentine’s Day are a thing of the past. It’s not that we don’t do romance, it’s just that we’ve got different things to spend our money on. For many years now Valentine’s Day for us has been about homemade cards and smaller, more meaningful gifts. I usually bake something sweet to share with the boys, this year I’ve made some romantic rose cupcakes, and they’re sure to be a hit.

A little while ago, whilst browsing the reduced yellow stickered items in a deli, I found a bottle of Holy Llama Rose Extract Spice Drops. They were a bargain, so they ended up in my shopping basket and then in my baking cupboard at home. If you don’t have Holy Llama Rose Extract Spice Drops, substitute this with whatever rose extract you have.

Recipe: Romantic Rose Cupcakes for Valentine's Day

I’ve been a bit worried about trying out my Rose Extract. Rose is one of those flavours which if you use too much of, whatever you’ve made will end up tasting like Granny’s soap. If you go easy and add a little at a time, everything should turn out rosy.

Romantic Rose Cupcakes

Ingredients:
4oz butter or margarine
4oz caster sugar
2 eggs (large)
4oz self raising flour
1 teaspoon baking powder
5 drops of Holy Llama Rose Extract Spice Drops

For the buttercream:
250g icing sugar
250g butter (softened)
3 drops of Holy Llama Rose Extract Spice Drops
Red food colouring

Method:
Pre-heat your oven to 180° and put paper cases in a bun or a muffin tray.

Cream your butter and sugar in a large mixing bowl. Add the rest of the ingredients and using a hand mixer combine until the batter is smooth and airy. When you add your rose extract, taste the batter to check the levels of rose flavour. Remember, a fair amount of the rose flavour will bake out of the cupcakes, so bear this in mind. I opted for a not very rose flavoured sponge because I knew the buttercream would be where most of the flavour was.

Dollop a large dessert spoon of the cake batter in each case and bake in the oven for 20 minutes. Once cooked remove from the oven and leave cool on a rack.

While your cupcakes are cooling, sift your icing sugar and beat together with the softened butter. Add your drops of rose extract, beating thoroughly and tasting as you go. You can always add more, but you can’t take it away!

Once you’re happy with the flavour, add a few drops of the red food colouring and mix well and add more colouring until you’re happy with the shade of pink you’ve got. Make sure your buttercream is well combined and smooth.

Once your cupcakes are cool, put your rose flavoured buttercream in a piping bag with a star piping nozzle – I used a Wilton 2D nozzle. Starting in the middle of the cupcake, swirl your buttercream around until you’ve got a buttercream rose shape. If you’re not sure how to do it, watch this short video.

Recipe: Romantic Rose Cupcakes for Valentine's Day

Tip: Once you’ve finished decorating your rose cupcakes, you could pop them in the fridge for an hour so the buttercream firms up a little before serving.

These Romantic Rose Cupcakes are really pretty and very easy to bake. The icing is much easier that you’d think and you can also scrape off and re-do any which you’re not happy with. I’m no expert cake decorator, but with a little bit of practice and patience, you’ll be piping buttercream roses like a pro!

If you enjoyed this recipe, you might also like my tangy marmalade cupcakes.

Recipe: Romantic Rose Cupcakes for Valentine's Day

Crafts: Easy Valentine’s Paper Heart Wreath

This month Craft Merrily have set the Bostik Bloggers the task of creating a craft for Valentine’s Day. Last year I made a lovely découpage candle holder for Valentine’s Day, but this year I thought I’d make a Paper Heart Wreath.

I really like making paper wreaths, we have a place in the kitchen where I like to hang the seasonal wreaths I make. This is a little different to my usual style, this Paper Heart Wreath is put together with easy to make 3D hearts. It’s really quite easy to make, it looks very effective and it’s a lovely Valentine’s decoration.

Crafts: Easy Valentine's Paper Heart Wreath

How to make a Paper Heart Wreath

You will need
Colourful paper, A4 size
Scissors or a craft knife
A ruler
Bostik Glu Dots
A length of ribbon

How to make your Paper Heart Wreath

Using a ruler measure the long side of your piece of paper and divide that length by 7. Measure out 7 equal widths of paper and carefully cut into strips using a pair of scissors or a craft knife. If you’re doing this with children then you may want to be in charge of this bit.

Fold each strip in half, make sure you’ve got a neat, crisp fold here, this will be the pointy bottom of your heart shape.

Crafts: Easy Valentine's Paper Heart Wreath

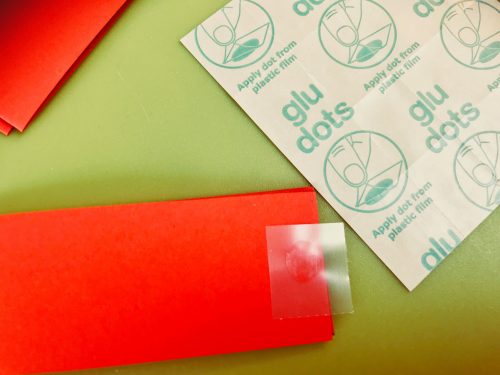
Using a glue dot, stick a dot at the end of your strip and bend the edges together to create the heart shape. Press the paper together so the glu dot is holding the shape firmly in place. Do this with all 7 hearts.

Crafts: Easy Valentine's Paper Heart Wreath

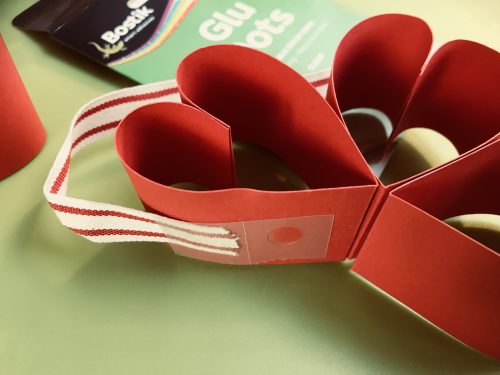
Take two hearts and stick them together using the glu dots. Then take your ribbon and using the glu dots stick the ribbon to either side of the two hearts. Make sure the ribbon is positioned so the ends will be hidden between the hearts. Using the glu dots, carry on sticking the hearts together until all 7 hearts are stuck together.

Crafts: Easy Valentine's Paper Heart Wreath

Your paper heart wreath is now finished and you just need to find somewhere to hang it!

I am a Bostik Craft Blogger and I was sent the materials to create this craft from Craft Merrily. 

Check out my other craft tutorials here!

Crafts: Easy Valentine's Paper Heart Wreath

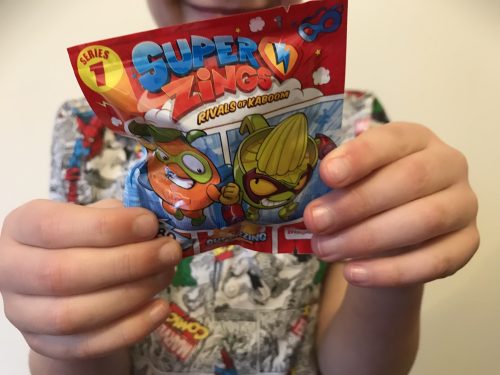
Toys: Introducing SuperZings – Rivals of Kaboom Blind Bags

When you’re 7 collectibles are so important. Amassing a collection of characters, swapping with your friends and trying to get the full set is the goal. In the last few years collectible characters have been huge in the UK and the newly launched SuperZings – Rivals of Kaboom (Series 1) are bound to be popular!

Toys: Introducing SuperZings - Rivals of Kaboom Blind Bags

SuperZings are everyday objects (like a tiny hairdryer or cheese grater with a face, a body and a cape) brought to life as heroes vs. villains, all living in Kaboom City. There are so many fun, colourful characters and accessories to collect; each with a matching rival.

There are 80 SuperZings to collect (all have their own superpower). Plus six Silver and two Gold Rare SuperZings to collect and one Enigma Super Rare SuperZing. They use one of the eight collectible Supercars to get around and live in Hideouts (eight to collect) which can also be used to launch the characters into the air.

Toys: Introducing SuperZings - Rivals of Kaboom Blind Bags

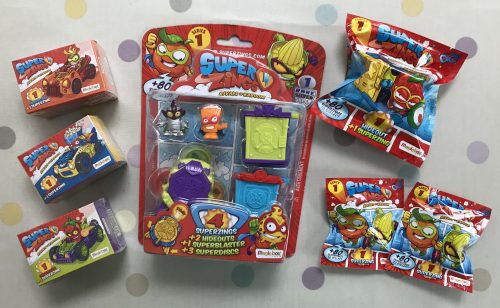
The range includes a Starter Pack to get your collection started. There’s also a Blister Pack containing four SuperZings; two Hideouts and an exclusive SuperDisc Blaster.

The SuperZings Series 1 collectible range is very reasonably priced and seems to be priced for pocket money spends rather that parental treats. The blind bags which contain one SuperZing are 80p each. The hideouts bags which also include one SuperZing are £1.50 each and the supercars including one SuperZing are £2.50 each. There is also a Starter Pack (£5) and a Blister Pack (£7) containing four SuperZings; two hideouts and an exclusive SuperDisc Blaster.

Toys: Introducing SuperZings - Rivals of Kaboom Blind Bags

Our verdict on SuperZings

My son thought they were really fun, he liked that they were everyday items turned into crazy superheroes. He also liked playing with the doors on the hideouts and launching the SuperZings across the room with them. We both really liked the Supercars. They are the kind of thing I’d throw into my bag to keep him entertained on a trip to a cafe.

They’re prices firmly in the pocket money zone and are suitable for ages 3+. They are small, so it’s worth keeping them away from younger children and pets (our dog was very interested in them, but that could be the crinkly bags rather than the toy).

The SuperDisc Blasters are lots of fun, but I did have to give the health and safety talk – don’t fire it at humans; don’t fire it at the dog; don’t fire it at my freshly painted walls. The discs are small plastic coin shaped things which are fired out of a blaster. Great fun for my 7 year old, as you can imagine.

The boy absolutely loved them. Blind bags and collectibles are so popular and watching him open them I can see why. It’s the element of mystery, the need to collect the full set and the excitement of being able to swap with his fellow collectors. if my son’s reaction is anything to go by, SuperZings – Rivals of Kaboom are going to be huge!

Watch our video to see us unbox the full SuperZings – Rivals of Kaboom range!

Superzings are sold at The Entertainer, Tesco, Asda, Co-op, Spar and other shops too. For further information visit http://www.magicboxint.com/uk/index.php

We were sent these products for review purposes. All images and opinions are our own.

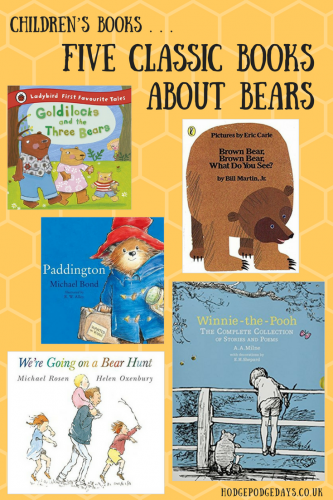
Children’s Books: Five Classic Books About Bears

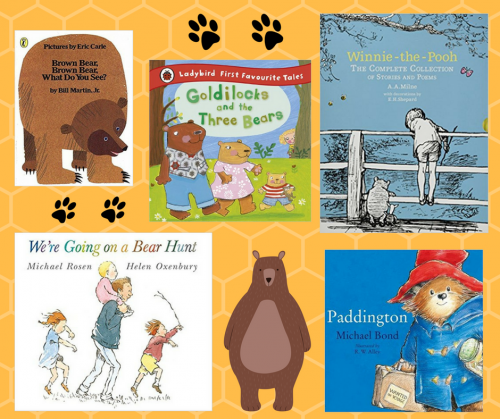
In real life, bears are such ferocious creatures that we are warned to steer well clear of them. But in the world of children’s fiction books, you’ll be hard pushed to find a better friend than a bear. I’ve picked out five classic books about bears, I’ve probably missed some really important ones, but these are my bear necessities of children’s books about bears.

Five Classic Books About Bears

Brown Bear, Brown Bear, What Do You See? is a classic picture book by Eric Carle and Bill Martin Jr. It is wonderfully rhythmic and is packed full of Eric Carle’s beautiful and iconic illustrations. It’s a great way to get pre-schoolers talking about animals and colours. Plus you’re guaranteed to get “brown bear, brown bear” stuck in your head.

Children’s Books: Five Classic Books About Bears

Goldilocks and the Three Bears – there are many versions of this 19th century fairy tale, but it’s the classic tale of Goldilocks, a girl who finds a cabin in the woods belonging to the three bears. She can’t help but creep in and explore – she sits in their chairs, eats some of their porridge, and sleeps in one of their beds. When the bears return and discover her, she jumps up, runs out and is never seen again. Goldilocks and the Three Bears is a classic which will never go out of fashion!

Paddington by Michael Bond has recently been made into a hit film, but the book is always worth returning to. This friendly bear from deepest, darkest Peru, dressed in a blue duffle coat and wearing a hat stuffed with marmalade sandwiches. Paddington has become a classic character in English children’s literature. These beautifully illustrated, easy reading books make the perfect bedtime story to share with your children.

We’re Going on a Bear Hunt by Michael Rosen and Helen Oxenbury is undoubtedly a modern classic. The story follows a family on an adventure, through swishy-swashy swathes of grass and across muddy fields. They get a bit wet and a bit cold, and when they finally find a bear, they’re a little bit scared. I always feel a bit sorry for the bear at the end, I think all he wants is a friend. It’s a beautiful story, fantastic to read and the textures of the grass, the mud and the wind are so evocative and great talking points for you and your child.

Winnie the Pooh by A.A. Milne is such a classic, no books about bears collection should be without him. This adorable and quietly wise bear is loved by adults and children alike. There are a million different Winnie the Pooh books available; from pop-up books to philosophy books for adults; but you can’t get any better than the original.

These classic books about bears are to my mind, essential reading for children and adults alike. There’s something friendly and cuddly about these bears, some of them are a bit edgy, but on the whole they just want to be your friend. Have I left any classic bears behind?

Children’s Books: Five Classic Books About Bears

This post contains affiliate links.